Vragen - introductie
From LimeSurvey Manual
Introductie
Nadat je een vraaggroep hebt aangemaakt, kun je vragen toevoegen. Dat kan op meerdere manieren, we noemen er hier drie:
- Je kunt vragen toevoegen via het menu Enquête structuur;
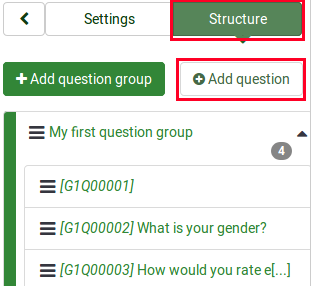
- Kies een vraaggroep en klik op de knop Vraag toevoegen.
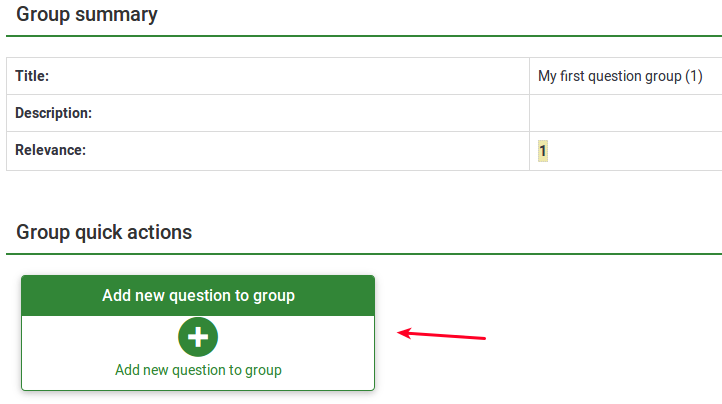
- Check the Overview tab, and look for the add new question quick button located in the Survey quick actions section.
Field descriptions
Je moet om een vraag toe te voegen, een "vraagcode", de "vraag", een "helptekst" en algemene vraagopties invullen:
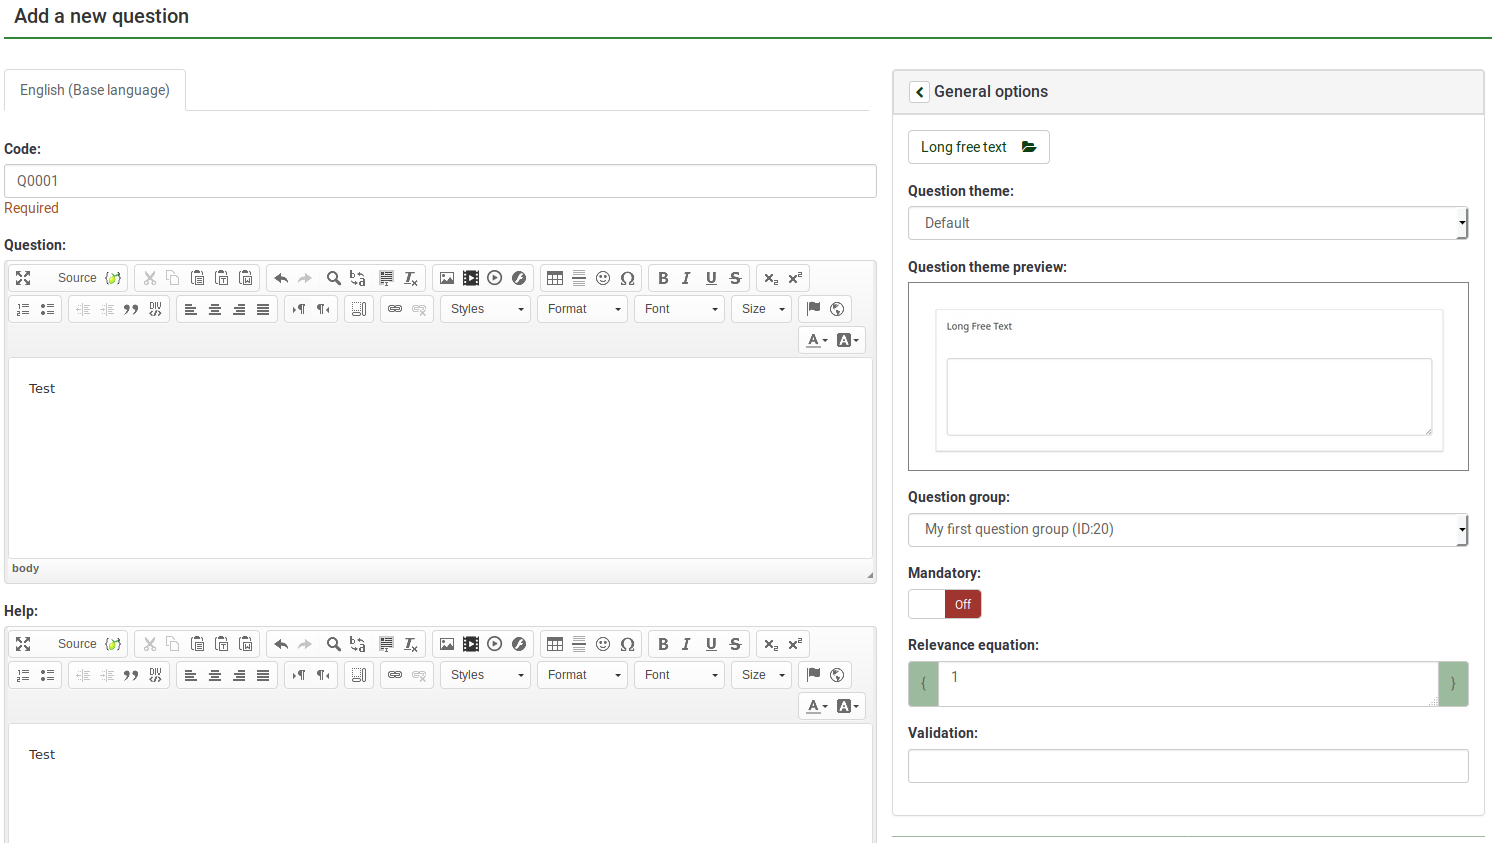
- Question code: It represents the ID, number or code for the question that is used for quick identification. This field is normally not displayed to people taking the survey unless specified in the Presentation panel - Show question number and/or code. It is especially useful if you wish to use the LimeSurvey assessments feature and/or the Expression Manager.
- Vraag: De vraag zoals die gesteld wordt aan de deelnemers. Als je een uitleg bij de vraag wilt geven, doe dat dan niet in de vraag zelf, maar gebruik het "Help" veld. Je kunt HTML-code gebruiken om bijvoorbeeld plaatjes toe te voegen:
<img src="http://www.yourdomain.com/yourpics/pic.jpg">
- Help: This is an optional field. It is useful if a question needs some explanation or you want to explain how it should be answered. When you put text in this field, a "question mark" icon appears on the survey entry screens with the help text right beside it.
Algemene opties
Different tabs are displayed on the right part of the screen. The most basic and important one is the General options tab. The following question settings can be changed from here:
- Question type: This determines the type of response the survey allows. View the question types section for a description of the various options available;
- Question group: To change the question group of a question, select from the dropdown list the desired group;
- Validation: This feature is available on all text- and numeric- type questions. You can use standard regular expressions in this field to validate the responses to the question, and if the responses don't validate against this expression, the user will be prompted to try again before he or she can progress;
- Other?: This option appears if you decide to use certain question types. If enabled, the question will include as a possible answer an extra "other" option/answer box, which can be selected by the survey participant if he or she is not satisfied with the predefined answer options;
- Mandatory?: This setting allows you to require survey participants to answer all the mandatory questions before they can move on to the next question. Note that for ranking question, all items have to be ranked;
- Relevance: This is the Boolean equation that specifies the conditions for this question. If it evaluates to true, the question will be displayed to the survey participant; otherwise it is hidden and since it is irrelevant, data for that question is NULLed in the database. Details about how to use this option can be found in the Expression Manager wiki section.
Importeren van een vraag
You may find on the top of the Add question page a toolbar with different options, one of them being the import one:

De volgende opties worden getoond:
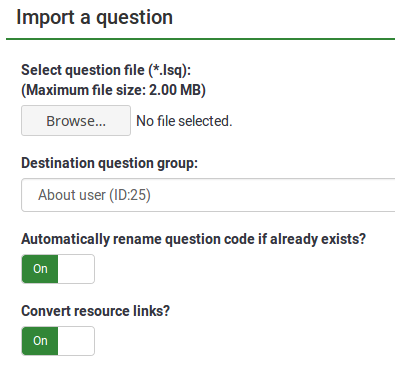
- Browse: Select the .lsq file (the LimeSurvey question-type format);
- Destination question group: Select the question group you wish to add the imported question to;
- Automatically rename question code if already exists: If the question code already exists, enable this option to use another question code. You can also have two questions that use the same question code. However, some issues might appear if you use more complex LimeSurvey options such as the Expression Manager or when you work with the exported data in R or SPSS (qcode becoming a value label).
- Convert resource links: It is usually used together with the Expression Manager to create advanced question types. If you use them together, complex branching, assessments, validation, and/or tailoring can be done.
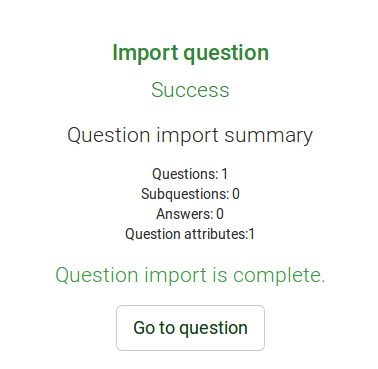
To import the question, click on the Import button located on the upper right part of the screen. If succeeded, the question import summary should look like this:
Informatie uit deelmerstabel
Je kunt informatie/tekst toevoegen vanuit de deelnemerstabel in je vraag zodat je bijbehorende informatie kunt tonen. Dit kan alleen als de enquête niet niet anoniem is en toegangscodes gebruikt.
The following placeholders can be used within a question:
| {TOKEN:FIRSTNAME} | de voornaam van de deelnemer |
| {TOKEN:LASTNAME} | de achternaam van de deelnemer |
| {TOKEN:EMAIL} | het e-mailadres van de deelnemer |
| {TOKEN:ATTRIBUTE_1} | de waarde van attribuut_1 |
| {TOKEN:ATTRIBUTE_2} | de waarde van attribuut_2 |
Om dit te gebruiken moet je de tekst precies als hierboven staat in je vraag gebruiken. Voorbeeld:
Hallo {TOKEN:FIRSTNAME}. We sturen je een e-mail op het e-mailadres {TOKEN:EMAIL}.
If you wish to further customize your questions, use the Expression Manager. For example, if you wish to make use of the tailoring technique, type in:
Wat denk je als {TOKEN:ATTRIBUTE_1} van je {if(TOKEN:ATTRIBUTE_1=='werknemer','baas','personeel')}?
You may also use JavaScript to achieve further question customization. First, you have to allow JavaScript to be used when setting up questions. This can be achieved by deactivating the XSS filter from the global settings of your LimeSurvey installation. However, deactivating this option is not always a good idea - read the following wiki section for further information. Question tailoring via JavaScript:
Hallo {TOKEN:FIRSTNAME}. We sturen je een e-mail. Klopt het dat  {TOKEN:EMAIL} je e-mailadres is?
Wat denk je als {TOKEN:ATTRIBUTE_1} van je
<script type="text/javascript" language="Javascript">;
   var job='{TOKEN:ATTRIBUTE_1}';
   if (job=='werknemer') {
      document.write ('baas')
   } else {
      document.write('personeel')
   }
</script>
?
Informatie van vorige antwoorden
Je kunt ook de antwoorden op voorafgaande vragen gebruiken in de tekst van een vraag, dit met de volgende beperkingen:
- Je kunt antwoorden op dezelfde pagina gebruiken, je kunt dit ook laten wijzigen als antwoorden worden gewijzigd
- Je kunt de vraagcode gebruiken. Lees: Expressie beheer
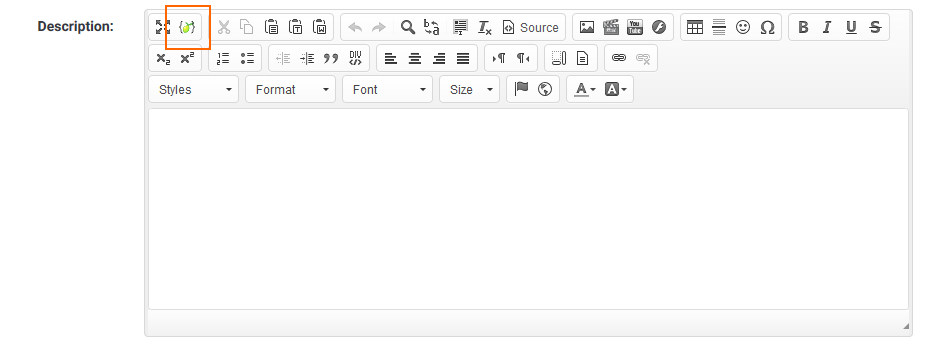
Er is een hulpmiddel toegevoegd aan de HTML-editor (FCKeditor). Je kunt nu eenvoudig de vraag/antwoordcodes van voorafgaande antwoorden toevoegen: deze plugin heet LimeReplacementFields. Om dit in de FCKeditor te gebruiken, moet je klikken op het icoon "replacement field properties" en een vraag selecteren. Alleen antwoorden van voorafgaande pagina's worden getoond.
Opmaak vragen
Je kunt de opmaak / lay-out van een vraag natuurlijk doen met gebruik van CSS via Sjabloonbeheer.
