Beoordelingen
From LimeSurvey Manual
Introduction
LimeSurvey kan "beoordelingen" aanmaken voor jou en je deelnemers, ook als die meertalig is. Beoordelingen zijn regels die de ingevulde antwoorden op enquêtes evalueren direct na het versturen door de gebruiker, het resultaat wordt aan de gebruiker getoond.
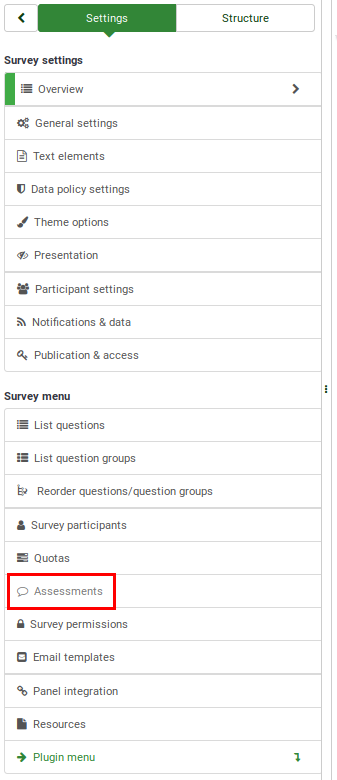
In order to use LimeSurvey's assessment feature, access the survey menu and click on the Assessments tab:
Once there, enable the assessment mode:

How do assessments work
Let's construct a simple example that can help you better understand the way in which the assessments mode is supposed to work.
Stel, je hebt twee vragen in je enquête, de eerste vraag is : "Rookt u?". Er zijn drie mogelijke antwoorden, "Ja, meer dan 10 per dag" met een beoordelingswaarde van "10", "Ja, maar minder dan 10 per dag" met een beoordelingswaarde van "5" en "Nee, ik rook niet" met een beoordelingswaarde van "1".
De andere vraag "Doet u aan sport?" met als antwoorden: "Ja, ik sport minstens 3 keer per week een half uur" met een waarde van "1", "Ja, ik sport af en toe" met een waarde van "5" en "Nee, ik sport nooit" met een waarde van "10".
Als we de totaalwaarde aan het eind van de enquête zouden optellen, dan hebben we een indicatie van de gezondheid van deze respondent. Iemand die rookt en niet sport scoort dan 10 punten per vraag dus 20 in totaal. Iemand die niet rookt en regelmatig sport scoort dan 1 punt per vraag, dus 2 punten in het totaal.
Beoordelingen
Once enabled, the following page will load up:
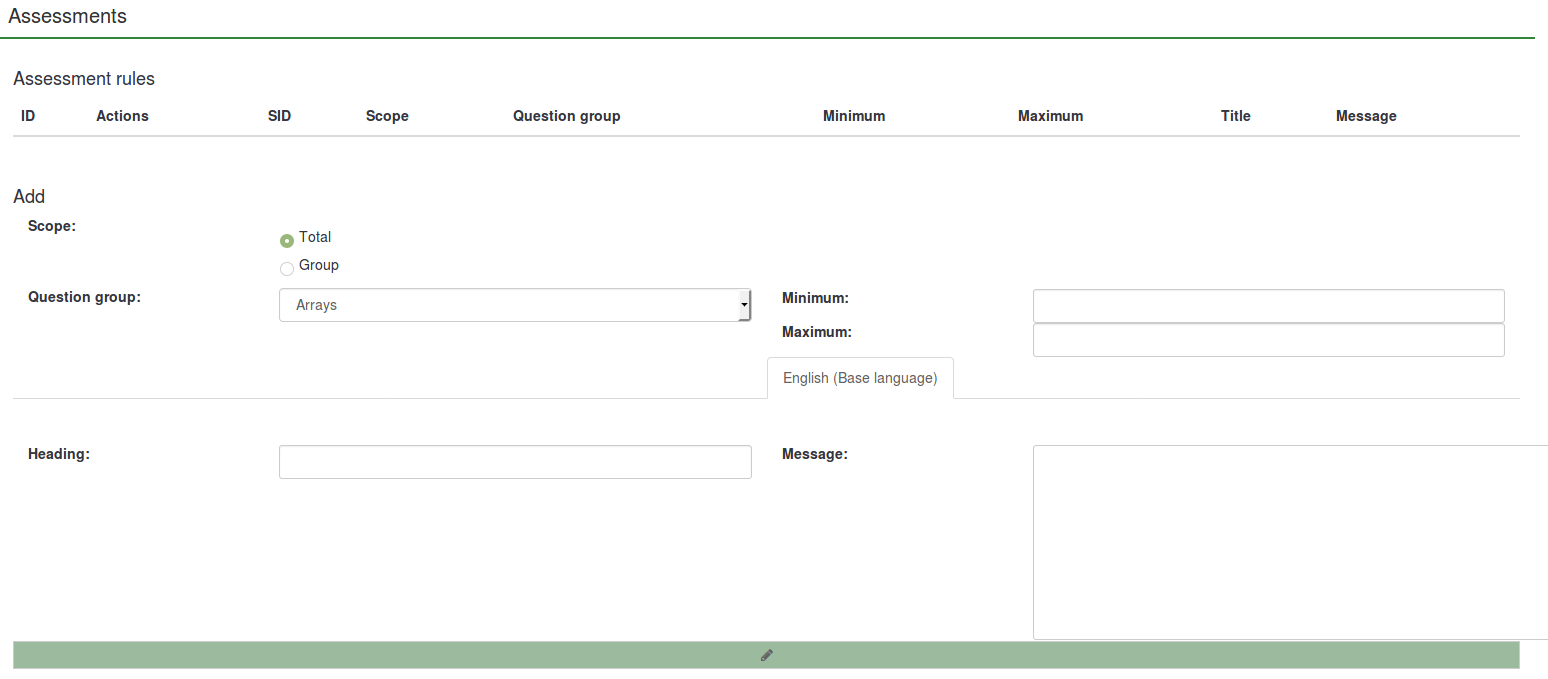
To start creating new assessments rules complete the fields located below the Assessment rules table. The following options are available:
- Scope: You can choose either Total or Group. The first will create an assessment based on the sum of all the submitted answers in the entire survey. The latter will create an assessment based on the sum of all the submitted answers from a question group;
- Group: The dropdown list allows you to choose the question group you wish to assess.
- Minimum: The minimum score to which this assessment will apply.
- Maximum: The maximum score of answers to which this assessment will apply;
- Heading: The heading of the assessment which will be displayed if the assessment is going to be displayed;
- Message: It represents the text message of the assessment - what is displayed at the end of the survey to the respondents. You can use the placeholders such as {PERC} and/or {TOTAL} to emphasize the scores of each survey question group or the total survey score. Click on the green pencil button to access the HTML-editor and enhance the final message of the assessment by adding colours, tables, images, and so on.
Je kunt zoveel beoordelingen aanmaken als je wilt.
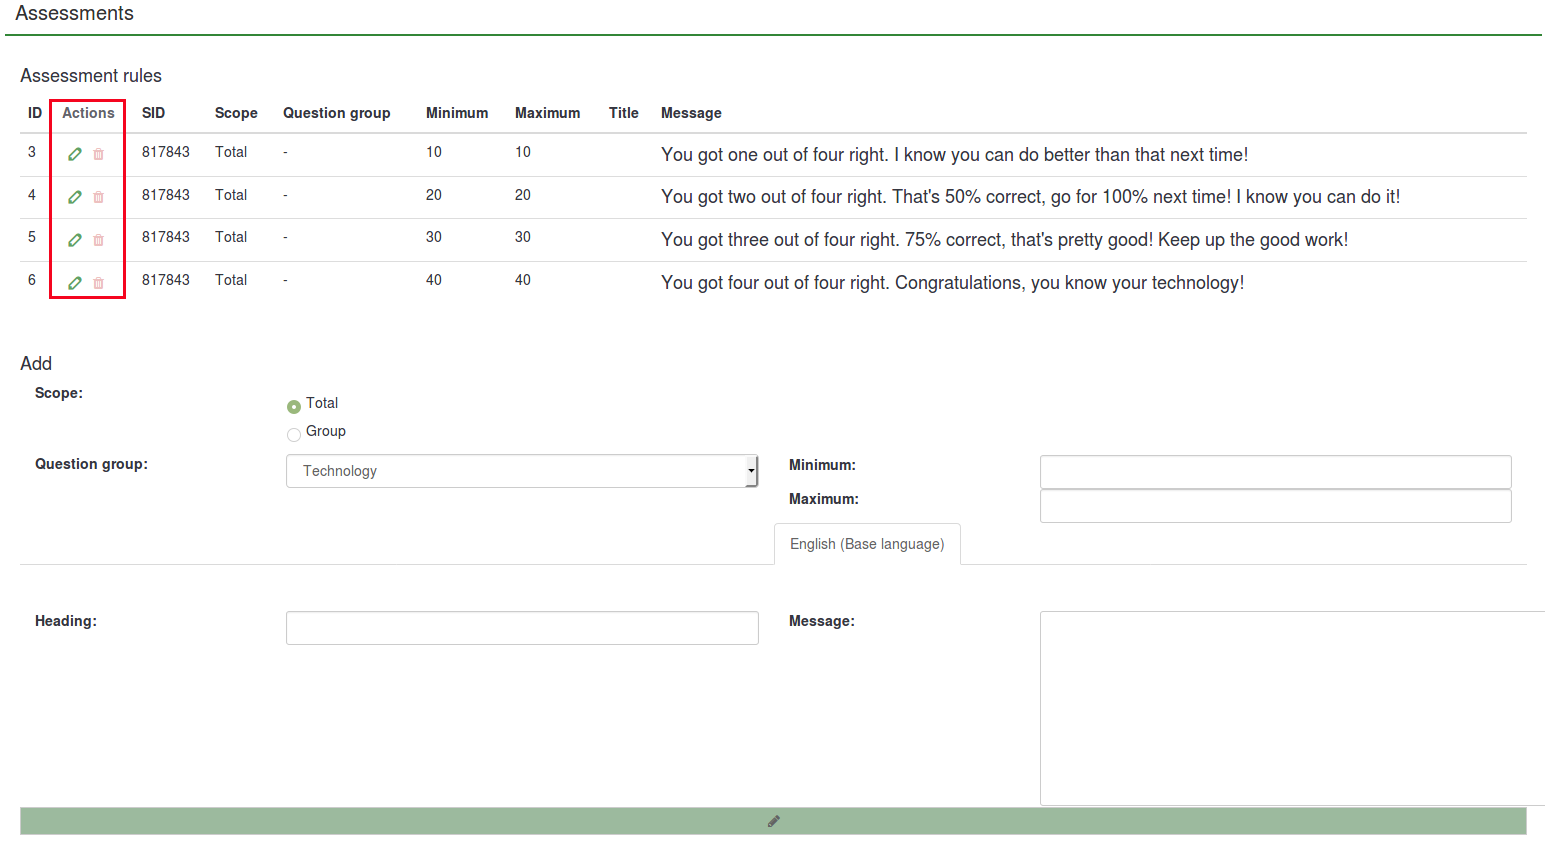
After adding some assessments, the possible assessments actions will be displayed under the Actions column in the Assessments rules table. From there, you can either edit or delete an assessment rule:
Hoe worden vraagtypes nagekeken
There are certain question types which will not be assessed or will be assessed in a special way. Some of the questions cannot be used with the assessment feature. However, they can be replaced with assessable question types. For example, a 5 point choice can always be replaced with a simple list (radio) question type.
The following question types can always be assessed:
- Array (Flexible labels) dual scale
- Array (Flexible labels)
- Array (Flexible labels) by column
- List (Flexible labels) (Dropdown)
- List (Flexible labels) (Radio)
- List (Dropdown)
- List (Radio)
- List with comment
- Multiple options
- Multiple options with comments
The following list contains question types that cannot be assessed:
- 5 point choice
- Array (5 point choice)
- Array (10 point choice)
- Array (Increase, Same, Decrease)
- Array (Multi flexible) (Text)
- Array (Yes/No/Uncertain)
- Array (Multi Flexible) (Numbers)
- Boilerplate question
- Date
- Gender
- Huge free text
- Language switch
- Long free text
- Multiple numerical input
- Numerical input
- Ranking
- Short free text
- Yes/No
Beoordelingswaarden voor elk antwoord/label
If enabled, the assessment mode will add an additional field between the answer code and answer option name for all the assessable questions:

You can also use label sets as answers for your set of questions. Just click on the Predefined label sets... button located under the answers matrix and select the your predefined label set.
If you decide to use label sets, assessment values can be added to all your labels from the moment in which they are firstly created. This allows the survey administrator to quickly use few assessed predefined label sets as answers for multiple sets of questions.

This process is less time-consuming and more practical. You can create a plan in the early stages of your survey in order to use only one set of label sets with predefined assessment values for multiple questions. In this way, you will not have to manually add assessment values to all the answers of the assessable questions used in your survey.
Kenmerken
De volgende kenmerken zijn beschikbaar:
- {PERC}: De score van de huidige vraaggroep. Alleen beschikbaar in het bericht van de beoordeling.
- {TOTAL}: De totale score. Alleen beschikbaar in het bericht van de beoordeling.
- {ASSESSMENT_CURRENT_TOTAL}: Dit is het huidige totaal van de score. Je moet minstens één beoordeling hiervoor definiëren. De score wordt alleen bijgewerkt bij het bladeren door de invuller, als er in de enquête maar een pagina is, is dit kenmerk dus zinloos.
Tips
- Als je het kenmerk {ASSESSMENT_CURRENT_TOTAL} wilt gebruiken zonder een beoordelingsbericht aan het einde van de enquête te tonen dan kun je:
- In het scherm enquête-tekst de URL-velden invullen en
- in het scherm presentatie de autoload URL activeren voor je enquête.
De beoordelingsmode uitschakelen
To deactivate it, go to the survey menu and look for the Data management tab. Click on it and the Notification and data management panel will be displayed. Look for the Enable assessment mode option and click on it to have it disabled for the respective survey.

Voorbeelden
De beoordelingsmode gebruiken
Let's recreate the example presented above in order to better understand the steps you have to pursue in order to correctly use the assessment feature.
{{Note|If you are unsure how to create a survey, use the following [[Quick start guide#Create a survey|quick start guide.}}
2) Activate the assessments. Go to the settings menu of the survey and click on the Assessments tab. Once there, activate the feature:

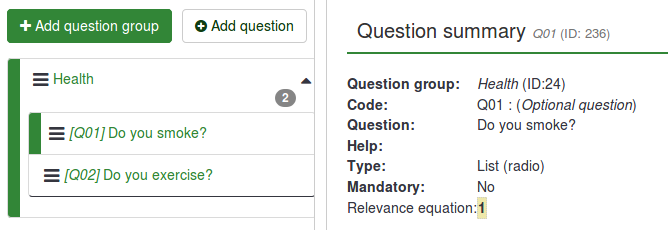
3) Create a question group and start adding the questions. Your survey structure should look like this:
4) Add answers for each question created above. While adding/editing the answers, complete also the assessment value field for each answer:

5) Now that you know the assessment values, access the Assessments panel and start adding assessment rules. Two rules were created for this example:

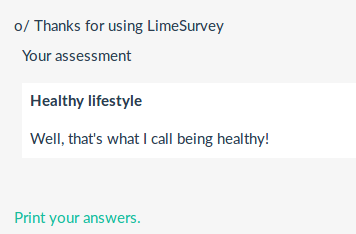
The text message of the first assessment rule (You should start exercising!) will be displayed if the respondent scores between 1 and 10 points. The text message of the second assessment rule (Well, that's what I call being healthy!) will be shown if the respondent scores between 11 and 21 points.
6) Now, preview the survey and see if the assessment mode is active. At the end of the survey, a text message will be displayed based on the score obtained by the respondent.
How to use the assessment placeholders
As mentioned in the previous subsection, three assessment-related placeholders can be used: {PERC}, {TOTAL}, and {ASSESSMENT_CURRENT_TOTAL}.
In the previous example, the following result was obtained: "Well, that's what I call being healthy!". However, no score was displayed.
There are many ways through which you can have it displayed. You can either create 6 assessment rules in order to emphasize each possible score/result or use assessment placeholders. The below example explains the latter option.
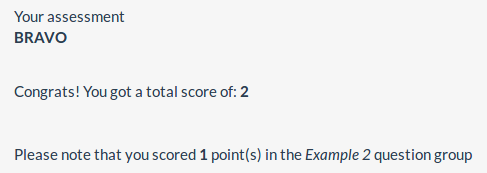
As mentioned above, {PERC} and {TOTAL} can be used in the message text box of the assessment rule in order to emphasize the score of the current group and the total score, respectively. Let's take a look at the following two screenshots to understand their usage.
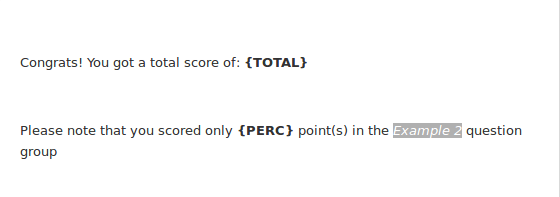
In the first screenshot, {PERC} and {TOTAL} were added into the message text box of the assessment rule.

In the second screenshot, you can see how the assessment rule looks like in order to correctly use both placeholders. Because {PERC} is used, the scope of the assessment rule must be switched from Total to Group in order to correctly display the score of the question group selected from the Question group dropdown list:

After completing the survey and depending on their answers, the respondents should get the following assessment message at the end:
{ASSESSMENT_CURRENT_TOTAL} can be used only inside a survey. You can use it after each question or question group from a quiz. You could show in this way to each respondent his or her current quiz/survey score. To use it, you could add for example at the beginning of every question or question group a message like: "You have accumulated till now {ASSESSMENT_CURRENT_TOTAL} points.