Survey quotas/nl: Difference between revisions
From LimeSurvey Manual
No edit summary |
(Created page with "*'''Quota wijzigen:''' Klik op de ''groene pijl'' onder de kolom '''Actie''' om de velden van die quota te wijzigen.") |
||
| Line 87: | Line 87: | ||
*'''[[Survey quotas/nl#Antwoord toevoegen|Antwoord toevoegen]]:''' Voeg eerst de quota toe! De limiet geldt <u>alleen</u> voor de antwoorden die in de quota-box getoond worden. | *'''[[Survey quotas/nl#Antwoord toevoegen|Antwoord toevoegen]]:''' Voeg eerst de quota toe! De limiet geldt <u>alleen</u> voor de antwoorden die in de quota-box getoond worden. | ||
*''' | *'''Quota wijzigen:''' Klik op de ''groene pijl'' onder de kolom '''Actie''' om de velden van die quota te wijzigen. | ||
*'''Delete quota:''' Click on the red trash button located under the '''Action''' column of the survey quotas table to delete the respective quota entry; | *'''Delete quota:''' Click on the red trash button located under the '''Action''' column of the survey quotas table to delete the respective quota entry; | ||
Revision as of 17:32, 12 February 2018
Inleiding
Met een quota kun je het aantal keren beperken dat een actieve enquête wordt ingevuld. Je kunt hier kijken naar verschillende kenmerken van de respondent zoals geslacht of leeftijd. Je kunt de quota beheren in de tab Enquête quota's.
Hoe werkt een quota
Je stelt een quota in dat je maximaal 20 responses met Ja wilt hebben op één bepaalde vraaggroep. De quota wordt gecontroleerd als er Ja wordt ingevuld.
Afhankelijk van het formaat van de enquête (hoe worden de vragen getoond bij het invullen van de enquête), gebeurt de controle bij het invoeren van :
- alle antwoorden in een keer: In dit formaat worden alle vragen (ook als er meerdere vraaggroepen zijn) op een pagina getoond. Daardoor wordt de controle op quota pas gedaan na het invullen en versturen van de antwoorden.
- de antwoorden van een vraaggroep: In dit formaat wordt de quota bij elke vraaggroep gecontroleerd na het invullen en versturen van de vragen van een vraaggroep. De quota kan dus na elke pagina, vraaggroep, bereikt zijn.
- het antwoord op een vraag: In dit formaat wordt elke vraag op een pagina getoond en wordt de quota dus na elke beantwoorde vraag gecontroleerd.
Als er Nee wordt ingevuld, dan is er geen quota, de enquête kan dan gewoon verder worden ingevuld.
Je kunt natuurlijk ook een quota zetten op het aantal responses die Nee kiezen.
Meer antwoorden en quota's gebruiken
Stel, je wilt een enquête maken met maximaal 25 mannelijke en maximaal 30 vrouwelijke respondenten. Dat zijn er dus twee quota's, een per geslacht.
Stel dat je 50 mannelijke en 50 vrouwelijke respondenten wilt hebben. Je hebt per antwoord dat de quota aanstuurt een eigen quota-regel. Als je de 2 antwoorden in 1 telt dan tel je maar 50 respondenten ongeacht het antwoord. Het gebruik van quota wordt hier met voorbeelden toegelicht.
Activeren quota als er al respondenten zijn
Je kunt ook na het activeren van een enquête nog quota toevoegen. Als je het toevoegt als de enquête al geactiveerd is dan worden de al aanwezige reacties bekeken. Als die al afgerond en volledig zijn dan tellen die mee. Als de quota dan al bereikt wordt, dan worden de overige al volledige reacties die nog niet geteld zijn als onvolledig gezien. Je raakt dus afgeronde reacties kwijt als je de quota te laag instelt.
Als je al 1000 afgeronde reacties van vrouwen hebt en je voegt dan een quota van 800 reacties van vrouwen in dan worden eventuele nieuwe reacties van vrouwen geheel of gedeeltelijk opgeslagen, afhankelijk van het formaat, deze reacties worden gemarkeerd als onvolledig (incomplete).
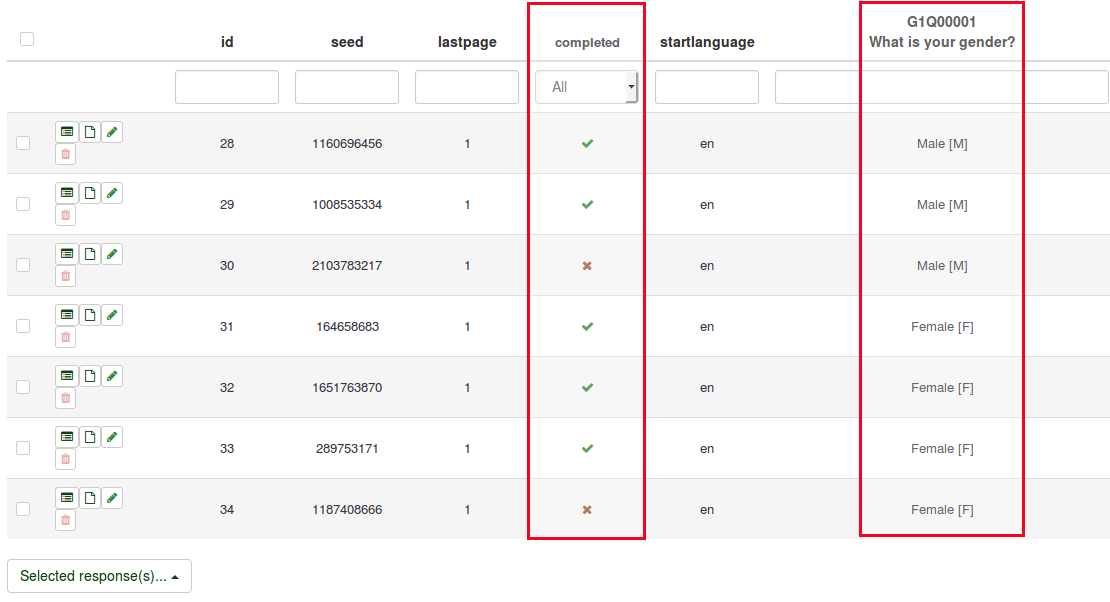
Het quota-systeem slaat geen gegevens op over antwoorden of het aantal gegeven antwoorden! Het is een filter op de enquête-tabel met reacties. Het kijkt naar afgeronde reacties en de vraagkolommen met antwoorden waar een quota op gezet is.
Mogelijke vraagtypes
Op dit moment ondersteunen de volgende vraagtypes het gebruik van quota:
- Geslacht
- Meerkeuzevraag
- Array (5 punten)
- Array (10 punten)
- Taalkeuze
- Ja/Nee
- Lijst (Radioknoppen)
- Lijst (Dropdown)
- Lijst met opmerkingen
Enquête quota's paneel
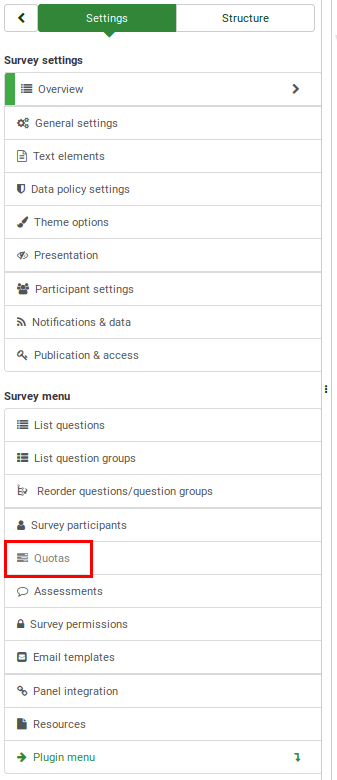
Klik op de tab Quota in het enquête-menu, dan krijg je de volgende pagina te zien:

Voeg een quota toe zodat alle opties van dit paneel getoond worden. De pagina ziet er dan ongeveer als volgt uit:

De opties zijn:
- Quota toevoegen: Rechtsonder de tabel met quota's. Zodra een quota wordt getoond kun je die implementeren op bepaalde antwoorden bij (sub)vragen.
- Antwoord toevoegen: Voeg eerst de quota toe! De limiet geldt alleen voor de antwoorden die in de quota-box getoond worden.
- Quota wijzigen: Klik op de groene pijl onder de kolom Actie om de velden van die quota te wijzigen.
- Delete quota: Click on the red trash button located under the Action column of the survey quotas table to delete the respective quota entry;
- Quota validation: Click on the last button located under the Action column of the survey quotas table to quickly check the quota message displayed to the respondents, the URL (and/or a short description of it) where they will be redirected;
- Quick CSV report: It exports a summary of the quotas under the form of a comma-delimited CSV table.
- Selected quota(s)...: It works like an aggregator. Select multiple quotas and use this button to apply one of the actions described below to the selected group of quotas:
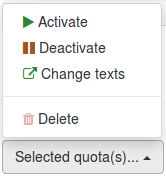
- Activate: Use this button to activate a quota. The active ones have the quota name, action, and URL written in white font on a green background.

- Deactivate: Use this button to deactivate a quota. The deactivated ones have the quota name, action, and URL written in black font on a grey background.

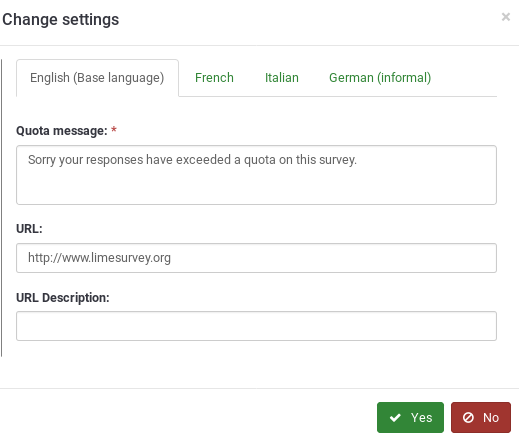
- Change texts: Use this button to quickly change the quota message, URL, and URL description of a group of a quotas. You may use this function to redirect respondents to a certain link once different quota conditions were met.
- Delete: If you wish to delete a group of quotas by a few clicks, tick the ones you wish to delete, click on the selected quota(s) button, and select the Delete option.
Quota toevoegen
Het toevoegen van een quota gaat in twee stappen. Je voegt eerst een quota toe aan de enquête "Toevoegen nieuwe quota". Daarna kies je met "Antwoord toevoegen" de quota.
Als je op de knop Toevoegen nieuwe quota klikt dan wordt het volgende scherm getoond:
De volgende opties zijn beschikbaar:
- Quota Name: This represents the name of the quota that will be displayed on the survey quotas table. It should describe the quota it will represent;
- Quota Limit: It represents the maximum number of completed surveys that will be stored in the responses table and marked as being complete. See above the wiki section on how do quotas work to better understand the mechanism employed by LimeSurvey.
- Quota Action: If the quota is triggered, then one of the two actions will happen:
- Terminate survey: This action immediately terminates the survey and closes the survey.
- Allow user to modify his last answers before terminate survey: Useful action when you want your respondents not to go for the same option. In this way, you can make some of them choose another solution or option. For example, when goodies are offered, you can use a quota on each option in order not to have more users selecting the same good. With this action activated, the users will be aware of the fact that you cannot offer an
- Autoload URL: de deelnemer wordt naar deze URL gestuurd wanneer de limiet is bereikt.
- Quota Message: Write the text you wish to be displayed to your respondents if the quota action is triggered. The message will be displayed if the Autoload URL is disabled.
- URL: The URL displayed to survey participants after the quota action was triggered. The users can also be automatically redirected to this URL if "Autoload URL" is enabled. You can use URL fields in this section.
- URL Description: A short URL description can be added in order to show to the other survey administrators the goal of the URL for example.
Antwoord toevoegen
Once the quota was created, you can start adding answers under it. To do that, access the Survey quotas panel. Look into the survey quotas table and select the Add answer option from the quota box where you wish to add the respective answer to:
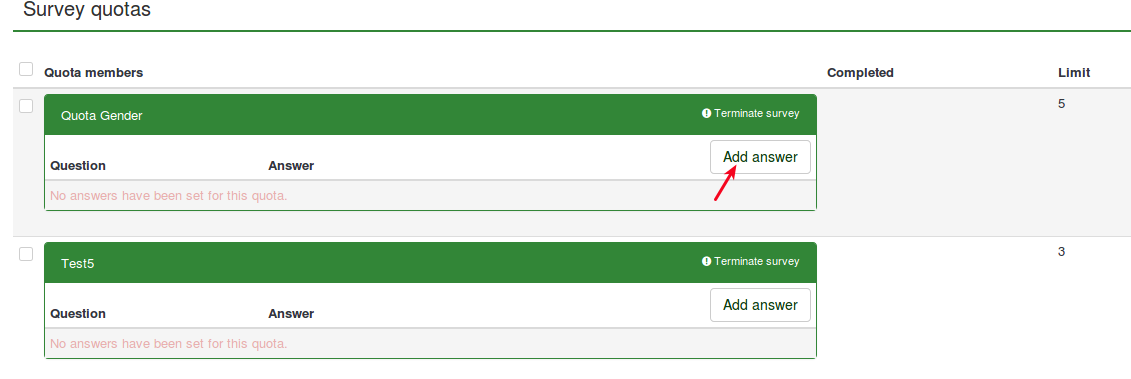
After you clicked it, a new page will load up asking you to select the question to which the quota will be applied to:
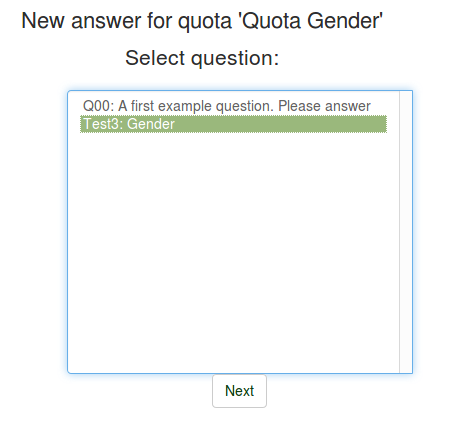
Once you click next, the answers of the question you selected one step before will be displayed. Now, you have to choose to which answer you wish the quota to be applied to:
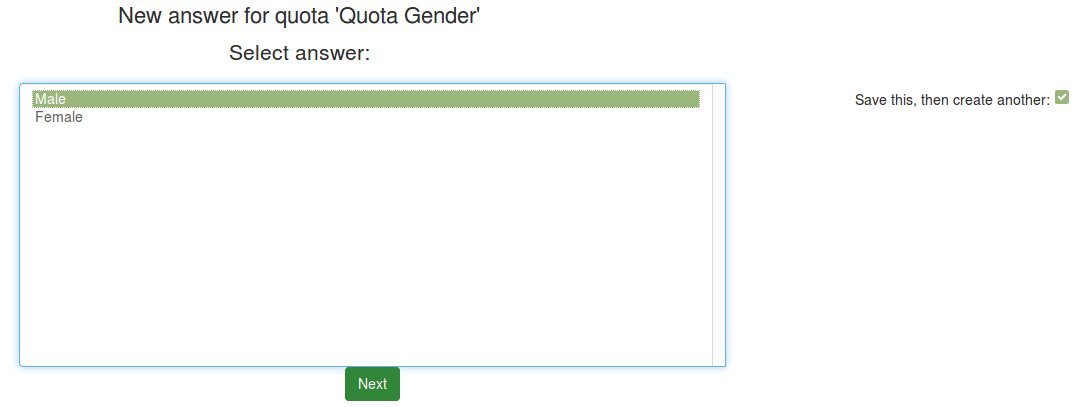
In this example, the "Male" answer will have the quota applied to it. Whenever respondents choose this option. the quota system registers the answer. Once the quota limit is reached, the stored survey answers will still be saved in the survey responses table, but it will be marked as being incomplete.
Snel CSV-rapport
The quick CSV report function is used to export the survey quotas table in a comma-delimited CSV file. It includes the following fields:
- Quota name: The name of the quotas;
- Limit: If the quota is active, it represents the maximum number of survey responses that can be marked as being complete in the survey responses table;
- Completed: The number of survey answers marked as being complete in the survey responses table. Please note tha an answer is marked as being incomplete if the quota is triggered.
- Remaining: The number of answers that can still be collected in the survey responses table and marked as being "complete" there.
Quota en toegangscodes
Als een enquête toegangscodes gebruikt en de deelnemer wordt niet meegenomen vanwege de quota, dan wordt de toegangscode gemerkt met een "Q" in het veld "Completed" bij de antwoorden. De toegangscode kan dan niet opnieuw worden gebruikt. De respondent kan dan dus niet opnieuw de enquête invullen.
Voorbeelden
The role of the following examples is to better explain the role of quotas and their usage within the LimeSurvey environment. Before continuing reading the below examples, please take into account that:
- answers added in the same quota are summed up. For example, if answers A and B from the available responses of a survey question are added to quota Q1, the quota limit sums up the number of users who pick up A and B as their answers. Therefore, the distribution of A and B answers will be (highly probable) uneven, being entirely dependent on the characteristics or preferences of your respondents.
- answers added in different quotas act as there is a logical operator "AND" between them. Let's suppose that A is added to Q1 and B to Q2. If A is chosen and Q1 is reached, then respondents won't get their answers marked as being "complete" in the survey responses table. However, the survey participants that choose B are still allowed to continue as long as Q2 is not reached. Once it is reached, respondents who further choose A or B as answers to that specific question will have their answers marked as being incomplete in the survey responses table.
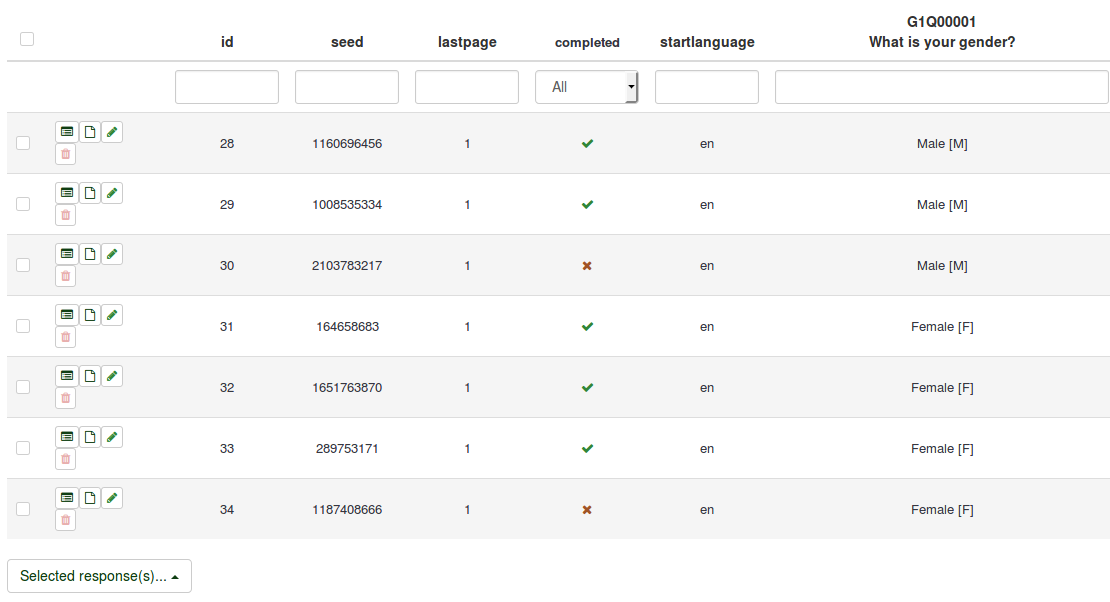
Antwoorden aan verschillende quota's toevoegen
Let's assume that you are doing a survey about LimeSurvey and you would like to receive some feedback from your users. You would like to receive 1000 answers from students (PhD student, graduate, undergraduate) and another 1000 from non-students (unemployed person, full/part-time working person or other). In order to do this, create two quotas: Students quota and Non-students quota.

Now, start adding answers to each quota box following the steps described above in the wiki section. The quota boxes should look like this:
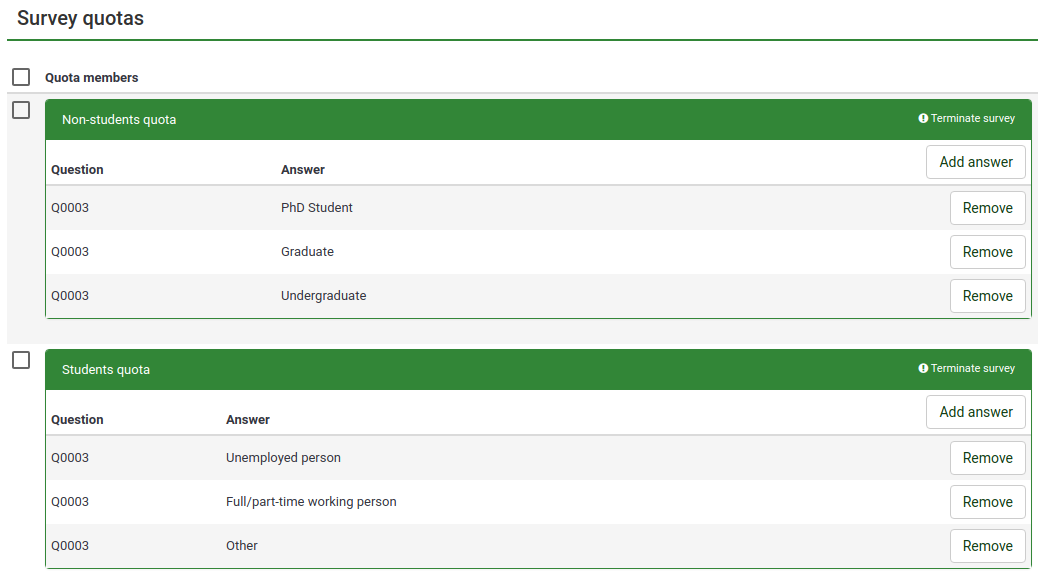
By using this method, you limit the number of responses you receive from the two defined groups: students and non-students groups. Now, activate the survey and start testing the quotas. If you first reach 1000 answers from the non-students group, the next answers you receive from this category will be marked as being incomplete in the survey responses table. Only answers that come from the students group will still be accepted. Once it also reaches 1000, no more answers will be registered as being complete in the survey responses table.
URL-link toevoegen
To add an URL link to a quota, please continue reading the URL fields wiki section.