New Template System in LS3.x/ja: Difference between revisions
From LimeSurvey Manual
Bravehorse (talk | contribs) (Created page with "LS3.xの新しいテンプレートシステム") |
Bravehorse (talk | contribs) No edit summary |
||
| (175 intermediate revisions by 3 users not shown) | |||
| Line 2: | Line 2: | ||
__TOC__ | __TOC__ | ||
= | =はじめに= | ||
注意:以前のバージョンのLimeSurveyでは、アンケートの見た目や、色、フォント、レイアウト、(一部の)動作の観点でアンケートがどのように表示されるかを定義するファイルを"テンプレート"と呼んでいました。新たな検討により、これは"テーマ"と呼ぶこととし、テンプレートはアンケート例のために予約されています。 | |||
* | このページでは、以下の方法について学習します。 | ||
* | |||
* | * LimeSurvey 3.0の新しいテーマシステムの使用 | ||
* | * 継承による独自テーマの管理 | ||
* テーマへの画像追加 | |||
* アンケートとアンケートグループのテーマオプション管理 | |||
<hr/> | <hr/> | ||
LimeSurvey | LimeSurvey 3では、Twig 1.29、Bootstrapに基づいた完全な新しいテンプレートエンジンシステムを導入し、テンプレートの継承とテンプレートオプションが利用可能になりました。これにより、古い置換キーワードシステムが完全にいらなくなり、フロントエンドHTMLの100%をカスタマイズすることができます。たとえば、古いテンプレートシステムでは、実行時に評価用HTMLに置き換えられるキーワード{ASSESSMENTS}がありました。テンプレートデザイナーは、JavaScriptを使用する以外にこのHTMLをカスタマイズする方法がありませんでした。今では、このHTMLを生成するためのロジック(Twigで書かれています)を含むassessmentments.twigというファイルがあります。こらのページでは、この新しいテンプレートエンジンの使用方法について説明します。 | ||
<div class="simplebox">[[File:help.png]] | <div class="simplebox">[[File:help.png]] ここでは、Twigの仕組みは詳しく説明しません。これは非常に単純化されたPHPのようなもので、“サンドボックス”と呼ばれるシステムにより高度なセキュリティが提供されます(Theme Engine Coreコードの部分で詳しく説明します)。すでにPHPを知っていれば、習得するのは非常に簡単です。PHPを知らないとしても、習得するのはかなり簡単なはずです。Twig 1.Xのドキュメントをご覧ください。https://twig.symfony.com/ </div> | ||
= | =管理インタフェースを使用した編集= | ||
== | ==テンプレートリスト== | ||
管理ダッシュボードに、テンプレートリストにアクセスするためのボックスが追加されました。 | |||
[[File:Template list.jpg|thumb|800px|center|baseline|border|'' | [[File:Template list.jpg|thumb|800px|center|baseline|border|''RC3の新規インストール後のテンプレートリスト'']] | ||
<br /> | <br /> | ||
リストは5つの列に分かれています。 | |||
* | * テンプレートのプレビュー: テンプレートのルートにある“preview.png”という画像ファイルです。 | ||
* | * マニフェストで指定されているテンプレートの“タイトル”(テンプレートのルートにあるconfig.xml) | ||
* | * テンプレートの説明: マニフェストに設定された文字列 | ||
* | * テンプレートのタイプ: コアテンプレート(LimeSurvey提供)、ユーザーテンプレート(アップロードディレクトリに追加)、XMLテンプレート(データベースに読み込まれない) | ||
* | * 拡張: テンプレートが別のテンプレートを拡張する場合は、その名前がここに表示されます。 | ||
* | * アクションボタン: | ||
** | ** インストール: テンプレートのマニフェストを読み込んでデータベースに追加し、アンケートレベルで選択できるようにします。 | ||
** | ** アンインストール:データベース内のテンプレートの設定エントリーを削除します。 | ||
** | ** テンプレートエディター: テンプレートエディターにリダイレクトされます。 | ||
** | ** テンプレートオプション:テンプレートオプションのグローバル設定を行います。 | ||
== | ==テーマエディター== | ||
<div class="simplebox">[[File:help.png]] | <div class="simplebox">[[File:help.png]] このドキュメントは、以前のバージョンのLSでテーマエディタを使用する方法をすでに知っていることを前提としています。</div> | ||
<br> | <br> | ||
テーマエディターは元のものにできるだけ近づけて維持されています。コアテーマを開いても編集できません。“コピー”ボタンではなく、“拡張ボタン”があります。 | |||
<br> | <br> | ||
[[File:Extends default.png|center|baseline|border|'' | [[File:Extends default.png|center|baseline|border|''テーマを'''拡張'''する'']] | ||
==== | ====テンプレート継承の考え方について==== | ||
LS3では、テンプレートは別のテンプレートから継承できるようになり、別のテンプレートを“拡張”することができます。これは、テンプレートディレクトリーは最初は空で、元のものと異なるファイル(ビュー、スタイルシート、スクリプト、リソースなど)のみが保存されます。そうすることで、多くのテンプレートを維持することなく、多くのユーザー向けのテンプレートを簡単に作成できます。たとえば、独自の自家製テンプレートを持つとともに、ある会社向けのバージョン(ロゴ、そのスタイル、フッターなどに配置するWebサイトへのリンクなど)、さらに別の会社向けのバージョンを持つことができます。カスタムテンプレートのCSSまたはグローバルレイアウトを更新すると、それを継承するすべてのテンプレートが自動的に更新されます。テンプレートは他のテンプレートを拡張するテンプレートを拡張することができる、といった具合に、継承は再帰的になります。 | |||
<div class="simplebox">[[File:help.png]] | <div class="simplebox">[[File:help.png]] LimeSurveyの主要なテンプレートを拡張すると、そのアップデートからのメリットを受けられるということでもあります。</div> | ||
==== | ====ユーザーインターフェイスの新規性==== | ||
LimeSurveyのMonochromeテーマを拡張するには、Templateリストに移動して、Monochromeテーマの“テーマエディター”ボタンをクリックします。次に、“拡張”をクリックして、新しい名前が“extends_monochrome”となっていることを確認します。 | |||
ファイル/ftpクライアントを使用してアップロードディレクトリに移動すると、新しいディレクトリ'''upload/templates/extends_monochrome'''が作成されていることがわかります。これにはXMLファイルとディレクトリが含まれていますが、ほとんどのディレクトリは空です。ビューもCSSもJSもありません。しかし、このテンプレートはアンケートから正常なテンプレートとして選択することができ、monochromeテンプレートとまったく同じように見えます。 | |||
[[File:Extends monochrome empty.jpg|center|baseline|border|'' | [[File:Extends monochrome empty.jpg|center|baseline|border|''作成直後のテンプレートツリー(ディレクトリーとファイル)です。最初は空です。'']] | ||
<div class="simplebox">[[File:help.png]] | <div class="simplebox">[[File:help.png]] 元のテンプレートのリソース(jpg、pngなど)は、テンプレートを拡張するときにコピーされます。これは、CSSファイルを元のテンプレートからローカルにコピーし、そのファイルを背景画像ステートメントなどで参照する場合、現在のテンプレートパスからそれらの画像にたどり着く必要があるからです。</div> | ||
extend_monochromeテンプレートのテンプレートエディタは次のようになります。 | |||
[[File:Editing extends monochrome.jpg|center|baseline|border|'' | [[File:Editing extends monochrome.jpg|center|baseline|border|''extends_monochromeテンプレートの編集'']] | ||
<br /><br /> | <br /><br /> | ||
古いテンプレートエディターと大きな違いはありません。主なものを挙げます。 | |||
<br /> | <br /> | ||
* | * ファイルリストにある'''継承'''というキーワード。これは、ファイルがテンプレートディレクトリーに存在せず、元のテンプレートのファイルが使用されることを意味します。 | ||
[[File:Inherited.jpg|center]] | [[File:Inherited.jpg|center]] | ||
<br> | <br> | ||
* | * メインエディター([https://ace.c9.io ACE editor ])には、選択したファイルの内容が表示されます。ファイルには、HTML、CSS、またはJSだけでなく、Twigステートメントも含まれています。これらのTwigステートメントは、以前はコアの深いところに位置していたテンプレートビューにいくつかのロジックをプッシュできるようになり、カスタマイズすることができます。 | ||
[[File:Twig code in editor.jpg|center|'' | [[File:Twig code in editor.jpg|center|''アンケートリストのtwigコードの例'']] | ||
<br> | <br> | ||
* | * このため、トップメニューのドロップダウンセレクタで、より多くの画面タイプを利用できるようになりました。以前には利用もカスタマイズもできなかった‘アンケートリスト’、‘読み込み’、‘保存’、‘エラー’、‘登録’、‘評価’、‘回答の印刷’などのページがあります。 | ||
[[File:Newscreens editables.jpg|195px|center|'' | [[File:Newscreens editables.jpg|195px|center|''すべての画面でのカスタマイズ'']] | ||
<br /> | <br /> | ||
* | * ファイルリストの一番下にある‘tip’リンクは、HTMLに画像をTwigで追加する方法を表示します。 | ||
[[File:Tip picture.png|605px|center]] | [[File:Tip picture.png|605px|center]] | ||
<br /> | <br /> | ||
* | * ‘変更を保存’ボタンは'''ローカルのテンプレートにコピーし、変更を保存する'''ボタンになっています。 | ||
[[File:Copytolocal.png|360px|center]] | [[File:Copytolocal.png|360px|center]] | ||
==== | ====簡単な例: 画像の追加 ==== | ||
'''ローカテンプレートにコピーして変更を保存する'''ボタンは、ファイル内の何かを編集してそのボタンをクリックすると、ファイルを編集中のテンプレートにコピーして変更を保存します。 | |||
<br> | <br> | ||
たとえば、layout_global.twigというファイルをクリックし、ブロックコンテンツ({% block content %})の直前にテキスト “TEST”を追加し、ボタンをクリックします。ファイルのラベルが “継承”から “ローカル”に変更され、ボタンが単純な'''変更を保存する'''ボタンになっていることがわかります。 | |||
[[File:After edition.png|center|'' | [[File:After edition.png|center|''ボタンクリック直後'']] | ||
<br> | <br> | ||
ファイルエクスプローラーを開いてupload/templates/extend_monochrome/views/ディレクトリーに移動すると、layout_global.twigというファイルが1つだけあり、その中に文字列“TEST”がそこにあることがわかります。 | |||
[[File:Tree with layout global arrow.png|center|'' | [[File:Tree with layout global arrow.png|center|''ファイルがテンプレートに表示された'']] | ||
<br><br> | <br><br> | ||
今、ランダムなテキストを追加する代わりに画像を追加します。TIPリンクをクリックすると、次のように表示されます。 | |||
<br> | <br> | ||
.twigファイルで画像を使用するには、次のようにします。 | |||
'''{{ image('./files/myfile.png', 'alt-text for my file', {"class": "myclass"}) }}''' | '''{{ image('./files/myfile.png', 'alt-text for my file', {"class": "myclass"}) }}''' | ||
<br> | <br> | ||
Twigのドキュメントを読むと(この時点ですでに読んでいるべきですが)、'''{{ function( ) }}<nowiki />'''によって関数の結果がスクリーンに表示されます。ここでは、その関数とはimaga()です。 | |||
<div class="simplebox">[[File:help.png]] | <div class="simplebox">[[File:help.png]] 詳しく知りたい場合は、ここからコード(RC3バージョン)を見ることができます。 [https://github.com/LimeSurvey/LimeSurvey/blob/f3737a75e428f604d68d2e5ba958f3eba3eba2e1/application/core/LS_Twig_Extension.php#L219-L237 RC3におけるimage()関数] | ||
コードを理解できない場合でも心配する必要はありません。どのように動作するのか知っている必要はありませんが、使う理由と使い方を理解していればいいのです。 | |||
</div> | </div> | ||
<br> | <br> | ||
次の2つの理由から、image()関数を使用する必要があります。 | |||
* | * image関数はテンプレートを検索して画像を見つけます。作業中のテンプレートが別のテンプレートに拡張されていて、画像をローカルに挿入した場所にファイルをコピーしたものの、その画像がローカルテーマにコピーされていない場合であっても、テンプレート継承ツリーを検索して、その画像がどこにあるかを見つけます。 | ||
* | * アセットマネージャーを使用するので、テンプレートのパフォーマンスを向上させます。詳細については、Yii Asset Managerのマニュアルを参照してください。http://www.yiiframework.com/wiki/148/understanding-assets/ | ||
<div class="simplebox"> | <div class="simplebox"> | ||
テーマに画像を追加するには、 | |||
* | * 右側のファイルアップローダーを使っていつものようにアップロードし、twigファイルの必要な場所に追加してください。 | ||
'''{{ image('./files/myfile.png') }}''' | '''{{ image('./files/myfile.png') }}''' | ||
* | * 画像の代替テキスト(スクリーンリーダーやHTML検証向け)を追加する場合は、次のようにします。 | ||
{{ image('./files/myfile.png'), ''' | {{ image('./files/myfile.png'), ''' ‘これが代替テキスト’ ''' }} | ||
* | * クラス属性を追加し、そのクラスにidを追加する場合は、次のようにします。 | ||
{{ image('./files/myfile.png'), | {{ image('./files/myfile.png'), ‘これが代替テキスト’, ''' {“class”: “a_nice_css_class”, “id”: “any_id”} ''' }} | ||
</div> | </div> | ||
==== | ====開発検討中の事項==== | ||
* | * エディター自体からカスタムプレビューファイルをアップロードできるようにする | ||
* | * ローカルファイルを削除し継承されたステートメントに戻るボタンを追加する | ||
* | * CSSファイルで使用されている画像のみをコピーする(コピーすべきファイルとしてマニフェストに記載します) | ||
* | * 現在のテンプレートを拡張したものがどのテンプレートかをわかるようにする(もしあれば) | ||
== | ==テーマオプション== | ||
LS3のもう一つの目新しい点は、テーマのオプションページです。後で説明するように、テーマ作成者は独自のオプションや独自の管理オプションページを作成することもできます。ここでは、コアテーマのオプションページの仕組みを簡単に見ていきます。グローバルレベルでテーマオプションにアクセスするには、テーマリストの“テーマオプション”をクリックします。 | |||
=== | ===詳細オプション=== | ||
{{QS:Theme editor - advanced options}} | {{QS:Theme editor - advanced options/ja}} | ||
=== | ===簡単オプション=== | ||
簡単オプションページは、テンプレート自体から生成されます。これは、template/optionsディレクトリーにあるtwigファイルとjavascriptで作成されています。https://github.com/LimeSurvey/LimeSurvey/tree/develop/templates/default/options | |||
<div class="simplebox">[[File:help.png]] このページはテーマごとに完全に異なるため、テンプレート提供者は独自のルック&フィールを作成することを強く推奨します。</div> | |||
<div class="simplebox">[[File:help.png]] | |||
[[File:Options.png|thumb|750px|center]] | [[File:Options.png|thumb|750px|center]] | ||
<br><br> | <br><br> | ||
簡単オプションページは、詳細オプションの設定フォーム入力を単に入力するだけです。簡単ページの設定をオンまたはオフにして、それに応じて詳細フォームの関連部分がどのように変更されるかを確認できます。たとえば、既定のテンプレートの簡単オプションでは、Bootswatchのテーマを“Darkly”に変更してから詳細オプションのタブをクリックすると(保存せずとも)、“Cssframework Css”の値が、 | |||
{"replace": [["css/bootstrap.css","css/flatly.css"]]}<br> | {"replace": [["css/bootstrap.css","css/flatly.css"]]}<br> | ||
から、次のモノに変わります。<br> | |||
{"replace": [["css/bootstrap.css","css/darkly.css"]]} | {"replace": [["css/bootstrap.css","css/darkly.css"]]} | ||
<br> | <br> | ||
コアテーマのさまざまな簡単オプションを次に示します。 | |||
*''' | *'''Ajaxモード:''' 次のページをajax(高速)またはページリロード(デバッグ目的に適しています)経由でロードするかどうかを指定します。 | ||
*''' | *'''背景画像:''' 「Yes」に設定すると、pattern.pngという画像がロードされます(マスターのファイルセレクタに置き換えられます) | ||
*''' | *'''ボックスコンテナ:''' 「No」に設定すると、質問がボックスに含まれなくなります(スクリーンの幅よりも大きい大きな配列を使用することができます) | ||
*'''Brandlogo:''' | *'''Brandlogo:''' 「no」に設定すると、アンケートの名前がトップバーに表示されます。「Yes」の場合は、ファイルディレクトリ内の画像の1つをロゴ画像として使用することができます。 | ||
*''' | *'''本体のアニメーション:''' 「yes」に設定すると、アンケートの本文がロードされたときに適用するアニメーションの1つを選択できます | ||
*''' | *'''質問のアニメーション:''' 質問について同様 | ||
*''' | *'''警告のアニメーション:''' 警告について同様 | ||
*''' | *'''Bootstrapテーマ:''' ここでは、ロードするブートストラップテーマを選択できます。Bootswatchは、次のサイトから来ています。https://bootswatch.com/3/ | ||
<br> | <br> | ||
アニメーションに使用されるライブラリはanimate.cssです。https://daneden.github.io/animate.css/ | |||
もちろん、テンプレート提供者は独自のアニメーションライブラリを追加することもできますし、アニメーションライブラリをまったく追加しないこともできます。 | |||
<div class="simplebox">[[File:help.png]] | <div class="simplebox">[[File:help.png]] monochromeのテンプレートは、管理ユーザーインターフェイスと同じブートストラップカラーテーマを使用します。これらはCSSフレームワークの置換システムを使用せず、CSSファイルを追加するだけです。つまり、テンプレート提供者がカスタムテーマを扱う別の方法を示しています。</div> | ||
=== | ===継承システム=== | ||
これまで、テンプレートを別のテンプレートに拡張できることがわかりました。テンプレート設定についても、別のテンプレート設定から継承することができます。つまり、個々のテンプレートについて以下のレベルで設定することができます。 | |||
* | * グローバルレベル(テンプレートリストからアクセスできるもの) | ||
* | * アンケートグループレベル | ||
* | * アンケートレベル | ||
各レベルのそれぞれのパラメータは、上位レベルから継承することができます。まず、アンケートグループレベルを見てみましょう。 | |||
==== | ====アンケートグループレベル==== | ||
LS3の重要な新規性の1つとして、アンケートグループシステムが挙げられます。さまざまなグループを作成してアンケートを整理できるようになりました。アクセスするには、アンケートリストに行き、アンケートグループタブをクリックします。 | |||
[[File:Surveygroup.png|thumb|800px|center|'' | [[File:Surveygroup.png|thumb|800px|center|''アンケートグループタブ'']] | ||
<br> | <br> | ||
このリストには、2つの操作ボタンがあります。グループが空の場合は、削除できます。空でない場合は、編集することができます。編集ボタンをクリックすると、アンケートグループ設定ページが表示されます。 | |||
[[File:Surveygroupedit.png|thumb|800px|center|'' | [[File:Surveygroupedit.png|thumb|800px|center|''既定のアンケートグループの編集'']] | ||
<br> | <br> | ||
このページの3番目のタブは、“このアンケートグループのテンプレートオプション”と呼ばれています。ここをクリックすると、テンプレートリストと同じテンプレートのリストが表示されますが、ここではオプションボタンのみが表示されます(テンプレートエディターにはメインリストからのみアクセスできます)。 | |||
<br> | <br> | ||
既定のテンプレートのオプションをクリックすると、次のように表示されます。 | |||
[[File:Option group inherit.png|thumb|800px|center|'' | [[File:Option group inherit.png|thumb|800px|center|''アンケートグループでは、テンプレートオプションはデフォルトで継承される'']] | ||
<br> | <br> | ||
* '''Inherit everything''' | * '''Inherit everything'''(すべて継承)ということは、すべての設定がグローバル設定レベルから継承されることを意味します。 | ||
* | * '''高度なオプションページ'''に行くと、すべてのフィールドが継承されて設定されていることがわかります。 | ||
* | * 簡単オプションの"Inherit everything"で"いいえ"を選択すると、グローバルオプションページと非常によく似たページが再び表示されます。唯一の違いは、フィールドごとにはい、いいえ、または継承(inherit)に設定できることです。各セレクタに'''継承'''があります。 | ||
[[File:Inherit group.png|thumb|800px|center|'' | [[File:Inherit group.png|thumb|800px|center|''個々の設定は継承という値がある'']] | ||
<div class="simplebox">[[File:help.png]] | <div class="simplebox">[[File:help.png]] アンケートグループは、別のグループの子になることができます。この場合、親から継承します。</div> | ||
==== | ====アンケートレベル==== | ||
アンケートを編集するときは、左のバーメニューに“テーマオプション”という新しいエントリーが表示されます。現在のアンケート用に選択されたテーマのオプションページに移動します。アンケートグループと同じ継承システムがありますが、この場合の継承は、アンケートが属するアンケートグループから設定値が継承されることを意味します。 | |||
[[File:Options survey.png|thumb|800px|center|'' | [[File:Options survey.png|thumb|800px|center|''アンケートレベルでのテーマオプション'']] | ||
== | ==ユースケースの例== | ||
たとえば、異なる企業(AとB)に1つのテンプレートを使用しているとします。お気に入りのオプションは、グローバルレベルで設定します(例:ajaxはon、本体のアニメーションはスライドイン、警告はパルス)。次に、各会社のアンケートグループを作成します。会社Aのアンケートグループは、この会社のすべてのアンケートをホストし、会社Bのアンケートグループは、会社Bのすべてのアンケートをホストします。このレベルでは、ロゴと背景のみを設定し、他のオプションは継承させます。これにより、グループAのすべてのアンケートでは、会社Aのロゴを使用し、グループBのすべてのアンケートは、会社Bのロゴを使用します。会社Aのあるアンケートで、トピックと関連して異なる背景を使用できます。アンケートレベルでオプションの背景を変更するだけです。B社の誰かが、パルスで表示される警告があまりにも目立ち、フェードインのようなスムーズなものを好む場合は、アンケートグループBレベルで警告のアニメーションを変更するだけで、このグループのすべてのアンケートでこのアニメーションが使用されるようになります。会社Aがロゴを変更した場合は、アンケートグループAのレベルで変更することができ、このグループのすべてのアンケートで新しいロゴが使用されます。 | |||
<br> | <br> | ||
<div class="simplebox"> | <div class="simplebox">この例は、コアテーマの現在のオプションに基づいています。ただし、あなたがテンプレート提供者で、またtwigで少しスクリプトを作成できる場合は、独自のオプションを追加することももちろん可能です。たとえば、会社のウェブサイトや電話番号のようなデータを追加するためのオプション "info footer"を追加することができます。次に、A社に個別の電話番号を持つ部門がある場合、アンケートグループAに各部門ごとに1つのサブグループを作成できます。各サブグループは、このオプションで独自の電話番号を持つことができます。</div> | ||
= | = テーマのカスタマイズに関するFAQ = | ||
ここでは、フォーラムで提起された質問に対する回答を紹介しており、テーマのカスタマイズに役立てることができます。 | |||
== | ==CSS/JSのカスタマイズ: アセットマネージャーを扱う("なぜ変更が反映されないのか") == | ||
<br /> | <br /> | ||
好みのエディターでコードを直接編集してテーマのCSS/JSを更新しようとしても、変更が適用されないことに驚くかもしれません。 | |||
<br /> | <br /> | ||
2.50以降、LSはYiiアセットマネージャを使用しています。 | |||
[http://www.yiiframework.com/wiki/148/understanding-assets/ | [http://www.yiiframework.com/wiki/148/understanding-assets/ アセットに関するYiiのドキュメント] | ||
<br /> | <br /> | ||
テーマのCSS/JSファイルをランダムな文字列を持つtmp/のサブディレクトリー(例: "tmp/1ef64ml/")に移動します。したがって、css/jsファイルに変更を加えてアセットマネージャに伝えると、ファイルは新しい名前で新しいサブディレクトリにコピーされ、ユーザーブラウザのキャッシュが更新され、新しいcss/jsが表示されます。それ以外の場合は、ブラウザのキャッシュを消去する必要があります。 | |||
<br /> | <br /> | ||
アセットマネージャーがオンのときのヘッダーのCSSリンクです。 | |||
<br /> | <br /> | ||
[[File:Assets on vanilla.jpg]] | [[File:Assets on vanilla.jpg]] | ||
<br /> | <br />ご覧のとおり、すべてがtmp/ サブフォルダーを参照しています。 | ||
<br /> | <br /> | ||
アセットマネージャーがオフのときのヘッダーのCSSリンクです。 | |||
<br /> | <br /> | ||
[[File:Asset off.png]] | [[File:Asset off.png]] | ||
<br /> | <br />ご覧のように、テーマの実際のファイルを指しています。 | ||
<br /> | <br /> | ||
<div class="simplebox">[[File:help.png]] | <div class="simplebox">[[File:help.png]] もちろん、アセットマネージャーがファイルを変更したことを知らない場合、古いtmp/ディレクトリーの古いファイルは変更されず、変更は適用されません。</div> | ||
テーマのCSS/JSを編集すときは、さまざまな方法があります。 | |||
*''' | *'''LSテーマエディターを使う:''' それはアセットマネージャーを扱うので、何も心配する必要はありません。 | ||
*''' | *'''デバッグモードをオンにする:''' アセットマネージャーがオフになり、テーマの実際のcss/jsファイルが呼び出されます(ただし、ロードごとにブラウザのキャッシュを更新する必要があります) | ||
* ''' | * '''アセットキャッシュを更新する''': 全体設定 -> 全般 -> アセットキャッシュをクリアする | ||
[[File:Clearassets-ls3 3.png]] | [[File:Clearassets-ls3 3.png]] | ||
<div class="simplebox">[[File:help.png]] ''' | <div class="simplebox">[[File:help.png]] '''テーマエディターを使用してカスタムCSSを編集するのが最良の解決策です。''' </div> | ||
テーマエディタを使用すると、新しいテーマエンジンのアーキテクチャを理解するのに役立ちます。 | |||
また、fruityをカスタマイズした場合は、CSSの指定に注意してください。ほとんどの定義ではセレクタ".fruity"(body要素のクラスの1つ)を使用します。 | |||
== | == テーマにカスタムフォントを追加する == | ||
=== | === 簡単な方法: Google Font CDNを使用する === | ||
Bootswatch | Bootswatch SurveyテーマはGoogle Font CDNを使用しています。どのように動作するか見てみましょう。 | ||
https://github.com/LimeSurvey/LimeSurvey/blob/70a1d99cd2ebe411597231a8bc746b4ca9e19584/themes/survey/bootswatch/css/variations/flatly.min.css | https://github.com/LimeSurvey/LimeSurvey/blob/70a1d99cd2ebe411597231a8bc746b4ca9e19584/themes/survey/bootswatch/css/variations/flatly.min.css | ||
<syntaxhighlight lang="css | <syntaxhighlight lang="css"> | ||
@import url("https://fonts.googleapis.com/css?family=Lato:400,700,400italic"); | @import url("https://fonts.googleapis.com/css?family=Lato:400,700,400italic"); | ||
</syntaxhighlight> | </syntaxhighlight> | ||
LatoフォントがCSSルールで使われています。 | |||
https://github.com/thomaspark/bootswatch/blob/master/dist/flatly/bootstrap.css#L72 | https://github.com/thomaspark/bootswatch/blob/master/dist/flatly/bootstrap.css#L72 | ||
<syntaxhighlight lang="css | <syntaxhighlight lang="css"> | ||
body { | body { | ||
... | ... | ||
| Line 264: | Line 263: | ||
</syntaxhighlight> | </syntaxhighlight> | ||
カスタムテーマでこのように任意のGoogleフォントを使用することができます。もちろん、テーマのオプションからフォントセレクタを削除する必要があります。options.twigの行を削除します。 | |||
https://github.com/LimeSurvey/LimeSurvey/blob/70a1d99cd2ebe411597231a8bc746b4ca9e19584/themes/survey/vanilla/options/options.twig#L209-L230 | https://github.com/LimeSurvey/LimeSurvey/blob/70a1d99cd2ebe411597231a8bc746b4ca9e19584/themes/survey/vanilla/options/options.twig#L209-L230 | ||
=== | === ローカルフォントの使用 === | ||
もちろん、フォントファイルをダウンロードして、GoogleのCDNではなくローカルサーバーから使用することもできます(プライバシー保護の点で優れています)。実例として、こちらのnotoフォントのローカルバージョンがあります。 | |||
https://github.com/LimeSurvey/LimeSurvey/blob/70a1d99cd2ebe411597231a8bc746b4ca9e19584/assets/fonts/noto.css | https://github.com/LimeSurvey/LimeSurvey/blob/70a1d99cd2ebe411597231a8bc746b4ca9e19584/assets/fonts/noto.css | ||
<syntaxhighlight lang="css | <syntaxhighlight lang="css"> | ||
@font-face { | @font-face { | ||
font-family: 'Noto Sans'; | font-family: 'Noto Sans'; | ||
| Line 280: | Line 279: | ||
</syntaxhighlight> | </syntaxhighlight> | ||
テーマのCSSファイルに非常によく似た定義を使用し、テーマのcss/font-src/ フォルダーにNotoSans-Regular.ttfファイルをコピーします。 | |||
次に、そのフォントを上記のようにbody(または他の要素)に適用し、既定のフォントセレクターを削除します。 | |||
=== | === オプションに独自のフォントセレクターを作成する === | ||
今のところ、コアフォントセレクターを使ってオプションで独自のフォントを簡単に追加することはできません。最初に、エンドユーザーにカスタムパッケージをアップロードできるようにする必要があります(次の段落「Fruityフォントセレクターを理解する」を見てください。) 。 | |||
<br> | <br> | ||
やり方は以下の通りです。 | |||
<br> | <br> | ||
* | *CDNまたはローカルサーバーを使用して、テーマに2つのフォント(my_custom_fontとmy_custom_other_font)を追加します。 | ||
* | *次に、cssファイルで、2つの新しいクラスを追加します。 | ||
<br> | <br> | ||
<syntaxhighlight lang="css | <syntaxhighlight lang="css"> | ||
.font-my_custom_font { | .font-my_custom_font { | ||
font-family: 'my_custom_font '; | font-family: 'my_custom_font '; | ||
| Line 300: | Line 299: | ||
} | } | ||
</syntaxhighlight> | </syntaxhighlight> | ||
* | *テーマのXMLファイルで、フォントオプションを追加します(デフォルトはmy_custom_fontになります)。 | ||
<syntaxhighlight lang="xml | <syntaxhighlight lang="xml"> | ||
<options> | <options> | ||
.... | .... | ||
| Line 308: | Line 307: | ||
</syntaxhighlight> | </syntaxhighlight> | ||
* | * option.twigで、以下の行を追加してフォントピッカーを追加します(今のところテストされていないので、うまくいかない場合はフォーラムに来て報告してください)。 | ||
<syntaxhighlight lang="html | <syntaxhighlight lang="html"> | ||
<div class='row ls-space margin top-15 bottom-15 action_hide_on_inherit'> | <div class='row ls-space margin top-15 bottom-15 action_hide_on_inherit'> | ||
| Line 323: | Line 322: | ||
<div class='col-sm-12'> | <div class='col-sm-12'> | ||
<select class='form-control selector_option_value_field' id='simple_edit_font' name='font'> | <select class='form-control selector_option_value_field' id='simple_edit_font' name='font'> | ||
{% if templateConfiguration.sid is not empty or templateConfiguration.gsid is not empty %} | {% if templateConfiguration.sid is not empty or templateConfiguration.gsid is not empty %} //Shouldn't this be "theme" in stead of "template"? | ||
{% set fontOptions = fontOptions ~ '<option value = "inherit" > Inherit</option>' %} | {% set fontOptions = fontOptions ~ '<option value = "inherit" > Inherit</option>' %} | ||
{% endif %} | {% endif %} | ||
| Line 341: | Line 340: | ||
<br> | <br> | ||
これでユーザーが2つのフォントを選択できるようになりました。 | |||
=== | === Fruityフォントセレクターの展望 === | ||
将来的には、エンドユーザーがフォントパッケージを含む独自のアセットパッケージをアップロードできるようになる予定です。これにより、非常に簡単にフォントの任意のカスタマイズができるようになります。 | |||
<br> | <br> | ||
Yiiパッケージを理解するにはこちらを参照してください。 | |||
<br> | <br> | ||
http://www.yiiframework.com/doc/api/1.1/CClientScript#packages-detail | http://www.yiiframework.com/doc/api/1.1/CClientScript#packages-detail | ||
<br> | <br> | ||
<br> | <br> | ||
LimeSurveyパッケージは多数のファイルで定義されています。フォントパッケージは、次のように定義されています。 | |||
https://github.com/LimeSurvey/LimeSurvey/blob/4c40b61afb0dba8fd80154b50f5831045df8d814/application/config/fonts.php | https://github.com/LimeSurvey/LimeSurvey/blob/4c40b61afb0dba8fd80154b50f5831045df8d814/application/config/fonts.php | ||
<br> | <br> | ||
例えば、Notoフォントパッケージはここで定義されています。 | |||
https://github.com/LimeSurvey/LimeSurvey/blob/4c40b61afb0dba8fd80154b50f5831045df8d814/application/config/fonts.php#L47-L53 | https://github.com/LimeSurvey/LimeSurvey/blob/4c40b61afb0dba8fd80154b50f5831045df8d814/application/config/fonts.php#L47-L53 | ||
<br> | <br> | ||
<syntaxhighlight lang="php | <syntaxhighlight lang="php"> | ||
'font-noto' => array( | 'font-noto' => array( | ||
| Line 368: | Line 367: | ||
</syntaxhighlight> | </syntaxhighlight> | ||
<br> | <br> | ||
ここに定義されているnoto.cssはこちらにあります。 | |||
https://github.com/LimeSurvey/LimeSurvey/blob/4c40b61afb0dba8fd80154b50f5831045df8d814/assets/fonts/noto.css | https://github.com/LimeSurvey/LimeSurvey/blob/4c40b61afb0dba8fd80154b50f5831045df8d814/assets/fonts/noto.css | ||
<br> | <br> | ||
最後にあるcssクラス".font-noto"に注目してください。 | |||
<syntaxhighlight lang="css | <syntaxhighlight lang="css"> | ||
@font-face { | @font-face { | ||
font-family: 'Noto Sans'; | font-family: 'Noto Sans'; | ||
| Line 384: | Line 383: | ||
</syntaxhighlight> | </syntaxhighlight> | ||
<br> | <br> | ||
次に、Vanillaテーマでは、notoパッケージを追加し、notoにフォントオプションを定義することによってnotoフォントが使えるようになります。 | |||
<br> | <br> | ||
https://github.com/LimeSurvey/LimeSurvey/blob/70a1d99cd2ebe411597231a8bc746b4ca9e19584/themes/survey/vanilla/config.xml#L79 | https://github.com/LimeSurvey/LimeSurvey/blob/70a1d99cd2ebe411597231a8bc746b4ca9e19584/themes/survey/vanilla/config.xml#L79 | ||
<syntaxhighlight lang="xml | <syntaxhighlight lang="xml"> | ||
<packages> | <packages> | ||
.... | .... | ||
| Line 396: | Line 395: | ||
https://github.com/LimeSurvey/LimeSurvey/blob/70a1d99cd2ebe411597231a8bc746b4ca9e19584/themes/survey/vanilla/config.xml#L58 | https://github.com/LimeSurvey/LimeSurvey/blob/70a1d99cd2ebe411597231a8bc746b4ca9e19584/themes/survey/vanilla/config.xml#L58 | ||
<br> | <br> | ||
<syntaxhighlight lang="xml | <syntaxhighlight lang="xml"> | ||
<options> | <options> | ||
.... | .... | ||
| Line 403: | Line 402: | ||
</syntaxhighlight> | </syntaxhighlight> | ||
<br> | <br> | ||
bodyクラスのフォントは、次の値を使用して定義されます。 | |||
https://github.com/LimeSurvey/LimeSurvey/blob/70a1d99cd2ebe411597231a8bc746b4ca9e19584/themes/survey/vanilla/views/layout_global.twig#L76 | https://github.com/LimeSurvey/LimeSurvey/blob/70a1d99cd2ebe411597231a8bc746b4ca9e19584/themes/survey/vanilla/views/layout_global.twig#L76 | ||
<syntaxhighlight lang="html | <syntaxhighlight lang="html"> | ||
<body class=" ... font-{{ aSurveyInfo.options.font }} ... " ... > | <body class=" ... font-{{ aSurveyInfo.options.font }} ... " ... > | ||
</syntaxhighlight> | </syntaxhighlight> | ||
もちろん、XMLファイルには、テンプレート設定の既定値のみが含まれています。しかし、実際には、これらの値はjson文字列として定義され、データベース内で読み込まれます("template_configuration"テーブル)。option.jsファイルでは、簡単オプションのフォントセレクタの値は詳細設定タブフォーム内の値を変更するために使われます。https://github.com/LimeSurvey/LimeSurvey/blob/70a1d99cd2ebe411597231a8bc746b4ca9e19584/themes/survey/vanilla/options/options.js#L148-L174 | |||
したがって、"アセットパッケージのアップロード"機能を利用できるようになると、既存のフォントパッケージをすべてスキャンしてセレクタに追加するスクリプトを簡単に追加できるようになります。 | |||
== | == アンケート要素の配置と表示を制御するテーマオプションの追加 == | ||
このチュートリアルでは、拡張テーマにオプションを追加してさまざまな場所にアンケート要素を表示する方法を示します。ここでは、2つの異なる場所にアンケートのタイトルを表示するためのテーマオプションを作成します。 | |||
<div class="simplebox">[[File:help.png]] | <div class="simplebox">[[File:help.png]] わかりやすくするため、このチュートリアルは、LimeSurveyバージョン3.4.3の"bootswatch"テーマの拡張をベースとします。</div> | ||
=== | === カスタムテーマの作成 === | ||
# | #上記のように"bootswatch"テーマを拡張します。 | ||
# | #上記のように<span style="color: #BA2121;">custom.css</span>をローカルテーマにコピーしテーマテンプレートオプションの作成=== | ||
#<span style="color: #BA2121;">/themes/survey/bootswatch/options/</span>の内容を<span style="color: #BA2121;">/upload/themes/survey/yourThemeName/options/</span>にコピーします。 | |||
# | #エディターで<span style="color: #BA2121;">/upload/themes/survey/yourThemeName/options/options.twig</span>を開き、"{# Bootstrap Bootswatch theme #}"を探します。親である<nowiki><div class='row'></nowiki>エレメントのすぐ前に以下を追加します。<syntaxhighlight lang="html"> | ||
# | |||
{# Custom survey name in navbar #} | {# Custom survey name in navbar #} | ||
<div class='row'> | <div class='row'> | ||
| Line 472: | Line 469: | ||
<hr/> | <hr/> | ||
</div></syntaxhighlight> | </div></syntaxhighlight> | ||
# | #<span style="color: #BA2121;">/upload/themes/survey/yourThemeName/config.xml</span>を開き、"options"ブロックに2つのアイテムを以下のように追加します。 <syntaxhighlight lang="xml"> <options> | ||
<ajaxmode>on</ajaxmode> | <ajaxmode>on</ajaxmode> | ||
... | ... | ||
| Line 478: | Line 475: | ||
<surveyname2>on</surveyname2> | <surveyname2>on</surveyname2> | ||
</options></syntaxhighlight> | </options></syntaxhighlight> | ||
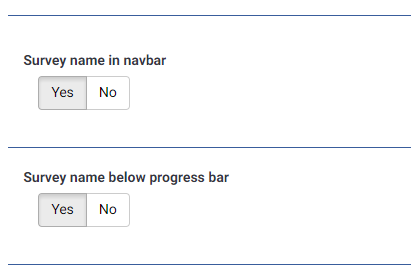
# | #これにより、テーマオプション画面に2つの新しいオプションが次のように追加されます。<br />[[File:Tutorial_tp_1_1.png]] | ||
=== | ===ナビゲーションバーのアンケートタイトルの見た目を変更する=== | ||
# | #次の新しいディレクトリーを作成します。<span style="color: #BA2121;">/upload/themes/survey/yourThemeName/views/subviews/header/</span> | ||
# | #<span style="color: #BA2121;">/themes/survey/vanilla/views/subviews/header/nav_bar.twig</span>をコピーし新しいディレクトリーにコピーします。 | ||
# | #<span style="color: #BA2121;">/themes/survey/vanilla/views/subviews/header/nav_bar.twig</span>を開き、"{# Logo option #}"を探します。その下で、 logo/survey-nameのIFステートメントを次のように変更します。<syntaxhighlight lang="html"> | ||
{# Logo option #} | {# Logo option #} | ||
{% if( aSurveyInfo.options.brandlogo == "on") %} | {% if( aSurveyInfo.options.brandlogo == "on") %} | ||
| Line 495: | Line 492: | ||
</div> | </div> | ||
{% endif %}</syntaxhighlight> | {% endif %}</syntaxhighlight> | ||
# | #<span style="color: #BA2121;">/upload/themes/survey/yourThemeName/css/custom.css</span>に次のような記述を追加します。<syntaxhighlight lang="css">.navbar-brand { | ||
line-height: 60px; | line-height: 60px; | ||
font-size: 32px; | font-size: 32px; | ||
}</syntaxhighlight> | }</syntaxhighlight> | ||
# | #"Survey name in navbar"というテーマオプションを"Yes"にします。 | ||
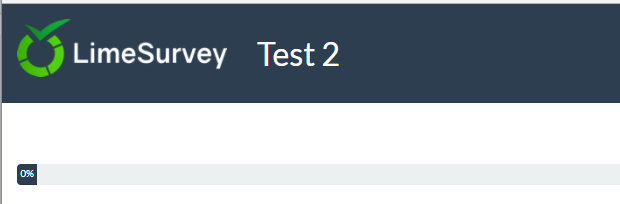
# | #このようになります。<br />[[File:Tutorial_tp_1_2.png]] | ||
=== | ===プログレスバーの下にあるアンケートタイトルの見た目を変更する=== | ||
# | #次の新しいディレクトリーを作成します。<span style="color: #BA2121;">/upload/themes/survey/yourThemeName/views/subviews/survey/group_subviews</span> | ||
# | #<span style="color: #BA2121;">/themes/survey/vanilla/views/subviews/survey/group_subviews/group_container.twig</span>を新しいディレクトリーにコピーします。 | ||
# | #<span style="color: #BA2121;">/themes/survey/vanilla/views/subviews/survey/group_subviews/group_container.twig</span>を開き、アンケート名のためのエレメント<nowiki><h1></nowiki>を追加します。このようになります。<syntaxhighlight lang="html"><div class="{{ aSurveyInfo.class.groupcontainer }} space-col" {{ aSurveyInfo.attr.groupcontainer }}> | ||
{# Custom survey name #} | {# Custom survey name #} | ||
| Line 537: | Line 534: | ||
{% endif %} | {% endif %} | ||
</div></syntaxhighlight> | </div></syntaxhighlight> | ||
# | # <span style="color: #BA2121;">/upload/themes/survey/yourThemeName/css/custom.css</span>に次のような記述を追加します。<syntaxhighlight lang="css">.navbar-brand { | ||
line-height: 60ph1.custom-survey-name { | line-height: 60ph1.custom-survey-name { | ||
margin: 0; | margin: 0; | ||
text-align: center; | text-align: center; | ||
}</syntaxhighlight> | }</syntaxhighlight> | ||
# | #"Survey name below progress bar"というテーマオプションを"Yes"にします。 | ||
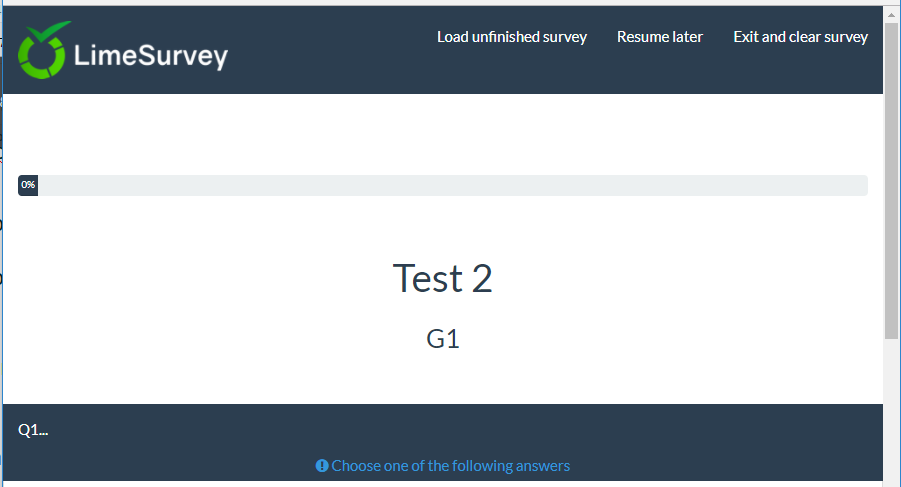
# | #このようになります。<br />[[File:Tutorial_tp_1_3.png]] | ||
===ダウンロード=== | |||
* 拡張されたテーマの例: [[Media:Test_survey_names.zip]] | |||
=テーマをスクラッチで作成する= | |||
ドキュメントは準備中です。 | |||
取り急ぎ、いくつかのヒントを紹介します。 | |||
==テーマの構造== | |||
=== ファイルとディレクトリー === | |||
スクラッチでテーマを作成するときは、Vanillaのfile/directory structure/css/jsを意識する必要はありません。 | |||
必須のcss/jsは自動的に追加されます(必要に応じて削除することもできます)。 | |||
テーマでは少なくともレイアウトファイルがなければなりません。 | |||
* '''layout_global.twig''' : アンケートページをレンダリングする | |||
* '''layout_survey_list.twig''' : アンケートリストをレンダリングする(このテーマが既定のものとして設定されている場合) | |||
* '''layout_errors.twig''' : アンケートのレンダリングを妨げるエラーをレンダリングするために使用する(間違ったアンケートID、プレビューグループにおける空のグループなど) | |||
* '''layout_user_forms.twig''': トークン(アンケート参加者)や登録ページなどのユーザーフォームをレンダリングする | |||
* '''layout_print.twig''' : アンケートをpdfに印刷するために使用する | |||
* '''layout_printanswers.twig''': 回答を印刷する | |||
これらのファイルが含まれているかどうかに関係なく、ファイルの内容は完全に自由に設定できます。 | |||
Vanillaに含まれているその他のファイルやディレクトリはすべて純粋にオプションあり、すきなようにコードを整理することができます。 | |||
<div class="simplebox">[[File:help.png]] フロントエンドのレンダリングコードを読むと、これらのファイル名が直接表示されていることがわかります。これが必須である理由です。 | |||
https://github.com/LimeSurvey/LimeSurvey/blob/2398dda3b425da1a37d4611cd7963d39ac739987/application/helpers/SurveyRuntimeHelper.php#L462 | |||
</div> | |||
===内容=== | |||
Vanillaのlayout_global.twigでは、何を表示するかを決定するために "include_content"という変数を使用しています。 | |||
https://github.com/LimeSurvey/LimeSurvey/blob/2398dda3b425da1a37d4611cd7963d39ac739987/themes/survey/vanilla/views/layout_global.twig#L114-L115 | |||
<syntaxhighlight lang="php"> | |||
{% set sViewContent = './subviews/content/' ~ aSurveyInfo.include_content ~ '.twig' %} | |||
{% include './subviews/content/outerframe.twig' with {'include_content': sViewContent } %} | |||
</syntaxhighlight> | |||
aSurveyInfo.include_contentは、現在どのようなアクションが行われているか(質問表示、結果送信、すべてクリアなど)を示します。 | |||
ご覧のとおり、vanillaでは、アクションによってインクルードするファイルを1つ作成します。アクションのリストを知りたい場合は、vanillaのディレクトリ'''views/subviews/content'''をチェックし、"twig"拡張子を削除してください。 | |||
https://github.com/LimeSurvey/LimeSurvey/tree/2398dda3b425da1a37d4611cd7963d39ac739987/themes/survey/vanilla/views/subviews/content | |||
* '''clearall.twig''' | |||
* '''firstpage.twig''' | |||
* '''load.twig''' | |||
* '''mainrow.twig''' | |||
* '''main.twig''' | |||
* '''optin.twig''' | |||
* '''optout.twig''' | |||
* '''outerframe.twig''' | |||
* '''printanswers.twig''' | |||
* '''quotas.twig''' | |||
* '''register.twig''' | |||
* '''save.twig''' | |||
* '''submit_preview.twig''' | |||
* '''submit.twig''' | |||
* '''userforms.twig''' | |||
LimeSurveyの2.xバージョン用に作成している場合は、それらのファイルほとんどはLimesurvey 2.x用の古いpstplファイルに対応していることがわかります。 | |||
繰り返しますが、テーマ内で、このディレクトリーにこれらの名前のファイルを作成する義務はありません。たとえば、各アクションに必要なHTMLを指定して、layout_global.twigに巨大なスイッチを追加するだけです。 | |||
=== マニフェストconfig.xml === | |||
テーマのマニフェストには、テーマに関する主な情報が含まれています。テーマをインストールすると、マニフェストの内容は2つの異なるテーブル(templateとtemplate_configuration)でデータベースに読み込まれます。そのため、テーマのマニフェストを変更するたびに、テーマをアンインストールして再インストールする(または単にリセットする)必要があります。テーマの開発中はこのプロセスが面倒なので、DBエントリーではなくXMLファイルを直接使用するようにできます。その場合は、config.phpでデバッグモードをオンにし、 'force_xmlsettings_for_survey_rendering'をtrueにします。 | |||
====メタデータセクション==== | |||
複雑なことは何もありません。テーマに関する主な情報だけです。これらはテーブルtemplates_configurationに格納されます。 | |||
<syntaxhighlight lang="xml"> | |||
<metadata> | |||
<name>the_name_of_your_theme</name> | |||
<title>The Title of your theme</title> | |||
<creationDate>16/10/2017</creationDate> | |||
<author>Your Name</author> | |||
<authorEmail>your@email.org</authorEmail> | |||
<authorUrl>http://www.yourwebsite.org</authorUrl> | |||
<copyright>Your Copyright </copyright> | |||
<license>Licence of your theme</license> | |||
<version>version of your theme</version> | |||
<apiVersion>3</apiVersion> | |||
<description>Description of your theme</description> | |||
<extends>parent_theme</extends> | |||
</metadata> | |||
</syntaxhighlight> | |||
ポイント: | |||
* '''name''': データベース内でキーとして使用されます。 従ってユニークでなければならず、スペースや特殊文字を含んではいけません。 大文字か小文字かは区別されないことに注意してください。 | |||
* '''Title''': テーマの名前をリストに表示するために使用されます。 特殊文字を含むことができます。 | |||
* '''description''': アンケートテーマのメインリストで使用されます。特殊文字、さらにはHTMLコードを含むことができます。 | |||
* '''extends''': 任意ですが、親テーマを定義します。 従って、このテーマにファイル(twig/js/css/jpgなど)が存在しない場合は、親テーマから検索されます。 | |||
<div class="simplebox">[[File:help.png]] 3つのコアテーマ(Vanilla、Bootswatch、Fruity)のいずれかを拡張した場合は、「extends」の値を別の親テーマに変更できます。 もちろん、テーマをリセットする必要があります。</div> | |||
====ファイルセクション==== | |||
これは重要なものです。これはテーブルtemplate_configurationのフィールドfiles_css、files_js、files_print_cssにjson配列として格納されます。 | |||
例:Material Premium Themeのfilesセクション | |||
<syntaxhighlight lang="xml"> | |||
<files> | |||
<css> | |||
<add>css/bootstrap-material-design.css</add> | |||
<add>css/ripples.min.css</add> | |||
<replace>css/ajaxify.css</replace> | |||
<replace>css/theme.css</replace> | |||
<replace>css/custom.css</replace> | |||
<remove>awesome-bootstrap-checkbox/awesome-bootstrap-checkbox.css</remove> | |||
</css> | |||
<js> | |||
<replace>scripts/theme.js</replace> | |||
<replace>scripts/ajaxify.js</replace> | |||
<add>scripts/material.js</add> | |||
<add>scripts/ripples.min.js</add> | |||
<replace>scripts/custom.js</replace> | |||
</js> | |||
<print_css> | |||
<add>css/print_theme.css</add> | |||
</print_css> | |||
</files> | |||
</syntaxhighlight> | |||
このセクションにあるすべてのCSS/JSファイルは、アンケートの開始時にロードされます(ajaxモードの場合。ajaxモードがオフの場合でも、各ページを開いたときにすべてのファイルが再ロードされます)。 | |||
これらはテーマの名前に基づいてYii Asset Packetに追加されます。そのため、Asset Managerがオンのとき(デバッグモードがオフのとき)、テーマのリセットにより、これらのファイルは残りのテーマとともにtmpディレクトリにコピーされます(したがって、CSSとJSでは相対パスを使用して画像ファイルにアクセスできます)。 | |||
Yiiのアセットマネージャーについて: | |||
https://www.yiiframework.com/wiki/148/understanding-assets | |||
Yiiのパッケージについて: | |||
http://www.yiiframework.com/doc/api/1.1 / CClientScript#packages-detail | |||
これらは継承システムを使います。つまり、CSS/JSファイルをテーマに追加しても、それがテーマに含まれていない場合、エンジンはこのテーマのすべての親テーマを調べ、最初に見つかったものを使用します。そのため、ユーザーがテーマエディターを介してテーマを拡張した場合、これらのファイルはすべて自分のテーマに継承されます。次のキーワードはこの継承システムを指定します。 | |||
* '''add''' : ファイルをテーマとそれを継承したすべてのテーマに追加します | |||
* '''replace''': 親テーマのファイルを置き換えます | |||
* '''remove''': '''すべて'''のパッケージ(コアパッケージも含む)から、ファイルを削除します(3.14以降) | |||
<div class="simplebox">[[File:help.png]] config.phpの 'force_xmlsettings_for_survey_rendering'に設定できるので、設定はDBではなくXMLから読み込まれます(リセットは不要)。これにより、XMLファイルの変更をテストしやすくなり、XMLを変更するたびにテーマをアンインストール/再インストールする必要がなくなります。</div> | |||
キーワードに関する事項 | |||
=====継承のヒント===== | |||
上述のとおり、"add"キーワードはファイルが親テーマの一部として指定します。そのため、このセクションにファイルを「追加」しても、そのファイルは当該のテーマに含めるのではなく、その親テーマの1つとして含めることになります。エンジンはすべての親テーマを調べ、最初に見つかったテーマを使用します。ファイルが見つからず、configでデバッグモードがオンになっていて、グローバル設定でjsフロントエンドデバッグモードがオンになっていると、コンソールにメッセージが表示されます。例: my_themeに<add>css/unexisting.css</add>のように追記した場合、コンソールには、次のように表示されます。 | |||
<syntaxhighlight lang=""> | |||
(¯`·._.·(¯`·._.· Theme Configuration Error ·._.·´¯)·._.·´¯) | |||
Can't find file 'css/unexisting.css' defined in theme 'my_theme' | |||
</syntaxhighlight> | |||
デバッグモードがオフの場合、エラーはまったく発生しません。エンジンは間違ったaddステートメントを無視するだけです。 | |||
===== addを使うか、replaceを使うか、親テーマに委ねるか ===== | |||
まず、addとreplaceはまったく同じキーワードです。どちらを使っても、エンジンはまったく同じように動作します。人間にとっては区別して使用される言葉ですが、設定者の意図が何であるかは理解されています。 | |||
親テーマと同じ名前のファイルを追加することはできません。常に親テーマのファイルを置き換えることになります。例: 親テーマに"my_mother_theme/foo.css"というファイルがあり、子テーマに"foo.cs"というファイルを追加すると、テーマには"daughter_theme/foo.css"だけが追加されます。 "my_mother_theme/foo.css"を保持したい場合は、"daughter_theme/foo.css"の代わりに、"daughter_theme/bar.css"のような別の名前を選択してください。そのため、キーワード "add"を "replace"キーワードと同様に使用できます。 | |||
これにより継承されたテーマの自動生成をずっと簡単になります。ファイルセクションをコピーすればそのまま動作します(ファイルを拡張するときに"add"を"replace"に置き換える必要はありません)。 | |||
明確にするために、Fruityの例を見てみましょう。CSSファイルセクションは以下のとおりです。 | |||
<syntaxhighlight lang="xml"> | |||
<css> | |||
<add>css/variations/sea_green.css</add> | |||
<replace>css/animate.css</replace> | |||
<replace>css/theme.css</replace> | |||
<replace>css/custom.css</replace> | |||
</css> | |||
</syntaxhighlight> | |||
Fruityのcustom.cssファイルは、vanillaのものと全く同じです。Fruityフルーティーの中のcustom.cssファイルを削除することができ、その場合、vanillaのものが読み込まれます。マニフェストから<replace>custom.css</replace>というステートメントを削除でき、その場合、vanillaのステートメントが使用され、vanillaのcustom.cssが読み込まれます。 | |||
では、なぜFruityのマニフェストで<replace>custom.css</replace>というステートメントを使用するのでしょうか。答えは簡単です。エンドユーザがFruityテーマを拡張し、彼らのローカルテーマのファイルを変更し、継承したテーマからこの変更したファイルを読み込めるようにしたいからです。理解するため、Fruityを拡張し、拡張されたテーマを見てください。拡張されたテーマにはcustom.cssというファイルがないので、Fruityのものが使用されます。しかし、もしユーザーが(テーマエディタの"extend"をクリックして)拡張したテーマでこのファイルを作成した場合、このファイルは作成したテーマから読み込まれます。 | |||
したがって、一般的には、テーマを拡張せず、スクラッチでテーマを作成する場合は、addステートメントを使用してcss/jsファイルを追加してください。とても簡単です。テーマを拡張して新たなテーマを作成し、ユーザーが親テーマから継承したcss/jsファイルによって拡張できないようにするには、マニフェストでaddステートメントを使用しないでください。 さもないと、ファイルは親テーマの設定により読み込まれます。テーマを拡張して新たなテーマを作成し、その親テーマのファイルを置き換える場合は、replaceキーワードを使用します(addキーワードを使用した場合も同じ結果になります)。 テーマを拡張して新たなテーマを作成し、なおかつ既存のcss/jsファイルを置き換えるのではないが、ユーザーがこのファイルを拡張できるようにする場合は、マニフェストで、このファイルについて"replace"ステートメントを使用します。ファイルを置き換えない場合でも、マニフェストでキーワードreplaceを使用することにより、ユーザーが置き換えを望む場合に対応できます。 | |||
他のケースは大したことではありませんが、この最後のケースだけは、少し頭の体操が必要です。 | |||
<div class="simplebox">[[File:help.png]] | |||
twigコードから直接CSSとJSファイルを登録することもできます。これらのファイルは、twigファイルが要求されたときにのみ読み込まれます。ユーザーがテーマエディタからこれらのJS/CSSファイルを継承できるようにするには、関数{{registerTemplateCssFile('my_style.css')}}と{{registerTemplateScript('my_script.js')}}を使用します。 これらの機能を使わなくても、テーマは動作するかもしれませんが、それに対する継承は機能しません。{{image('my_picture.jpg')}}関数と同じ考え方です。 | |||
</div> | |||
===== removeキーワード===== | |||
removeキーワードは3.14以降で利用可能です。これを使えば、どんなコアパッケージでも、どんなパッケージからでもどんなcss/jsファイルでも削除することができます。次の例では、Material Premium ThemeでAwseome Bootstrap Checkboxのファイルを削除するために使用されています。 | |||
<syntaxhighlight lang="xml"> | |||
<remove>awesome-bootstrap-checkbox/awesome-bootstrap-checkbox.css</remove> | |||
</syntaxhighlight> | |||
パッケージのファイルとまったく同じ構文を使用する必要があります(例: フォルダーパスなしで"awesome-bootstrap-checkbox.css"を単独で使用すると、うまく機能しません)。/application/config/packages.phpとconfig/third_party.phpにコアパッケージとその中にあるファイルの完全なリストがあります。例えば、awesome-bootstrap-checkbox.cssについては、以下のようになっています。 | |||
https://github.com/LimeSurvey/LimeSurvey/blob/2398dda3b425da1a37d4611cd7963d39ac739987/application/config/packages.php#L54-L56 | |||
<syntaxhighlight lang="php"> | |||
'css'=> array( | |||
'awesome-bootstrap-checkbox/awesome-bootstrap-checkbox.css', | |||
), | |||
</syntaxhighlight> | |||
removeタグで使用する正確な名前を見つけるもう1つの方法は、アセットマネージャーをオンにすることです(デバッグモードをオフにするか、configで'use_asset_manager'=>trueとします)。使用するパスは、tmpディレクトリー内のランダムディレクトリーの直後のパスになります。例えば、awesome-bootstrap-checkbox.cssは以下のようになります。 | |||
<syntaxhighlight lang="html"> | |||
<link rel="stylesheet" type="text/css" href="/tmp/assets/cbc4e3cb/awesome-bootstrap-checkbox/awesome-bootstrap-checkbox.css" /> | |||
</syntaxhighlight> | |||
削除すべきでないファイルは以下のとおりです。 | |||
'''jquery-3.1.1.min.js''' : 必要 | |||
'''jquery-migrate-3.0.0.min.js''' : 必要 | |||
'''survey.js''' : 必要 | |||
'''moment-with-locales.min.js''' : 日付の質問タイプなどに必要 | |||
'''em_javascript.js''' : すべてのExpressionScriptのjavascriptで必要 | |||
==== オプションセクション ==== | |||
このセクションはあなたのテーマのオプションに関するものです。これは、ファイル化された "options"をtemplate_configurationテーブルにJSON配列として格納するために使用します。 | |||
===追加情報=== | |||
* [[Theme:Available function/ja|テーマ: 利用できる機能]] | |||
=== | ==注記== | ||
'''注意''': テーマのXMLファイルを編集する場合は、そのテーマが反映されるようにテーマをアンインストールしてから再びインストールする必要があります。 | |||
''' | '''注意''': これを避けるために、DBではなく強制的にXMLを使用することができます。config.phpでデバッグモードをオンにし、コメントアウトします。 | ||
'' | 'force_xmlsettings_for_survey_rendering' => true, // DBではなく強制的にXMLファイルを使用したい場合はコメントを外します(簡単なテーマ開発のため)。 | ||
注意: すべてがXMLから読み込まれるようになります(オプションなど) | |||
'''注意''': テーマエディターを使用せずにCSS/JSファイルを手動で編集し、かつデバッグモードがオフの場合は、アセットを強制的にフラッシュできるようになりました。 "全体設定"、"全般"タブで、"アセットキャッシュをクリアする"ボタンをクリックします。 | |||
''' | '''注意''': セクションを削除した場合 | ||
Latest revision as of 05:35, 26 June 2022
はじめに
注意:以前のバージョンのLimeSurveyでは、アンケートの見た目や、色、フォント、レイアウト、(一部の)動作の観点でアンケートがどのように表示されるかを定義するファイルを"テンプレート"と呼んでいました。新たな検討により、これは"テーマ"と呼ぶこととし、テンプレートはアンケート例のために予約されています。
このページでは、以下の方法について学習します。
- LimeSurvey 3.0の新しいテーマシステムの使用
- 継承による独自テーマの管理
- テーマへの画像追加
- アンケートとアンケートグループのテーマオプション管理
LimeSurvey 3では、Twig 1.29、Bootstrapに基づいた完全な新しいテンプレートエンジンシステムを導入し、テンプレートの継承とテンプレートオプションが利用可能になりました。これにより、古い置換キーワードシステムが完全にいらなくなり、フロントエンドHTMLの100%をカスタマイズすることができます。たとえば、古いテンプレートシステムでは、実行時に評価用HTMLに置き換えられるキーワード{ASSESSMENTS}がありました。テンプレートデザイナーは、JavaScriptを使用する以外にこのHTMLをカスタマイズする方法がありませんでした。今では、このHTMLを生成するためのロジック(Twigで書かれています)を含むassessmentments.twigというファイルがあります。こらのページでは、この新しいテンプレートエンジンの使用方法について説明します。
管理インタフェースを使用した編集
テンプレートリスト
管理ダッシュボードに、テンプレートリストにアクセスするためのボックスが追加されました。

リストは5つの列に分かれています。
- テンプレートのプレビュー: テンプレートのルートにある“preview.png”という画像ファイルです。
- マニフェストで指定されているテンプレートの“タイトル”(テンプレートのルートにあるconfig.xml)
- テンプレートの説明: マニフェストに設定された文字列
- テンプレートのタイプ: コアテンプレート(LimeSurvey提供)、ユーザーテンプレート(アップロードディレクトリに追加)、XMLテンプレート(データベースに読み込まれない)
- 拡張: テンプレートが別のテンプレートを拡張する場合は、その名前がここに表示されます。
- アクションボタン:
- インストール: テンプレートのマニフェストを読み込んでデータベースに追加し、アンケートレベルで選択できるようにします。
- アンインストール:データベース内のテンプレートの設定エントリーを削除します。
- テンプレートエディター: テンプレートエディターにリダイレクトされます。
- テンプレートオプション:テンプレートオプションのグローバル設定を行います。
テーマエディター
テーマエディターは元のものにできるだけ近づけて維持されています。コアテーマを開いても編集できません。“コピー”ボタンではなく、“拡張ボタン”があります。

テンプレート継承の考え方について
LS3では、テンプレートは別のテンプレートから継承できるようになり、別のテンプレートを“拡張”することができます。これは、テンプレートディレクトリーは最初は空で、元のものと異なるファイル(ビュー、スタイルシート、スクリプト、リソースなど)のみが保存されます。そうすることで、多くのテンプレートを維持することなく、多くのユーザー向けのテンプレートを簡単に作成できます。たとえば、独自の自家製テンプレートを持つとともに、ある会社向けのバージョン(ロゴ、そのスタイル、フッターなどに配置するWebサイトへのリンクなど)、さらに別の会社向けのバージョンを持つことができます。カスタムテンプレートのCSSまたはグローバルレイアウトを更新すると、それを継承するすべてのテンプレートが自動的に更新されます。テンプレートは他のテンプレートを拡張するテンプレートを拡張することができる、といった具合に、継承は再帰的になります。
ユーザーインターフェイスの新規性
LimeSurveyのMonochromeテーマを拡張するには、Templateリストに移動して、Monochromeテーマの“テーマエディター”ボタンをクリックします。次に、“拡張”をクリックして、新しい名前が“extends_monochrome”となっていることを確認します。
ファイル/ftpクライアントを使用してアップロードディレクトリに移動すると、新しいディレクトリupload/templates/extends_monochromeが作成されていることがわかります。これにはXMLファイルとディレクトリが含まれていますが、ほとんどのディレクトリは空です。ビューもCSSもJSもありません。しかし、このテンプレートはアンケートから正常なテンプレートとして選択することができ、monochromeテンプレートとまったく同じように見えます。

extend_monochromeテンプレートのテンプレートエディタは次のようになります。

古いテンプレートエディターと大きな違いはありません。主なものを挙げます。
- ファイルリストにある継承というキーワード。これは、ファイルがテンプレートディレクトリーに存在せず、元のテンプレートのファイルが使用されることを意味します。

- メインエディター(ACE editor )には、選択したファイルの内容が表示されます。ファイルには、HTML、CSS、またはJSだけでなく、Twigステートメントも含まれています。これらのTwigステートメントは、以前はコアの深いところに位置していたテンプレートビューにいくつかのロジックをプッシュできるようになり、カスタマイズすることができます。

- このため、トップメニューのドロップダウンセレクタで、より多くの画面タイプを利用できるようになりました。以前には利用もカスタマイズもできなかった‘アンケートリスト’、‘読み込み’、‘保存’、‘エラー’、‘登録’、‘評価’、‘回答の印刷’などのページがあります。

- ファイルリストの一番下にある‘tip’リンクは、HTMLに画像をTwigで追加する方法を表示します。

- ‘変更を保存’ボタンはローカルのテンプレートにコピーし、変更を保存するボタンになっています。

簡単な例: 画像の追加
ローカテンプレートにコピーして変更を保存するボタンは、ファイル内の何かを編集してそのボタンをクリックすると、ファイルを編集中のテンプレートにコピーして変更を保存します。
たとえば、layout_global.twigというファイルをクリックし、ブロックコンテンツ({% block content %})の直前にテキスト “TEST”を追加し、ボタンをクリックします。ファイルのラベルが “継承”から “ローカル”に変更され、ボタンが単純な変更を保存するボタンになっていることがわかります。

ファイルエクスプローラーを開いてupload/templates/extend_monochrome/views/ディレクトリーに移動すると、layout_global.twigというファイルが1つだけあり、その中に文字列“TEST”がそこにあることがわかります。
今、ランダムなテキストを追加する代わりに画像を追加します。TIPリンクをクリックすると、次のように表示されます。
.twigファイルで画像を使用するには、次のようにします。
{{ image('./files/myfile.png', 'alt-text for my file', {"class": "myclass"}) }}
Twigのドキュメントを読むと(この時点ですでに読んでいるべきですが)、{{ function( ) }}によって関数の結果がスクリーンに表示されます。ここでは、その関数とはimaga()です。
コードを理解できない場合でも心配する必要はありません。どのように動作するのか知っている必要はありませんが、使う理由と使い方を理解していればいいのです。
次の2つの理由から、image()関数を使用する必要があります。
- image関数はテンプレートを検索して画像を見つけます。作業中のテンプレートが別のテンプレートに拡張されていて、画像をローカルに挿入した場所にファイルをコピーしたものの、その画像がローカルテーマにコピーされていない場合であっても、テンプレート継承ツリーを検索して、その画像がどこにあるかを見つけます。
- アセットマネージャーを使用するので、テンプレートのパフォーマンスを向上させます。詳細については、Yii Asset Managerのマニュアルを参照してください。http://www.yiiframework.com/wiki/148/understanding-assets/
テーマに画像を追加するには、
- 右側のファイルアップローダーを使っていつものようにアップロードし、twigファイルの必要な場所に追加してください。
{{ image('./files/myfile.png') }}
- 画像の代替テキスト(スクリーンリーダーやHTML検証向け)を追加する場合は、次のようにします。
{{ image('./files/myfile.png'), ‘これが代替テキスト’ }}
- クラス属性を追加し、そのクラスにidを追加する場合は、次のようにします。
{{ image('./files/myfile.png'), ‘これが代替テキスト’, {“class”: “a_nice_css_class”, “id”: “any_id”} }}
開発検討中の事項
- エディター自体からカスタムプレビューファイルをアップロードできるようにする
- ローカルファイルを削除し継承されたステートメントに戻るボタンを追加する
- CSSファイルで使用されている画像のみをコピーする(コピーすべきファイルとしてマニフェストに記載します)
- 現在のテンプレートを拡張したものがどのテンプレートかをわかるようにする(もしあれば)
テーマオプション
LS3のもう一つの目新しい点は、テーマのオプションページです。後で説明するように、テーマ作成者は独自のオプションや独自の管理オプションページを作成することもできます。ここでは、コアテーマのオプションページの仕組みを簡単に見ていきます。グローバルレベルでテーマオプションにアクセスするには、テーマリストの“テーマオプション”をクリックします。
詳細オプション
テーマオプションタブを開くと、 簡単なオプションか高度なオプションのどちらかを使って編集するか選ぶことができます。“高度なオプション”は、データベースからメインのテーマ設定欄に直接アクセスできるフォームです。動作原理を理解するため、XMLファイルやスクラッチでテーマを作成することも理解しなければなりません。したがって、非常に複雑で上級者向けです。
それでも高度な設定の編集をしたければ、高度なオプションタブをクリックします。

- Files css: テンプレートに含めるCSSファイル
- Files js: テンプレートに含めるJSファイル
- Files Print Css: テンプレートを印刷するときに読み込むCSSファイル
- Options: テンプレートビューに必要なオプション(とその設定値)
- CssFramework Name: 読み込むCSSフレームワークの名前。現時点では、Bootstrapか何も指定しないかとどちらかです。
- Cssframework Css: コアのbootstrap.cssを、カスタマイズしたものに置き換えます。
- Cssframework Js: コアのbootstrap.jsを、カスタマイズしたものに置き換えます。
- Packages To Load: この設定により、LimeSurveyからコアのアセットパッケージを読み込ませることができます。
画面上部から、テーマのディレクトリーにファイルをアップロードすることができます。 これらのパラメーターは、テーマの全体的な外観を変えるために使用します。
簡単オプション
簡単オプションページは、テンプレート自体から生成されます。これは、template/optionsディレクトリーにあるtwigファイルとjavascriptで作成されています。https://github.com/LimeSurvey/LimeSurvey/tree/develop/templates/default/options

簡単オプションページは、詳細オプションの設定フォーム入力を単に入力するだけです。簡単ページの設定をオンまたはオフにして、それに応じて詳細フォームの関連部分がどのように変更されるかを確認できます。たとえば、既定のテンプレートの簡単オプションでは、Bootswatchのテーマを“Darkly”に変更してから詳細オプションのタブをクリックすると(保存せずとも)、“Cssframework Css”の値が、
{"replace": [["css/bootstrap.css","css/flatly.css"]]}
から、次のモノに変わります。
{"replace": [["css/bootstrap.css","css/darkly.css"]]}
コアテーマのさまざまな簡単オプションを次に示します。
- Ajaxモード: 次のページをajax(高速)またはページリロード(デバッグ目的に適しています)経由でロードするかどうかを指定します。
- 背景画像: 「Yes」に設定すると、pattern.pngという画像がロードされます(マスターのファイルセレクタに置き換えられます)
- ボックスコンテナ: 「No」に設定すると、質問がボックスに含まれなくなります(スクリーンの幅よりも大きい大きな配列を使用することができます)
- Brandlogo: 「no」に設定すると、アンケートの名前がトップバーに表示されます。「Yes」の場合は、ファイルディレクトリ内の画像の1つをロゴ画像として使用することができます。
- 本体のアニメーション: 「yes」に設定すると、アンケートの本文がロードされたときに適用するアニメーションの1つを選択できます
- 質問のアニメーション: 質問について同様
- 警告のアニメーション: 警告について同様
- Bootstrapテーマ: ここでは、ロードするブートストラップテーマを選択できます。Bootswatchは、次のサイトから来ています。https://bootswatch.com/3/
アニメーションに使用されるライブラリはanimate.cssです。https://daneden.github.io/animate.css/
もちろん、テンプレート提供者は独自のアニメーションライブラリを追加することもできますし、アニメーションライブラリをまったく追加しないこともできます。
継承システム
これまで、テンプレートを別のテンプレートに拡張できることがわかりました。テンプレート設定についても、別のテンプレート設定から継承することができます。つまり、個々のテンプレートについて以下のレベルで設定することができます。
- グローバルレベル(テンプレートリストからアクセスできるもの)
- アンケートグループレベル
- アンケートレベル
各レベルのそれぞれのパラメータは、上位レベルから継承することができます。まず、アンケートグループレベルを見てみましょう。
アンケートグループレベル
LS3の重要な新規性の1つとして、アンケートグループシステムが挙げられます。さまざまなグループを作成してアンケートを整理できるようになりました。アクセスするには、アンケートリストに行き、アンケートグループタブをクリックします。

このリストには、2つの操作ボタンがあります。グループが空の場合は、削除できます。空でない場合は、編集することができます。編集ボタンをクリックすると、アンケートグループ設定ページが表示されます。

このページの3番目のタブは、“このアンケートグループのテンプレートオプション”と呼ばれています。ここをクリックすると、テンプレートリストと同じテンプレートのリストが表示されますが、ここではオプションボタンのみが表示されます(テンプレートエディターにはメインリストからのみアクセスできます)。
既定のテンプレートのオプションをクリックすると、次のように表示されます。

- Inherit everything(すべて継承)ということは、すべての設定がグローバル設定レベルから継承されることを意味します。
- 高度なオプションページに行くと、すべてのフィールドが継承されて設定されていることがわかります。
- 簡単オプションの"Inherit everything"で"いいえ"を選択すると、グローバルオプションページと非常によく似たページが再び表示されます。唯一の違いは、フィールドごとにはい、いいえ、または継承(inherit)に設定できることです。各セレクタに継承があります。

アンケートレベル
アンケートを編集するときは、左のバーメニューに“テーマオプション”という新しいエントリーが表示されます。現在のアンケート用に選択されたテーマのオプションページに移動します。アンケートグループと同じ継承システムがありますが、この場合の継承は、アンケートが属するアンケートグループから設定値が継承されることを意味します。

ユースケースの例
たとえば、異なる企業(AとB)に1つのテンプレートを使用しているとします。お気に入りのオプションは、グローバルレベルで設定します(例:ajaxはon、本体のアニメーションはスライドイン、警告はパルス)。次に、各会社のアンケートグループを作成します。会社Aのアンケートグループは、この会社のすべてのアンケートをホストし、会社Bのアンケートグループは、会社Bのすべてのアンケートをホストします。このレベルでは、ロゴと背景のみを設定し、他のオプションは継承させます。これにより、グループAのすべてのアンケートでは、会社Aのロゴを使用し、グループBのすべてのアンケートは、会社Bのロゴを使用します。会社Aのあるアンケートで、トピックと関連して異なる背景を使用できます。アンケートレベルでオプションの背景を変更するだけです。B社の誰かが、パルスで表示される警告があまりにも目立ち、フェードインのようなスムーズなものを好む場合は、アンケートグループBレベルで警告のアニメーションを変更するだけで、このグループのすべてのアンケートでこのアニメーションが使用されるようになります。会社Aがロゴを変更した場合は、アンケートグループAのレベルで変更することができ、このグループのすべてのアンケートで新しいロゴが使用されます。
テーマのカスタマイズに関するFAQ
ここでは、フォーラムで提起された質問に対する回答を紹介しており、テーマのカスタマイズに役立てることができます。
CSS/JSのカスタマイズ: アセットマネージャーを扱う("なぜ変更が反映されないのか")
好みのエディターでコードを直接編集してテーマのCSS/JSを更新しようとしても、変更が適用されないことに驚くかもしれません。
2.50以降、LSはYiiアセットマネージャを使用しています。
アセットに関するYiiのドキュメント
テーマのCSS/JSファイルをランダムな文字列を持つtmp/のサブディレクトリー(例: "tmp/1ef64ml/")に移動します。したがって、css/jsファイルに変更を加えてアセットマネージャに伝えると、ファイルは新しい名前で新しいサブディレクトリにコピーされ、ユーザーブラウザのキャッシュが更新され、新しいcss/jsが表示されます。それ以外の場合は、ブラウザのキャッシュを消去する必要があります。
アセットマネージャーがオンのときのヘッダーのCSSリンクです。
![]()
ご覧のとおり、すべてがtmp/ サブフォルダーを参照しています。
アセットマネージャーがオフのときのヘッダーのCSSリンクです。
![]()
ご覧のように、テーマの実際のファイルを指しています。
テーマのCSS/JSを編集すときは、さまざまな方法があります。
- LSテーマエディターを使う: それはアセットマネージャーを扱うので、何も心配する必要はありません。
- デバッグモードをオンにする: アセットマネージャーがオフになり、テーマの実際のcss/jsファイルが呼び出されます(ただし、ロードごとにブラウザのキャッシュを更新する必要があります)
- アセットキャッシュを更新する: 全体設定 -> 全般 -> アセットキャッシュをクリアする
![]()
テーマエディタを使用すると、新しいテーマエンジンのアーキテクチャを理解するのに役立ちます。
また、fruityをカスタマイズした場合は、CSSの指定に注意してください。ほとんどの定義ではセレクタ".fruity"(body要素のクラスの1つ)を使用します。
テーマにカスタムフォントを追加する
簡単な方法: Google Font CDNを使用する
Bootswatch SurveyテーマはGoogle Font CDNを使用しています。どのように動作するか見てみましょう。 https://github.com/LimeSurvey/LimeSurvey/blob/70a1d99cd2ebe411597231a8bc746b4ca9e19584/themes/survey/bootswatch/css/variations/flatly.min.css
@import url("https://fonts.googleapis.com/css?family=Lato:400,700,400italic");
LatoフォントがCSSルールで使われています。 https://github.com/thomaspark/bootswatch/blob/master/dist/flatly/bootstrap.css#L72
body {
  ...
 font-family: "Lato";
 ...
}
カスタムテーマでこのように任意のGoogleフォントを使用することができます。もちろん、テーマのオプションからフォントセレクタを削除する必要があります。options.twigの行を削除します。 https://github.com/LimeSurvey/LimeSurvey/blob/70a1d99cd2ebe411597231a8bc746b4ca9e19584/themes/survey/vanilla/options/options.twig#L209-L230
ローカルフォントの使用
もちろん、フォントファイルをダウンロードして、GoogleのCDNではなくローカルサーバーから使用することもできます(プライバシー保護の点で優れています)。実例として、こちらのnotoフォントのローカルバージョンがあります。 https://github.com/LimeSurvey/LimeSurvey/blob/70a1d99cd2ebe411597231a8bc746b4ca9e19584/assets/fonts/noto.css
@font-face {
  font-family: 'Noto Sans';
  font-weight: 300;
  font-style: normal;
  src: url('./font-src/Noto/NotoSans-Regular.ttf');
}
...
テーマのCSSファイルに非常によく似た定義を使用し、テーマのcss/font-src/ フォルダーにNotoSans-Regular.ttfファイルをコピーします。
次に、そのフォントを上記のようにbody(または他の要素)に適用し、既定のフォントセレクターを削除します。
オプションに独自のフォントセレクターを作成する
今のところ、コアフォントセレクターを使ってオプションで独自のフォントを簡単に追加することはできません。最初に、エンドユーザーにカスタムパッケージをアップロードできるようにする必要があります(次の段落「Fruityフォントセレクターを理解する」を見てください。) 。
やり方は以下の通りです。
- CDNまたはローカルサーバーを使用して、テーマに2つのフォント(my_custom_fontとmy_custom_other_font)を追加します。
- 次に、cssファイルで、2つの新しいクラスを追加します。
.font-my_custom_font {
 font-family: 'my_custom_font ';
}
.font-my_custom_other_font {
 font-family: 'my_custom_other_font';
}
- テーマのXMLファイルで、フォントオプションを追加します(デフォルトはmy_custom_fontになります)。
    <options>
        ....
        <font>my_custom_font</font>
    </options>
- option.twigで、以下の行を追加してフォントピッカーを追加します(今のところテストされていないので、うまくいかない場合はフォーラムに来て報告してください)。
            <div class='row ls-space margin top-15 bottom-15 action_hide_on_inherit'>
                <hr/>
            </div>
            <div class='row action_hide_on_inherit'>
                <div class='col-sm-12'>
                    <div class='panel panel-default'>
                        <div class='panel-heading'>{{ "My custom fonts" | t }}</div>
                        <div class='panel-body'>
                            <div class='form-group row'>
                                <label for='simple_edit_font' class='control-label'>{{ "Select font:" | t }}</label>
                                <div class='col-sm-12'>
                                    <select class='form-control selector_option_value_field' id='simple_edit_font' name='font'>
                                    {% if templateConfiguration.sid is not empty or templateConfiguration.gsid is not empty %} //Shouldn't this be "theme" in stead of "template"?
                                        {% set fontOptions = fontOptions ~ '<option value = "inherit" > Inherit</option>' %}
                                    {% endif %}
                                   <optgroup  label="{{ "My Custom fonts" | t }}">
                                   <option class="font-my_custom_font"     value="custom_font"   data-font-package=""  >Custom</option>
                                  <option class="font-my_custom_other_font" value="my_custom_other_font" data-font-package=""  >Other</option>
                                  </optgroup>

                                    </select>
                                </div>
                            </div>
                        </div>
                    </div>
                </div>
            </div>
これでユーザーが2つのフォントを選択できるようになりました。
Fruityフォントセレクターの展望
将来的には、エンドユーザーがフォントパッケージを含む独自のアセットパッケージをアップロードできるようになる予定です。これにより、非常に簡単にフォントの任意のカスタマイズができるようになります。
Yiiパッケージを理解するにはこちらを参照してください。
http://www.yiiframework.com/doc/api/1.1/CClientScript#packages-detail
LimeSurveyパッケージは多数のファイルで定義されています。フォントパッケージは、次のように定義されています。
https://github.com/LimeSurvey/LimeSurvey/blob/4c40b61afb0dba8fd80154b50f5831045df8d814/application/config/fonts.php
例えば、Notoフォントパッケージはここで定義されています。
https://github.com/LimeSurvey/LimeSurvey/blob/4c40b61afb0dba8fd80154b50f5831045df8d814/application/config/fonts.php#L47-L53
    'font-noto' => array(
        'devBaseUrl' => 'assets/fonts/',
        'basePath' => 'fonts',
        'css' => array(
            'noto.css',
        ),
    ),
ここに定義されているnoto.cssはこちらにあります。
https://github.com/LimeSurvey/LimeSurvey/blob/4c40b61afb0dba8fd80154b50f5831045df8d814/assets/fonts/noto.css
最後にあるcssクラス".font-noto"に注目してください。
@font-face {
  font-family: 'Noto Sans';
  ...
}
...
.font-noto{
    font-family: 'Noto Sans';
}
次に、Vanillaテーマでは、notoパッケージを追加し、notoにフォントオプションを定義することによってnotoフォントが使えるようになります。
https://github.com/LimeSurvey/LimeSurvey/blob/70a1d99cd2ebe411597231a8bc746b4ca9e19584/themes/survey/vanilla/config.xml#L79
        <packages>
             ....
            <add>font-noto</add>
        </packages>
    <options>
        ....
        <font>noto</font>
    </options>
bodyクラスのフォントは、次の値を使用して定義されます。
https://github.com/LimeSurvey/LimeSurvey/blob/70a1d99cd2ebe411597231a8bc746b4ca9e19584/themes/survey/vanilla/views/layout_global.twig#L76
<body class=" ... font-{{ aSurveyInfo.options.font }} ... " ... >
もちろん、XMLファイルには、テンプレート設定の既定値のみが含まれています。しかし、実際には、これらの値はjson文字列として定義され、データベース内で読み込まれます("template_configuration"テーブル)。option.jsファイルでは、簡単オプションのフォントセレクタの値は詳細設定タブフォーム内の値を変更するために使われます。https://github.com/LimeSurvey/LimeSurvey/blob/70a1d99cd2ebe411597231a8bc746b4ca9e19584/themes/survey/vanilla/options/options.js#L148-L174
したがって、"アセットパッケージのアップロード"機能を利用できるようになると、既存のフォントパッケージをすべてスキャンしてセレクタに追加するスクリプトを簡単に追加できるようになります。
アンケート要素の配置と表示を制御するテーマオプションの追加
このチュートリアルでは、拡張テーマにオプションを追加してさまざまな場所にアンケート要素を表示する方法を示します。ここでは、2つの異なる場所にアンケートのタイトルを表示するためのテーマオプションを作成します。
カスタムテーマの作成
- 上記のように"bootswatch"テーマを拡張します。
- 上記のようにcustom.cssをローカルテーマにコピーしテーマテンプレートオプションの作成===
- /themes/survey/bootswatch/options/の内容を/upload/themes/survey/yourThemeName/options/にコピーします。
- エディターで/upload/themes/survey/yourThemeName/options/options.twigを開き、"{# Bootstrap Bootswatch theme #}"を探します。親である<div class='row'>エレメントのすぐ前に以下を追加します。
{# Custom survey name in navbar #} <div class='row'> <div class='col-sm-12 col-md-6'> <div class='form-group row'> <label for='simple_edit_options_surveyname1' class='control-label'>Survey name in navbar</label> <div class='col-sm-12'> <div class="btn-group" data-toggle="buttons"> <label class="btn btn-default"> <input name='surveyname1' type='radio' value='on' class='selector_option_radio_field ' data-id='simple_edit_options_surveyname1'/> Yes </label> <label class="btn btn-default"> <input name='surveyname1' type='radio' value='off' class='selector_option_radio_field ' data-id='simple_edit_options_surveyname1'/> No </label> </div> </div> </div> </div> </div> <div class='row'> <hr/> </div> {# Custom survey name below progress bar #} <div class='row'> <div class='col-sm-12 col-md-6'> <div class='form-group row'> <label for='simple_edit_options_surveyname2' class='control-label'>Survey name below progress bar</label> <div class='col-sm-12'> <div class="btn-group" data-toggle="buttons"> <label class="btn btn-default"> <input name='surveyname2' type='radio' value='on' class='selector_option_radio_field ' data-id='simple_edit_options_surveyname2'/> Yes </label> <label class="btn btn-default"> <input name='surveyname2' type='radio' value='off' class='selector_option_radio_field ' data-id='simple_edit_options_surveyname2'/> No </label> </div> </div> </div> </div> </div> <div class='row'> <hr/> </div> - /upload/themes/survey/yourThemeName/config.xmlを開き、"options"ブロックに2つのアイテムを以下のように追加します。
    <options>
        <ajaxmode>on</ajaxmode>
        ...
        <surveyname1>on</surveyname1>
        <surveyname2>on</surveyname2>
    </options>
- これにより、テーマオプション画面に2つの新しいオプションが次のように追加されます。

ナビゲーションバーのアンケートタイトルの見た目を変更する
- 次の新しいディレクトリーを作成します。/upload/themes/survey/yourThemeName/views/subviews/header/
- /themes/survey/vanilla/views/subviews/header/nav_bar.twigをコピーし新しいディレクトリーにコピーします。
- /themes/survey/vanilla/views/subviews/header/nav_bar.twigを開き、"{# Logo option #}"を探します。その下で、 logo/survey-nameのIFステートメントを次のように変更します。
{# Logo option #} {% if( aSurveyInfo.options.brandlogo == "on") %} <div class="{{ aSurveyInfo.class.navbarbrand }} logo-container" {{ aSurveyInfo.attr.navbarbrand }} > {{ image(aSurveyInfo.options.brandlogofile, aSurveyInfo.name, {"class": "logo img-responsive"}) }} </div> {% endif %} {% if( aSurveyInfo.options.surveyname1 == "on") %} <div class="{{ aSurveyInfo.class.navbarbrand }}" {{ aSurveyInfo.attr.navbarbrand }} > {{ aSurveyInfo.name }} </div> {% endif %} - /upload/themes/survey/yourThemeName/css/custom.cssに次のような記述を追加します。
.navbar-brand {
    line-height: 60px;
    font-size: 32px;
}
- "Survey name in navbar"というテーマオプションを"Yes"にします。
- このようになります。

プログレスバーの下にあるアンケートタイトルの見た目を変更する
- 次の新しいディレクトリーを作成します。/upload/themes/survey/yourThemeName/views/subviews/survey/group_subviews
- /themes/survey/vanilla/views/subviews/survey/group_subviews/group_container.twigを新しいディレクトリーにコピーします。
- /themes/survey/vanilla/views/subviews/survey/group_subviews/group_container.twigを開き、アンケート名のためのエレメント<h1>を追加します。このようになります。
<div class="{{ aSurveyInfo.class.groupcontainer }} space-col" {{ aSurveyInfo.attr.groupcontainer }}>

    {# Custom survey name #}
    {% if( aSurveyInfo.options.surveyname2 == "on") %}
    	<h1 class="custom-survey-name">{{ aSurveyInfo.name }}</h1>
    {% endif %}

    {# Group Name #}
    {{ include('./subviews/survey/group_subviews/group_name.twig') }}

    {# Group Description #}
    {{ include('./subviews/survey/group_subviews/group_desc.twig') }}

    {#
        PRESENT THE QUESTIONS

        This is the main part. It will render each question for this group
     #}

    <!-- PRESENT THE QUESTIONS -->
    {% for  aQuestion in aGroup.aQuestions %}
         {{ include('./subviews/survey/question_container.twig') }}
    {% endfor %}

    <!-- Hidden inputs -->
    {% if aGroup.show_last_group == true %}
        <input type='hidden' name='lastgroup' value='{{ aGroup.lastgroup }}' id='lastgroup' />
    {% endif %}

    {% if aGroup.show_last_answer == true %}
        <input type='hidden' name='lastanswer' value='{{ aGroup.lastanswer }}' id='lastanswer' />
    {% endif %}
</div>
- /upload/themes/survey/yourThemeName/css/custom.cssに次のような記述を追加します。
.navbar-brand {
    line-height: 60ph1.custom-survey-name {
	margin: 0;
	text-align: center;
}
- "Survey name below progress bar"というテーマオプションを"Yes"にします。
- このようになります。

ダウンロード
- 拡張されたテーマの例: Media:Test_survey_names.zip
テーマをスクラッチで作成する
ドキュメントは準備中です。
取り急ぎ、いくつかのヒントを紹介します。
テーマの構造
ファイルとディレクトリー
スクラッチでテーマを作成するときは、Vanillaのfile/directory structure/css/jsを意識する必要はありません。 必須のcss/jsは自動的に追加されます(必要に応じて削除することもできます)。
テーマでは少なくともレイアウトファイルがなければなりません。
- layout_global.twig : アンケートページをレンダリングする
- layout_survey_list.twig : アンケートリストをレンダリングする(このテーマが既定のものとして設定されている場合)
- layout_errors.twig : アンケートのレンダリングを妨げるエラーをレンダリングするために使用する(間違ったアンケートID、プレビューグループにおける空のグループなど)
- layout_user_forms.twig: トークン(アンケート参加者)や登録ページなどのユーザーフォームをレンダリングする
- layout_print.twig : アンケートをpdfに印刷するために使用する
- layout_printanswers.twig: 回答を印刷する
これらのファイルが含まれているかどうかに関係なく、ファイルの内容は完全に自由に設定できます。 Vanillaに含まれているその他のファイルやディレクトリはすべて純粋にオプションあり、すきなようにコードを整理することができます。
内容
Vanillaのlayout_global.twigでは、何を表示するかを決定するために "include_content"という変数を使用しています。 https://github.com/LimeSurvey/LimeSurvey/blob/2398dda3b425da1a37d4611cd7963d39ac739987/themes/survey/vanilla/views/layout_global.twig#L114-L115
                    {% set sViewContent =  './subviews/content/' ~ aSurveyInfo.include_content ~ '.twig' %}
                    {% include './subviews/content/outerframe.twig' with {'include_content': sViewContent } %}
aSurveyInfo.include_contentは、現在どのようなアクションが行われているか(質問表示、結果送信、すべてクリアなど)を示します。 ご覧のとおり、vanillaでは、アクションによってインクルードするファイルを1つ作成します。アクションのリストを知りたい場合は、vanillaのディレクトリviews/subviews/contentをチェックし、"twig"拡張子を削除してください。 https://github.com/LimeSurvey/LimeSurvey/tree/2398dda3b425da1a37d4611cd7963d39ac739987/themes/survey/vanilla/views/subviews/content
- clearall.twig
- firstpage.twig
- load.twig
- mainrow.twig
- main.twig
- optin.twig
- optout.twig
- outerframe.twig
- printanswers.twig
- quotas.twig
- register.twig
- save.twig
- submit_preview.twig
- submit.twig
- userforms.twig
LimeSurveyの2.xバージョン用に作成している場合は、それらのファイルほとんどはLimesurvey 2.x用の古いpstplファイルに対応していることがわかります。 繰り返しますが、テーマ内で、このディレクトリーにこれらの名前のファイルを作成する義務はありません。たとえば、各アクションに必要なHTMLを指定して、layout_global.twigに巨大なスイッチを追加するだけです。
マニフェストconfig.xml
テーマのマニフェストには、テーマに関する主な情報が含まれています。テーマをインストールすると、マニフェストの内容は2つの異なるテーブル(templateとtemplate_configuration)でデータベースに読み込まれます。そのため、テーマのマニフェストを変更するたびに、テーマをアンインストールして再インストールする(または単にリセットする)必要があります。テーマの開発中はこのプロセスが面倒なので、DBエントリーではなくXMLファイルを直接使用するようにできます。その場合は、config.phpでデバッグモードをオンにし、 'force_xmlsettings_for_survey_rendering'をtrueにします。
メタデータセクション
複雑なことは何もありません。テーマに関する主な情報だけです。これらはテーブルtemplates_configurationに格納されます。
    <metadata>
        <name>the_name_of_your_theme</name>
        <title>The Title of your theme</title>
        <creationDate>16/10/2017</creationDate>
        <author>Your Name</author>
        <authorEmail>your@email.org</authorEmail>
        <authorUrl>http://www.yourwebsite.org</authorUrl>
        <copyright>Your Copyright </copyright>
        <license>Licence of your theme</license>
        <version>version of your theme</version>
        <apiVersion>3</apiVersion>
        <description>Description of your theme</description>
        <extends>parent_theme</extends>
    </metadata>
ポイント:
- name: データベース内でキーとして使用されます。 従ってユニークでなければならず、スペースや特殊文字を含んではいけません。 大文字か小文字かは区別されないことに注意してください。
- Title: テーマの名前をリストに表示するために使用されます。 特殊文字を含むことができます。
- description: アンケートテーマのメインリストで使用されます。特殊文字、さらにはHTMLコードを含むことができます。
- extends: 任意ですが、親テーマを定義します。 従って、このテーマにファイル(twig/js/css/jpgなど)が存在しない場合は、親テーマから検索されます。
ファイルセクション
これは重要なものです。これはテーブルtemplate_configurationのフィールドfiles_css、files_js、files_print_cssにjson配列として格納されます。
例:Material Premium Themeのfilesセクション
    <files>
        <css>
            <add>css/bootstrap-material-design.css</add>
            <add>css/ripples.min.css</add>
            <replace>css/ajaxify.css</replace>
            <replace>css/theme.css</replace>
            <replace>css/custom.css</replace>
            <remove>awesome-bootstrap-checkbox/awesome-bootstrap-checkbox.css</remove>
        </css>
        <js>
            <replace>scripts/theme.js</replace>
            <replace>scripts/ajaxify.js</replace>
            <add>scripts/material.js</add>
            <add>scripts/ripples.min.js</add>
            <replace>scripts/custom.js</replace>
        </js>
        <print_css>
            <add>css/print_theme.css</add>
        </print_css>
    </files>
このセクションにあるすべてのCSS/JSファイルは、アンケートの開始時にロードされます(ajaxモードの場合。ajaxモードがオフの場合でも、各ページを開いたときにすべてのファイルが再ロードされます)。
これらはテーマの名前に基づいてYii Asset Packetに追加されます。そのため、Asset Managerがオンのとき(デバッグモードがオフのとき)、テーマのリセットにより、これらのファイルは残りのテーマとともにtmpディレクトリにコピーされます(したがって、CSSとJSでは相対パスを使用して画像ファイルにアクセスできます)。
Yiiのアセットマネージャーについて:
https://www.yiiframework.com/wiki/148/understanding-assets
Yiiのパッケージについて:
http://www.yiiframework.com/doc/api/1.1 / CClientScript#packages-detail
これらは継承システムを使います。つまり、CSS/JSファイルをテーマに追加しても、それがテーマに含まれていない場合、エンジンはこのテーマのすべての親テーマを調べ、最初に見つかったものを使用します。そのため、ユーザーがテーマエディターを介してテーマを拡張した場合、これらのファイルはすべて自分のテーマに継承されます。次のキーワードはこの継承システムを指定します。
- add : ファイルをテーマとそれを継承したすべてのテーマに追加します
- replace: 親テーマのファイルを置き換えます
- remove: すべてのパッケージ(コアパッケージも含む)から、ファイルを削除します(3.14以降)
キーワードに関する事項
継承のヒント
上述のとおり、"add"キーワードはファイルが親テーマの一部として指定します。そのため、このセクションにファイルを「追加」しても、そのファイルは当該のテーマに含めるのではなく、その親テーマの1つとして含めることになります。エンジンはすべての親テーマを調べ、最初に見つかったテーマを使用します。ファイルが見つからず、configでデバッグモードがオンになっていて、グローバル設定でjsフロントエンドデバッグモードがオンになっていると、コンソールにメッセージが表示されます。例: my_themeに<add>css/unexisting.css</add>のように追記した場合、コンソールには、次のように表示されます。
 (¯`·._.·(¯`·._.· Theme Configuration Error  ·._.·´¯)·._.·´¯)

Can't find file 'css/unexisting.css' defined in theme 'my_theme'
デバッグモードがオフの場合、エラーはまったく発生しません。エンジンは間違ったaddステートメントを無視するだけです。
addを使うか、replaceを使うか、親テーマに委ねるか
まず、addとreplaceはまったく同じキーワードです。どちらを使っても、エンジンはまったく同じように動作します。人間にとっては区別して使用される言葉ですが、設定者の意図が何であるかは理解されています。
親テーマと同じ名前のファイルを追加することはできません。常に親テーマのファイルを置き換えることになります。例: 親テーマに"my_mother_theme/foo.css"というファイルがあり、子テーマに"foo.cs"というファイルを追加すると、テーマには"daughter_theme/foo.css"だけが追加されます。 "my_mother_theme/foo.css"を保持したい場合は、"daughter_theme/foo.css"の代わりに、"daughter_theme/bar.css"のような別の名前を選択してください。そのため、キーワード "add"を "replace"キーワードと同様に使用できます。
これにより継承されたテーマの自動生成をずっと簡単になります。ファイルセクションをコピーすればそのまま動作します(ファイルを拡張するときに"add"を"replace"に置き換える必要はありません)。
明確にするために、Fruityの例を見てみましょう。CSSファイルセクションは以下のとおりです。
        <css>
            <add>css/variations/sea_green.css</add>
            <replace>css/animate.css</replace>
            <replace>css/theme.css</replace>
            <replace>css/custom.css</replace>
        </css>
Fruityのcustom.cssファイルは、vanillaのものと全く同じです。Fruityフルーティーの中のcustom.cssファイルを削除することができ、その場合、vanillaのものが読み込まれます。マニフェストから<replace>custom.css</replace>というステートメントを削除でき、その場合、vanillaのステートメントが使用され、vanillaのcustom.cssが読み込まれます。
では、なぜFruityのマニフェストで<replace>custom.css</replace>というステートメントを使用するのでしょうか。答えは簡単です。エンドユーザがFruityテーマを拡張し、彼らのローカルテーマのファイルを変更し、継承したテーマからこの変更したファイルを読み込めるようにしたいからです。理解するため、Fruityを拡張し、拡張されたテーマを見てください。拡張されたテーマにはcustom.cssというファイルがないので、Fruityのものが使用されます。しかし、もしユーザーが(テーマエディタの"extend"をクリックして)拡張したテーマでこのファイルを作成した場合、このファイルは作成したテーマから読み込まれます。
したがって、一般的には、テーマを拡張せず、スクラッチでテーマを作成する場合は、addステートメントを使用してcss/jsファイルを追加してください。とても簡単です。テーマを拡張して新たなテーマを作成し、ユーザーが親テーマから継承したcss/jsファイルによって拡張できないようにするには、マニフェストでaddステートメントを使用しないでください。 さもないと、ファイルは親テーマの設定により読み込まれます。テーマを拡張して新たなテーマを作成し、その親テーマのファイルを置き換える場合は、replaceキーワードを使用します(addキーワードを使用した場合も同じ結果になります)。 テーマを拡張して新たなテーマを作成し、なおかつ既存のcss/jsファイルを置き換えるのではないが、ユーザーがこのファイルを拡張できるようにする場合は、マニフェストで、このファイルについて"replace"ステートメントを使用します。ファイルを置き換えない場合でも、マニフェストでキーワードreplaceを使用することにより、ユーザーが置き換えを望む場合に対応できます。
他のケースは大したことではありませんが、この最後のケースだけは、少し頭の体操が必要です。
twigコードから直接CSSとJSファイルを登録することもできます。これらのファイルは、twigファイルが要求されたときにのみ読み込まれます。ユーザーがテーマエディタからこれらのJS/CSSファイルを継承できるようにするには、関数Template:RegisterTemplateCssFile('my style.css')とTemplate:RegisterTemplateScript('my script.js')を使用します。 これらの機能を使わなくても、テーマは動作するかもしれませんが、それに対する継承は機能しません。Template:Image('my picture.jpg')関数と同じ考え方です。
&action=edit&redlink=1)
removeキーワード
removeキーワードは3.14以降で利用可能です。これを使えば、どんなコアパッケージでも、どんなパッケージからでもどんなcss/jsファイルでも削除することができます。次の例では、Material Premium ThemeでAwseome Bootstrap Checkboxのファイルを削除するために使用されています。
<remove>awesome-bootstrap-checkbox/awesome-bootstrap-checkbox.css</remove>
パッケージのファイルとまったく同じ構文を使用する必要があります(例: フォルダーパスなしで"awesome-bootstrap-checkbox.css"を単独で使用すると、うまく機能しません)。/application/config/packages.phpとconfig/third_party.phpにコアパッケージとその中にあるファイルの完全なリストがあります。例えば、awesome-bootstrap-checkbox.cssについては、以下のようになっています。 https://github.com/LimeSurvey/LimeSurvey/blob/2398dda3b425da1a37d4611cd7963d39ac739987/application/config/packages.php#L54-L56
        'css'=> array(
            'awesome-bootstrap-checkbox/awesome-bootstrap-checkbox.css',
        ),
removeタグで使用する正確な名前を見つけるもう1つの方法は、アセットマネージャーをオンにすることです(デバッグモードをオフにするか、configで'use_asset_manager'=>trueとします)。使用するパスは、tmpディレクトリー内のランダムディレクトリーの直後のパスになります。例えば、awesome-bootstrap-checkbox.cssは以下のようになります。
<link rel="stylesheet" type="text/css" href="/tmp/assets/cbc4e3cb/awesome-bootstrap-checkbox/awesome-bootstrap-checkbox.css" />
削除すべきでないファイルは以下のとおりです。
jquery-3.1.1.min.js : 必要
jquery-migrate-3.0.0.min.js : 必要
survey.js : 必要
moment-with-locales.min.js : 日付の質問タイプなどに必要
em_javascript.js : すべてのExpressionScriptのjavascriptで必要
オプションセクション
このセクションはあなたのテーマのオプションに関するものです。これは、ファイル化された "options"をtemplate_configurationテーブルにJSON配列として格納するために使用します。
追加情報
注記
注意: テーマのXMLファイルを編集する場合は、そのテーマが反映されるようにテーマをアンインストールしてから再びインストールする必要があります。
注意: これを避けるために、DBではなく強制的にXMLを使用することができます。config.phpでデバッグモードをオンにし、コメントアウトします。
'force_xmlsettings_for_survey_rendering' => true, // DBではなく強制的にXMLファイルを使用したい場合はコメントを外します(簡単なテーマ開発のため)。
注意: すべてがXMLから読み込まれるようになります(オプションなど)
注意: テーマエディターを使用せずにCSS/JSファイルを手動で編集し、かつデバッグモードがオフの場合は、アセットを強制的にフラッシュできるようになりました。 "全体設定"、"全般"タブで、"アセットキャッシュをクリアする"ボタンをクリックします。
注意: セクションを削除した場合