Zestawy etykiet
From LimeSurvey Manual
Ogólne
Zestawy etykiet to szablony list, gdzie każda lista zawiera zestaw kodów z etykietami i może być używana w większości typów pytań jako odpowiedzi lub pytania podrzędne. Należy pamiętać, że zestawy etykiet LimeSurvey są jedynie kopiowane do konkretnego pytania jako pytania podrzędne lub odpowiedzi. Dlatego też, jeśli zmienisz zestaw etykiet po tym, jak „użyłeś” go w kwestionariuszu, zmiany nie zostaną przeniesione na pytania z kwestionariusza, w których wykorzystano odpowiedni zestaw etykiet.
To nowe zastosowanie zestawów etykiet zapewnia znacznie większą elastyczność w zakresie przyszłego rozwoju i sprawia, że struktura pytania jest bardziej logiczna.
Poniżej znajduje się przykładowy zestaw etykiet, który pomoże Ci lepiej zrozumieć tę koncepcję. Kliknij tutaj, jeśli chcesz przejść bezpośrednio do funkcji zarządzania zestawami etykiet w LimeSurvey.
Jeśli chcesz zdefiniować niestandardową skalę 7-punktową, zestaw etykiet udostępnia tę funkcję. W poniższym przykładzie bardzo prosty zestaw niestandardowych etykiet składający się z par kod/etykieta („etykieta jest tym, co pojawia się w rzeczywistych pytaniach”).
| Kod | 'Etykieta |
| 1 | W ogóle nieprzydatny |
| 2 | 2 |
| 3 | 3 |
| 4 | Coś przydatnego |
| 5 | 5 |
| 7 | Bardzo przydatne |
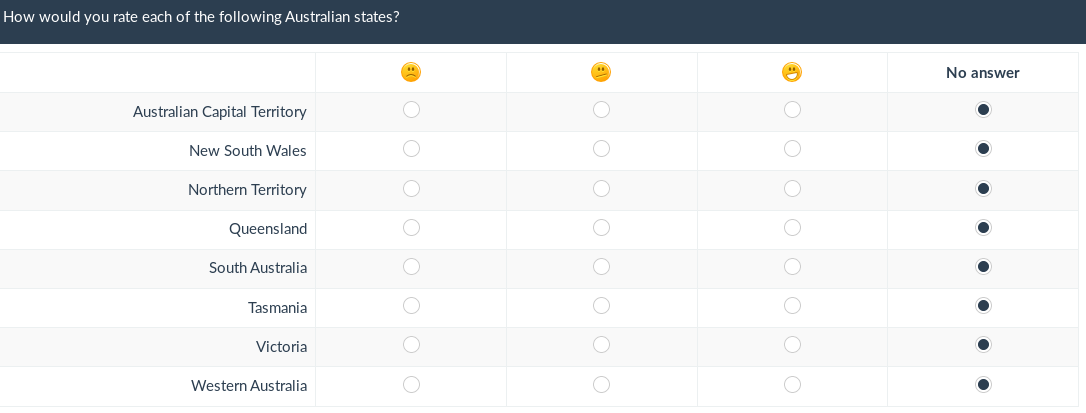
Poniżej znajduje się graficzny przykład, w którym zamiast tekstu etykiety użyto trzech różnych emotikonów:

Zestawy etykiet - jak...
Kliknij opcję „Zarządzaj zestawami etykiet” w menu „Konfiguracja”, aby edytować, tworzyć, usuwać, importować i/lub eksportować zestawy etykiet.

...utwórz lub importuj nowe zestawy etykiet
Kliknij przycisk „Utwórz lub zaimportuj nowy zestaw etykiet” znajdujący się w lewym górnym rogu strony. Możesz utworzyć nowy zestaw etykiet lub zaimportować go z innego źródła:
- Nowy zestaw etykiet: Zestawy etykiet muszą zostać utworzone ręcznie.
- Nazwa zestawu: Każdemu nowemu zestawowi etykiet należy nadać nazwę.
- 'Języki:' Każdy zestaw etykiet musi być określony dla języka, w którym jest używany. Możesz wybrać dowolną liczbę języków z menu.
- Importuj zestawy etykiet: Aby zaimportować zestaw etykiet, kliknij przeglądaj i dodaj plik zestawu etykiet .lsl. Jeśli wcześniej utworzyłeś zestaw etykiet, LimeSurvey nie pozwoli Ci zaimportować podobnego zewnętrznego zestawu etykiet, chyba że wyłączysz opcję „Nie importuj, jeśli zestaw etykiet już istnieje”. Kilka przydatnych zestawów etykiet jest dostępnych na witryny LimeSurvey.
Po zaimportowaniu lub utworzeniu etykiety kliknij przycisk Zapisz znajdujący się w prawej górnej części ekranu.
...edytuj, usuwaj lub eksportuj zestaw etykiet
Każdy zestaw etykiet znajdujący się na liście „Zestawy etykiet” ma odpowiadające mu menu zawierające cztery następujące opcje:
- Wyświetl etykiety: Umożliwia użytkownikowi przeglądanie istniejących etykiet znajdujących się w odpowiednim zestawie etykiet.
- Edytuj zestaw etykiet: Użytkownik może zmienić nazwę zestawu etykiet i/lub dodać /usuń języki.
- Eksportuj zestaw etykiet: Eksportuj zestaw etykiet do pliku .lsl.
- Usuń zestaw etykiet: Pojawi się okno w celu potwierdzenia czy chcesz usunąć odpowiedni zestaw etykiet, czy nie.
Etykiety - jak...
...dodaj etykietę
Należy podać kod etykiety, wartość oceny i opis etykiety.

Następnie kliknij znak plusa ![]() , aby dodać nową etykietę. Możliwe jest użycie grafiki zamiast (lub oprócz) tekstu etykiety. Aby to zrobić, musisz użyć kodu HTML i dołączyć żądaną grafikę, np.:
, aby dodać nową etykietę. Możliwe jest użycie grafiki zamiast (lub oprócz) tekstu etykiety. Aby to zrobić, musisz użyć kodu HTML i dołączyć żądaną grafikę, np.:
<img border="0" src="http://www.yourdomain.at/pics/pic.gif">Aby pomóc w procesie edycji kodu HTML, użyj wbudowanego edytora HTML LimeSurvey, który znajduje się na końcu pola tekstowego etykiety (kliknij zielony przycisk pióra -> 0,85 piksela).

Szybkie dodanie
Innym sposobem dodania etykiet jest użycie przycisku Szybkie dodanie.... Po kliknięciu wyświetli się okno. Działa w następującej formie: Kod ; Tytuł.
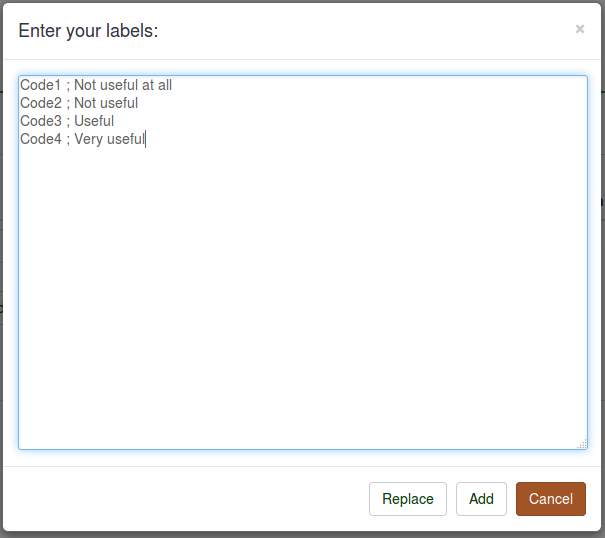
Możesz zastąpić lub dodać etykiety. Jeśli klikniesz „Zamień”, wszystkie istniejące etykiety zostaną usunięte i zastąpione tymi wprowadzonymi przez Ciebie. Jeśli klikniesz „Dodaj”, nowe etykiety zostaną dodane do zestawu etykiet (nie ma to wpływu na istniejące).
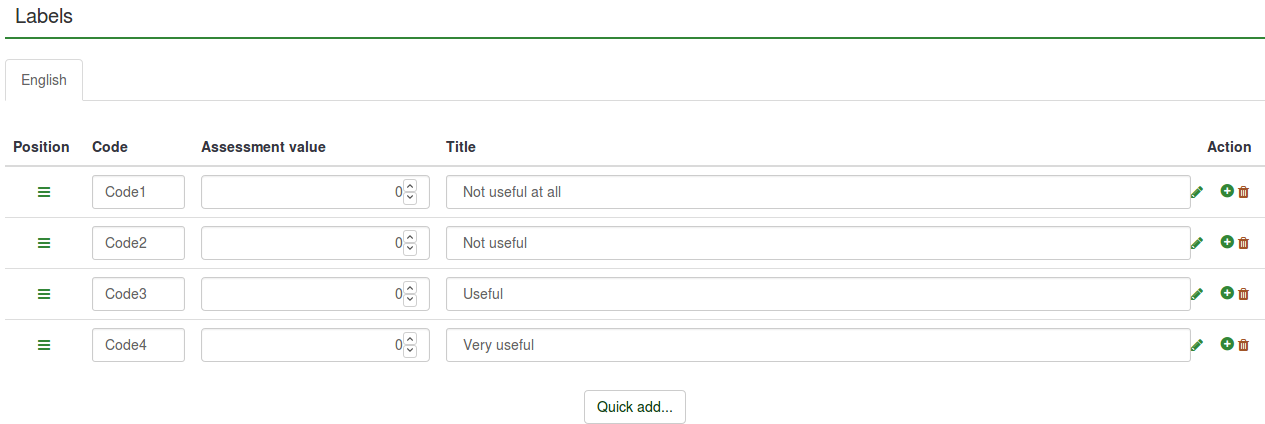
„Kod” jest dodawany automatycznie w przypadku tworzenia nowych wejść. Można zatem wpisać tylko tytuły etykiet, którym automatycznie zostanie przypisany kod:
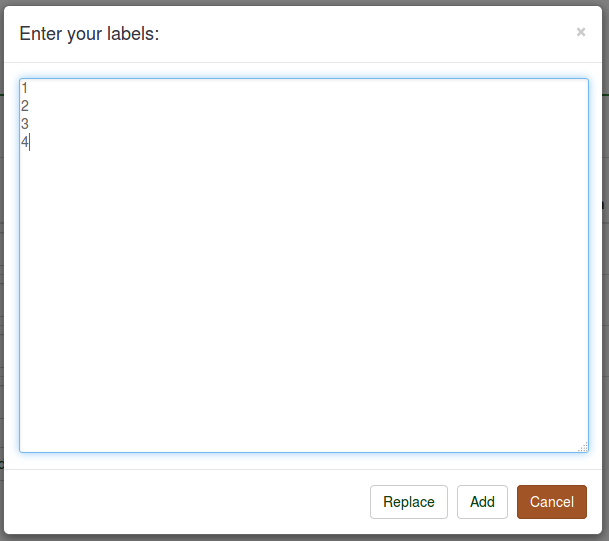
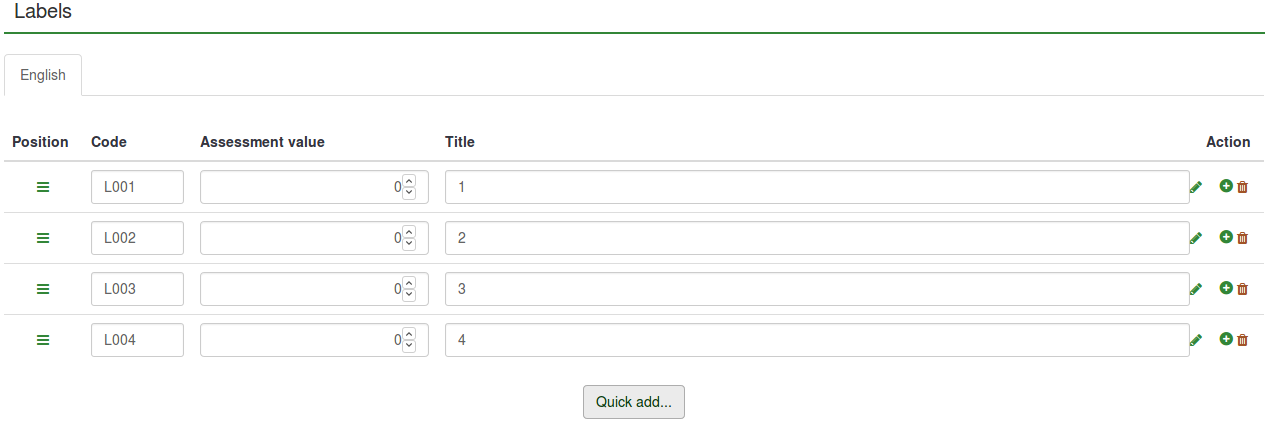
Za pomocą tej opcji nie można edytować/wprowadzić wartości oceny - należy je zmienić ręcznie z listy etykiet.
...usuń etykietę
Aby usunąć etykietę, kliknij czerwony przycisk kosza (![]() ) znajdujący się pod kolumną „Akcja”.
) znajdujący się pod kolumną „Akcja”.
...zmień etykietę
Aby zmienić kolejność etykiet, kliknij zielony znak (0.85px) znajdujący się pod kolumną „Pozycja” i zmień położenie etykiety.
...dodaj nowy język
Aby dodać nowy język: Utwórz lub zaimportuj nowy zestaw etykiet -> Języki -> wybierz języki, które chcesz dodać.
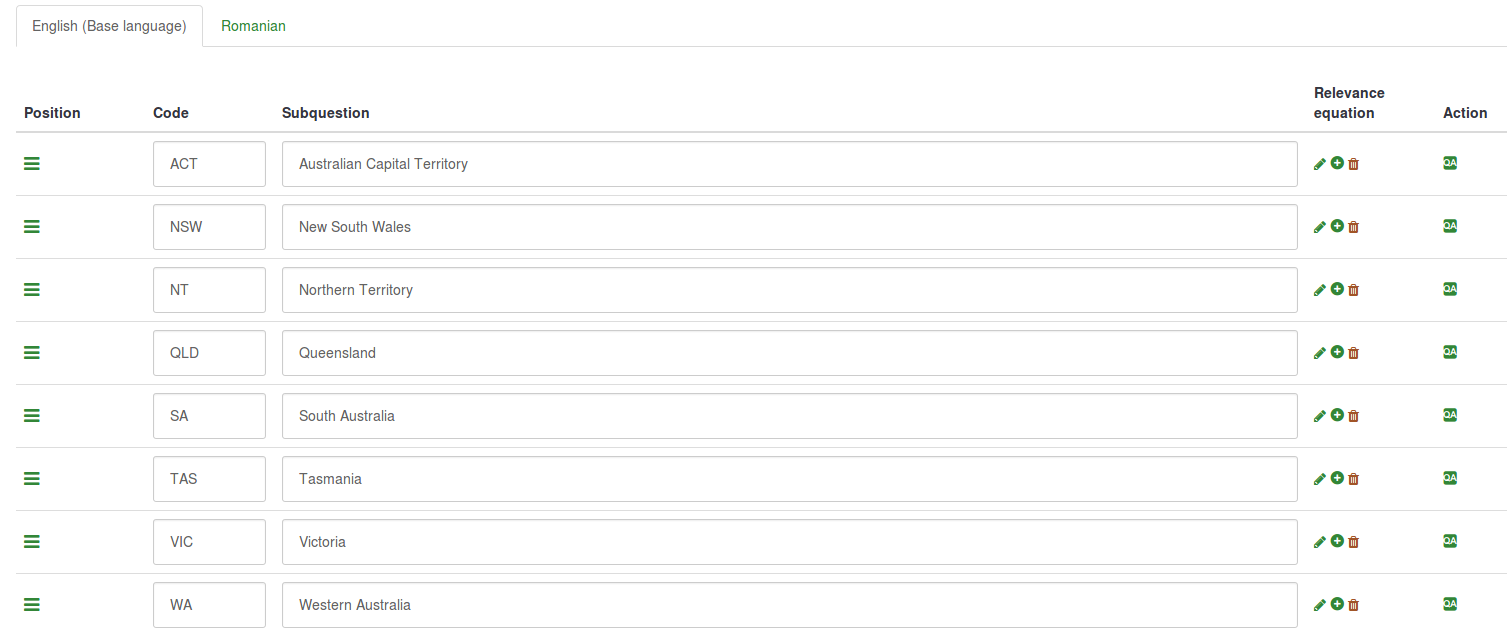
Aby rozpocząć tłumaczenie etykiet na inny język, wybierz z górnej części matrycy język, na który chcesz przetłumaczyć etykiety.
Każda etykieta wymaga kodu, wartości oceny i opisu (jak wspomniano powyżej). Chociaż opis etykiety można edytować dla wszystkich opcji językowych, kody etykiet i wartości ocen można edytować tylko z poziomu pierwszej opcji języka, która znajduje się na pasku narzędzi języków macierzy. Kolejność języków jest alfabetyczna i nie można jej zmienić.
W naszym przypadku językiem, w którym można zmieniać kody etykiet i wartości oceny, jest język angielski. Po wybraniu karty rumuńskiej można edytować tylko opis etykiety, który reprezentuje odpowiednie tłumaczenie etykiety na rumuńską etykietę angielską.
Po zakończeniu wprowadzania zmian nie zapomnij kliknąć przycisku „Zapisz zmiany” znajdującego się w prawej górnej części ekranu.
Examples
For a better understanding of the label sets option, let's take a look at the following examples:
- I want to use a label set as an answer list for one question;
- I want to use labels in another language as answers;
- I want to use emoticons instead of label text;
- I want to import a label set and use it as a subquestion list.
I want to use a label set as an answer list for one question
Assuming that the label set and survey are created:
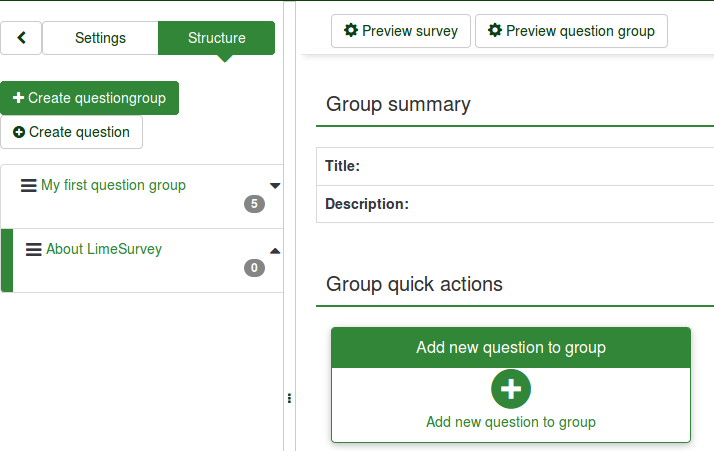
- Go to the structure of the survey and create a question group - About LimeSurvey.

- Click the Structure tab and then on the newly created question group (About LimeSurvey in our case). Look for group quick actions and choose Add new question to group:
- Type in the code and text of the question.
- To use a label set as a set of answers, pick the right type of question that can make use of label sets. The array question type is selected in our example:

- Save the question to add it into your question group.
- Once created, you will have to add subquestions and answers:

- Add at least one subquestion:

- Add answer options. Predefined label sets... option will be used:
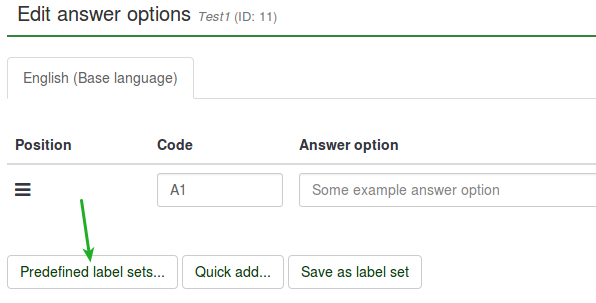
- Select the label set you want to use:
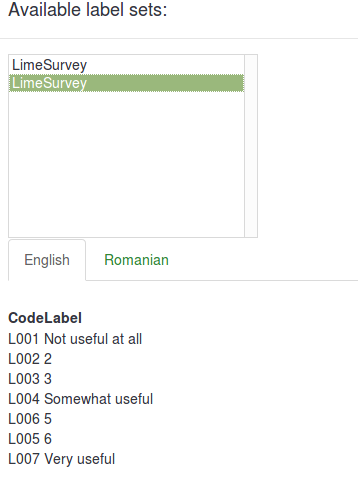
The result should look like this:
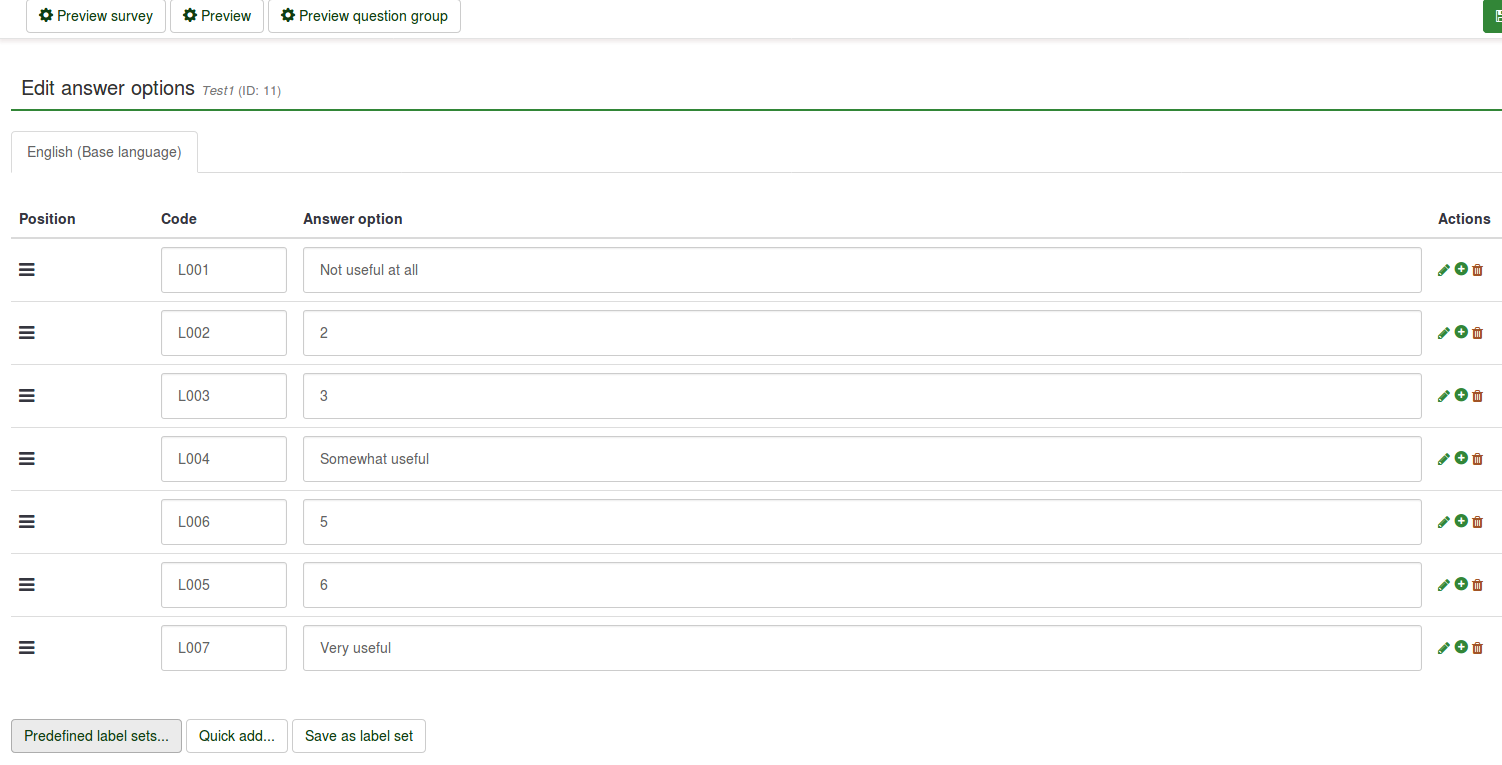
- Save & preview the question:

I want to use labels in another language as answers
- Create a label set and select the other languages you would like to use in your survey. For further details, read our wiki on how to translate a label set in other languages.
- Edit your survey (Settings -> General Settings) by adding the additional languages you want to translate to. For more details on how to create a survey, read the following wiki.
Assuming that the label set and survey are created:
- Create a question that can make use of label sets (e.g. array question type):
- Because the array question type is selected, both the subquestions and answers need to be translated.

- Translate the subquestions. Do not forget to select the right language tab for translation:

- Translate the answers. However, because we use predefined label sets, select the right language tab to add the translated label set as answer options:
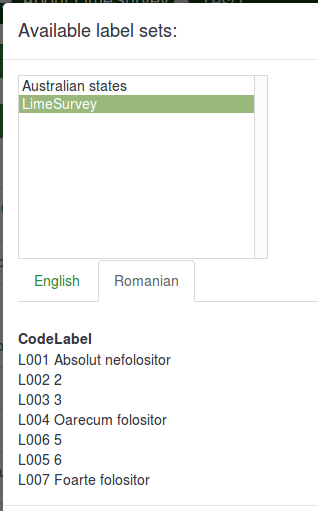
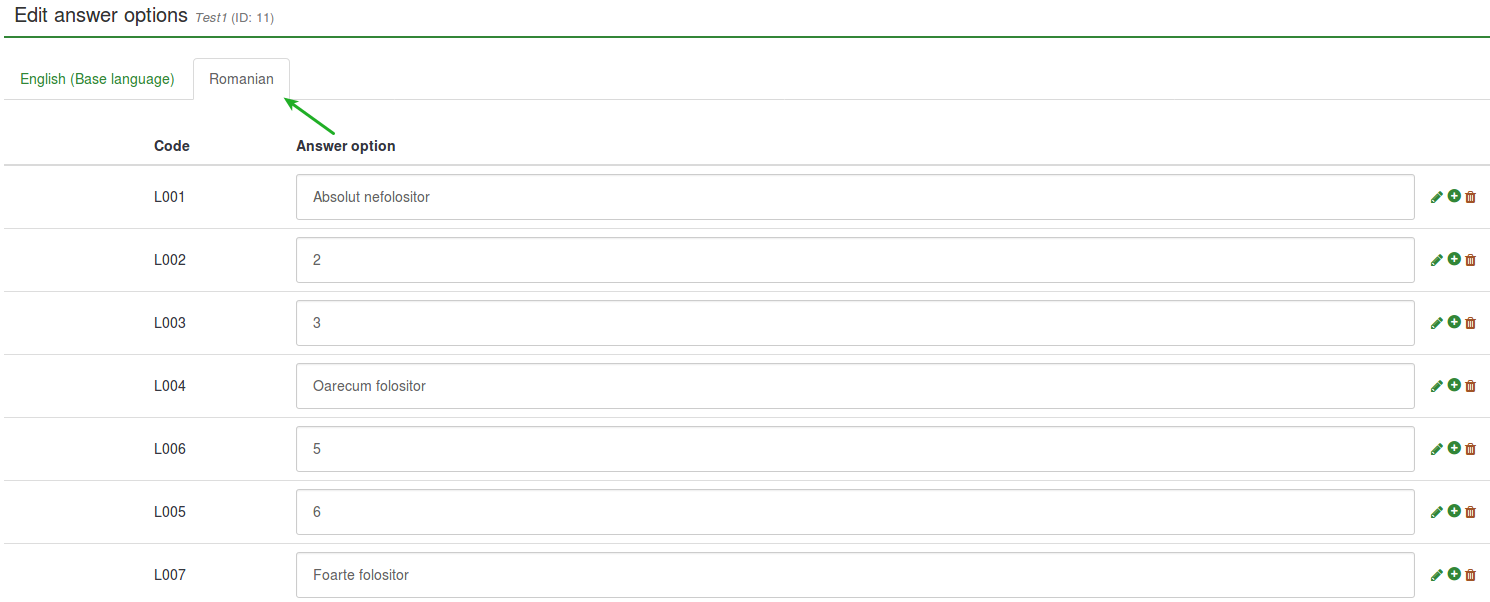
- Save & Preview the survey:

I want to use emoticons instead of label text
Assuming that the survey is created:
- Create a label set and access it. Instead of writing in the Title column, open the HTML editor by clicking on the green pen and add graphics instead of text:


The HTML editor offers you a more comprehensive view on how different options can be used to enhance your survey. It is not necessary to have HTML knowledge because the toolbar is self-explaining (for further details you can either hover the mouse over the options or click on that option for more details). By using such an editor, you can also add (for example) smileys, images and/or videos that are either hosted online or on your server.
In this example. three smileys have been added:

- Create a question that can make use of label sets as predefined answers (e.g. array question type):
- Edit the subquestions and the answer options

- Set predefined labels as answer options.

- Save and preview the question:
I want to import a label set and use it as a subquestion list
Assuming that the survey is created:
- Go to Configuration and click Manage label sets button.
- Click Create or import new label set(s) (in the upper-left side of the screen) -> Import label set(s). Browse your computer and select the .lsl file (the label set format).
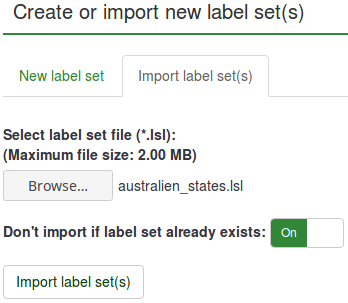
- Now that the label set was uploaded, create a question that requires the usage of subquestions (array question types).
- Edit subquestions.

- Load the imported label set:
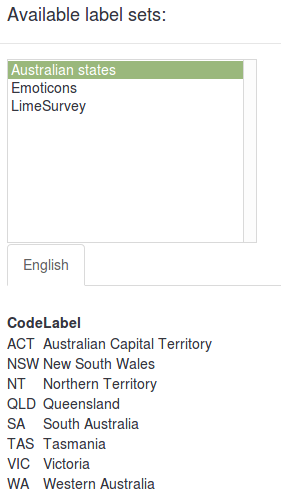
- Save and preview.
