Label sets/da: Difference between revisions
From LimeSurvey Manual
Maren.fritz (talk | contribs) (Created page with "Du skal udfylde en etiketkode, en vurderingsværdi og en etiketbeskrivelse.") |
Maren.fritz (talk | contribs) (Created page with "<center>File:Labels table.png</center>") |
||
| Line 87: | Line 87: | ||
Klik derefter på plustegnet [[File:Add label.png]] for at tilføje den nye etiket. Det er muligt at bruge en grafik i stedet for (eller i tillæg til) en etikettekst. For at gøre det skal du bruge HTML-kode til at inkludere den ønskede grafik, f.eks. | |||
<syntaxhighlight lang="html4strict"> | <syntaxhighlight lang="html4strict"> | ||
Revision as of 14:56, 2 January 2024
Generelt
Etiketsæt er listeskabeloner, hvor hver liste har et sæt koder med etiketter og kan bruges i de fleste spørgsmålstyper enten som svar eller som underspørgsmål. Vær opmærksom på, at LimeSurveys etiketsæt blot kopieres til det pågældende spørgsmål som underspørgsmål eller svar. Hvis du derfor ændrer et etiketsæt, efter du har 'brugt' det i et spørgeskema, vil ændringerne ikke forplante sig til spørgsmålene fra spørgeskemaet, hvor det respektive etiketsæt er udnyttet.
Denne nye brug af etiketsæt giver meget mere fleksibilitet til fremtidig udvikling og gør strukturen af et spørgsmål mere logisk.
Nedenfor er et eksempel på et etiketsæt, der hjælper dig med bedre at forstå konceptet. Klik her hvis du vil gå direkte til LimeSurvey's etiketsætstyringsfunktioner.
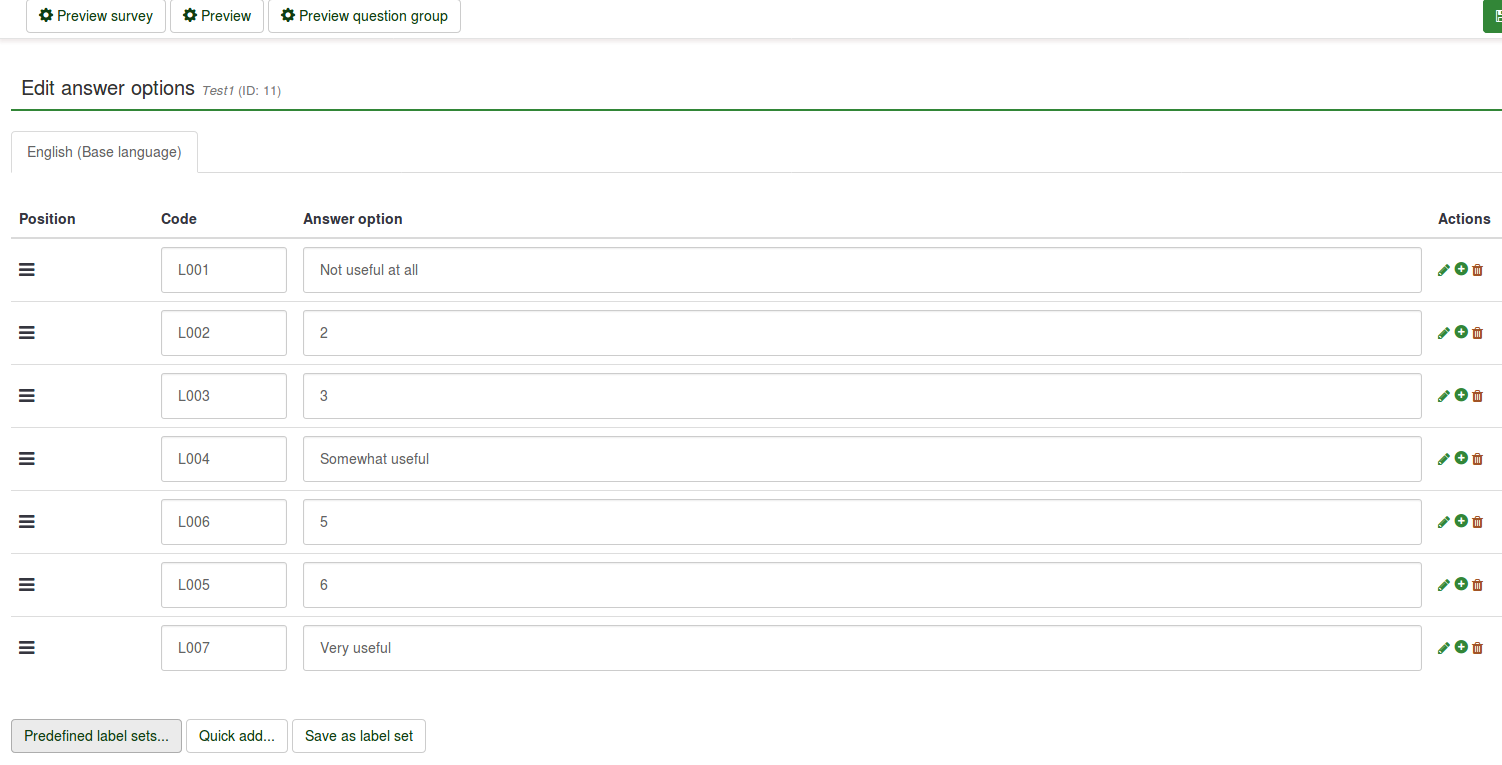
Hvis du ønsker at definere en brugerdefineret 7-punkts skala, giver et etiketsæt denne funktion. I eksemplet nedenfor er et meget simpelt brugerdefineret etiketsæt med kode/etiket-parrene (etiketten er, hvad der vises i de faktiske spørgsmål).
| Kode | Etiket |
| 1 | Ikke nyttig |
| 2 | 2 |
| 3 | 3 |
| 4 | Lidt brugbar |
| 5 | 5 |
| 6 | 6 |
| 7 | Meget nyttig |
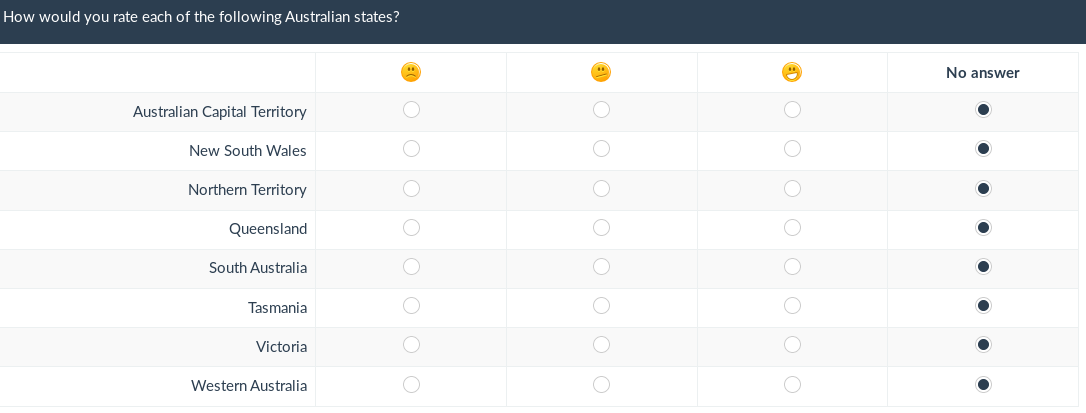
Nedenfor er et grafisk eksempel, hvor der bruges tre forskellige smileys i stedet for etikettekst:

Etiketsæt - hvordan...
Klik på 'Administrer etiketsæt i menuen Konfiguration for at redigere, oprette, slette, importere og/eller eksportere etiketsæt.

...opret eller importér nye etiketsæt
Klik på knappen Opret eller importér nye etiketsæt i øverste venstre hjørne af siden. Du kan enten oprette et nyt etiketsæt eller importere det fra en anden kilde:
- Nyt etiketsæt: Etiketsæt skal oprettes manuelt.
- Sætnavn: Hvert nyt etiketsæt skal have et navn.
- 'Sprog:' Hvert etiketsæt skal angives for det sprog, det bruges til. Du kan vælge så mange sprog fra menuen, som du vil.
- Importér etiketsæt: For at importere et etiketsæt skal du klikke på gennemse og tilføje .lsl etiketsætfilen. Hvis du tidligere har oprettet et etiketsæt, så vil LimeSurvey ikke tillade dig at importere et lignende eksternt etiketsæt, medmindre du deaktiverer muligheden Importér ikke, hvis etiketsæt allerede findes. Nogle nyttige etiketsæt er tilgængelige på LimeSurvey-webstedet.
Når etiketten er blevet importeret eller oprettet, skal du klikke på knappen Gem i den øverste højre del af skærmen.
...rediger, slet eller eksporter et etiketsæt
Hvert etiketsæt på listen Etiketsæt har en tilsvarende menu, der indeholder følgende fire muligheder:
- Se etiketter: Giver brugeren mulighed for at se de eksisterende etiketter placeret i det respektive etiketsæt.
- Rediger etiketsæt: Brugeren kan omdøbe etiketsættet og/eller tilføje /fjern sprog.
- Eksportér etiketsæt: Eksportér etiketsæt til en .lsl-fil.
- Slet etiketsæt: Et vindue vil poppe op for at bekræfte om du vil slette det respektive etiketsæt eller ej.
Etiketter - hvordan...
...tilføj en etiket
Du skal udfylde en etiketkode, en vurderingsværdi og en etiketbeskrivelse.

Klik derefter på plustegnet ![]() for at tilføje den nye etiket. Det er muligt at bruge en grafik i stedet for (eller i tillæg til) en etikettekst. For at gøre det skal du bruge HTML-kode til at inkludere den ønskede grafik, f.eks.
for at tilføje den nye etiket. Det er muligt at bruge en grafik i stedet for (eller i tillæg til) en etikettekst. For at gøre det skal du bruge HTML-kode til at inkludere den ønskede grafik, f.eks.
<img border="0" src="http://www.yourdomain.at/pics/pic.gif">To help with the editing process of the HTML-code, use the embedded HTML editor of LimeSurvey, which is located at the end of the label-text box (click on the green pen button ->![]() ).
).

Quick add
Another way to add labels is to use the Quick add... button. When you click it, a window be displayed. It works under the following form: Code ; Title.
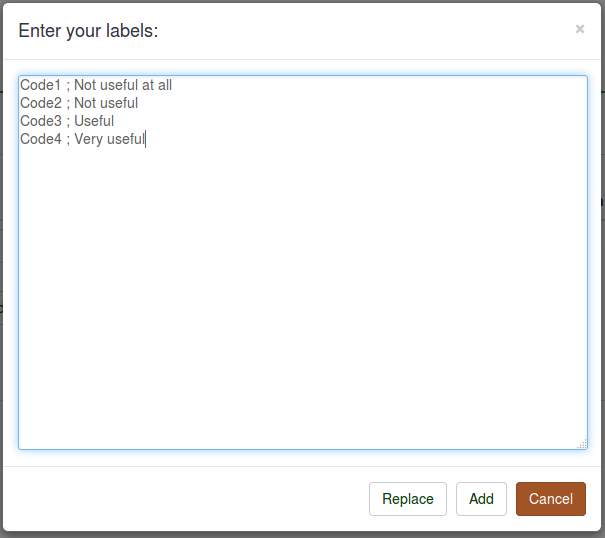
You can either replace or add labels. If you click Replace, all the preexisting labels will be deleted and replaced by the ones entered by you. If you click Add, the new labels will be added into the label set (the preexisting ones not being affected).
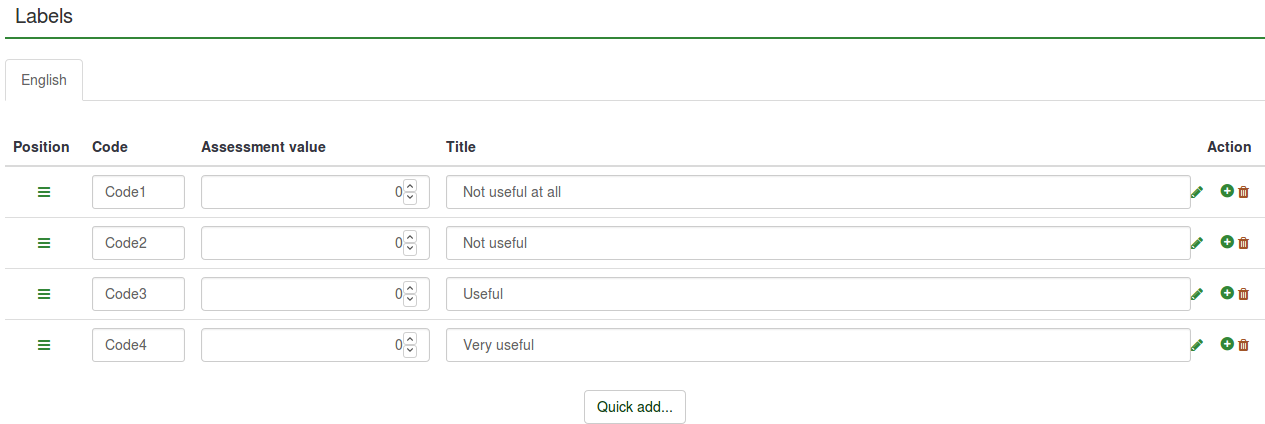
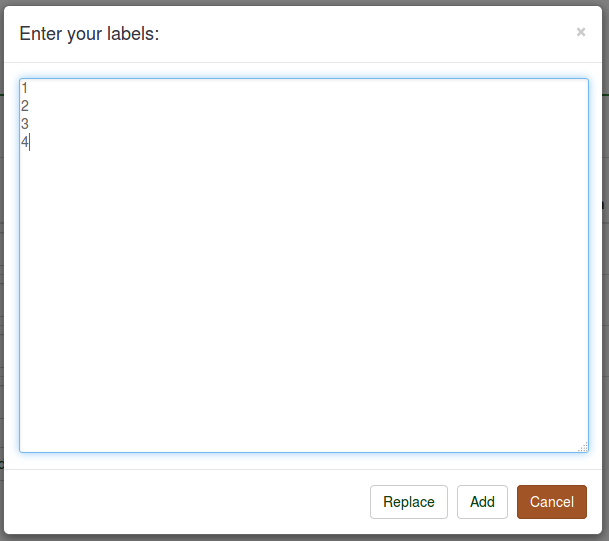
The Code is automatically added if new entrances are created. Therefore, you can type in only the title of the labels which will automatically be assigned a code:
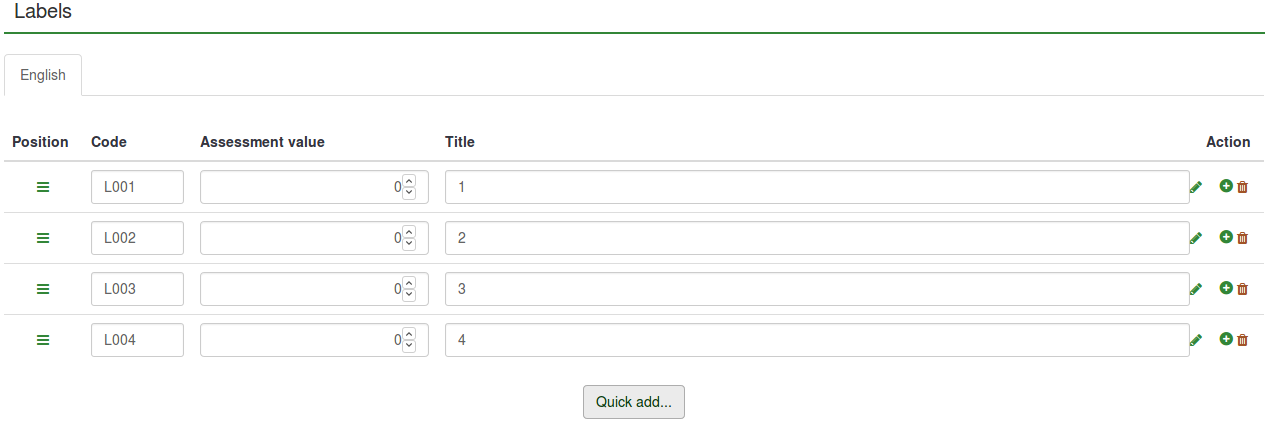
The assessment values cannot be edited/entered via this option - it has to be changed manually from the list of labels.
...delete a label
To delete a label, click the red trash button (![]() ) located under the 'Action' column.
) located under the 'Action' column.
...rearrange a label
To rearrange the order of the labels, click the green sign (![]() ) located under the column called 'Position' and re-position the label.
) located under the column called 'Position' and re-position the label.
...add a new language
To add a new language: Create or import new label set(s) -> Languages -> select the languages you wish to add.
To start translating the labels into another language, select the language in which you would like to translate the labels to from the upper part of the matrix.
Every label needs a code, an assessment value, and a description (as mentioned above). While the label description can be edited for all language options, label codes and assessment values can be edited only from the first language option that is located on the languages toolbar of the matrix. The order of the languages is alphabetical and cannot be changed.
In our case, the language from where the label codes and assessment values can be changed is English. Only the label description can be edited when the Romanian tab is selected - which represents the corresponding Romanian label translation of the English label.
Once you are done with the changes, do not forget to click on the 'Save changes' button located in the upper-right part of the screen.
Examples
For a better understanding of the label sets option, let's take a look at the following examples:
- I want to use a label set as an answer list for one question;
- I want to use labels in another language as answers;
- I want to use emoticons instead of label text;
- I want to import a label set and use it as a subquestion list.
I want to use a label set as an answer list for one question
Assuming that the label set and survey are created:
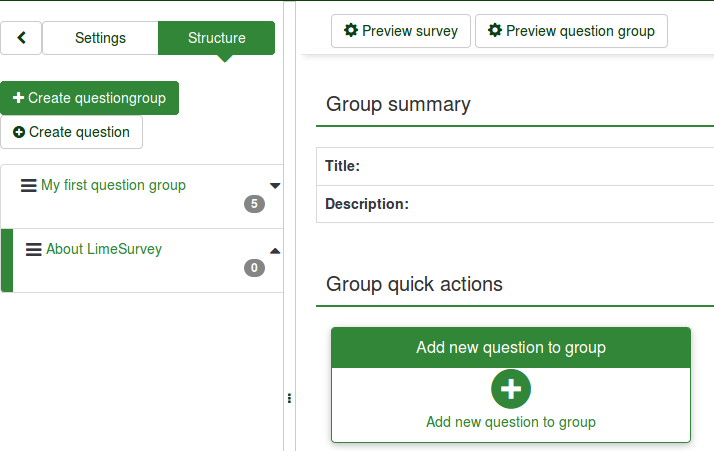
- Go to the structure of the survey and create a question group - About LimeSurvey.

- Click the Structure tab and then on the newly created question group (About LimeSurvey in our case). Look for group quick actions and choose Add new question to group:
- Type in the code and text of the question.
- To use a label set as a set of answers, pick the right type of question that can make use of label sets. The array question type is selected in our example:

- Save the question to add it into your question group.
- Once created, you will have to add subquestions and answers:

- Add at least one subquestion:

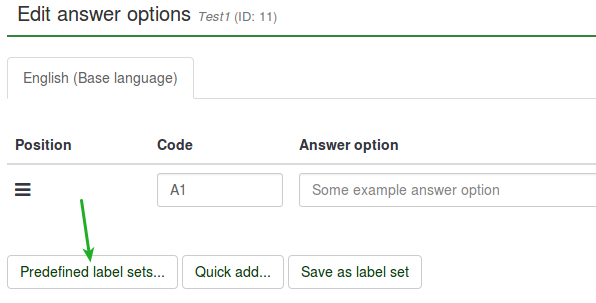
- Add answer options. Predefined label sets... option will be used:
- Select the label set you want to use:
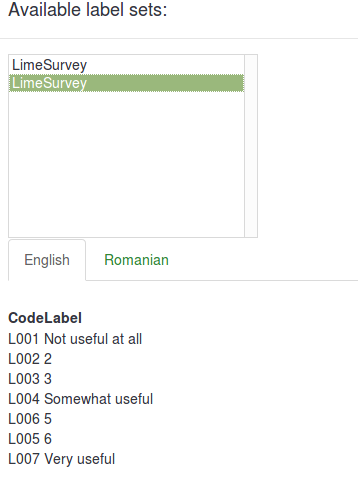
The result should look like this:
- Save & preview the question:

I want to use labels in another language as answers
- Create a label set and select the other languages you would like to use in your survey. For further details, read our wiki on how to translate a label set in other languages.
- Edit your survey (Settings -> General Settings) by adding the additional languages you want to translate to. For more details on how to create a survey, read the following wiki.
Assuming that the label set and survey are created:
- Create a question that can make use of label sets (e.g. array question type):
- Because the array question type is selected, both the subquestions and answers need to be translated.

- Translate the subquestions. Do not forget to select the right language tab for translation:

- Translate the answers. However, because we use predefined label sets, select the right language tab to add the translated label set as answer options:
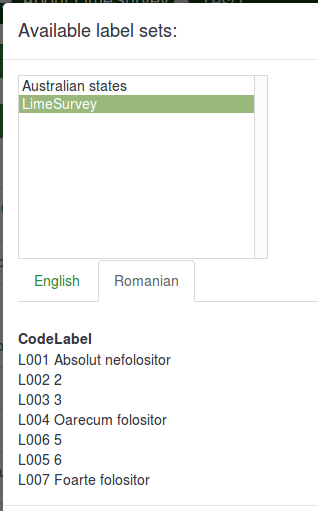
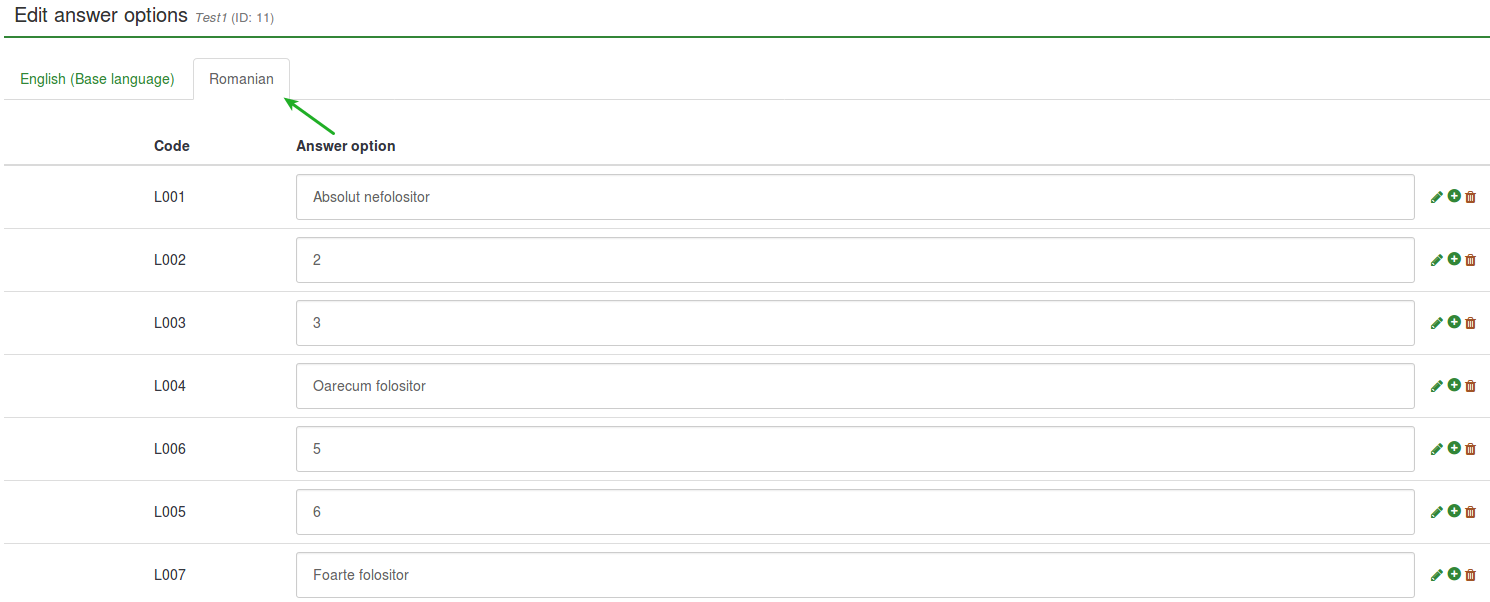
- Save & Preview the survey:

I want to use emoticons instead of label text
Assuming that the survey is created:
- Create a label set and access it. Instead of writing in the Title column, open the HTML editor by clicking on the green pen and add graphics instead of text:


The HTML editor offers you a more comprehensive view on how different options can be used to enhance your survey. It is not necessary to have HTML knowledge because the toolbar is self-explaining (for further details you can either hover the mouse over the options or click on that option for more details). By using such an editor, you can also add (for example) smileys, images and/or videos that are either hosted online or on your server.
In this example. three smileys have been added:

- Create a question that can make use of label sets as predefined answers (e.g. array question type):
- Edit the subquestions and the answer options

- Set predefined labels as answer options.

- Save and preview the question:
I want to import a label set and use it as a subquestion list
Assuming that the survey is created:
- Go to Configuration and click Manage label sets button.
- Click Create or import new label set(s) (in the upper-left side of the screen) -> Import label set(s). Browse your computer and select the .lsl file (the label set format).
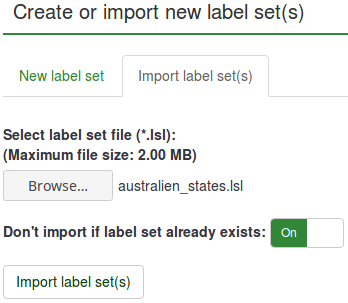
- Now that the label set was uploaded, create a question that requires the usage of subquestions (array question types).
- Edit subquestions.

- Load the imported label set:
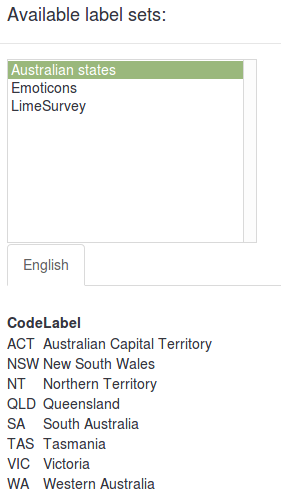
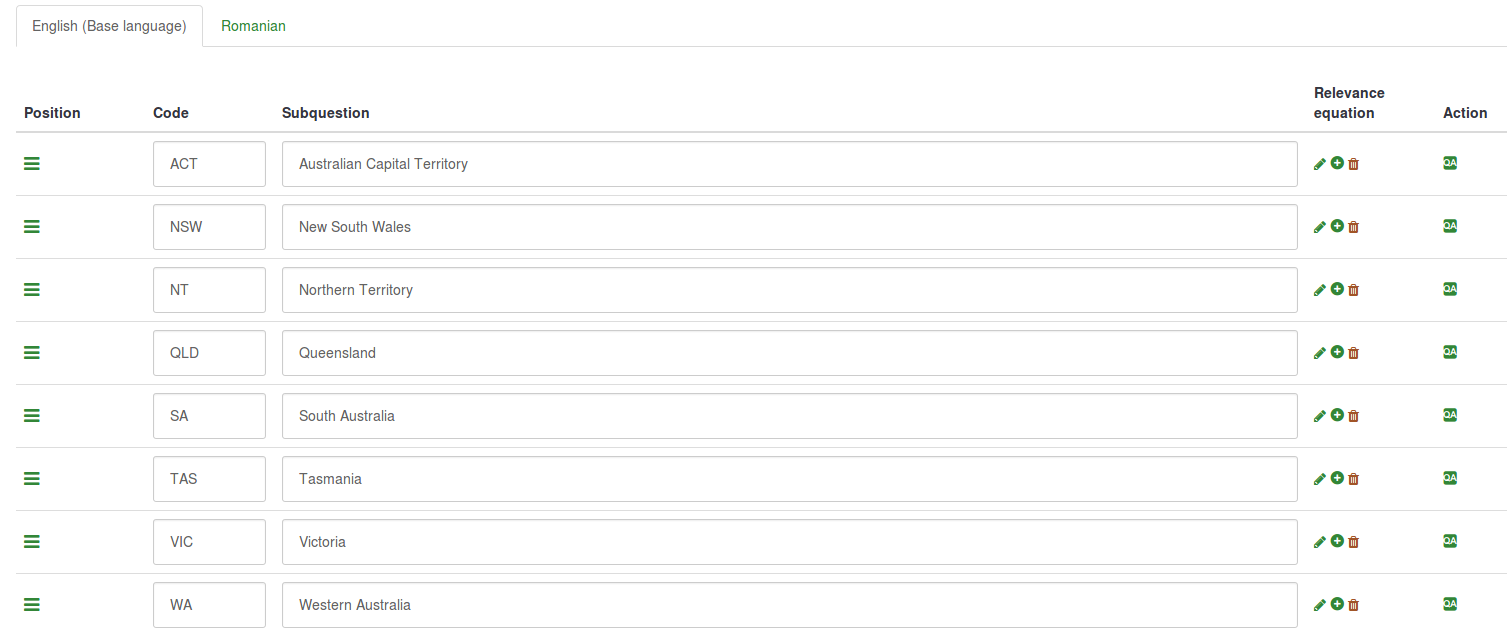
- Save and preview.
