Multilingual survey/es: Difference between revisions
From LimeSurvey Manual
Maren.fritz (talk | contribs) (Created page with "Ahora, si revisas la barra de herramientas superior, podrás observar que apareció una pequeña flecha al lado de "Vista previa de la encuesta". Esto significa que se puede o...") |
Maren.fritz (talk | contribs) (Created page with "<center>File:Multilingual survey - preview.png</center>") |
||
| Line 42: | Line 42: | ||
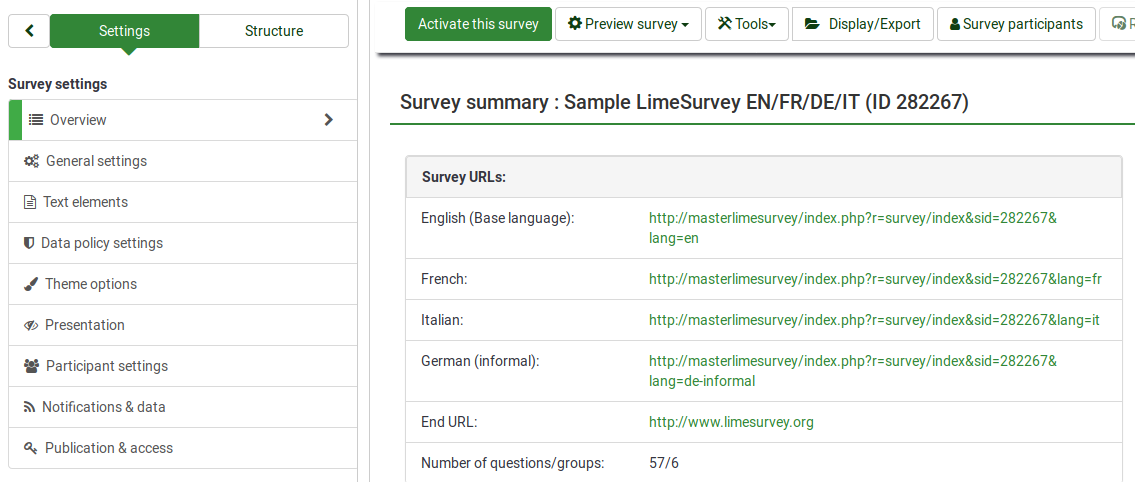
Si accede al panel [[Overview#Introduction|overview]], se muestran cuatro enlaces de encuestas adicionales. Corresponden a los idiomas añadidos recientemente: | |||
Revision as of 08:38, 6 September 2023
Introducción
LimeSurvey contiene una función incorporada que permite la traducción rápida y sencilla de encuestas. Esta función está diseñada para facilitar que un traductor humano traduzca una encuesta del idioma base a cualquier idioma de destino específico.
Esta sección wiki cubre rápidamente cómo se puede crear una encuesta multilingüe. La guía cubre temas como:
El ejemplo analizado a lo largo de la sección wiki se puede descargar desde aquí: Muestra de encuesta multilingüe LS3. Descomprímelo e importa el archivo .lss a tu instancia de LimeSurvey.
Agregar idiomas adicionales
El idioma predeterminado de la encuesta es el que seleccionó en el campo de idioma base. Por defecto, es el idioma configurado en la global settings de tu instancia.
Para comprobar cuál es el idioma base, acceda al panel de configuración general de la encuesta y busque el campo de idioma base. En nuestro ejemplo, el idioma base es "inglés". Para comenzar a agregar nuevos idiomas a los que desea traducir la encuesta, consulte el campo de idiomas adicionales. En nuestro ejemplo, se han seleccionado otros tres idiomas: francés, alemán e italiano.
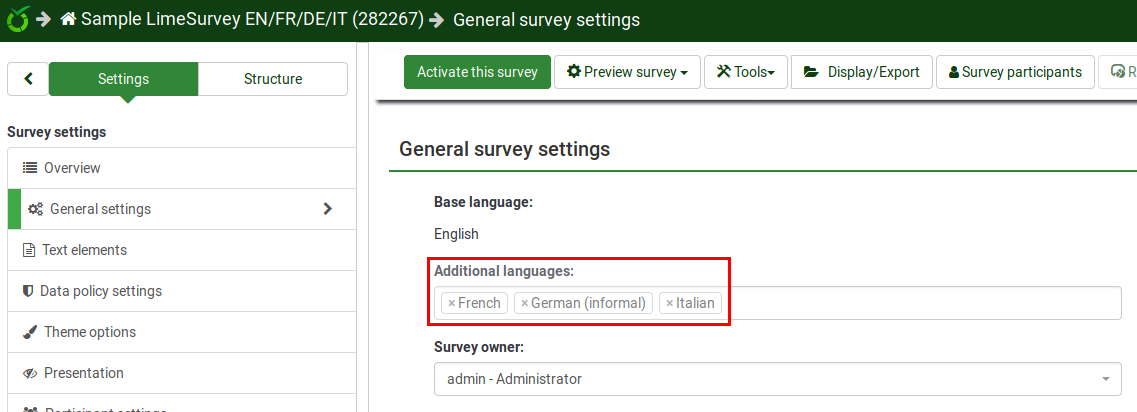
Una vez hecho esto, no olvides hacer clic en el botón "Guardar" ubicado en la parte superior derecha de la pantalla.
Ahora, si revisas la barra de herramientas superior, podrás observar que apareció una pequeña flecha al lado de "Vista previa de la encuesta". Esto significa que se puede obtener una vista previa de la encuesta en diferentes idiomas:

Si accede al panel overview, se muestran cuatro enlaces de encuestas adicionales. Corresponden a los idiomas añadidos recientemente:
Translating strings
To start translating strings, access the editor panel of each of your question. You can observe in the below screenshot that three additional languages are displayed above the question code field:
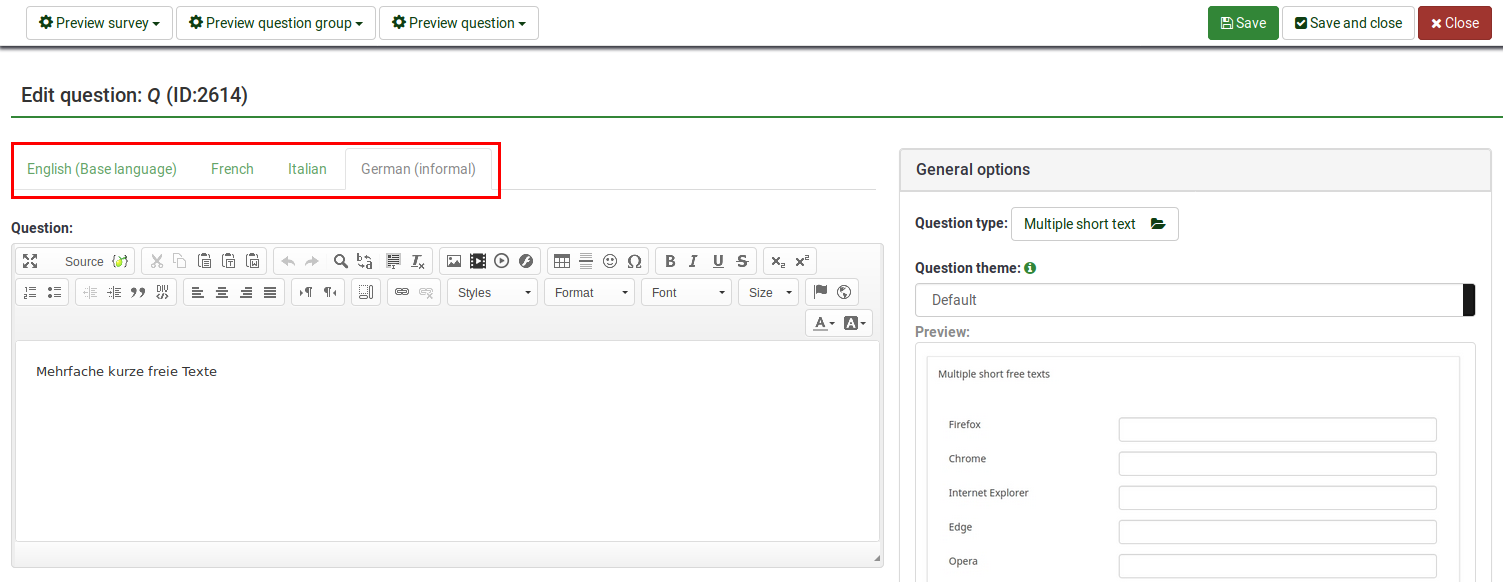
Click on any of them and start translating the question field.
The same type of "language bar" is located in many other places such as in the text elements and data policy settings panels, answer and subquestion text fields, and so on. However, translating fields using this method can get tricky if your survey is long and you wish not to miss anything. That is why we heavily recommend our users to use the quick translation tool. To access it, click on any survey-related setting (such as "Overview") -> Tools -> Quick-translation
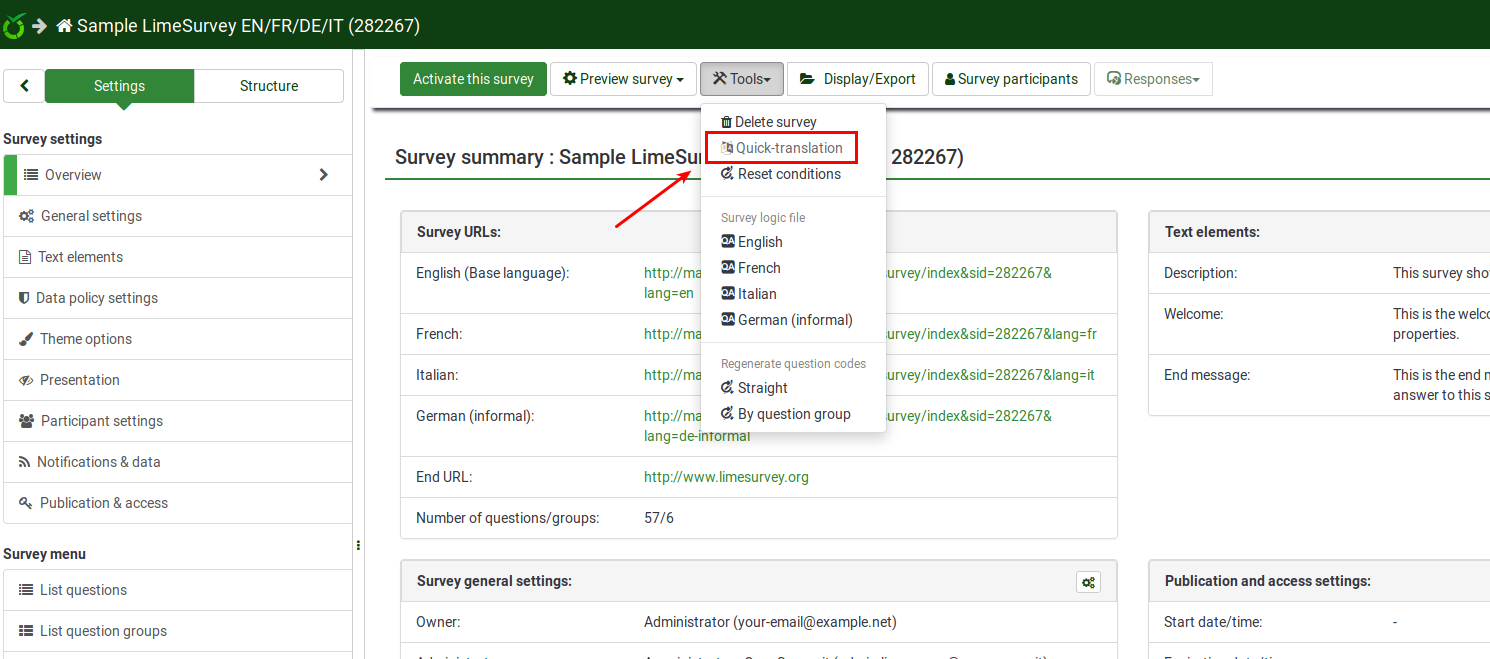
Quick-translation tool
The quick-translation tool has been specifically designed for those that work with multilingual surveys. Once accessed, the following panel will be loaded:
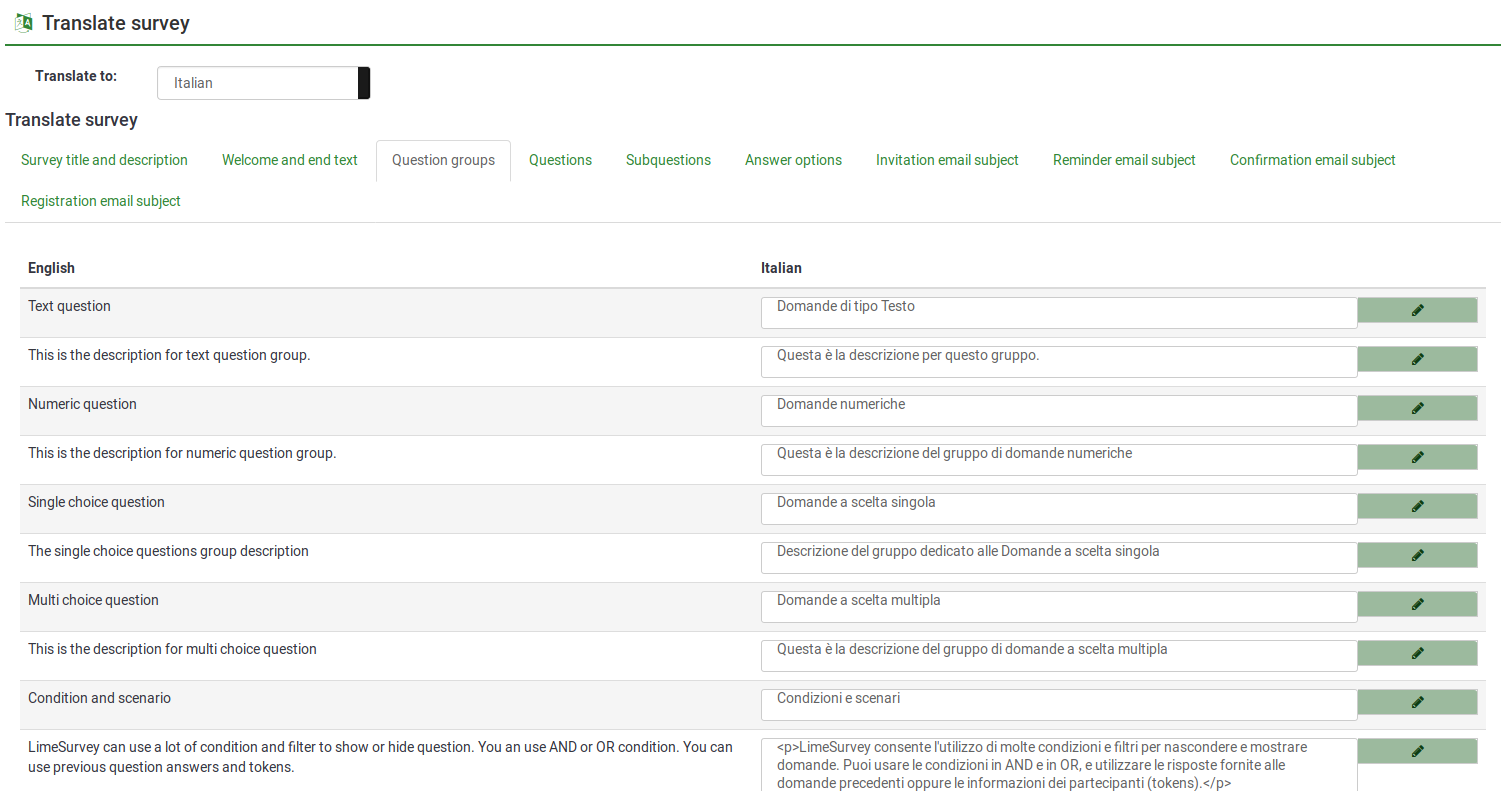
The first option, translate to, gives you the possibility to select the language you wish to translate into from your base language.
The next options refer to the translation of your survey content. They refer to:
- Survey title and description
- Welcome and end texts
- Question groups
- Questions
- Subquestions
- Answer options
- Invitation email subject
- Reminder email subject
- Confirmation email subject
- Registration email subject
Once you are done translating these fields, do not forget to click on the "Save" button located in the upper right part of the panel.
Multilingual survey overview
To check your work, use the preview button. The welcome page will look like this:
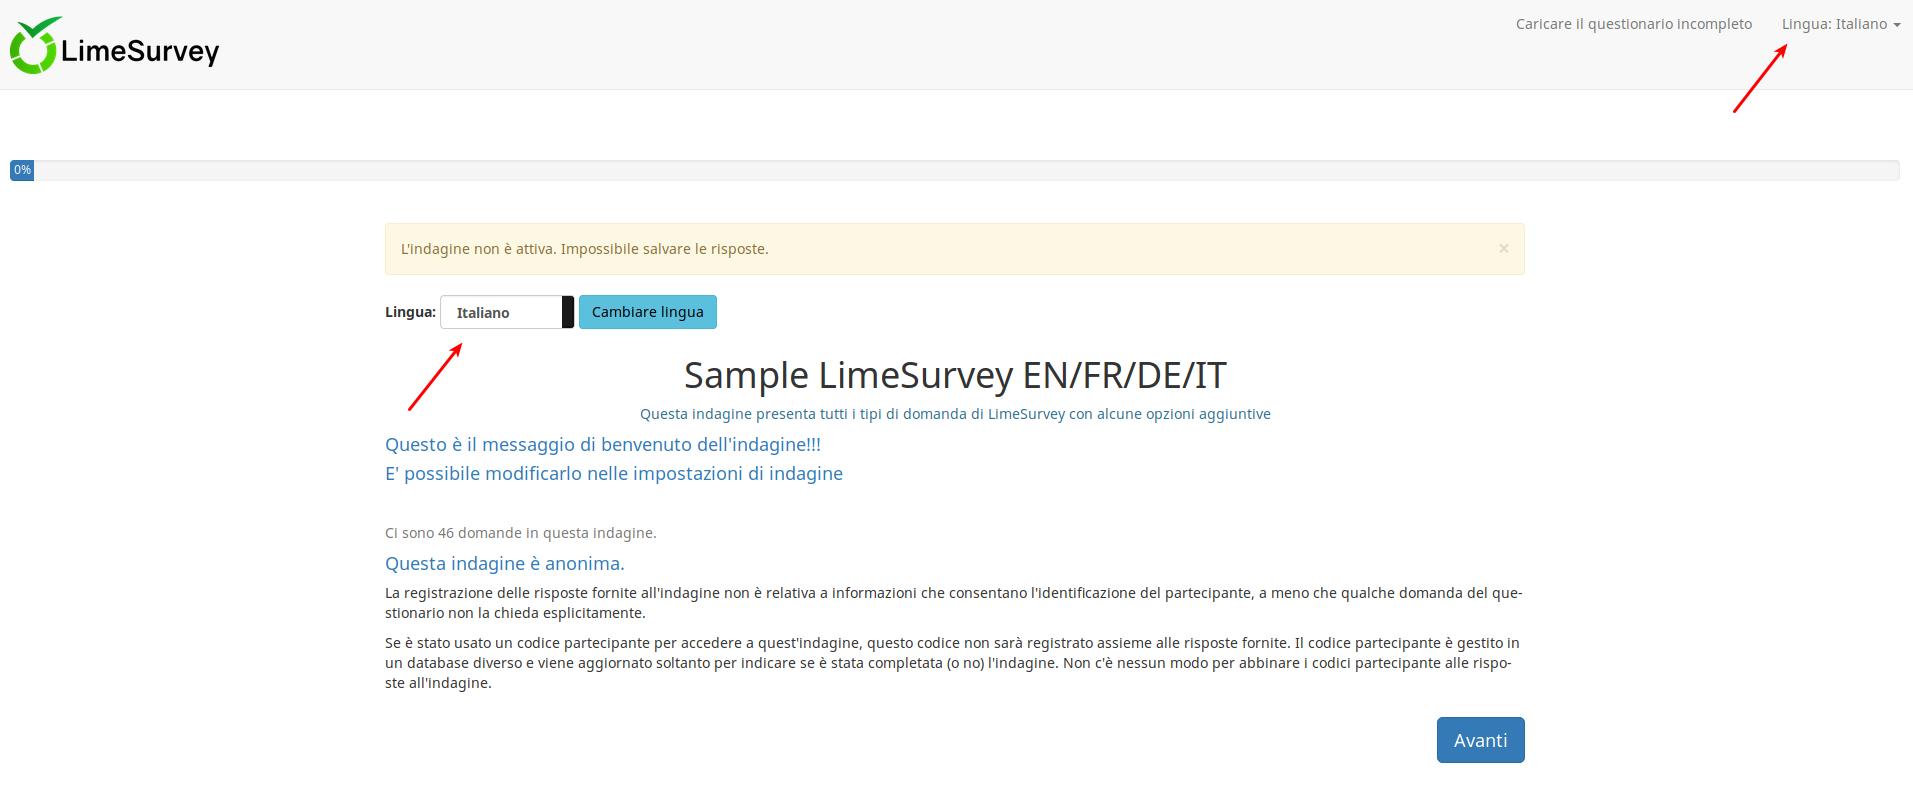
Two language switcher can be observed once the welcome page is loaded. LimeSurvey offers the possibility to your respondents to change the language of instructions even though you shared with them the corresponding link for a specific language. A language switcher will also be located on the top right-side of your survey.
In the case in which you wish to hide the two "language switcher" buttons, edit the theme of your survey. For more details, see the hints & tips wiki subsection.
Hints & tips
- If you wish to grant users translation permissions to access the quick-translation tool, check the following wiki subsection.
- The "Auto-translate" feature makes use of the Google translate web service for automatic translation of a survey. You must enter your Google Translate API Key under global settings to access this feature. Google currently charges $20 US per 1 million characters submitted for translation.
How to hide the language switcher from the welcome page
In the case in which you decide to launch a multilingual survey, you will observe on the welcome page a drop-down menu that permits your respondents to select the language in which they wish to fill in your survey:

However, in certain scenarios you wish to hide the respective option. There are many ways in which you can hide the language switcher. The "twig" way is displayed below.
Access Themes from the global Configuration menu:

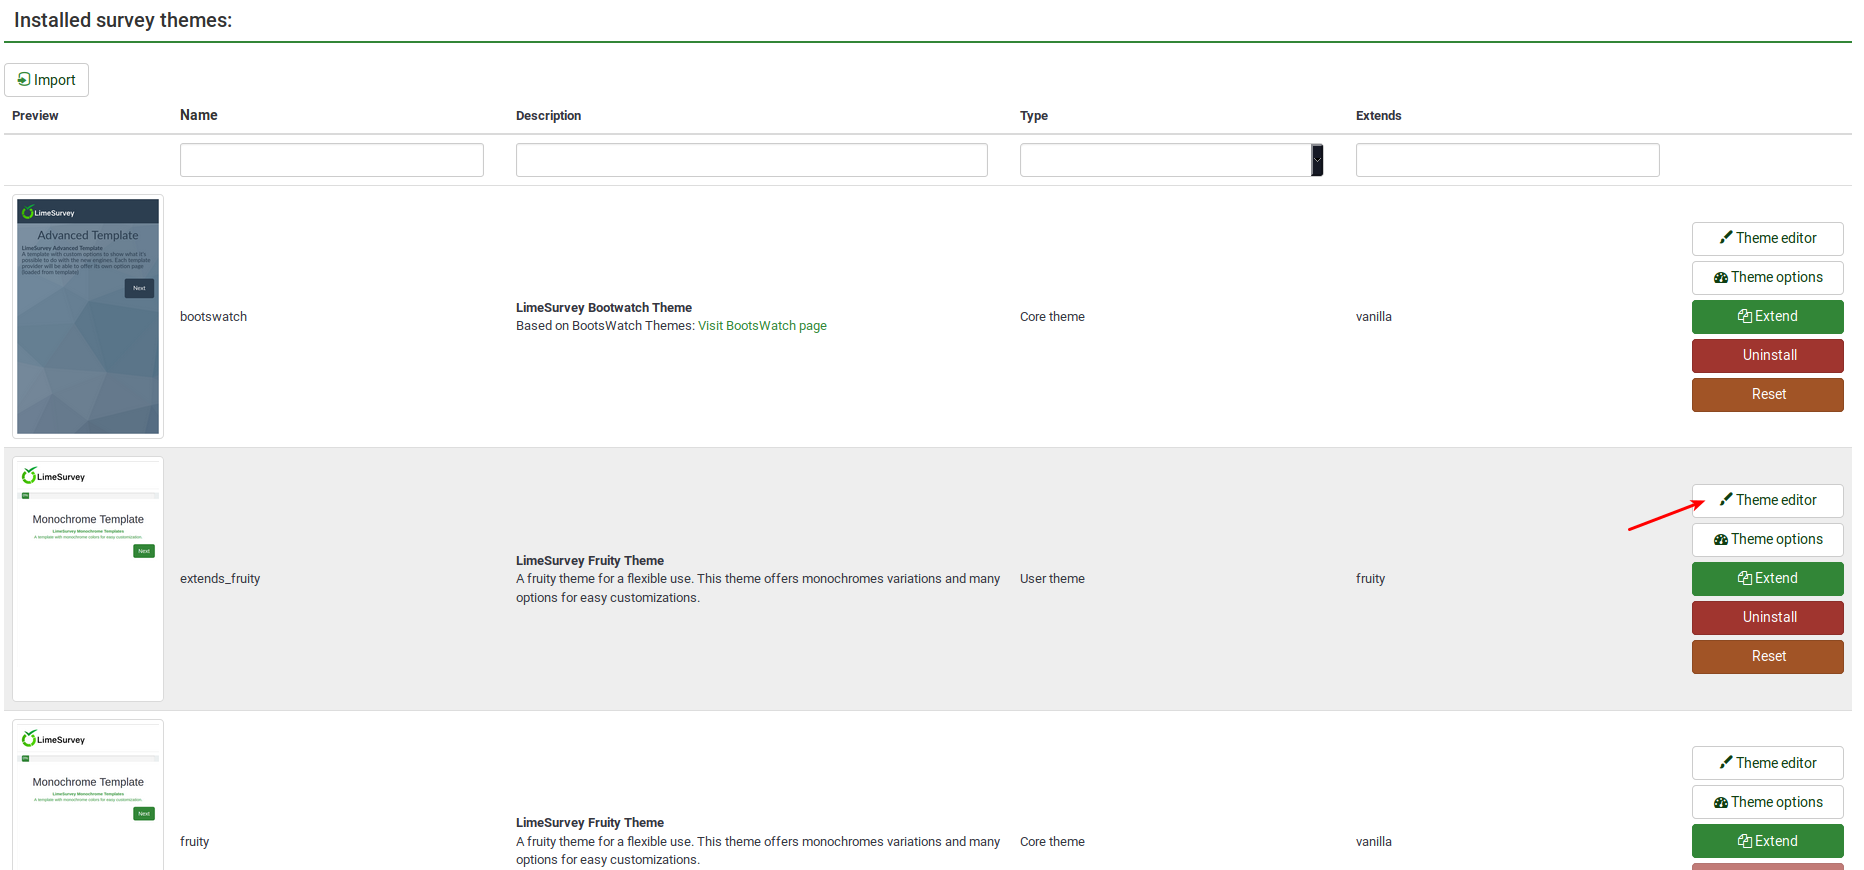
Click on the Theme editor button to edit the desired theme:
Look on the left side of the screen for the language_changer.twig file.
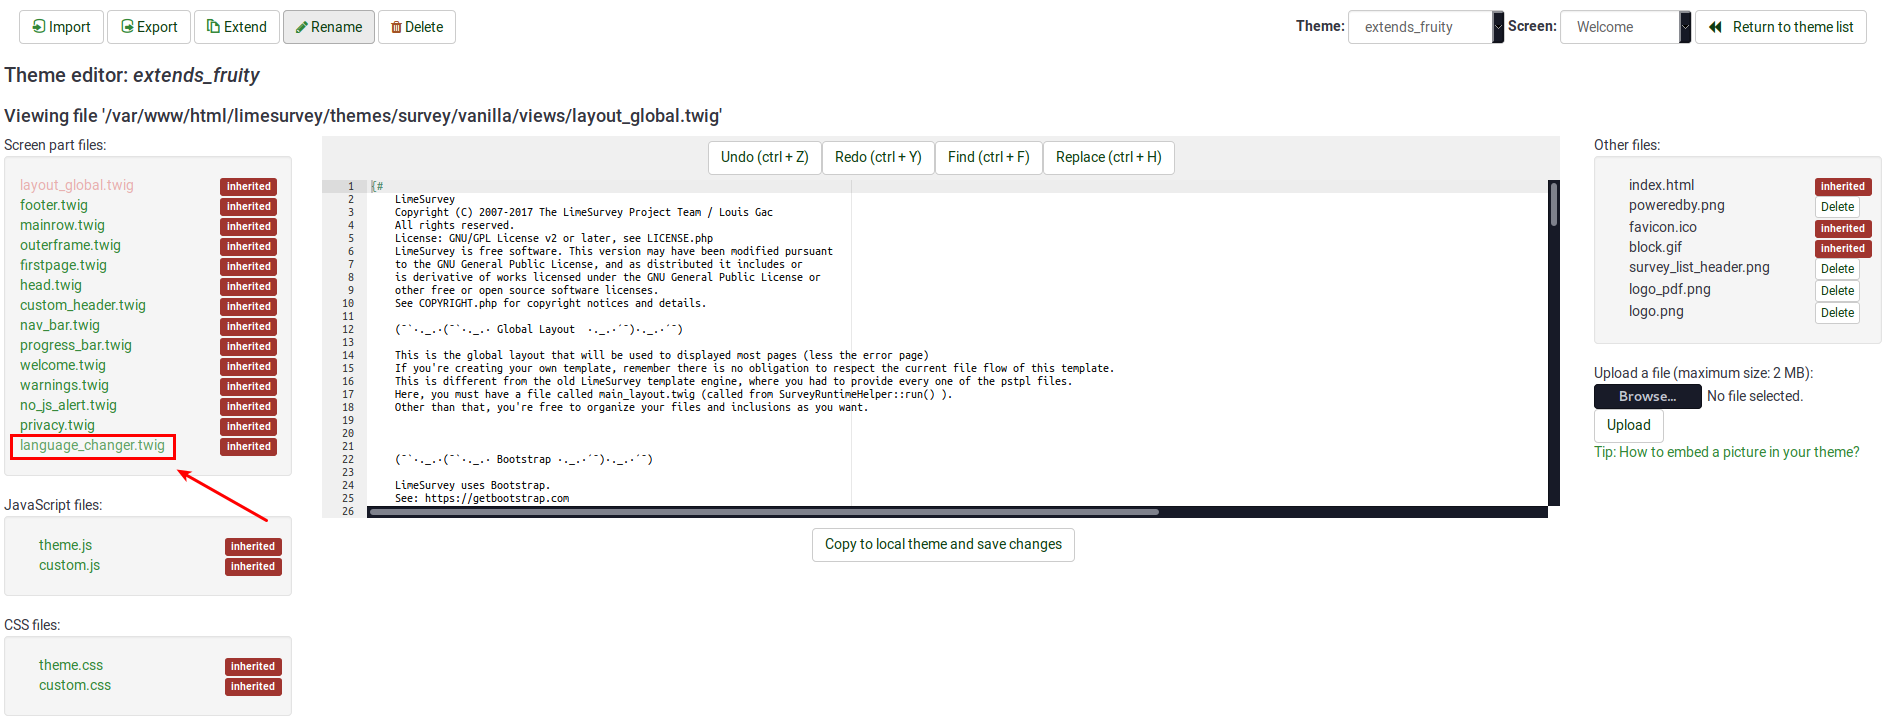
Go to the line that contains the following function:
{% if aSurveyInfo.alanguageChanger.show == true %}
Comment it out (replace "%" with "#") and copy the following line below it:
{% if false == true %}
The line should look like this in the end:

Click on "Copy to local theme and save changes".
Access your survey and select the edited theme from the general settings panel. Now, the welcome page should look like this:

To hide the top language switcher, we will follow pretty much the same steps as described above. We just have to access the right twig file to edit it. Access again the theme you wish to change, and then go to Screen which is located in the upper-right part of the window and select Navigation from the dropdown list. Now, look on the left side of the window for "language_changer_top_menu.twig". Click on it and comment out:
{% if aSurveyInfo.alanguageChanger.show == true %}
Add the following line below it:
{% if false == true %}
No language switcher will be displayed on the right side of the screen:
