Theme editor/ja: Difference between revisions
From LimeSurvey Manual
(Updating to match new version of source page) |
No edit summary |
||
| (322 intermediate revisions by 4 users not shown) | |||
| Line 1: | Line 1: | ||
<languages /> | <languages /> | ||
==はじめに== | |||
LimeSurvey は、開発者がアンケートの外観のカスタマイズを効率的に行える、高度なテーマとスタイルのシステムを備えています。かつては「テンプレート」の用語を用いていましたが、LS3 で「テーマ」と置き換えました。「テーマ」は、アンケートのページスタイルを制御できます。アンケート管理者は、既定のテーマを選択することができ、また個々のアンケートにカスタマイズを加えることができます。「テーマ」では、アンケート管理者がプログラムの技術をもたなくとも、ようこそ画面にロゴを追加したり、背景色を変更したり、フォントを選択したりといったことが簡単にできる設定を用意しています。 | |||
LimeSurvey には、3 つのテーマが付属しています。これらの初期テーマは、LimeSurveyのインストールディレクトリ下の「themes/survey/」ディレクトリーにあります。さらに個々のテーマごとにディレクトリーが分かれています。テーマのメインディレクトリーには、XML 形式の設定ファイル、テーマを構成する .twig ファイルを収めた「views 」、「css」、「scripts」、.jpg や .png を収めた「images」、その他、多くのディレクトリーが入っています。 | |||
LimeSurvey 2.50 以降、テーマエンジンは CSS フレームワークとして、[http://getbootstrap.com/docs/3.3/ Bootstrap 3] を使用しています。Bootstrap 3 は標準的なフレームワークなので、開発者はインターネット上で多くのドキュメント、チュートリアル、フォーラムでのやり取りを見つけることができます。 | |||
LimeSurvey 3 以降、テーマエンジンは、[https://twig.symfony.com Twig] を使用しており、テーマ開発者はアンケートレンダリングのロジックを安全かつ簡単に変えることができます。Twig はそれ以前のバージョンで使っていたキーワード置換システムに代わるものです。キーワードの HTML を生成するのに利用するロジックを、テーマのビューの中で利用できます。 | |||
Vanillaテーマのスニペット: | |||
<syntaxhighlight lang="twig"> | |||
<div class="{{ aSurveyInfo.class.answercontainer }} col-xs-12" {{ aSurveyInfo.attr.answercontainer }}> | |||
{# NOTE: If you want to customize the question rendering, use a question theme #} | |||
{{ aQuestion.answer | raw }} | |||
</div> | |||
</syntaxhighlight> | |||
テーマは、HTMLとTwigコードからできており、表示されるテキストの位置と形式、ページの同様の構造的特徴を定義します。テーマには他のファイルを参照したり取り込んだりすることが多くあります。ほとんどの場合、アンケートのすべてのページで共通に利用するフォントスタイル、色、背景や同様のパラメーターについて定義したカスケーディング・スタイル・シート(CSS)ファイルを参照します。スタイルシートは、HTMLコードに含まれる様々なオブジェクトタイプに関連づけられた'''クラス'''パラメーターを参照します。これにより、スタイルシートは、複数の場所に現れるテキストや他のオブジェクトをどのように表示させるかを規定できます。LimeSurveyでは質問タイプごとに固有のクラスがあり、それぞれの見た目を細かく規定することができます。ロゴや進捗バーで使用する画像ファイルもテーマファイルの中で参照されます。最後に、中括弧に挟まれた特別なキーワードは、対応する言語の翻訳として定義されたテキストに置き換えられます(例えば、それぞれの言語で書かれた'アンケートタイトル'、'質問文'など)。 | |||
新しいカスタムテーマを作成したら、LimeSurveyコミュニティーに共有し、他の人が使えるようにすることを検討してください。あなたの貢献によって、テーマ、アンケート、その他のアドオンが豊富になり、LimeSurveyがよりよいものになります。 | |||
テンプレートの共有については、[https://www.limesurvey.org/index.php?option=com_sobipro&sid=55:Templates&Itemid=729 LimeSurveyテンプレートリポジトリー]を参照してください。 | |||
==新しいテーマの作成== | |||
新しいテーマを作成する(既存のテーマを編集する)には、LimeSurveyで[[Manage users/ja#Set global permissions for a user|テーマ編集ユーザー権限]]を設定する必要があります。また、LimeSurveyをインストールしているOSのファイル操作権限も併せて設定します。 | |||
<div class="simplebox"><span style='color:red'>'''警告の注意:'''</span> テーマを変更した場合、LimeSurveyにすでに存在するアンケートに影響を及ぼす可能性があります。テーマは、経験とHTMLの知識を必要とする高度な機能です。</div> | |||
新しいテーマを作成するには、上部のツールバーの'''設定'''にある'''テーマエディター'''(下記参照)を通じて行うのが望ましいやり方です。ウェブインターフェースではなく、お気に入りのテキストエディターを使ってテーマファイルを編集したい人もいるでしょう。この場合でも、新しいテーマを作成するときはテーマエディターを使います。これにより、''LimeSurvey_web_root/upload/themes/survey/your_new_template''ディレクトリーに必要なすべてのファイルが配置され、基礎となるテーマが作成されます。この後、好みのテキストエディターを使ってテンプレートファイルを編集することができます。 | |||
<div class="simplebox">'''パーミッションに関する注意:''' unix/linuxシステムでは、ウェブサーバーを起動しているグループやユーザーがテーマファイルのオーナーになっています(いくつかのシステムでは"www"かもしれません)。したがって、ファイルを編集するときは適切なアクセス権があるか確認するとともに、保存するときは所有権を変えないように注意しましょう。このようにすれば、ウェブのテーマ編集インターフェースを使うことができます。</div><br /> | |||
LimeSurveyの'public'エレメントの多くはテーマによって調整することができます。次のセクションでは、テーマテンプレートについて簡単に説明します。 | |||
{{Note|テーマファイルは複雑です。HTMLのほか、CSS、Twig、JavaScriptについて理解している必要があります。}} | |||
=LimeSurveyテーマエディター= | |||
'''テーマエディター''': '''設定''' > '''テーマ''' > '''テーマエディター''' | |||
{{Alert|title=注意|text=テーマが正しく構成されていない場合、そのテーマを利用しているアンケートは、正常に動作しません。}} | |||
LimeSurveyテーマエディターは、テーマのコンテンツをオンラインで編集できます。テーマエディターを起動するには、'''設定'''メニューの'''テーマ'''リンクをクリックし、編集したいテーマの隣にある"テーマエディター"ボタンをクリックします。 | |||
[[File:Themes menu.png]] | |||
[[File:Theme editor button.png|''The button to access the theme editor for Bootswatch theme'']] | |||
テンプレートエディターページでは、編集/閲覧したいテンプレートを選択します。 | |||
[[File:Template-editor-2013-7-10_11_38_16.png|center]] | |||
下記のオプションが使用できます。 | |||
*'''作成''': 新しいテンプレートを作成します。ゼロから作るのでなければ、'default'がコピーされます。 | |||
*'''インポート''': ZIPファイルでテンプレートをインポートします。 | |||
*'''エクスポート''': 現在のテンプレートをZIPファイルにエクスポートします。 | |||
*'''コピー''': 現在のテンプレートを新しいテンプレートとしてコピーします。 | |||
*'''名前を変更''': テンプレートの名前を変更します。通常、コピーやインポートした後に使います。 | |||
*'''テンプレート''': LimeSurveyで利用できる状態にあるテンプレートをドロップダウンリストで表示します。 | |||
*'''画面''': It is a drop-down list which allows you to choose which particular survey page of that template you want to look at. | |||
*'''管理パネルに戻る''' | |||
== | ===テンプレートのインポート/エクスポート/コピー=== | ||
テンプレートを'''エクスポート'''するとき、テンプレートを構成するすべてのファイル(.pstplファイル、画像、cssファイルなど)がアーカイブされたZIPファイルが生成されます。エクスポートしたZIPファイルをインポート機能を使って他のLimeSurveyに'''インポート'''するか、他のLimeSurveyに手動でコピーして対応する[[Theme editor/ja#.E3.83.86.E3.83.B3.E3.83.97.E3.83.AC.E3.83.BC.E3.83.88.E3.83.95.E3.82.A1.E3.82.A4.E3.83.AB.E3.81.AE.E5.A0.B4.E6.89.80|テンプレートディレクトリー]]に展開します。 | |||
ただし、LimeSurveyのテンプレートエディターで、テンプレート のインポート/エクスポート/コピー機能を使うことを推奨します。 | |||
===ページ構成 / テンプレートの利用=== | |||
*'''ようこそページ:''' startpage.pstpl、welcome.pstpl、privacy.pstpl、navigator.pstpl、endpage.pstpl | |||
*'''質問ページ:''' startpage.pstpl、survey.pstpl、startgroup.pstpl、groupdescription.pstpl、question.pstpl、endgroup.pstpl、endpage.pstpl | |||
*'''最終ページ:''' startpage.pstpl、assessment.pstpl、completed.pstpl、endpage.pstpl | |||
===テンプレートファイル=== | |||
以下のテンプレートファイルは、アンケート作成時に使用され、新たに作成したテンプレートフォルダーになければなりません。 | |||
*''' | *'''startpage.pstpl:''' HTMLページのスタート部分を形成します。"<head>"タグで始まります("<html>"タグを含んではなりません)。この、標準的なHTMLページの'冒頭部分'はスクリプトで書かれています。startpage.pstplファイルには<body>タグを含めます。多くのブラウザーは、W3 HTML標準に厳格に従わないことも許容していますが、LimeSurveyスクリプトでは、JavaScriptエレメントを実行するため、<body>タグがなければなりません。startpage.pstplファイルに、多くの'キーワード'を入れる必要はありませんが、タイトルに{SURVEYNAME}を入れたいと思うでしょう。startpage.pstplファイルには、対応するendpage.pstplファイルで閉じるコードを入れることができます。例えば、このファイルでテーブルを開始し、endpage.pstplファイルで閉じるような場合です。LimeSurveyで使用されるあらゆるページはstartpage.pstplとendpage.pstplファイルに挟まれます。 | ||
*''' | *'''survey.pstpl:''' このテンプレートは、ほとんどのページで使用されるもので、アンケートの名前と説明を表示させます。このテンプレートは、対応する'閉じる'テンプレートはなく、このテンプレートファイルで開いたタグはすべてこのファイルの中で閉じなければなりません(例えば、閉じるものがなくなるので、テーブルを開いたままにしてはいけません)。 | ||
*''' | *'''welcome.pstpl:''' このテンプレートはようこそ画面で使用されます(全体が1ページで構成されるアンケート画面を含みます)。歓迎のテキストのほか、アンケートを始める前に提供すべき情報を表示できます。'survey.pstpl'と同様、対応する'閉じる'テンプレートはないので、このテンプレートファイルで開いたタグは同様に閉じなければなりません。 | ||
*''' | *'''startgroup.pstpl:''' このテンプレートは、グループの質問をくるむものです。このファイルで開いたタグを閉じることができる'endgroup.pstpl'テンプレートがあるので、この中でテーブルを開くことができます。 | ||
*'''groupdescription.pstpl:''' このテンプレートファイルは、グループの説明を表示するために使用します。アンケート設定('''プレゼンテーション'''タブの''表示とナビゲーション設定''からアクセス)から、グループの説明を表示するかどうかを設定します。表示しない設定の場合、このファイルは無視されます。 | |||
*'''question.pstpl:''' このファイルは、アンケートの質問、回答、ヘルプテキストから構成されます。"グループごと"と"一括"型のアンケートでは、このテンプレートは質問ごとに繰り返されます。対応する'閉じる'ファイルがないので、すべてのタグを閉じる必要があります。 | |||
*'''question_start.pstpl:''' このファイルには、質問の初めに表示される個々のエレメントが含まれます。{QUESTION}キーワードによって、'question.pstpl'ファイルに取り込まれます。これは、テンプレートデザイナーが質問のレイアウトをもっとコントロールしたい場合に使用します。このテンプレートは通常のテンプレートシステムの外にあり、'''LimeSurvey 1.87以降置き換えられています'''。このテンプレートのキーワードは、question.pstplで直接利用できます。 | |||
*'''completed.pstpl:''' このページは、アンケートの回答が保存され、アンケートが終了したときに、最終ページとして表示されます。アンケート設計時に設定した"転送リンク"を表示する場合に使用します。 | |||
*'''endgroup.pstpl:''' このファイルはグループを閉じるもので、startgroup.pstplファイルで開いたすべてのタグを閉じます。 | |||
*'''navigator.pstpl:''' このファイルには、アンケートをナビゲートするための"次へ"、"前へ"、"最終"、"送信"、"保存"、"クリア"ボタンが含まれます。最終ページ以外のすべてのページで使用されます。 | |||
*'''printanswers.pstpl:''' このファイルには、アンケートの印刷バージョンで必要なHTMLラッパーが含まれます。 | |||
*'''print_group.pstpl:''' このファイルはstartgroup.pstplとendgroup.pstplファイルと同様で、印刷バージョンで使われます。 | |||
*'''print_question.pstpl:''' このファイルはquestion.pstplと同様で、印刷バージョンで使われます。 | |||
*'''print_survey.pstpl:''' このファイルはsurvey.pstplと同様で、印刷バージョンで使われます。 | |||
== | === CSSとJavascript=== | ||
template.css(CSS用)とtemplate.js(Javascript用)の二つは、テンプレートで必ず使われます。 | |||
*''' | *'''{TEMPLATECSS}:''' 既定のCSSであるtemplate.css(RTL言語ではtemplate-rtl.css)へのリンクに置き換えられます。 | ||
*'''{TEMPLATEJS}:''' 既定のJavascriptファイルであるtemplate.jsとLimeSurveyに必要なすべてのjsファイルへのリンクに置き換えられます。 | |||
*''' | |||
== | ===Bootstrapの利用=== | ||
LimeSurveyはBootstrap 3を組み込んでいるので、正しく記述されたBootstrapクラスによってテンプレートにスタイルを適用することができます。 | |||
詳細は、[https://getbootstrap.com Bootstrapドキュメント]を参照してください。 | |||
[https://github.com/flatlogic/awesome-bootstrap-checkbox Awesome-Bootstrap-Checkbox]プラグインも組み込まれています。これにより、Bootstrapのcolor-class(info、warning、dangerなど)と"-checkbox"や"-radio"で終わるクラスを使い、チェックボックスやラジオボタンを好きなデザインにすることができます。 | |||
=== | ====既定のCSS、Javascriptを置き換える==== | ||
特別なJavascript、CSSファイルを使用することができます。functionを置き換えたい場合は、カスケードシステムを使用します。Javascriptのfunctionでは、最後に読み込まれたものが使用されます。 | |||
== | ===その他のテンプレートファイル=== | ||
'''privacy.pstpl'''、'''invitationemail.pstpl'''、'''reminderemail.pstpl'''、'''confirmationemail.pstpl'''はLimeSurveyではもう使われておらず、既定値は言語ファイルに収録されています。メールメッセージはアンケートごとに編集することができるようになりました。 | |||
=== | ===標準ページ=== | ||
アンケート参加者がLimeSurveyのアプリケーションにアクセスするときに目にする標準ページが10個あります。それぞれ、アンケートの設定で指定した'''テンプレート'''の共通のファイルから構成されます。次の表はどのテンプレートファイルがそれぞれのページを構成するかを示したものです。 | |||
{| class="wikitable" | {| class="wikitable" | ||
! ''' | ! '''アンケートページ/'''<br />'''テンプレートファイル'''!!アンケートリスト<br />!!ようこそ!!質問!!完了!!すべてクリア!!登録!!読込み!!保存!!回答<br />印刷!!アンケート<br />印刷 | ||
|- | |- | ||
|SurveyList||align="center" | [[File:check.gif]]|| || || || || || || || || | |SurveyList||align="center" | [[File:check.gif]]|| || || || || || || || || | ||
| Line 177: | Line 173: | ||
|} | |} | ||
<span style='color:red'>'''*'''</span> | <span style='color:red'>'''*'''</span>注意: バージョン1.90+では、question.pstplとquestion_start.pstplが置き換えられています。古いカスタムテンプレートを使用している場合は、question.pstplの初めに次の行を追加します。<syntaxhighlight lang="php"><div {QUESTION_ESSENTIALS} class="{QUESTION_CLASS}{QUESTION_MAN_CLASS}{QUESTION_INPUT_ERROR_CLASS}"></syntaxhighlight>さらに、question.pstplの終わりに対応する閉じるタグを追加します。<syntaxhighlight lang="php"></div></syntaxhighlight> | ||
<span style='color:red'>'''*'''</span> | <span style='color:red'>'''*'''</span>注意: バージョン1.91以前では、LimeSurveyのjsファイルはテンプレートに含まれません。バージョン2では、jsファイルにリンクさせるため、'''テンプレートファイルのひとつに{TEMPLATEJS}を入れなければなりません'''。startpage.pstplかendpage.pstplに追加することができます。{TEMPLATEURL}/template.jsの行を削除し、パーソナルテンプレートを更新するため、{TEMPLATEJS}に置き換えなければなりません、 | ||
== | ===ファイルコントロールセクション=== | ||
左側の"ファイルコントロール"ウィンドウで、ページを編集するために使われるテンプレートファイルをクリックします。''画面パーツ''、JavaScript、CSSファイルがあります。そのファイルの中央のHTMLコードが"編集中"ウィンドウに表示されます。テンプレートが編集可能な場合(ディレクトリーに設定された権限による)、好きなように変更して保存することができます。 | |||
<center>[[File:File Control Section.png|center]]</center> | |||
"その他のファイル"ウィンドウでは、テンプレートディレクトリーにあるその他のファイルの一覧が表示されます。右側から'''テンプレートを作成するために必要な画像ファイル(画像、ロゴなど)やその他のファイルのアップロードや選択'''ができます。 | |||
それぞれの画像へのリンクを使わずに、{TEMPLATEURL}という文字列を使います。つまり、 | |||
== | <syntaxhighlight lang="html4strict"">img src='/limesurvey/templates/yourtemplate/files/mypicture.jpg'</syntaxhighlight> | ||
ではなく、次のようにします{{NewIn|2.50}}。 | |||
<syntaxhighlight lang="html4strict">img src='{TEMPLATEURL}files/mypicture.jpg'</syntaxhighlight> | |||
LimeSurveyのバージョン2.50以前では、次のようにします。 | |||
<syntaxhighlight lang="html4strict">img src='{TEMPLATEURL}mypicture.jpg'</syntaxhighlight> | |||
編集中のテンプレートページの"例"は、画面下部に表示されます。テンプレートエディタでテンプレートを削除することはできません。ディレクトリーにアクセスし、そこから手動でファイルを削除する必要があります。テンプレートの見た目をさらに評価するため、他の画面解像度を選択することもできます。 | |||
<div class="simplebox">'''注意:''' 同梱のテンプレートはテンプレートエディターで編集することはできません。編集する場合は、コピーを作成し、それを編集します。</div> | |||
===テンプレートファイルの場所=== | |||
LimeSurveyでは、他のpublicファイルが格納されているpublicディレクトリーに"/templates"ディレクトリーがあり、その中のテンプレートごとのサブディレクトリーに個々の'標準'テンプレートが格納されています。カスタマイズされたユーザーテンプレートは、''/upload/templates''ディレクトリーに格納されています。 | |||
テンプレートディレクトリーには、'''必ず'''"default"ディレクトリーがあります。このテンプレートは、既定として使われ、テンプレートフォルダーが見つからない場合の代理として使用されます。デフォルトでインストールされています。 | |||
次の構文を使用して、テンプレート管理領域にアップロードした画像ファイルを使用することができます。 | |||
<syntaxhighlight lang="php" | <syntaxhighlight lang="php">{TEMPLATEURL}filename.xyz</syntaxhighlight> | ||
==CSSによる質問のスタイリング== | |||
CSSによる質問のスタイリングは簡単になりました。それぞれの質問タイプには固有のクラスがあります。必須の質問は更に必須項目としてのクラスがあります。例えば、必須ではない質問では、 | |||
<syntaxhighlight lang="html4strict"><div id="question5" class="gender"> | |||
... | ... | ||
</div></syntaxhighlight> | </div></syntaxhighlight> | ||
となっていて、一方、必須の質問では、 | |||
<syntaxhighlight lang=" | <syntaxhighlight lang="html4strict"><div id="question5" class="gender mandatory"> | ||
... | ... | ||
</div></syntaxhighlight> | </div></syntaxhighlight> | ||
となります。必須の質問でユーザーが回答しなかったり、質問で検証が設定されている場合、 | |||
<syntaxhighlight lang=" | <syntaxhighlight lang="html4strict"><div id="question5" class="gender mandatory input-error"> | ||
... | ... | ||
</div></syntaxhighlight> | </div></syntaxhighlight> | ||
となります。質問に検証が適用され、回答が正しくない場合、次のようになります。 | |||
<syntaxhighlight lang=" | <syntaxhighlight lang="html4strict"><div id="question6" class="text-short input-error"> | ||
... | ... | ||
</div></syntaxhighlight> | </div></syntaxhighlight> | ||
== | ==質問パート全体のクラス== | ||
このクラスはすべての質問タイプで使用されます。質問タイプにより、一つまたは複数のクラスが使われます。 | |||
{| class="wikitable alternance" | {| class="wikitable alternance" | ||
|+ | |+ グローバルクラス | ||
|- | |- | ||
! scope="col" | | ! scope="col" | クラス名 | ||
! scope="col" | | ! scope="col" | 適用箇所 | ||
! scope="col" | | ! scope="col" | 質問タイプ | ||
! scope="col" | | ! scope="col" | 例 | ||
! scope="col" | | ! scope="col" | 備考 | ||
|- | |- | ||
! scope="row" | .question | ! scope="row" | .question {{ObsoleteIn|3.0}} | ||
| | | 質問ブロック全体 | ||
| | | すべての質問タイプ | ||
|<p class="question">, <ul class="question">, <table class="question"> | |<p class="question">, <ul class="question">, <table class="question"> | ||
| | |||
|- | |||
! scope="row" | .ls-answers {{NewIn/ja|3.0}} | |||
| 質問ブロック全体 | |||
| すべての質問タイプ | |||
|<div class="ls-answers ">, <ul class="ls-answers ">, <table class="ls-answers"> | |||
| | | | ||
|- | |- | ||
! scope="row" | .subquestions-list | ! scope="row" | .subquestions-list | ||
| | | サブ質問のリスト | ||
| | | 複数選択質問、配列質問タイプ | ||
| <ul class="subquestions-list">, <table class="subquestions-list"> | | <ul class="subquestions-list">, <table class="subquestions-list"> | ||
| .questions- | | .questions-listも使われます。 | ||
|- | |- | ||
! scope="row" | .answers-list | ! scope="row" | .answers-list | ||
| | | 回答リスト | ||
| | | 択一質問、配列質問タイプ、複数入力テキスト質問 | ||
| <ul class="answers-list">, <table class="answers-list"> | | <ul class="answers-list">, <table class="answers-list"> | ||
| | | | ||
|- | |- | ||
! scope="row" | .answer-item | ! scope="row" | .answer-item | ||
| | | 回答部分: 単一の回答 | ||
| | | 択一質問、配列質問タイプ、複数入力テキスト質問 | ||
| <li class="answer-item">, <td class="answer-item"> | | <li class="answer-item">, <td class="answer-item"> | ||
| | | | ||
|- | |- | ||
! scope="row" | .noanswer-item | ! scope="row" | .noanswer-item | ||
| | | 回答なしの回答部分 | ||
| | | 択一質問、配列質問タイプ | ||
| <li class="noanswer-item">, <td class="noanswer-item"> | | <li class="noanswer-item">, <td class="noanswer-item"> | ||
| | | 回答なしも回答であり、noanswer-itemとanswer-itemの2つのクラスを持ちます。 | ||
|- | |- | ||
! scope="row" | .question-item | ! scope="row" | .question-item | ||
| | | 回答部分: 単一の回答 | ||
| | | 複数テキスト質問、配列質問タイプ | ||
| <li class="question-item">, <tr class="question-item"> | | <li class="question-item">, <tr class="question-item"> | ||
| | | 質問でもある回答があります。class="question-item answer-item"となるものが多数あります。 | ||
|- | |- | ||
! scope="row" | .checkbox-list | ! scope="row" | .checkbox-list | ||
| | | チェックボックスのリスト | ||
| | | 複数選択質問、数値の配列(チェックボックス)質問タイプ | ||
| <ul class="checkbox-list">, <tr class="checkbox-list"> | | <ul class="checkbox-list">, <tr class="checkbox-list"> | ||
| | | コメントつきチェックボックス: class="checkbox-list text-list"のように、multi-listクラスを使用する質問タイプがあります。 | ||
|- | |||
! scope="row" | .checkbox-array {{NewIn/ja|3.0}} | |||
| チェックボックス配列 | |||
| チェックボックスオプションを使用した配列(数字) | |||
| <table class="checkbox-list"> | |||
| | |||
|- | |- | ||
! scope="row" | .checkbox-item | ! scope="row" | .checkbox-item | ||
| | | チェックボックスの回答部分 | ||
| | | 複数選択質問、チェックボックスの配列(数字)質問タイプ | ||
| <li class="checkbox-item">, <td class="checkbox-item"> | | <li class="checkbox-item">, <td class="checkbox-item"> | ||
| | | | ||
|- | |- | ||
! scope="row" | .radio-list | ! scope="row" | .radio-list | ||
| | | ラジオボタンのリスト | ||
| | | 択一質問、配列質問タイプ(各列) | ||
| <ul class="radio-list">, <tr class="radio-list"> | | <ul class="radio-list">, <tr class="radio-list"> | ||
| | |||
|- | |||
! scope="row" | .radio-array {{NewIn|3.0}} | |||
| ラジオボタンのリスト | |||
| 配列質問タイプ | |||
| <table class="radio-array"> | |||
| | | | ||
|- | |- | ||
! scope="row" | .radio-item | ! scope="row" | .radio-item | ||
| | | ラジオボタンの回答部分 | ||
| | | 択一質問、配列質問タイプ | ||
| <li class="radio-item">, <td class="radio-item"> | | <li class="radio-item">, <td class="radio-item"> | ||
| | | | ||
|- | |- | ||
! scope="row" | .text-list | ! scope="row" | .text-list | ||
| | | テキスト入力のリスト | ||
| | | 複数テキスト質問タイプ、配列(テキスト) | ||
| <ul class="text-list">, <tr class="text-list"> | | <ul class="text-list">, <tr class="text-list"> | ||
| | | | ||
|- | |- | ||
! scope="row" | .text-item | ! scope="row" | .text-item | ||
| | | テキスト入力の回答部分 | ||
| | | 複数テキスト質問タイプ、配列(テキスト) | ||
| <li class="text-item">, <td class="text-item"> | | <li class="text-item">, <td class="text-item"> | ||
| | | | ||
|- | |- | ||
! scope="row" | .numeric-list | ! scope="row" | .numeric-list | ||
| | | 数字入力に限定されたテキスト入力のリスト | ||
| | | 数値入力(複数)質問タイプ、配列(数字) | ||
| <ul class="text-list numeric-list">, <tr class="text-list numeric-list"> | |||
| | |||
|- | |||
! scope="row" | .number-list | |||
| 数字入力に限定されたテキスト入力のリスト(各列) | |||
| 数値入力(複数)質問タイプ、配列(数字) | |||
| <ul class="text-list numeric-list">, <tr class="text-list numeric-list"> | | <ul class="text-list numeric-list">, <tr class="text-list numeric-list"> | ||
| | | | ||
|- | |- | ||
! scope="row" | . | ! scope="row" | .number-array {{NewIn/ja|3.0}} | ||
| | | 数字入力の回答部分 | ||
| | | 配列(数字) | ||
| < | | <table class="number-array"> | ||
| | | | ||
|- | |- | ||
! scope="row" | .select-list | ! scope="row" | .select-list {{ObsoleteIn|2.50}} | ||
| | | ドロップダウンリスト | ||
| | | 配列(数字)、二元スケール配列(ドロップダウン) | ||
| <table class="select-list"> | | <table class="select-list"> | ||
| | | | ||
|- | |- | ||
! scope="row" | .select-item | ! scope="row" | .dropdown-list {{NewIn/ja|2.50}} | ||
| | | ドロップダウンリスト | ||
| | | 配列(数字)、二元スケール配列(ドロップダウン)(各列) | ||
| <table class="dropdown-list"> | |||
| | |||
|- | |||
! scope="row" | .dropdown-array {{NewIn/ja|3.0}} | |||
| ドロップダウンの配列 | |||
| 配列(数字)、二元スケール配列(ドロップダウン) | |||
| <table class="dropdown-array"> | |||
| | |||
|- | |||
! scope="row" | .select-item {{ObsoleteIn|2.50}} | |||
| ドロップダウンの回答部分 | |||
| 配列(数字)、二元スケール配列(ドロップダウン)、ドロップダウンによる択一質問 | |||
| <p class="select-item">, <td class="select-item"> | | <p class="select-item">, <td class="select-item"> | ||
| | | | ||
|- | |- | ||
! scope="row" | .hide | ! scope="row" | .dropdown-item {{NewIn/ja|2.50}} | ||
| | | ドロップダウンの回答部分 | ||
| | | 配列(数字)、二元スケール配列(ドロップダウン)、ドロップダウンによる択一質問 | ||
| <p class="dropdown-item">, <td class="dropdown-item"> | |||
| | |||
|- | |||
! scope="row" | .hide {{ObsoleteIn|3.0}} | |||
| アクセシビリティ対応: CSSにより非表示となりますが、スクリーンリーダーが読み上げます。2.50以降は、bootstrapのsr-onlyを使用できます。 | |||
| 自由回答(短い) | |||
| <label class="hide"> | | <label class="hide"> | ||
| | | 他の目的で利用します。 | ||
|- | |||
! scope="row" | .ls-js-hidden {{NewIn/ja|3.0}} | |||
| JavaScriptが有効な場合に非表示となる部分で使用 | |||
| 例:ボタン | |||
| <div class="ls-js-hidden"> | |||
| LimeSurveyのコアで使用されていますが、テンプレートの中でも使用できます。 | |||
|- | |||
! scope="row" | .ls-js-hidden-sr {{NewIn/ja|3.0}} | |||
| アクセシビリティ対応: jsが有効な場合に非表示となりますが、スクリーンリーダーを利用する場合は常に表示されます。 | |||
| 例:ボタン | |||
| <a class="ls-js-hidden-sr"> | |||
| ボタン | |||
|- | |||
! scope="row" | .ls-no-js-hidden {{NewIn/ja|3.0}} | |||
| JavaScriptが有効でない場合に非表示となる部分で使用 | |||
| リンク | |||
| <a class="ls-no-js-hidden"> | |||
| LimeSurveyのコアで、JavaScriptが有効でない場合に非表示のリンクで使用されています。 | |||
|- | |||
! scope="row" | .ls-label-xs-visibility {{NewIn/ja|3.0}} | |||
| 大画面で非表示とし、小さい画面(テーブルなし)やスクリーンリーダーで表示されるラベル | |||
| ラベル | |||
| <label class="ls-no-js-hidden"> | |||
| 配列質問タイプのテーブル内のラベルで使用します。 | |||
|- | |- | ||
! scope="row" | . | ! scope="row" | .ls-input-group-extra {{NewIn/ja|3.0}} | ||
| | | bootstrapのinput-group-addonと同じ利用方法ですが、枠線と背景がありません。 | ||
| | | 右側の接尾辞 | ||
| < | | <div class="ls-input-group-extra"> | ||
| | | 接尾辞・接頭辞で使用(グローバル) | ||
|- | |- | ||
! scope="row" | .checkbox | ! scope="row" | .checkbox {{ObsoleteIn|3.0}} | ||
| input[type=checkbox] | | input[type=checkbox] | ||
| | | チェックボックスを利用する質問タイプ | ||
| <input type="checkbox" class="checkbox"> | | <input type="checkbox" class="checkbox"> | ||
| | | 最新のブラウザーでは必要ありませんが、古いブラウザーでは必要となります。 | ||
|- | |- | ||
! scope="row" | .radio | ! scope="row" | .radio {{ObsoleteIn|3.0}} | ||
| input[type=radio] | | input[type=radio] | ||
| | | 羅時をボタンを利用する質問タイプ | ||
| <input type="radio" class="radio"> | | <input type="radio" class="radio"> | ||
| | | 最新のブラウザーでは必要ありませんが、古いブラウザーでは必要となります。 | ||
|- | |- | ||
! scope="row" | .text | ! scope="row" | .text | ||
| input[type=text] | | input[type=text] | ||
| | | テキスト入力を利用する質問 | ||
| <textarea class="text"> | | <textarea class="text"> | ||
| | | | ||
|- | |- | ||
! scope="row" | .answertext | ! scope="row" | .answertext | ||
| | | 配列質問タイプ | ||
| | | 配列質問タイプの回答部分 | ||
| <th class="answertext"> | | <th class="answertext"> | ||
| | | | ||
|- | |- | ||
! scope="row" | .col-answers | ! scope="row" | .col-answers | ||
| | | 配列質問タイプ | ||
| | | 回答の列 | ||
| <col class="col-answers"> | | <col class="col-answers"> | ||
| | | | ||
|- | |- | ||
! scope="row" | .odd .even | ! scope="row" | .odd .even {{ObsoleteIn|2.50}} | ||
| | | 配列質問タイプ | ||
| | | 一列おき | ||
| <col class="odd"> | | <col class="odd"> | ||
| | | | ||
|- | |- | ||
! scope="row" | . | ! scope="row" | .array1 .array2 {{ObsoleteIn|3.0}} | ||
| | | 配列質問タイプ | ||
| | | 一行おき | ||
| < | | <tr class="array1"> | ||
| | | | ||
|- | |- | ||
! scope="row" | . | ! scope="row" | .ls-odd .ls-even {{NewIn/ja|3.0}} | ||
| | | 配列質問タイプ | ||
| | | サブ質問、Y軸の一行おき | ||
| <tr class=" | | <tr class="ls-odd"> | ||
| | | | ||
|} | |} | ||
''' | ==== 質問部分のクラスの例==== | ||
<source lang="html4strict"> | |||
'''自由回答(短い)質問タイプ:'''<source lang="html4strict"> | |||
<p class="question answer-item text-item "> | <p class="question answer-item text-item "> | ||
<label class="hide label" for="answerSGQA">Answer</label><input type="text" value="" id="answerSGQA" name="SGQA" size="50" class="text empty"> | <label class="hide label" for="answerSGQA">Answer</label><input type="text" value="" id="answerSGQA" name="SGQA" size="50" class="text empty"> | ||
</p> | </p> | ||
</source> | </source> | ||
'''自由回答(短い・複数)質問タイプ'''<source lang="html4strict"> | |||
''' | |||
<source lang="html4strict"> | |||
<ul class="subquestions-list questions-list text-list"> | <ul class="subquestions-list questions-list text-list"> | ||
<li class="question-item answer-item text-item" id="javatbdSGQA"> | <li class="question-item answer-item text-item" id="javatbdSGQA"> | ||
| Line 420: | Line 487: | ||
</ul> | </ul> | ||
</source> | </source> | ||
'''配列質問タイプ'''<source lang="html4strict"> | |||
''' | |||
<source lang="html4strict"> | |||
<table class="question subquestion-list questions-list "> | <table class="question subquestion-list questions-list "> | ||
<caption class="hide read">Some explanation for accessibility.</caption> | <caption class="hide read">Some explanation for accessibility.</caption> | ||
| Line 453: | Line 518: | ||
</table> | </table> | ||
</source> | </source> | ||
== | ===質問のクラス一覧=== | ||
{| | {| | ||
|''' | |'''質問タイプ'''||'''質問クラス'''||'''質問ID''' | ||
|- | |- | ||
| | |5点尺度||.choice-5-pt-radio||5 | ||
|- | |- | ||
| | |配列(10点尺度)||.array-10-pt||B | ||
|- | |- | ||
| | |配列(5点尺度)||.array-5-pt||A | ||
|- | |- | ||
| | |二元スケール配列||.array-flexible-duel-scale ||1 | ||
|- | |- | ||
| | |配列(増加/同じ/減少)||.array-increase-same-decrease||E | ||
|- | |- | ||
| | |配列(数字)||.array-multi-flexi ||: | ||
|- | |- | ||
| | |配列(テキスト)||.array-multi-flexi-text||; | ||
|- | |- | ||
| | |配列(はい/いいえ/どちらでもない)||.array-yes-uncertain-no||C | ||
|- | |- | ||
| | |配列||.array-flexible-row ||F | ||
|- | |- | ||
| | |軸を反転した配列||.array-flexible-column||H | ||
|- | |- | ||
| | |式||.boilerplate||X | ||
|- | |- | ||
| | |日付||.date||D | ||
|- | |- | ||
| | |性別||.gender||G | ||
|- | |- | ||
| | |自由回答(非常に長い)||.text-huge||U | ||
|- | |- | ||
| | |言語の変更||.language||I | ||
|- | |- | ||
| | |リスト(ドロップダウン)||.list-dropdown||! | ||
|- | |- | ||
| | |リスト(ラジオボタン)||.list-radio||L | ||
|- | |- | ||
| | |リスト(コメントつき)||.list-with-comment||O | ||
|- | |- | ||
| | |自由回答(長い)||.text-long||T | ||
|- | |- | ||
| | |数値入力(複数)||.numeric-multi||K | ||
|- | |- | ||
| | |複数選択||.multiple-opt||M | ||
|- | |- | ||
| | |コメントつき複数選択||.multiple-opt-comments||P | ||
|- | |- | ||
| | |自由回答(短い・複数)||.multiple-short-txt||Q | ||
|- | |- | ||
| | |数字入力||.numeric||N | ||
|- | |- | ||
| | |順位付け||.ranking||R | ||
|- | |- | ||
| | |自由回答(短い)||.text-short||S | ||
|- | |- | ||
| | |はい/いいえ||.yes-no||Y | ||
|- | |- | ||
| | | | ||
|} | |} | ||
== | ===検証のクラス一覧=== | ||
<div class="simplebox"> | <div class="simplebox">注意: 1.92以前で使用できるクラスは、.mandatoryと.input-errorのみです。</div> | ||
これらは、ヘルプと検証TIPメッセージに適用され、タイプごとにスタイリングできます。 | |||
既定では、.hide-tipと.input-errorは連動しており、検証TIPを非表示にしておくことができます。検証エラーが発生するとTIPが現れ、エラーが解消されると再び非表示になります。 | |||
これらは、ポップアップの警告メッセージの必要性をなくすためにデザインされています。代わりに、必要に応じてTIPが表示され、回答が検証式に適合したかどうかを表示色で示します。 | |||
さらに、ページを開いたばかりの未回答状態で検証条件を満たさない場合は、検証条件を満たしていない旨のTIPはやさしい色で表示される一方、回答を送信して検証エラーが発生した場合は注意を促す色付けで表示されます。 | |||
{| | {| | ||
|''' | |'''目的'''||'''CSSクラス'''||'''説明''' | ||
|- | |- | ||
| | |回答必須||.mandatory||質問への回答必須 | ||
|- | |- | ||
| | |入力エラー||.input-error||少なくとも一つの検証エラーがある | ||
|- | |- | ||
| | |TIP非表示||.hide-tip||hide_tipオプションを使用した場合に追加される | ||
|- | |- | ||
| | |数字回答||.em_num_answers||min_answers、max_answers向け | ||
|- | |- | ||
| | |値の範囲||.em_value_range||min/max_num_value_n、multiflexible_min/max向け | ||
|- | |- | ||
| | |合計の範囲||.em_sum_range||min/max/equals_num_value向け | ||
|- | |- | ||
| | |正規表現による検証||.em_regex_validation||正規表現による検証向け | ||
|- | |- | ||
| | |質問レベルの検証機能||.em_q_fn_validation||em_validation_qオプション向け | ||
|- | |- | ||
| | |サブ質問レベルの検証機能||.em_sq_fn_validation||em_validation_sqオプション向け | ||
|- | |- | ||
| | |「その他」コメント必須||.em_other_comment_mandatory||other_comment_mandatoryオプション向け("その他"が選択されているがコメントがない場合に表示される) | ||
|- | |- | ||
| | | | ||
|} | |} | ||
== | ===カスタムテンプレートにスタイルをインポートする=== | ||
カスタマイズされた質問のスタイルは、それぞれのテンプレートのCSSファイルの最後のほうにあり、次の記述から始まります。<syntaxhighlight lang="php">/* --------------------------- START: Question styles ------------------------------ */</syntaxhighlight> | |||
カスタムテンプレートの他のスタイルに影響を与えずにスタイルを適用する場合は、''templates/default/template.css''(テーブルベースのレイアウトの場合)と''/templates/limespired/template.css''(CSSベースのレイアウトの場合)の中にある上記の行の後のすべての記述を独自のスタイルシートにコピーしなければなりません。 | |||
==Internet | ===Internet Explorer向けの条件付きスタイルシート=== | ||
IE6・IE7とその他のブラウザーの間のレンダリングには著しい違いがあるため、各テンプレートにはIE向けの特別な条件付きスタイルシートがあります。 | |||
< | <source lang="html4strict"> | ||
<!--[ | <!--[IE(IEむけ)]> | ||
<link rel="stylesheet" type="text/css" href="{TEMPLATEURL}IE_fix_all-versions.css" /> | <link rel="stylesheet" type="text/css" href="{TEMPLATEURL}IE_fix_all-versions.css" /> | ||
<![endif]--> | <![endif]--> | ||
<!--[if lt IE | <!--[if lt IE 7(IE 7以前向け)]> | ||
<link rel="stylesheet" type="text/css" href="{TEMPLATEURL}IE_fix_older-than-7.css" /> | <link rel="stylesheet" type="text/css" href="{TEMPLATEURL}IE_fix_older-than-7.css" /> | ||
<![endif]--> | <![endif]--> | ||
<!--[if IE | <!--[if IE 8(IE 8向け)]> | ||
<link rel="stylesheet" type="text/css" href="{TEMPLATEURL}ie_fix_8.css" /> | <link rel="stylesheet" type="text/css" href="{TEMPLATEURL}ie_fix_8.css" /> | ||
<![endif]--> | <![endif]--> | ||
</ | </source> | ||
上記のコードを '''startpage.pstpl'''の中、''/templates/default/''または''/templates/limespired''からテーブルベースのレイアウト用とCSSベースのレイアウト用のそれぞれのIEスタイルシートのコピーに入れます。 | |||
<div class="simplebox">''' | <div class="simplebox">'''注意:''' 独自のスタイルシートにスタイルをコピーする場合、ほとんどの場合、調整を加える必要があります。</div> | ||
=== | ====Internet explorer向けの別のソリューション==== | ||
bodyの条件付きクラスをstartpage.pstplに配置し、このクラスをtemplate.cssで使用できます。このメソッドは、citronadeテンプレート{{ObsoleteIn|2.06}}で使用されます。JavaScriptが動作するシステムにはjsクラス、動作しないシステムにはno-jsクラスを追加します。 | |||
< | <source lang="html4strict"><!--[if lt IE 7 ]> <body class="lang-{SURVEYLANGUAGE} {SURVEYFORMAT} ie ie6 ielt7 ielt8 ielt9 no-js"> <![endif]--> | ||
<!--[if IE 7 ]> <body class="lang-{SURVEYLANGUAGE} {SURVEYFORMAT} ie ie7 ielt8 ielt9 no-js"> <![endif]--> | |||
<!--[if IE 8 ]> <body class="lang-{SURVEYLANGUAGE} {SURVEYFORMAT} ie ie8 ielt9 no-js"> <![endif]--> | |||
<!--[if IE 9 ]> <body class="lang-{SURVEYLANGUAGE} {SURVEYFORMAT} ie ie9 no-js"> <![endif]--> | |||
<!--[if gt IE 9]><!--><body id="body" class="lang-{SURVEYLANGUAGE} {SURVEYFORMAT} no-js"><!--<![endif]--> | |||
<script type='text/javascript'>/*<![CDATA[*/(function(H){ H.className=H.className.replace(/\bno-js\b/,'js') })(document.getElementsByTagName('body')[0]);/*]]>*/</script></source> | |||
また、template.cssでは次のように使用します。 | |||
< | <source lang="css">.ie6{/*internet explorer 6向け*/} | ||
. | .ielt8{/*internet explorer 6、7向け*/} | ||
.ie{/*すべてのinternet explorer向け */}</source> | |||
=== 右から左に記述する(RTL)言語と均等割り付け=== | |||
LimeSurveyのテキストエディターは、RTLテキストを書式設定できます。しかし、エディター自体は、均等割り付けしたときにRTL言語を左から右の形式で表示します。これはエディターの表示上の問題です。RTLで均等割り付けされた質問またはテキストは、アンケートやプレビューでは正しく右から左に表示されます。 | |||
===キーワード=== | |||
{{Deprecated/ja|3.0}} | |||
テンプレートファイル内のキーワードは、現在のアンケート情報に置き換えられます。中括弧で囲まれています(例:{SURVEYNAME})。 | |||
次の文字列は、テンプレートファイルを解析してアンケートユーザーに提示するときにLimeSurveyに置き換えられます。これらのフィールド文字列は、'完了ページ'以外のほぼすべてのテンプレートで機能します。(これらの文字列のほとんどはcommon.phpファイルにありますが、そこにない場合はindex.phpファイルを見てください。) | |||
{|class=wikitable | {|class=wikitable | ||
!''' | !'''キーワード'''!!'''テンプレートファイル '''!!'''説明''' | ||
|- | |||
|{SURVEYNAME}||すべてのファイル||アンケートのタイトル | |||
|- | |- | ||
|{ | |{SURVEYDESCRIPTION}||すべてのファイル||アンケートの説明 | ||
|- | |- | ||
|{ | |{WELCOME}||すべてのファイル(主にwelcome.pstpl)||アンケートの'ようこそ'テキスト | ||
|- | |- | ||
|{ | |{PERCENTCOMPLETE}||survey.pstpl||アンケートの完了率を示す小さなグラフ | ||
|- | |- | ||
|{ | |{GROUPNAME}||startgroup.pstpl, groupdescription.pstpl, endgroup.pstpl||現在のグループ名を表示します。 | ||
|- | |- | ||
|{ | |{GROUPDESCRIPTION}||startgroup.pstpl, groupdescription.pstpl, endgroup.pstpl||現在のグループの説明を表示します。 | ||
|- | |- | ||
|{ | |{NUMBEROFQUESTIONS}||welcome.pstpl||アンケートの質問総数(数字のみ)を表示します。 | ||
|- | |- | ||
|{ | |{THEREAREXQUESTIONS}||welcome.pstpl||関連する言語ファイルから"このアンケートはX問あります"という文が表示されます。Xは質問の数で置き換えられます。これは、単数形または複数形に対しても適切に機能します。質問が1つしかない場合、"このアンケートは1問あります"と表示されます。 | ||
|- | |- | ||
|{ | |{CHECKJAVASCRIPT}||すべてのファイル(主にwelcome.pstpl)||エンドユーザーのブラウザでJavaScriptが無効になっているときの警告メッセージ | ||
|- | |- | ||
|{ | |{QUESTION}||Question.pstpl||('''LS1.87から置き換えられました''')現在の質問のテキストを表示します({QUESTION}の書式は、'question_start.pstpl'を編集することによってカスタマイズできます)。 次のものを使用します:{QUESTION_TEXT}、{QUESTION_MANDATORY}、{QUESTION_HELP}、{QUESTION_MAN_MESSAGE}、{QUESTION_VALID_MESSAGE}、{QUESTION_INPUT_ERROR_CLASS}、{QUESTION}の代わりのラッピングHTML | ||
|- | |- | ||
|{ | |{ANSWER}||question.pstpl, print_question.pstpl||現在の質問に対する回答フォームを表示します。 | ||
|- | |- | ||
|{ | |{SGQ}||question.pstpl, question text||現在の質問のSurvey-Group-Question idを表示することにより、質問の入力フィールドを動的に参照するために、質問テキストの中で使用できます(svn build 9755現在)。 | ||
|- | |- | ||
|{ | |{QUESTIONHELP}||question.pstpl, print_question.pstpl||現在の質問のヘルプテキスト(質問タイプごとにあらかじめ決められたヒント)を表示します。 | ||
|- | |- | ||
|{ | |{QUESTION_CLASS}||question.pstpl, print_question.pstpl||各質問タイプに固有のクラスです(質問を包含するタグに含められます)。 | ||
|- | |- | ||
|{ | |{QUESTION_CODE}||question.pstpl, print_question.pstpl||現在の質問コードを表示します。 | ||
|- | |- | ||
|{ | |{QUESTION_ESSENTIALS}||question.pstpl||質問IDと(条件付き質問の場合)、'style="display:none;"'(質問を包含するタグに含められます)。 | ||
|- | |- | ||
|{ | |{QUESTION_HELP}||question.pstp, question_start.pstpl||現在の質問に対しユーザーが定義したヘルプテキストを表示します。 | ||
|- | |- | ||
|{ | |{QUESTION_TYPE_HELP}||print_question.pstp||現在の質問に対しユーザーが定義したヘルプテキストを表示します。 | ||
|- | |- | ||
|{ | |{QUESTION_INPUT_ERROR_CLASS}||question.pstp, question_start.pstpl||ユーザー入力エラーがあった場合に適用されるクラスです。 | ||
|- | |- | ||
|{ | |{QUESTION_ID}||print_question.pstp||個別の質問のスタイリングを可能にするために、各質問に一意のIDを付与します。 | ||
|- | |- | ||
|{ | |{QUESTION_TEXT}||question.pstp, print_question.pstp, question_start.pstpl||現在の質問のテキストを表示します。 | ||
|- | |- | ||
|{ | |{QUESTION_MANDATORY}||question.pstp, print_question.pstp, question_start.pstpl||現在の質問に関する翻訳された'必須'テキストを表示します。 | ||
|- | |- | ||
|{ | |{QUESTION_MAN_CLASS}||question.pstpl, print_question.pstpl||質問が必須の場合のクラスです(質問を包含するタグに含められます)。 | ||
|- | |- | ||
|{ | |{QUESTION_MAN_MESSAGE}||question.pstp, print_question.pstp, question_start.pstpl||現在の質問に関する翻訳された'必須'ヘルプメッセージテキストを表示します。 | ||
|- | |- | ||
|{ | |{QUESTION_NUMBER}||print_question.pstpl||質問番号。 | ||
|- | |- | ||
|{ | |{QUESTION_VALID_MESSAGE}||question.pstp, print_question.pstp, question_start.pstpl||現在の質問に関する翻訳された'有効'ヘルプメッセージテキストを表示します。 | ||
|- | |- | ||
|{ | |{QUESTION_SCENARIO}||print_question.pstp||条件付き質問の'シナリオ'テキストを印刷します。 | ||
|- | |- | ||
|{ | |{NAVIGATOR}||navigator.pstpl||ナビゲーションボタンを表示します(次へ、前へ、最後へ) | ||
|- | |- | ||
|{ | |{CLEARALL}||すべてのファイル (navigator.pstplが対象)||"結果を破棄して終了"リンクを表示します。 | ||
|- | |- | ||
|{ | |{COMPLETED}||completed.pstpl||登録時の'完了'メッセージを表示します(attribute_1フィールドとattribute_2フィールドが設定されているかどうかによって変化)。 | ||
|- | |- | ||
|{ | |{URL}||completed.pstpl||アンケートの'url'と'url text'を表示します。 | ||
|- | |- | ||
|{ | |{PRIVACYMESSAGE}||privacy.pstpl||アンケートを匿名に設定すると、プライバシーメッセージが表示されます。テキストは、言語ファイルで[[Translating LimeSurvey/ja|編集・翻訳]]することができます。privacy.pstplテンプレートを編集して手動で変更することもできます。 | ||
|- | |- | ||
|{ | |{TEMPLATEURL}||すべてのファイル||現在のテンプレートの場所へのURLです(テンプレート内の画像ファイルを参照するのに便利)。 | ||
|- | |- | ||
|{ | |{SURVEYRESOURCESURL}||すべてのファイル||このアンケート用の現在のアップロードファイルのURLです(質問、グループなどの画像ファイルを参照するのに便利です)。 | ||
|- | |- | ||
|{ | |{SUBMITCOMPLETE}||endpage.pstpl||アンケートを完了したこととと、"送信"ボタンを押すようユーザーに知らせる(言語ファイルの)メッセージ。 | ||
|- | |- | ||
|{ | |{SUBMITREVIEW}||survey.pstpl||"<< 前へ"をクリックして回答を確認したり変更したりすることができる旨をユーザーに知らせるメッセージ(言語ファイルから) | ||
|- | |- | ||
|{ | |{SAVEDID}||All Files||ユーザーの'回答ID'を表示します。 | ||
|- | |- | ||
|- | |- | ||
|{ | |{QUEXMLPDF}||すべてのファイル||それまでに入力完了した回答を含むアンケートのqueXML PDFをエクスポートするボタンを表示します。 | ||
|- | |- | ||
|{TOKEN: | |{TOKEN:FIRSTNAME}||すべてのファイル||***アンケート回答が匿名でない場合、トークンテーブルのユーザーの名に置き換えられます。 | ||
|- | |- | ||
|{TOKEN: | |{TOKEN:LASTNAME}||すべてのファイル||***アンケート回答が匿名でない場合、トークンテーブルのユーザーの姓に置き換えられます。*** | ||
|- | |- | ||
|{TOKEN: | |{TOKEN:EMAIL}||すべてのファイル||***アンケート回答が匿名でない場合、トークンテーブルのユーザーのメールアドレスに置き換えられます。*** | ||
|- | |- | ||
|{TOKEN: | |{TOKEN:ATTRIBUTE_1}||すべてのファイル||***アンケート回答が匿名でない場合、トークンテーブルのユーザーのattribute_1に置き換えられます。*** | ||
|- | |- | ||
|{ | |{TOKEN:ATTRIBUTE_2}||すべてのファイル||***アンケート回答が匿名でない場合、トークンテーブルのユーザーのattribute_2に置き換えられます。*** | ||
|- | |- | ||
|{ | |{ANSWERSCLEARED}||Preferably in navigator.pstpl||言語ファイルの "回答の消去"メッセージ。 | ||
|- | |- | ||
|{ | |{RESTART}||clearall.pstpl||アンケートを再開するURL。 | ||
|- | |- | ||
|{REGISTERERROR}||register.pstpl|| | |{REGISTERERROR}||register.pstpl||登録ページにエラーメッセージが表示されます(例えば、"メールアドレスを入力する必要があります")。 | ||
|- | |- | ||
|{REGISTERMESSAGE1}||register.pstpl|| | |{REGISTERMESSAGE1}||register.pstpl||言語ファイルの"のアンケートを実施するには、登録を行う必要があります。"というメッセージ。 | ||
|- | |- | ||
|{REGISTERMESSAGE2}||register.pstpl|| | |{REGISTERMESSAGE2}||register.pstpl||言語ファイルの登録の詳細のメッセージ | ||
|- | |- | ||
|{REGISTERFORM}||register.pstpl|| | |{REGISTERFORM}||register.pstpl||実際の登録フォーム。attribute_1フィールドとattribute_2フィールドが設定されているかどうかによって変わります。 | ||
|- | |- | ||
|{SAVE}|| | |{SAVE}||navigator.pstplで動作||'今までの回答を保存する'ボタンを表示して、後でアンケートに戻るようにすることができます。アンケートプロパティで[保存]オプションを無効にすると、タグは表示されず無視されます。 | ||
|- | |- | ||
|{LANGUAGECHANGER}||survey.pstpl|| | |{LANGUAGECHANGER}||survey.pstpl||多言語アンケートのスイッチを表示して質問を変更します。 | ||
|} | |} | ||
== | ===入力/ボタン=== | ||
アンケートの各"入力"タイプには独自のクラス名が与えられているため、"startpage.pstpl"ファイルにCSSを追加したり、フォームボタンや入力の外観をある程度制御することができます。クラス名は次のとおりです。 | |||
*'''submit''' | *'''submit''' (送信ボタン) | ||
*'''text''' | *'''text''' (テキスト入力 - 短い自由文、日付、数値タイプ) | ||
*'''answertext''' | *'''answertext''' (回答のテキスト) | ||
*'''radio''' | *'''radio''' (ラジオボタン) | ||
*'''checkbox''' | *'''checkbox''' (チェックボックス) | ||
*'''select''' | *'''select''' (セレクト/リストボックス) | ||
*'''textarea''' | *'''textarea''' (長いテキスト入力 - 長い自由文) | ||
*'''clearall''' | *'''clearall''' ("回答を破棄して終了"のリンク) | ||
*'''rank''' | *'''rank''' (順位付けスタイルの質問。選択ボックスやテキストボックスの色は設定しませんが、その他の順位付け質問の場合は背景色、テキストの色、サイズなどを変更できます) | ||
*'''graph''' | *'''graph''' ("完了率"のグラフテーブル) | ||
*'''innergraph''' | *'''innergraph''' (グラフテーブル内のテーブル - 0%と100%のテキストが含まれています。このテキストのサイズを変更します。) | ||
*'''question''' | *'''question''' (テーブル内に表示されるすべての質問の一般的な設定です。通常は、これを使用して、他の場所で既定として使用したフォントサイズと色と同じになるようにします) | ||
*'''mandatory''' | *'''mandatory''' (必須の質問) | ||
*'''input-error''' | *'''input-error''' (ユーザー入力エラー - ユーザーが必須の質問や検証つきの質問で間違えた場合) | ||
*'''array1''' | *'''array1'''と'''array2''' (配列型の質問について複数の回答を提示するときに、これらの2つのスタイルが交互に繰り返されます。こうした質問タイプで背景色を交互に変えることができます。'''Array1は、こうした質問タイプの列見出しにも使用されます。) | ||
*'''errormandatory''' | *'''errormandatory''' ("この質問は必須です"というエラーメッセージの色とスタイルを設定します。) | ||
*'''warningjs''' | *'''warningjs''' (参加者のブラウザがJavaScriptを無効にしている場合に表示される警告メッセージの色とスタイルを設定します。) | ||
要素のIDを使用してアクセスできる要素もいくつかあります(CSSの'''#ID''')。 | |||
*'''surveycontact''' | *'''surveycontact''' (開始ページに表示されるコンタクトメッセージ) | ||
*'''tokenmessage''' | *'''tokenmessage''' (アンケート内のメッセージ、たとえばセッションの期限切れエラーメッセージなど) | ||
HTMLのすべての部分を編集できるため、<syntaxhighlight lang="php"><div class='new_name'></div></syntaxhighlight>のようにテンプレートを囲んで、new_nameクラスのCSSを定義する必要はありません。 | |||
==プログレスバーのスタイル== | |||
プログレスバーの外観はCSSで変更できます。 | |||
バーの背景色を変更するには、custom.cssファイルの最後に次のような記述を追加します(fruityテーマの例)。 | |||
<syntaxhighlight lang="php">.fruity .progress-bar { | |||
<syntaxhighlight lang="php | |||
background-color: #3300FF; | background-color: #3300FF; | ||
}</syntaxhighlight> | }</syntaxhighlight> | ||
バーの境界線の色を変更するには、custom.cssファイルの最後に次のような記述を追加します(fruityテーマの例)。 | |||
<syntaxhighlight lang="php | <syntaxhighlight lang="php">.fruity .progress-bar { | ||
border: 1px solid #FF0000; | border: 1px solid #FF0000; | ||
}</syntaxhighlight> | }</syntaxhighlight> | ||
== | ==開発者が利用できる高度な機能== | ||
LimeSurveyには、特別な変更を可能にするユーザー作成のパッチがいくつか統合されています。これらの非常に高度な機能は、(一般的に)LimeSurveyの根底にあるコードベースを変更する必要があり、セキュリティホールを生まないよう慎重に行う必要があります。 | |||
=== | ====自作のJavascript関数のサポート==== | ||
アンケートページでJavascriptを実行する必要があるユーザーもいるかもしれませんが、BODY要素で'''checkconditions()'''を呼び出すことにより、これができなくなっています。この関数呼び出しはHEAD内の小さなJavaScript関数に置き換えられ、'''checkconditions()'''と'''template_onload()'''が存在するかどうかを呼び出す前に調べます。このようにして、テンプレート作成者は、HEADに既定のものを置き換える独自の'''template_onload()'''関数を作成できます。 | |||
*XSS filterを無効にする: 全体設定 -> セキュリティで"HTMLのXSSフィルター"をオフにします。 | |||
*質問またはグループの説明のソースにスクリプトを入力します。 | |||
{{Note|詳細については、[[Workarounds: Manipulating a survey at runtime using Javascript#How to use Script (eg. JavaScript etc.) in LimeSurvey|技術的な回避策のセクション]]を参照してください。}} | |||
==TIP&トリック== | |||
=== | ===言語固有の要素=== | ||
アンケートに言語特有の文(例えば、各ページの最後にあるヘルプ)が必要な場合は、.pstlファイルに文を追加する(他の言語では表示しない)ことができます。template.cssで非表示にする場合、疑似セレクタ:langを使うこともできますが、互換性を高めるためにクラスを使用しています。 | |||
以下に、フランス語と英語の2つのヘルプ文があります。これをendpage.pstplに配置します。 | |||
<syntaxhighlight lang="php"><div class="fr" lang="fr">Pour de l'aide en direct appelez le 000000</div> | |||
<syntaxhighlight lang="php | |||
<div class="en" lang="en">For some help, please call 000000</div></syntaxhighlight> | <div class="en" lang="en">For some help, please call 000000</div></syntaxhighlight> | ||
template.cssでは次のようにします。 | |||
<syntaxhighlight lang="php | <syntaxhighlight lang="php">.lang-fr .en{display:none} | ||
.lang-en .fr{display:none}</syntaxhighlight> | .lang-en .fr{display:none}</syntaxhighlight> | ||
===アンケートページのレイアウトを変更する=== | |||
== | |||
テンプレートを編集して保存した後は、アンケートの設定から選択されている場合にのみ、アンケートリストページに適用されます。既定のテンプレートにするには、LimeSurveyの'''全体設定'''にある'''全般'''タブに移動し、目的のテンプレートを選択します。以降、テンプレートとして"既定"のオプションを使用するテンプレートと、新たに作成されるテンプレートを加えたすべてのテンプレートは、新しく選択された既定のテンプレートを使用します。 | |||
このページで現在のテンプレートを使用するには、'''全体設定'''から設定を変更する必要があります。以前のバージョンでは、この変更はconfigファイルで$defaulttemplate設定を編集することによって行うことができます。この設定を、config-defaults.phpから(config-defaults.phpより優先される)config.phpにコピーして次のように設定を編集します。<code lang="html">$defaulttemplate = 'yourtemplatename';</code> | |||
== | ===テンプレートのインポート/エクスポート: Macユーザー=== | ||
<u>Macユーザー</u>の場合、Mac OSXの既定のアーカイブユーティリティで"オンザフライで生成された"zipフォルダに問題がある可能性があります。 | |||
コマンドラインからunixのunzipを実行することによって回避できます。 | |||
$ unzip template.zip -d template | $ unzip template.zip -d template | ||
| Line 838: | Line 873: | ||
inflating: ... | inflating: ... | ||
もう1つの回避策は、macでコンパイルされたスクリプトを使用することです。 | |||
===同じテンプレートで別々のロゴを使う=== | |||
すべてのアンケートに同じテンプレートを使用し、アンケートごとにロゴを変更する場合は、テンプレート.pstplファイル内の{SID}プレースホルダを使用して、別の画像を参照できます。 | |||
<syntaxhighlight lang="php"><img src="{TEMPLATEURL}files/logoImage-{SID}.png"></syntaxhighlight> | |||
=== カスタムファビコンを表示する=== | |||
ファビコンは、ブラウザのアドレスバー、ブックマークのリスト、タブに表示される小さなアイコンです。次のように自分のアイコンを表示することができます。 | |||
#ファビコンを作成する - Googleでたくさんのフリーファビコンジェネレーターを見つけることができます。 | |||
#新しいファビコンに "favicon.ico"と名前をつけ、テンプレートの/filesディレクトリーに配置します。 | |||
#'''startpage.pstpl'''の</head>タグの前に次のコードを追加します。 | |||
<syntaxhighlight lang="html4strict"><link rel="shortcut icon" href="{TEMPLATEURL}files/favicon.ico" type="image/x-icon"> | |||
<link rel="icon" href="{TEMPLATEURL}files/favicon.ico" type="image/x-icon"></syntaxhighlight> | |||
=== アンケート/質問ページごとに外観を変える=== | |||
LimeSurveyでページごと(奇数ページ、偶数ページごと)に外観を変更したい場合は、CSSファイルの'''.page-odd'''クラスを使用して、奇数ページの外観を変更することができます。 | |||
LimeSurvey 1.91+の既定のテンプレートの例。 | |||
<syntaxhighlight lang="php"> | |||
.page-odd table.question-group { | |||
background-color: #D2F2D3; | |||
}</syntaxhighlight> | |||
偶数ページと奇数ページを同じものにしたい場合は、template.cssの''.page-odd''のすべてのインスタンスを見つけ、スタイルを削除します。 | |||
===二元スケール配列の垂直セパレータの境界線を作成する=== | |||
二元スケール配列の垂直セパレータの境界線を作成するには、'''template.css'''ファイルに次の行を追加します。 | |||
<syntaxhighlight lang="php"> | |||
table.question thead td.header_separator, | |||
table.question tbody td.dual_scale_separator | |||
{ | |||
border-right:solid 1px #00A8E1; | |||
} | |||
</syntaxhighlight> | |||
''header_separator''は、ヘッダー"td"の区切り文字を入力するために使用します。"dual_scale_separator"は、二元スケール配列内のセパレータ列の指定に使用します。 | |||
===独自のロゴをアンケートリストに追加する {{NewIn/ja|3.0}} === | |||
# 最初に、使用したいテーマのテーマエディターを開きます。[[File:OpenThemeEditor.jpg]] | |||
# fruityの使用をお勧めします、それは現状ベストのテーマです。 | |||
# その後、テーマを拡張し、後でわかるように名前を付けます。 [[File:ExtendTheme.jpg]] | |||
# 次のビューで、使用するロゴをアップロードすることができます。[[File:UploadFileTheme.jpg]] | |||
# 画面の右下にあるドロップダウンリストから、`アンケートリスト´というエディタ画面を選択します。[[File:OpenScreenSurveyList.jpg]] | |||
# 次に左側のメニューで、`layout_survey_list.twig´を選択します。 [[File:EditLayoutSurveyListTwig.jpg]] | |||
# エディターで126行目にスクロールし、マークされた部分をテーマにアップロードした画像のファイル名に変更します。[[File:ChangeSurveyListHeaderImageEditor.jpg]] | |||
# ファイルを保存します。[[File:ThemeEditorSaveChanges.jpg]] | |||
# デフォルトテーマを拡張したテーマに変更します。[[File:ChangeDefaultTheme.jpg]] | |||
=== ロゴをアンケートページの中央に配置する=== | |||
この例は、"extends_fruity"テンプレート用です。他のテンプレートでは、必要なCSSが異なる場合があります。 | |||
# LimeSurveyの管理エリアにログインします。 | |||
# テーマエディターを開きます。:設定 > テーマ | |||
# リストから"LimeSurvey Fruityテーマ"を探し、"テーマエディター"ボタンをクリックします。 | |||
# ページ下部付近の左側にあるファイル一覧から"custom.css"をクリックします。 | |||
# そのファイルに以下のCSSをコピーし、"変更を保存"を押します。 | |||
<syntaxhighlight lang="css"> | |||
.navbar-fixed-top > div.navbar-header { | |||
width: 100% !important; | |||
} | |||
.navbar-fixed-top > div.navbar-header > div { | |||
width: 100% !important; | |||
} | |||
.navbar-fixed-top > div.navbar-header > div > img { | |||
margin: 0 auto 0 auto !important; | |||
} | |||
</syntaxhighlight> | |||
== | ==カスタム質問ビュー {{NewIn/ja|3.0}}== | ||
<div class="simplebox">'''注意:''' これは将来的に質問オブジェクトによって置き換えられる予定の一時的な機能です(カスタムビューを質問オブジェクトに移すのが非常に簡単になります)。既定では無効になっています。</div> | |||
バージョン2.5では、質問と組み込み要素の一部について、テンプレート固有のカスタムビューを作成できます。複数のアンケートの特定の質問タイプのHTMLレイアウトを変更する場合に便利です。 | |||
*application/config/config.phpで、'config'=>arrayを探し、次の行を配列に加えます。'allow_templates_to_overwrite_views'=>1 | |||
*/{your_template}/config.xmlで、"overwrite_question_views"をtrueに設定します。 | |||
*application/views/survey/*をtemplate/{your_view_directory}/survey/にコピーします。 | |||
*変更するファイルのみをコピーする必要がありますが、ファイル構造はapplication/views/survey/と同じでなければなりません。 | |||
==テンプレートにカスタムCSSまたはJavaScriptファイルを挿入する== | |||
バージョン2.50以降では、config.xmlファイルを使用してプラグインファイルを自動的に読み込むことができます。 | |||
*テンプレートの/cssまたは/scriptsフォルダーにファイルをアップロードする | |||
*/{your_template}/config.xmlで、<css>ブロックまたは<js>ブロックにファイルパスを追加します。<syntaxhighlight lang="xml"><css> | |||
<filename>css/jquery-ui-custom.css</filename> | |||
<filename>css/bootstrap-slider.css</filename> | |||
<filename>css/awesome-bootstrap-checkbox/awesome-bootstrap-checkbox.css</filename> | |||
<filename>css/flat_and_modern.css</filename> | |||
<filename>css/template.css</filename> | |||
<filename>css/myCustomPlugin.css</filename> | |||
</css> | |||
<js> | |||
<filename>scripts/template.js</filename> | |||
<filename>scripts/bootstrap-slider.js</filename> | |||
< | <filename>scripts/myCustomPlugin.js</filename> | ||
</js> | |||
</syntaxhighlight> | </syntaxhighlight> | ||
==クラス定義(開発者向け)== | |||
== | ===answer-list=== | ||
{|class=wikitable | |||
!'''質問'''!!'''質問タイプ'''!!'''要素''' | |||
|- | |||
|arrays/5point || A || tr | |||
|- | |||
|arrays/10point|| B|| tr | |||
|- | |||
|arrays/array || F || tr | |||
|- | |||
|arrays/column || H || trとcol | |||
|- | |||
|arrays/dualscale || 1 || tr | |||
|- | |||
|arrays/increasesamedecrease || E || tr | |||
|- | |||
|arrays/yesnouncertain || C || tr | |||
|- | |||
|gender || G || divとul | |||
|- | |||
|list_with_comment || O || div | |||
|- | |||
|ranking || R || ulとdiv | |||
|- | |||
|yesno || Y || ulとdiv | |||
|- | |||
|ranking_advanced || R || ulとdiv | |||
|- | |||
|listradio || L || div | |||
|- | |||
|5pointchoice || 5 || ul | |||
|- | |||
|multiplechoice || M || div | |||
|- | |||
|} | |||
===radio-list=== | |||
{|class=wikitable | |||
!'''質問'''!!'''質問タイプ'''!!'''要素''' | |||
|- | |||
| yesno || Y || ul | |||
|- | |||
|gender || G || ul | |||
|- | |||
|arrays/yesnouncertain || C || tr | |||
|- | |||
|arrays/increasesamedecrease || E || tr | |||
|- | |||
|arrays/dualscale || 1 || tr | |||
|- | |||
|arrays/5point || A || tableとtr | |||
|- | |||
|arrays/10point || B || tr | |||
|- | |||
|arrays/array || F || tr | |||
|- | |||
|arrays/column || H || col | |||
|- | |||
|listradio || L || div | |||
|- | |||
|list_with_comment || O || divに続くul | |||
|- | |||
|} | |||
===radio-item=== | |||
{|class=wikitable | |||
!'''質問'''!!'''質問タイプ'''!!'''要素''' | |||
|- | |||
|arrays/yesnouncertain || C || td | |||
|- | |||
|5pointchoice || 5 || li | |||
|- | |||
|arrays/10point || B || td | |||
|- | |||
|arrays/5point || A || td | |||
|- | |||
|arrays/array || F || td | |||
|- | |||
|arrays/column || H || td | |||
|- | |||
|arrays/dualscale || 1 || td | |||
|- | |||
|arrays/increasesamedecrease || E || td | |||
|- | |||
|gender || G || li | |||
|- | |||
|listradio || L || li | |||
|- | |||
|yesno || Y || li | |||
|- | |||
|listradio || L || liとdiv | |||
|- | |||
|image_select-listradio || L || liとdiv | |||
|- | |||
|list_with_comment || 0 || li | |||
|- | |||
|} | |||
===list-group=== | |||
{|class=wikitable | |||
!'''質問'''!!'''質問タイプ'''!!'''要素''' | |||
|- | |||
|yesno || Y || ul | |||
|- | |||
|5pointchoice || 5 || ul | |||
|- | |||
|gender || G || ul | |||
|- | |||
|ranking || R || ul | |||
|- | |||
|ranking_advanced || R || ulとdiv | |||
|- | |||
|question_index_group_buttons || || div | |||
|- | |||
|question_index_questions_buttons || || div | |||
|- | |||
|} | |||
== | ===list-group-horizontal=== | ||
{|class=wikitable | |||
!'''質問'''!!'''質問タイプ'''!!'''要素''' | |||
|- | |||
|yesno || Y || ul | |||
|- | |||
|5pointchoice || 5 || ul | |||
|- | |||
|gender || G || ul | |||
|- | |||
|} | |||
===list-unstyled=== | |||
{|class=wikitable | |||
!'''質問'''!!'''質問タイプ'''!!'''要素''' | |||
|- | |||
|list_with_comment || 0 || ul | |||
|- | |||
|listradio|| L || ul | |||
|- | |||
|multiplechoice|| M || ul | |||
|- | |||
|multiplechoice_with_comments|| P || ul | |||
|- | |||
|multiplenumeric|| K || ul | |||
|- | |||
|multipleshorttext|| Q || ul | |||
|- | |||
|ranking|| R || ul | |||
|- | |||
|ranking_advanced|| R || ul | |||
|- | |||
|bootstrap_buttons_multi|| M || ul | |||
|- | |||
|image_select-multiplechoice|| M || ul | |||
|- | |||
|inputondemand/multipleshorttext || Q || ul | |||
|- | |||
|register_error|| || ul | |||
|- | |||
|register_message|| || ul | |||
|- | |||
|layout_survey_list || || ul | |||
|- | |||
|load|| || ul | |||
|- | |||
|save|| || ul | |||
|- | |||
|captcha|| || ul | |||
|- | |||
|} | |||
===select-list=== | |||
{|class=wikitable | |||
!'''質問'''!!'''質問タイプ'''!!'''要素''' | |||
|- | |||
|ranking|| R || ul | |||
|- | |||
|ranking_advanced|| R || ul | |||
|- | |||
|} | |||
===checkbox-item=== | |||
{|class=wikitable | |||
!'''質問'''!!'''質問タイプ'''!!'''要素''' | |||
|- | |||
|multiflexi (Array numbers)|| : || td | |||
|- | |||
|multiplechoice|| M || li | |||
|- | |||
|multiplechoice_with_comments|| P || div | |||
|- | |||
|image_select-listradio|| L || li | |||
|- | |||
|image_select-multiplechoice|| M || liとdiv | |||
|- | |||
|navigator|| || span | |||
|- | |||
|} | |||
===checkbox-text-item=== | |||
{|class=wikitable | |||
{ | !'''質問'''!!'''質問タイプ'''!!'''要素''' | ||
|- | |||
|multiplechoice_with_comments|| P || li | |||
|- | |||
|multiplechoice|| M || li | |||
|- | |||
|image_select-multiplechoice|| M || li | |||
|- | |||
|} | |||
[[Category:Theme]] | |||
[[Category:Twig]] | |||
Latest revision as of 05:30, 20 December 2023
はじめに
LimeSurvey は、開発者がアンケートの外観のカスタマイズを効率的に行える、高度なテーマとスタイルのシステムを備えています。かつては「テンプレート」の用語を用いていましたが、LS3 で「テーマ」と置き換えました。「テーマ」は、アンケートのページスタイルを制御できます。アンケート管理者は、既定のテーマを選択することができ、また個々のアンケートにカスタマイズを加えることができます。「テーマ」では、アンケート管理者がプログラムの技術をもたなくとも、ようこそ画面にロゴを追加したり、背景色を変更したり、フォントを選択したりといったことが簡単にできる設定を用意しています。
LimeSurvey には、3 つのテーマが付属しています。これらの初期テーマは、LimeSurveyのインストールディレクトリ下の「themes/survey/」ディレクトリーにあります。さらに個々のテーマごとにディレクトリーが分かれています。テーマのメインディレクトリーには、XML 形式の設定ファイル、テーマを構成する .twig ファイルを収めた「views 」、「css」、「scripts」、.jpg や .png を収めた「images」、その他、多くのディレクトリーが入っています。
LimeSurvey 2.50 以降、テーマエンジンは CSS フレームワークとして、Bootstrap 3 を使用しています。Bootstrap 3 は標準的なフレームワークなので、開発者はインターネット上で多くのドキュメント、チュートリアル、フォーラムでのやり取りを見つけることができます。
LimeSurvey 3 以降、テーマエンジンは、Twig を使用しており、テーマ開発者はアンケートレンダリングのロジックを安全かつ簡単に変えることができます。Twig はそれ以前のバージョンで使っていたキーワード置換システムに代わるものです。キーワードの HTML を生成するのに利用するロジックを、テーマのビューの中で利用できます。
Vanillaテーマのスニペット:
<div class="{{ aSurveyInfo.class.answercontainer }} col-xs-12" {{ aSurveyInfo.attr.answercontainer }}>
    {# NOTE: If you want to customize the question rendering, use a question theme #}
    {{ aQuestion.answer | raw }}
</div>
テーマは、HTMLとTwigコードからできており、表示されるテキストの位置と形式、ページの同様の構造的特徴を定義します。テーマには他のファイルを参照したり取り込んだりすることが多くあります。ほとんどの場合、アンケートのすべてのページで共通に利用するフォントスタイル、色、背景や同様のパラメーターについて定義したカスケーディング・スタイル・シート(CSS)ファイルを参照します。スタイルシートは、HTMLコードに含まれる様々なオブジェクトタイプに関連づけられたクラスパラメーターを参照します。これにより、スタイルシートは、複数の場所に現れるテキストや他のオブジェクトをどのように表示させるかを規定できます。LimeSurveyでは質問タイプごとに固有のクラスがあり、それぞれの見た目を細かく規定することができます。ロゴや進捗バーで使用する画像ファイルもテーマファイルの中で参照されます。最後に、中括弧に挟まれた特別なキーワードは、対応する言語の翻訳として定義されたテキストに置き換えられます(例えば、それぞれの言語で書かれた'アンケートタイトル'、'質問文'など)。
新しいカスタムテーマを作成したら、LimeSurveyコミュニティーに共有し、他の人が使えるようにすることを検討してください。あなたの貢献によって、テーマ、アンケート、その他のアドオンが豊富になり、LimeSurveyがよりよいものになります。 テンプレートの共有については、LimeSurveyテンプレートリポジトリーを参照してください。
新しいテーマの作成
新しいテーマを作成する(既存のテーマを編集する)には、LimeSurveyでテーマ編集ユーザー権限を設定する必要があります。また、LimeSurveyをインストールしているOSのファイル操作権限も併せて設定します。
新しいテーマを作成するには、上部のツールバーの設定にあるテーマエディター(下記参照)を通じて行うのが望ましいやり方です。ウェブインターフェースではなく、お気に入りのテキストエディターを使ってテーマファイルを編集したい人もいるでしょう。この場合でも、新しいテーマを作成するときはテーマエディターを使います。これにより、LimeSurvey_web_root/upload/themes/survey/your_new_templateディレクトリーに必要なすべてのファイルが配置され、基礎となるテーマが作成されます。この後、好みのテキストエディターを使ってテンプレートファイルを編集することができます。
LimeSurveyの'public'エレメントの多くはテーマによって調整することができます。次のセクションでは、テーマテンプレートについて簡単に説明します。
LimeSurveyテーマエディター
テーマエディター: 設定 > テーマ > テーマエディター
LimeSurveyテーマエディターは、テーマのコンテンツをオンラインで編集できます。テーマエディターを起動するには、設定メニューのテーマリンクをクリックし、編集したいテーマの隣にある"テーマエディター"ボタンをクリックします。


テンプレートエディターページでは、編集/閲覧したいテンプレートを選択します。

下記のオプションが使用できます。
- 作成: 新しいテンプレートを作成します。ゼロから作るのでなければ、'default'がコピーされます。
- インポート: ZIPファイルでテンプレートをインポートします。
- エクスポート: 現在のテンプレートをZIPファイルにエクスポートします。
- コピー: 現在のテンプレートを新しいテンプレートとしてコピーします。
- 名前を変更: テンプレートの名前を変更します。通常、コピーやインポートした後に使います。
- テンプレート: LimeSurveyで利用できる状態にあるテンプレートをドロップダウンリストで表示します。
- 画面: It is a drop-down list which allows you to choose which particular survey page of that template you want to look at.
- 管理パネルに戻る
テンプレートのインポート/エクスポート/コピー
テンプレートをエクスポートするとき、テンプレートを構成するすべてのファイル(.pstplファイル、画像、cssファイルなど)がアーカイブされたZIPファイルが生成されます。エクスポートしたZIPファイルをインポート機能を使って他のLimeSurveyにインポートするか、他のLimeSurveyに手動でコピーして対応するテンプレートディレクトリーに展開します。
ただし、LimeSurveyのテンプレートエディターで、テンプレート のインポート/エクスポート/コピー機能を使うことを推奨します。
ページ構成 / テンプレートの利用
- ようこそページ: startpage.pstpl、welcome.pstpl、privacy.pstpl、navigator.pstpl、endpage.pstpl
- 質問ページ: startpage.pstpl、survey.pstpl、startgroup.pstpl、groupdescription.pstpl、question.pstpl、endgroup.pstpl、endpage.pstpl
- 最終ページ: startpage.pstpl、assessment.pstpl、completed.pstpl、endpage.pstpl
テンプレートファイル
以下のテンプレートファイルは、アンケート作成時に使用され、新たに作成したテンプレートフォルダーになければなりません。
- startpage.pstpl: HTMLページのスタート部分を形成します。"<head>"タグで始まります("<html>"タグを含んではなりません)。この、標準的なHTMLページの'冒頭部分'はスクリプトで書かれています。startpage.pstplファイルには<body>タグを含めます。多くのブラウザーは、W3 HTML標準に厳格に従わないことも許容していますが、LimeSurveyスクリプトでは、JavaScriptエレメントを実行するため、<body>タグがなければなりません。startpage.pstplファイルに、多くの'キーワード'を入れる必要はありませんが、タイトルに{SURVEYNAME}を入れたいと思うでしょう。startpage.pstplファイルには、対応するendpage.pstplファイルで閉じるコードを入れることができます。例えば、このファイルでテーブルを開始し、endpage.pstplファイルで閉じるような場合です。LimeSurveyで使用されるあらゆるページはstartpage.pstplとendpage.pstplファイルに挟まれます。
- survey.pstpl: このテンプレートは、ほとんどのページで使用されるもので、アンケートの名前と説明を表示させます。このテンプレートは、対応する'閉じる'テンプレートはなく、このテンプレートファイルで開いたタグはすべてこのファイルの中で閉じなければなりません(例えば、閉じるものがなくなるので、テーブルを開いたままにしてはいけません)。
- welcome.pstpl: このテンプレートはようこそ画面で使用されます(全体が1ページで構成されるアンケート画面を含みます)。歓迎のテキストのほか、アンケートを始める前に提供すべき情報を表示できます。'survey.pstpl'と同様、対応する'閉じる'テンプレートはないので、このテンプレートファイルで開いたタグは同様に閉じなければなりません。
- startgroup.pstpl: このテンプレートは、グループの質問をくるむものです。このファイルで開いたタグを閉じることができる'endgroup.pstpl'テンプレートがあるので、この中でテーブルを開くことができます。
- groupdescription.pstpl: このテンプレートファイルは、グループの説明を表示するために使用します。アンケート設定(プレゼンテーションタブの表示とナビゲーション設定からアクセス)から、グループの説明を表示するかどうかを設定します。表示しない設定の場合、このファイルは無視されます。
- question.pstpl: このファイルは、アンケートの質問、回答、ヘルプテキストから構成されます。"グループごと"と"一括"型のアンケートでは、このテンプレートは質問ごとに繰り返されます。対応する'閉じる'ファイルがないので、すべてのタグを閉じる必要があります。
- question_start.pstpl: このファイルには、質問の初めに表示される個々のエレメントが含まれます。{QUESTION}キーワードによって、'question.pstpl'ファイルに取り込まれます。これは、テンプレートデザイナーが質問のレイアウトをもっとコントロールしたい場合に使用します。このテンプレートは通常のテンプレートシステムの外にあり、LimeSurvey 1.87以降置き換えられています。このテンプレートのキーワードは、question.pstplで直接利用できます。
- completed.pstpl: このページは、アンケートの回答が保存され、アンケートが終了したときに、最終ページとして表示されます。アンケート設計時に設定した"転送リンク"を表示する場合に使用します。
- endgroup.pstpl: このファイルはグループを閉じるもので、startgroup.pstplファイルで開いたすべてのタグを閉じます。
- navigator.pstpl: このファイルには、アンケートをナビゲートするための"次へ"、"前へ"、"最終"、"送信"、"保存"、"クリア"ボタンが含まれます。最終ページ以外のすべてのページで使用されます。
- printanswers.pstpl: このファイルには、アンケートの印刷バージョンで必要なHTMLラッパーが含まれます。
- print_group.pstpl: このファイルはstartgroup.pstplとendgroup.pstplファイルと同様で、印刷バージョンで使われます。
- print_question.pstpl: このファイルはquestion.pstplと同様で、印刷バージョンで使われます。
- print_survey.pstpl: このファイルはsurvey.pstplと同様で、印刷バージョンで使われます。
CSSとJavascript
template.css(CSS用)とtemplate.js(Javascript用)の二つは、テンプレートで必ず使われます。
- {TEMPLATECSS}: 既定のCSSであるtemplate.css(RTL言語ではtemplate-rtl.css)へのリンクに置き換えられます。
- {TEMPLATEJS}: 既定のJavascriptファイルであるtemplate.jsとLimeSurveyに必要なすべてのjsファイルへのリンクに置き換えられます。
Bootstrapの利用
LimeSurveyはBootstrap 3を組み込んでいるので、正しく記述されたBootstrapクラスによってテンプレートにスタイルを適用することができます。 詳細は、Bootstrapドキュメントを参照してください。
Awesome-Bootstrap-Checkboxプラグインも組み込まれています。これにより、Bootstrapのcolor-class(info、warning、dangerなど)と"-checkbox"や"-radio"で終わるクラスを使い、チェックボックスやラジオボタンを好きなデザインにすることができます。
既定のCSS、Javascriptを置き換える
特別なJavascript、CSSファイルを使用することができます。functionを置き換えたい場合は、カスケードシステムを使用します。Javascriptのfunctionでは、最後に読み込まれたものが使用されます。
その他のテンプレートファイル
privacy.pstpl、invitationemail.pstpl、reminderemail.pstpl、confirmationemail.pstplはLimeSurveyではもう使われておらず、既定値は言語ファイルに収録されています。メールメッセージはアンケートごとに編集することができるようになりました。
標準ページ
アンケート参加者がLimeSurveyのアプリケーションにアクセスするときに目にする標準ページが10個あります。それぞれ、アンケートの設定で指定したテンプレートの共通のファイルから構成されます。次の表はどのテンプレートファイルがそれぞれのページを構成するかを示したものです。
| アンケートページ/ テンプレートファイル |
アンケートリスト |
ようこそ | 質問 | 完了 | すべてクリア | 登録 | 読込み | 保存 | 回答 印刷 |
アンケート 印刷 |
|---|---|---|---|---|---|---|---|---|---|---|
| SurveyList | ||||||||||
| Welcome | ||||||||||
| Privacy | ||||||||||
| Navigator | ||||||||||
| Survey | ||||||||||
| StartGroup | ||||||||||
| GroupDescription | ||||||||||
| Question* | ||||||||||
| EndGroup | ||||||||||
| Assessment | ||||||||||
| Completed | ||||||||||
| ClearAll | ||||||||||
| Register | ||||||||||
| Load | ||||||||||
| Save | ||||||||||
| PrintAnswers | ||||||||||
| Print Survey | ||||||||||
| Print Group | ||||||||||
| Print Question | ||||||||||
| StartPage EndPage Template.css |
*注意: バージョン1.90+では、question.pstplとquestion_start.pstplが置き換えられています。古いカスタムテンプレートを使用している場合は、question.pstplの初めに次の行を追加します。
<div {QUESTION_ESSENTIALS} class="{QUESTION_CLASS}{QUESTION_MAN_CLASS}{QUESTION_INPUT_ERROR_CLASS}">
さらに、question.pstplの終わりに対応する閉じるタグを追加します。
</div>
*注意: バージョン1.91以前では、LimeSurveyのjsファイルはテンプレートに含まれません。バージョン2では、jsファイルにリンクさせるため、テンプレートファイルのひとつに{TEMPLATEJS}を入れなければなりません。startpage.pstplかendpage.pstplに追加することができます。{TEMPLATEURL}/template.jsの行を削除し、パーソナルテンプレートを更新するため、{TEMPLATEJS}に置き換えなければなりません、
ファイルコントロールセクション
左側の"ファイルコントロール"ウィンドウで、ページを編集するために使われるテンプレートファイルをクリックします。画面パーツ、JavaScript、CSSファイルがあります。そのファイルの中央のHTMLコードが"編集中"ウィンドウに表示されます。テンプレートが編集可能な場合(ディレクトリーに設定された権限による)、好きなように変更して保存することができます。

"その他のファイル"ウィンドウでは、テンプレートディレクトリーにあるその他のファイルの一覧が表示されます。右側からテンプレートを作成するために必要な画像ファイル(画像、ロゴなど)やその他のファイルのアップロードや選択ができます。
それぞれの画像へのリンクを使わずに、{TEMPLATEURL}という文字列を使います。つまり、
img src='/limesurvey/templates/yourtemplate/files/mypicture.jpg'ではなく、次のようにします (New in 2.50 )。
img src='{TEMPLATEURL}files/mypicture.jpg'LimeSurveyのバージョン2.50以前では、次のようにします。
img src='{TEMPLATEURL}mypicture.jpg'編集中のテンプレートページの"例"は、画面下部に表示されます。テンプレートエディタでテンプレートを削除することはできません。ディレクトリーにアクセスし、そこから手動でファイルを削除する必要があります。テンプレートの見た目をさらに評価するため、他の画面解像度を選択することもできます。
テンプレートファイルの場所
LimeSurveyでは、他のpublicファイルが格納されているpublicディレクトリーに"/templates"ディレクトリーがあり、その中のテンプレートごとのサブディレクトリーに個々の'標準'テンプレートが格納されています。カスタマイズされたユーザーテンプレートは、/upload/templatesディレクトリーに格納されています。
テンプレートディレクトリーには、必ず"default"ディレクトリーがあります。このテンプレートは、既定として使われ、テンプレートフォルダーが見つからない場合の代理として使用されます。デフォルトでインストールされています。
次の構文を使用して、テンプレート管理領域にアップロードした画像ファイルを使用することができます。
{TEMPLATEURL}filename.xyz
CSSによる質問のスタイリング
CSSによる質問のスタイリングは簡単になりました。それぞれの質問タイプには固有のクラスがあります。必須の質問は更に必須項目としてのクラスがあります。例えば、必須ではない質問では、
<div id="question5" class="gender">
...
</div>
となっていて、一方、必須の質問では、
<div id="question5" class="gender mandatory">
...
</div>
となります。必須の質問でユーザーが回答しなかったり、質問で検証が設定されている場合、
<div id="question5" class="gender mandatory input-error">
...
</div>
となります。質問に検証が適用され、回答が正しくない場合、次のようになります。
<div id="question6" class="text-short input-error">
...
</div>
質問パート全体のクラス
このクラスはすべての質問タイプで使用されます。質問タイプにより、一つまたは複数のクラスが使われます。
| クラス名 | 適用箇所 | 質問タイプ | 例 | 備考 | |
|---|---|---|---|---|---|
| .question (Obsolete since 3.0) | 質問ブロック全体 | すべての質問タイプ | <p class="question">, <ul class="question">, <table class="question"> | ||
| .ls-answers (3.0 から追加) | 質問ブロック全体 | すべての質問タイプ | <div class="ls-answers ">, <ul class="ls-answers ">, <table class="ls-answers"> | ||
| .subquestions-list | サブ質問のリスト | 複数選択質問、配列質問タイプ | <ul class="subquestions-list">, <table class="subquestions-list"> | .questions-listも使われます。 | |
| .answers-list | 回答リスト | 択一質問、配列質問タイプ、複数入力テキスト質問 | <ul class="answers-list">, <table class="answers-list"> | ||
| .answer-item | 回答部分: 単一の回答 | 択一質問、配列質問タイプ、複数入力テキスト質問 | <li class="answer-item">, <td class="answer-item"> | ||
| .noanswer-item | 回答なしの回答部分 | 択一質問、配列質問タイプ | <li class="noanswer-item">, <td class="noanswer-item"> | 回答なしも回答であり、noanswer-itemとanswer-itemの2つのクラスを持ちます。 | |
| .question-item | 回答部分: 単一の回答 | 複数テキスト質問、配列質問タイプ | <li class="question-item">, <tr class="question-item"> | 質問でもある回答があります。class="question-item answer-item"となるものが多数あります。 | |
| .checkbox-list | チェックボックスのリスト | 複数選択質問、数値の配列(チェックボックス)質問タイプ | <ul class="checkbox-list">, <tr class="checkbox-list"> | コメントつきチェックボックス: class="checkbox-list text-list"のように、multi-listクラスを使用する質問タイプがあります。 | |
| .checkbox-array (3.0 から追加) | チェックボックス配列 | チェックボックスオプションを使用した配列(数字) | <table class="checkbox-list"> | ||
| .checkbox-item | チェックボックスの回答部分 | 複数選択質問、チェックボックスの配列(数字)質問タイプ | <li class="checkbox-item">, <td class="checkbox-item"> | ||
| .radio-list | ラジオボタンのリスト | 択一質問、配列質問タイプ(各列) | <ul class="radio-list">, <tr class="radio-list"> | ||
| .radio-array (New in 3.0 ) | ラジオボタンのリスト | 配列質問タイプ | <table class="radio-array"> | ||
| .radio-item | ラジオボタンの回答部分 | 択一質問、配列質問タイプ | <li class="radio-item">, | ||
| .text-list | テキスト入力のリスト | 複数テキスト質問タイプ、配列(テキスト) | <ul class="text-list">, <tr class="text-list"> | ||
| .text-item | テキスト入力の回答部分 | 複数テキスト質問タイプ、配列(テキスト) | <li class="text-item">, | ||
| .numeric-list | 数字入力に限定されたテキスト入力のリスト | 数値入力(複数)質問タイプ、配列(数字) | <ul class="text-list numeric-list">, <tr class="text-list numeric-list"> | ||
| .number-list | 数字入力に限定されたテキスト入力のリスト(各列) | 数値入力(複数)質問タイプ、配列(数字) | <ul class="text-list numeric-list">, <tr class="text-list numeric-list"> | ||
| .number-array (3.0 から追加) | 数字入力の回答部分 | 配列(数字) | <table class="number-array"> | ||
| .select-list (Obsolete since 2.50) | ドロップダウンリスト | 配列(数字)、二元スケール配列(ドロップダウン) | <table class="select-list"> | ||
| .dropdown-list (2.50 から追加) | ドロップダウンリスト | 配列(数字)、二元スケール配列(ドロップダウン)(各列) | <table class="dropdown-list"> | ||
| .dropdown-array (3.0 から追加) | ドロップダウンの配列 | 配列(数字)、二元スケール配列(ドロップダウン) | <table class="dropdown-array"> | ||
| .select-item (Obsolete since 2.50) | ドロップダウンの回答部分 | 配列(数字)、二元スケール配列(ドロップダウン)、ドロップダウンによる択一質問 | <p class="select-item">, <td class="select-item"> | ||
| .dropdown-item (2.50 から追加) | ドロップダウンの回答部分 | 配列(数字)、二元スケール配列(ドロップダウン)、ドロップダウンによる択一質問 | <p class="dropdown-item">, <td class="dropdown-item"> | ||
| .hide (Obsolete since 3.0) | アクセシビリティ対応: CSSにより非表示となりますが、スクリーンリーダーが読み上げます。2.50以降は、bootstrapのsr-onlyを使用できます。 | 自由回答(短い) | <label class="hide"> | 他の目的で利用します。 | |
| .ls-js-hidden (3.0 から追加) | JavaScriptが有効な場合に非表示となる部分で使用 | 例:ボタン | <div class="ls-js-hidden"> | LimeSurveyのコアで使用されていますが、テンプレートの中でも使用できます。 | |
| .ls-js-hidden-sr (3.0 から追加) | アクセシビリティ対応: jsが有効な場合に非表示となりますが、スクリーンリーダーを利用する場合は常に表示されます。 | 例:ボタン | <a class="ls-js-hidden-sr"> | ボタン | |
| .ls-no-js-hidden (3.0 から追加) | JavaScriptが有効でない場合に非表示となる部分で使用 | リンク | <a class="ls-no-js-hidden"> | LimeSurveyのコアで、JavaScriptが有効でない場合に非表示のリンクで使用されています。 | |
| .ls-label-xs-visibility (3.0 から追加) | 大画面で非表示とし、小さい画面(テーブルなし)やスクリーンリーダーで表示されるラベル | ラベル | <label class="ls-no-js-hidden"> | 配列質問タイプのテーブル内のラベルで使用します。 | |
| .ls-input-group-extra (3.0 から追加) | bootstrapのinput-group-addonと同じ利用方法ですが、枠線と背景がありません。 | 右側の接尾辞 | <div class="ls-input-group-extra"> | 接尾辞・接頭辞で使用(グローバル) | |
| .checkbox (Obsolete since 3.0) | input[type=checkbox] | チェックボックスを利用する質問タイプ | <input type="checkbox" class="checkbox"> | 最新のブラウザーでは必要ありませんが、古いブラウザーでは必要となります。 | |
| .radio (Obsolete since 3.0) | input[type=radio] | 羅時をボタンを利用する質問タイプ | <input type="radio" class="radio"> | 最新のブラウザーでは必要ありませんが、古いブラウザーでは必要となります。 | |
| .text | input[type=text] | テキスト入力を利用する質問 | <textarea class="text"> | ||
| .answertext | 配列質問タイプ | 配列質問タイプの回答部分 | <th class="answertext"> | ||
| .col-answers | 配列質問タイプ | 回答の列 | <col class="col-answers"> | ||
| .odd .even (Obsolete since 2.50) | 配列質問タイプ | 一列おき | <col class="odd"> | ||
| .array1 .array2 (Obsolete since 3.0) | 配列質問タイプ | 一行おき | <tr class="array1"> | ||
| .ls-odd .ls-even (3.0 から追加) | 配列質問タイプ | サブ質問、Y軸の一行おき | <tr class="ls-odd"> |
質問部分のクラスの例
自由回答(短い)質問タイプ:
<p class="question answer-item text-item ">
<label class="hide label" for="answerSGQA">Answer</label><input type="text" value="" id="answerSGQA" name="SGQA" size="50" class="text  empty">
</p>
自由回答(短い・複数)質問タイプ
<ul class="subquestions-list questions-list text-list">
  <li class="question-item answer-item text-item" id="javatbdSGQA">
    <label for="answerSGQA">Some example subquestion</label>
     <span><input type="text" value="" id="answerSGQA" name="SGQA" size="20" class="text empty"></span>
  </li>
</ul>
配列質問タイプ
<table class="question subquestion-list questions-list ">
<caption class="hide read">Some explanation for accessibility.</caption>
<colgroup class="col-responses">
<col width="50%" class="col-answers">
<col width="25%" class="odd">
<col width="13.3%" class="col-no-answer even">
</colgroup>
<thead>
<tr class="array1 dontread">
<td> </td>
<th>1</th>
<th>No answer</th>
</tr>
</thead>
<tbody>
<tr class="array2 answers-list radio-list" id="javatbdSGQ">
<th width="20%" class="answertext">Some example subquestion
</th>
<td class="answer_cell_001 answer-item radio-item">
<label for="answerSGQA" class="hide read">1</label>
<input type="radio" value="1" id="answerSGQA" name="SGQA" class="radio">
</td>
<td class="answer-item radio-item noanswer-item">
<label for="answerSGQA" class="hide read">No answer</label>
<input type="radio" value="" id="answerSGQA" name="SGQA" class="radio">
</td>
</tr>
</tbody>
</table>質問のクラス一覧
| 質問タイプ | 質問クラス | 質問ID |
| 5点尺度 | .choice-5-pt-radio | 5 |
| 配列(10点尺度) | .array-10-pt | B |
| 配列(5点尺度) | .array-5-pt | A |
| 二元スケール配列 | .array-flexible-duel-scale | 1 |
| 配列(増加/同じ/減少) | .array-increase-same-decrease | E |
| 配列(数字) | .array-multi-flexi | : |
| 配列(テキスト) | .array-multi-flexi-text | ; |
| 配列(はい/いいえ/どちらでもない) | .array-yes-uncertain-no | C |
| 配列 | .array-flexible-row | F |
| 軸を反転した配列 | .array-flexible-column | H |
| 式 | .boilerplate | X |
| 日付 | .date | D |
| 性別 | .gender | G |
| 自由回答(非常に長い) | .text-huge | U |
| 言語の変更 | .language | I |
| リスト(ドロップダウン) | .list-dropdown | ! |
| リスト(ラジオボタン) | .list-radio | L |
| リスト(コメントつき) | .list-with-comment | O |
| 自由回答(長い) | .text-long | T |
| 数値入力(複数) | .numeric-multi | K |
| 複数選択 | .multiple-opt | M |
| コメントつき複数選択 | .multiple-opt-comments | P |
| 自由回答(短い・複数) | .multiple-short-txt | Q |
| 数字入力 | .numeric | N |
| 順位付け | .ranking | R |
| 自由回答(短い) | .text-short | S |
| はい/いいえ | .yes-no | Y |
検証のクラス一覧
これらは、ヘルプと検証TIPメッセージに適用され、タイプごとにスタイリングできます。
既定では、.hide-tipと.input-errorは連動しており、検証TIPを非表示にしておくことができます。検証エラーが発生するとTIPが現れ、エラーが解消されると再び非表示になります。
これらは、ポップアップの警告メッセージの必要性をなくすためにデザインされています。代わりに、必要に応じてTIPが表示され、回答が検証式に適合したかどうかを表示色で示します。
さらに、ページを開いたばかりの未回答状態で検証条件を満たさない場合は、検証条件を満たしていない旨のTIPはやさしい色で表示される一方、回答を送信して検証エラーが発生した場合は注意を促す色付けで表示されます。
| 目的 | CSSクラス | 説明 |
| 回答必須 | .mandatory | 質問への回答必須 |
| 入力エラー | .input-error | 少なくとも一つの検証エラーがある |
| TIP非表示 | .hide-tip | hide_tipオプションを使用した場合に追加される |
| 数字回答 | .em_num_answers | min_answers、max_answers向け |
| 値の範囲 | .em_value_range | min/max_num_value_n、multiflexible_min/max向け |
| 合計の範囲 | .em_sum_range | min/max/equals_num_value向け |
| 正規表現による検証 | .em_regex_validation | 正規表現による検証向け |
| 質問レベルの検証機能 | .em_q_fn_validation | em_validation_qオプション向け |
| サブ質問レベルの検証機能 | .em_sq_fn_validation | em_validation_sqオプション向け |
| 「その他」コメント必須 | .em_other_comment_mandatory | other_comment_mandatoryオプション向け("その他"が選択されているがコメントがない場合に表示される) |
カスタムテンプレートにスタイルをインポートする
カスタマイズされた質問のスタイルは、それぞれのテンプレートのCSSファイルの最後のほうにあり、次の記述から始まります。
/* --------------------------- START: Question styles ------------------------------ */
カスタムテンプレートの他のスタイルに影響を与えずにスタイルを適用する場合は、templates/default/template.css(テーブルベースのレイアウトの場合)と/templates/limespired/template.css(CSSベースのレイアウトの場合)の中にある上記の行の後のすべての記述を独自のスタイルシートにコピーしなければなりません。
Internet Explorer向けの条件付きスタイルシート
IE6・IE7とその他のブラウザーの間のレンダリングには著しい違いがあるため、各テンプレートにはIE向けの特別な条件付きスタイルシートがあります。
<!--[IE(IEむけ)]>
  <link rel="stylesheet" type="text/css" href="{TEMPLATEURL}IE_fix_all-versions.css" />
<![endif]-->
<!--[if lt IE 7(IE 7以前向け)]>
  <link rel="stylesheet" type="text/css" href="{TEMPLATEURL}IE_fix_older-than-7.css" />
<![endif]-->
<!--[if IE 8(IE 8向け)]>
		<link rel="stylesheet" type="text/css" href="{TEMPLATEURL}ie_fix_8.css" />
<![endif]-->
上記のコードを startpage.pstplの中、/templates/default/または/templates/limespiredからテーブルベースのレイアウト用とCSSベースのレイアウト用のそれぞれのIEスタイルシートのコピーに入れます。
Internet explorer向けの別のソリューション
bodyの条件付きクラスをstartpage.pstplに配置し、このクラスをtemplate.cssで使用できます。このメソッドは、citronadeテンプレート (Obsolete since 2.06)で使用されます。JavaScriptが動作するシステムにはjsクラス、動作しないシステムにはno-jsクラスを追加します。
<!--[if lt IE 7 ]> <body class="lang-{SURVEYLANGUAGE} {SURVEYFORMAT} ie ie6 ielt7 ielt8 ielt9 no-js"> <![endif]-->
<!--[if IE 7 ]> <body class="lang-{SURVEYLANGUAGE} {SURVEYFORMAT} ie ie7 ielt8 ielt9 no-js"> <![endif]-->
<!--[if IE 8 ]> <body class="lang-{SURVEYLANGUAGE} {SURVEYFORMAT} ie ie8 ielt9  no-js"> <![endif]-->
<!--[if IE 9 ]> <body class="lang-{SURVEYLANGUAGE} {SURVEYFORMAT} ie ie9 no-js"> <![endif]-->
<!--[if gt IE 9]><!--><body id="body" class="lang-{SURVEYLANGUAGE} {SURVEYFORMAT} no-js"><!--<![endif]-->
<script type='text/javascript'>/*<![CDATA[*/(function(H){ H.className=H.className.replace(/\bno-js\b/,'js') })(document.getElementsByTagName('body')[0]);/*]]>*/</script>
また、template.cssでは次のように使用します。
.ie6{/*internet explorer 6向け*/}
.ielt8{/*internet explorer 6、7向け*/}
.ie{/*すべてのinternet explorer向け */}
右から左に記述する(RTL)言語と均等割り付け
LimeSurveyのテキストエディターは、RTLテキストを書式設定できます。しかし、エディター自体は、均等割り付けしたときにRTL言語を左から右の形式で表示します。これはエディターの表示上の問題です。RTLで均等割り付けされた質問またはテキストは、アンケートやプレビューでは正しく右から左に表示されます。
キーワード
テンプレートファイル内のキーワードは、現在のアンケート情報に置き換えられます。中括弧で囲まれています(例:{SURVEYNAME})。
次の文字列は、テンプレートファイルを解析してアンケートユーザーに提示するときにLimeSurveyに置き換えられます。これらのフィールド文字列は、'完了ページ'以外のほぼすべてのテンプレートで機能します。(これらの文字列のほとんどはcommon.phpファイルにありますが、そこにない場合はindex.phpファイルを見てください。)
| キーワード | テンプレートファイル | 説明 |
|---|---|---|
| {SURVEYNAME} | すべてのファイル | アンケートのタイトル |
| {SURVEYDESCRIPTION} | すべてのファイル | アンケートの説明 |
| {WELCOME} | すべてのファイル(主にwelcome.pstpl) | アンケートの'ようこそ'テキスト |
| {PERCENTCOMPLETE} | survey.pstpl | アンケートの完了率を示す小さなグラフ |
| {GROUPNAME} | startgroup.pstpl, groupdescription.pstpl, endgroup.pstpl | 現在のグループ名を表示します。 |
| {GROUPDESCRIPTION} | startgroup.pstpl, groupdescription.pstpl, endgroup.pstpl | 現在のグループの説明を表示します。 |
| {NUMBEROFQUESTIONS} | welcome.pstpl | アンケートの質問総数(数字のみ)を表示します。 |
| {THEREAREXQUESTIONS} | welcome.pstpl | 関連する言語ファイルから"このアンケートはX問あります"という文が表示されます。Xは質問の数で置き換えられます。これは、単数形または複数形に対しても適切に機能します。質問が1つしかない場合、"このアンケートは1問あります"と表示されます。 |
| {CHECKJAVASCRIPT} | すべてのファイル(主にwelcome.pstpl) | エンドユーザーのブラウザでJavaScriptが無効になっているときの警告メッセージ |
| {QUESTION} | Question.pstpl | (LS1.87から置き換えられました)現在の質問のテキストを表示します({QUESTION}の書式は、'question_start.pstpl'を編集することによってカスタマイズできます)。 次のものを使用します:{QUESTION_TEXT}、{QUESTION_MANDATORY}、{QUESTION_HELP}、{QUESTION_MAN_MESSAGE}、{QUESTION_VALID_MESSAGE}、{QUESTION_INPUT_ERROR_CLASS}、{QUESTION}の代わりのラッピングHTML |
| {ANSWER} | question.pstpl, print_question.pstpl | 現在の質問に対する回答フォームを表示します。 |
| {SGQ} | question.pstpl, question text | 現在の質問のSurvey-Group-Question idを表示することにより、質問の入力フィールドを動的に参照するために、質問テキストの中で使用できます(svn build 9755現在)。 |
| {QUESTIONHELP} | question.pstpl, print_question.pstpl | 現在の質問のヘルプテキスト(質問タイプごとにあらかじめ決められたヒント)を表示します。 |
| {QUESTION_CLASS} | question.pstpl, print_question.pstpl | 各質問タイプに固有のクラスです(質問を包含するタグに含められます)。 |
| {QUESTION_CODE} | question.pstpl, print_question.pstpl | 現在の質問コードを表示します。 |
| {QUESTION_ESSENTIALS} | question.pstpl | 質問IDと(条件付き質問の場合)、'style="display:none;"'(質問を包含するタグに含められます)。 |
| {QUESTION_HELP} | question.pstp, question_start.pstpl | 現在の質問に対しユーザーが定義したヘルプテキストを表示します。 |
| {QUESTION_TYPE_HELP} | print_question.pstp | 現在の質問に対しユーザーが定義したヘルプテキストを表示します。 |
| {QUESTION_INPUT_ERROR_CLASS} | question.pstp, question_start.pstpl | ユーザー入力エラーがあった場合に適用されるクラスです。 |
| {QUESTION_ID} | print_question.pstp | 個別の質問のスタイリングを可能にするために、各質問に一意のIDを付与します。 |
| {QUESTION_TEXT} | question.pstp, print_question.pstp, question_start.pstpl | 現在の質問のテキストを表示します。 |
| {QUESTION_MANDATORY} | question.pstp, print_question.pstp, question_start.pstpl | 現在の質問に関する翻訳された'必須'テキストを表示します。 |
| {QUESTION_MAN_CLASS} | question.pstpl, print_question.pstpl | 質問が必須の場合のクラスです(質問を包含するタグに含められます)。 |
| {QUESTION_MAN_MESSAGE} | question.pstp, print_question.pstp, question_start.pstpl | 現在の質問に関する翻訳された'必須'ヘルプメッセージテキストを表示します。 |
| {QUESTION_NUMBER} | print_question.pstpl | 質問番号。 |
| {QUESTION_VALID_MESSAGE} | question.pstp, print_question.pstp, question_start.pstpl | 現在の質問に関する翻訳された'有効'ヘルプメッセージテキストを表示します。 |
| {QUESTION_SCENARIO} | print_question.pstp | 条件付き質問の'シナリオ'テキストを印刷します。 |
| {NAVIGATOR} | navigator.pstpl | ナビゲーションボタンを表示します(次へ、前へ、最後へ) |
| {CLEARALL} | すべてのファイル (navigator.pstplが対象) | "結果を破棄して終了"リンクを表示します。 |
| {COMPLETED} | completed.pstpl | 登録時の'完了'メッセージを表示します(attribute_1フィールドとattribute_2フィールドが設定されているかどうかによって変化)。 |
| {URL} | completed.pstpl | アンケートの'url'と'url text'を表示します。 |
| {PRIVACYMESSAGE} | privacy.pstpl | アンケートを匿名に設定すると、プライバシーメッセージが表示されます。テキストは、言語ファイルで編集・翻訳することができます。privacy.pstplテンプレートを編集して手動で変更することもできます。 |
| {TEMPLATEURL} | すべてのファイル | 現在のテンプレートの場所へのURLです(テンプレート内の画像ファイルを参照するのに便利)。 |
| {SURVEYRESOURCESURL} | すべてのファイル | このアンケート用の現在のアップロードファイルのURLです(質問、グループなどの画像ファイルを参照するのに便利です)。 |
| {SUBMITCOMPLETE} | endpage.pstpl | アンケートを完了したこととと、"送信"ボタンを押すようユーザーに知らせる(言語ファイルの)メッセージ。 |
| {SUBMITREVIEW} | survey.pstpl | "<< 前へ"をクリックして回答を確認したり変更したりすることができる旨をユーザーに知らせるメッセージ(言語ファイルから) |
| {SAVEDID} | All Files | ユーザーの'回答ID'を表示します。 |
| {QUEXMLPDF} | すべてのファイル | それまでに入力完了した回答を含むアンケートのqueXML PDFをエクスポートするボタンを表示します。 |
| {TOKEN:FIRSTNAME} | すべてのファイル | ***アンケート回答が匿名でない場合、トークンテーブルのユーザーの名に置き換えられます。 |
| {TOKEN:LASTNAME} | すべてのファイル | ***アンケート回答が匿名でない場合、トークンテーブルのユーザーの姓に置き換えられます。*** |
| {TOKEN:EMAIL} | すべてのファイル | ***アンケート回答が匿名でない場合、トークンテーブルのユーザーのメールアドレスに置き換えられます。*** |
| {TOKEN:ATTRIBUTE_1} | すべてのファイル | ***アンケート回答が匿名でない場合、トークンテーブルのユーザーのattribute_1に置き換えられます。*** |
| {TOKEN:ATTRIBUTE_2} | すべてのファイル | ***アンケート回答が匿名でない場合、トークンテーブルのユーザーのattribute_2に置き換えられます。*** |
| {ANSWERSCLEARED} | Preferably in navigator.pstpl | 言語ファイルの "回答の消去"メッセージ。 |
| {RESTART} | clearall.pstpl | アンケートを再開するURL。 |
| {REGISTERERROR} | register.pstpl | 登録ページにエラーメッセージが表示されます(例えば、"メールアドレスを入力する必要があります")。 |
| {REGISTERMESSAGE1} | register.pstpl | 言語ファイルの"のアンケートを実施するには、登録を行う必要があります。"というメッセージ。 |
| {REGISTERMESSAGE2} | register.pstpl | 言語ファイルの登録の詳細のメッセージ |
| {REGISTERFORM} | register.pstpl | 実際の登録フォーム。attribute_1フィールドとattribute_2フィールドが設定されているかどうかによって変わります。 |
| {SAVE} | navigator.pstplで動作 | '今までの回答を保存する'ボタンを表示して、後でアンケートに戻るようにすることができます。アンケートプロパティで[保存]オプションを無効にすると、タグは表示されず無視されます。 |
| {LANGUAGECHANGER} | survey.pstpl | 多言語アンケートのスイッチを表示して質問を変更します。 |
入力/ボタン
アンケートの各"入力"タイプには独自のクラス名が与えられているため、"startpage.pstpl"ファイルにCSSを追加したり、フォームボタンや入力の外観をある程度制御することができます。クラス名は次のとおりです。
- submit (送信ボタン)
- text (テキスト入力 - 短い自由文、日付、数値タイプ)
- answertext (回答のテキスト)
- radio (ラジオボタン)
- checkbox (チェックボックス)
- select (セレクト/リストボックス)
- textarea (長いテキスト入力 - 長い自由文)
- clearall ("回答を破棄して終了"のリンク)
- rank (順位付けスタイルの質問。選択ボックスやテキストボックスの色は設定しませんが、その他の順位付け質問の場合は背景色、テキストの色、サイズなどを変更できます)
- graph ("完了率"のグラフテーブル)
- innergraph (グラフテーブル内のテーブル - 0%と100%のテキストが含まれています。このテキストのサイズを変更します。)
- question (テーブル内に表示されるすべての質問の一般的な設定です。通常は、これを使用して、他の場所で既定として使用したフォントサイズと色と同じになるようにします)
- mandatory (必須の質問)
- input-error (ユーザー入力エラー - ユーザーが必須の質問や検証つきの質問で間違えた場合)
- array1とarray2 (配列型の質問について複数の回答を提示するときに、これらの2つのスタイルが交互に繰り返されます。こうした質問タイプで背景色を交互に変えることができます。Array1は、こうした質問タイプの列見出しにも使用されます。)
- errormandatory ("この質問は必須です"というエラーメッセージの色とスタイルを設定します。)
- warningjs (参加者のブラウザがJavaScriptを無効にしている場合に表示される警告メッセージの色とスタイルを設定します。)
要素のIDを使用してアクセスできる要素もいくつかあります(CSSの#ID)。
- surveycontact (開始ページに表示されるコンタクトメッセージ)
- tokenmessage (アンケート内のメッセージ、たとえばセッションの期限切れエラーメッセージなど)
HTMLのすべての部分を編集できるため、
<div class='new_name'></div>
のようにテンプレートを囲んで、new_nameクラスのCSSを定義する必要はありません。
プログレスバーのスタイル
プログレスバーの外観はCSSで変更できます。
バーの背景色を変更するには、custom.cssファイルの最後に次のような記述を追加します(fruityテーマの例)。
.fruity .progress-bar {
 background-color: #3300FF;
}
バーの境界線の色を変更するには、custom.cssファイルの最後に次のような記述を追加します(fruityテーマの例)。
.fruity .progress-bar {
 border: 1px solid #FF0000;
}
開発者が利用できる高度な機能
LimeSurveyには、特別な変更を可能にするユーザー作成のパッチがいくつか統合されています。これらの非常に高度な機能は、(一般的に)LimeSurveyの根底にあるコードベースを変更する必要があり、セキュリティホールを生まないよう慎重に行う必要があります。
自作のJavascript関数のサポート
アンケートページでJavascriptを実行する必要があるユーザーもいるかもしれませんが、BODY要素でcheckconditions()を呼び出すことにより、これができなくなっています。この関数呼び出しはHEAD内の小さなJavaScript関数に置き換えられ、checkconditions()とtemplate_onload()が存在するかどうかを呼び出す前に調べます。このようにして、テンプレート作成者は、HEADに既定のものを置き換える独自のtemplate_onload()関数を作成できます。
- XSS filterを無効にする: 全体設定 -> セキュリティで"HTMLのXSSフィルター"をオフにします。
- 質問またはグループの説明のソースにスクリプトを入力します。
TIP&トリック
言語固有の要素
アンケートに言語特有の文(例えば、各ページの最後にあるヘルプ)が必要な場合は、.pstlファイルに文を追加する(他の言語では表示しない)ことができます。template.cssで非表示にする場合、疑似セレクタ:langを使うこともできますが、互換性を高めるためにクラスを使用しています。
以下に、フランス語と英語の2つのヘルプ文があります。これをendpage.pstplに配置します。
<div class="fr" lang="fr">Pour de l'aide en direct appelez le 000000</div>
<div class="en" lang="en">For some help, please call 000000</div>
template.cssでは次のようにします。
.lang-fr .en{display:none}
.lang-en .fr{display:none}
アンケートページのレイアウトを変更する
テンプレートを編集して保存した後は、アンケートの設定から選択されている場合にのみ、アンケートリストページに適用されます。既定のテンプレートにするには、LimeSurveyの全体設定にある全般タブに移動し、目的のテンプレートを選択します。以降、テンプレートとして"既定"のオプションを使用するテンプレートと、新たに作成されるテンプレートを加えたすべてのテンプレートは、新しく選択された既定のテンプレートを使用します。
このページで現在のテンプレートを使用するには、全体設定から設定を変更する必要があります。以前のバージョンでは、この変更はconfigファイルで$defaulttemplate設定を編集することによって行うことができます。この設定を、config-defaults.phpから(config-defaults.phpより優先される)config.phpにコピーして次のように設定を編集します。$defaulttemplate = 'yourtemplatename';
テンプレートのインポート/エクスポート: Macユーザー
Macユーザーの場合、Mac OSXの既定のアーカイブユーティリティで"オンザフライで生成された"zipフォルダに問題がある可能性があります。
コマンドラインからunixのunzipを実行することによって回避できます。
$ unzip template.zip -d template
Archive: template.zip
inflating: template/startpage
inflating: ...
もう1つの回避策は、macでコンパイルされたスクリプトを使用することです。
同じテンプレートで別々のロゴを使う
すべてのアンケートに同じテンプレートを使用し、アンケートごとにロゴを変更する場合は、テンプレート.pstplファイル内の{SID}プレースホルダを使用して、別の画像を参照できます。
<img src="{TEMPLATEURL}files/logoImage-{SID}.png">
カスタムファビコンを表示する
ファビコンは、ブラウザのアドレスバー、ブックマークのリスト、タブに表示される小さなアイコンです。次のように自分のアイコンを表示することができます。
- ファビコンを作成する - Googleでたくさんのフリーファビコンジェネレーターを見つけることができます。
- 新しいファビコンに "favicon.ico"と名前をつけ、テンプレートの/filesディレクトリーに配置します。
- startpage.pstplの</head>タグの前に次のコードを追加します。
<link rel="shortcut icon" href="{TEMPLATEURL}files/favicon.ico" type="image/x-icon">
<link rel="icon" href="{TEMPLATEURL}files/favicon.ico" type="image/x-icon">
アンケート/質問ページごとに外観を変える
LimeSurveyでページごと(奇数ページ、偶数ページごと)に外観を変更したい場合は、CSSファイルの.page-oddクラスを使用して、奇数ページの外観を変更することができます。
LimeSurvey 1.91+の既定のテンプレートの例。
.page-odd table.question-group {
 background-color: #D2F2D3;
}
偶数ページと奇数ページを同じものにしたい場合は、template.cssの.page-oddのすべてのインスタンスを見つけ、スタイルを削除します。
二元スケール配列の垂直セパレータの境界線を作成する
二元スケール配列の垂直セパレータの境界線を作成するには、template.cssファイルに次の行を追加します。
table.question thead td.header_separator,
table.question tbody td.dual_scale_separator
{
   border-right:solid 1px #00A8E1;
}
header_separatorは、ヘッダー"td"の区切り文字を入力するために使用します。"dual_scale_separator"は、二元スケール配列内のセパレータ列の指定に使用します。
独自のロゴをアンケートリストに追加する (3.0 から追加)
- 最初に、使用したいテーマのテーマエディターを開きます。
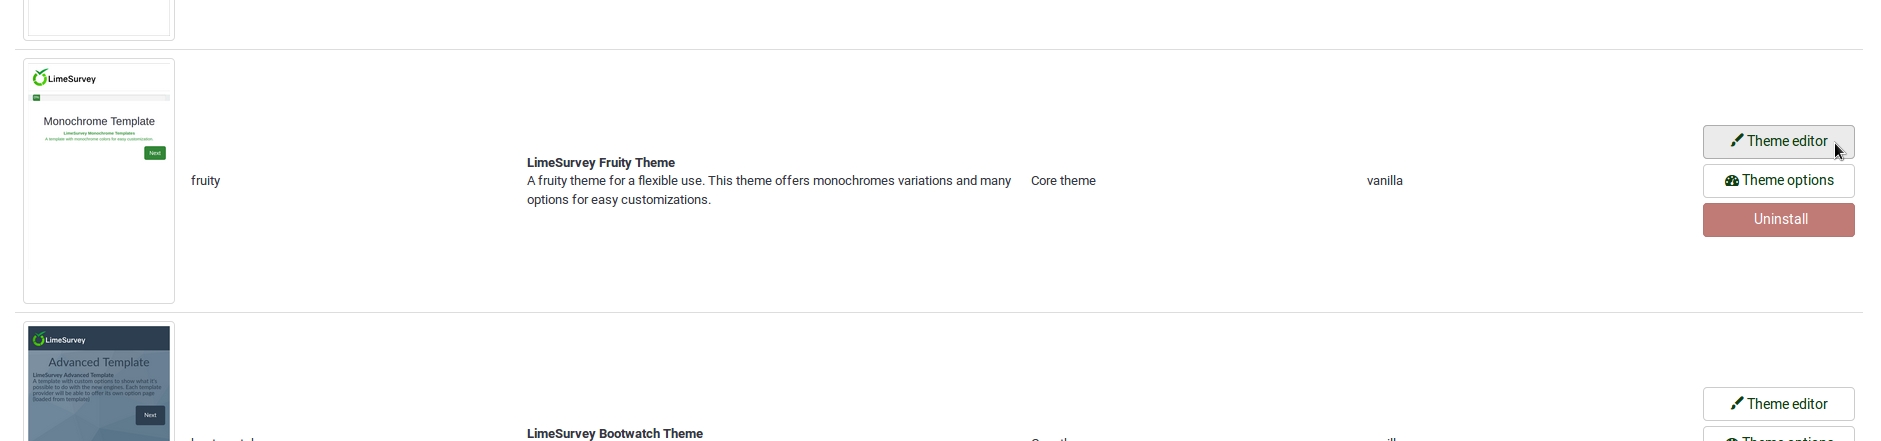
- fruityの使用をお勧めします、それは現状ベストのテーマです。
- その後、テーマを拡張し、後でわかるように名前を付けます。
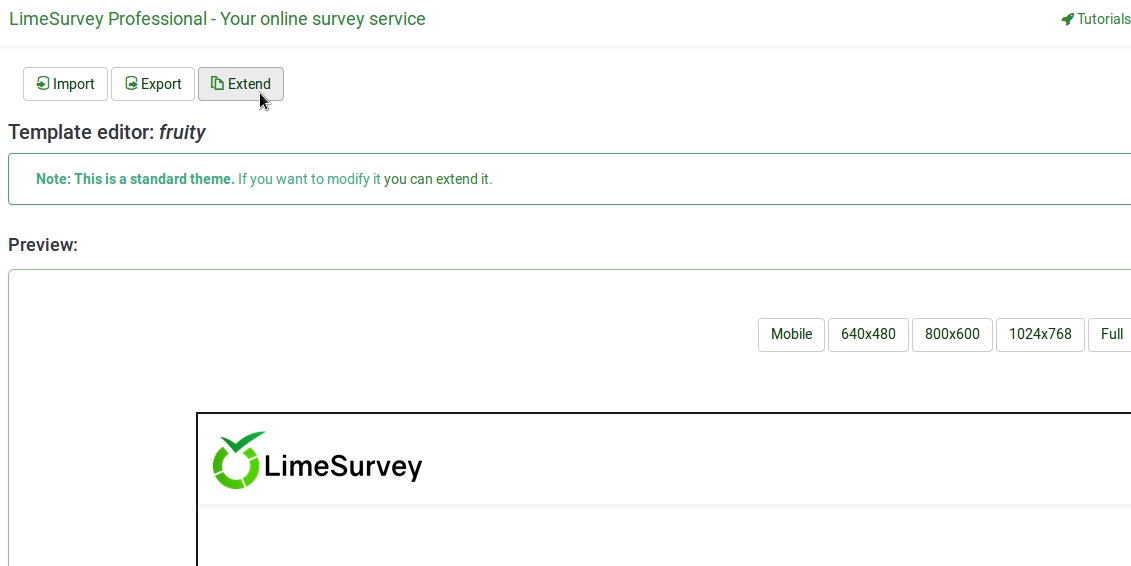
- 次のビューで、使用するロゴをアップロードすることができます。
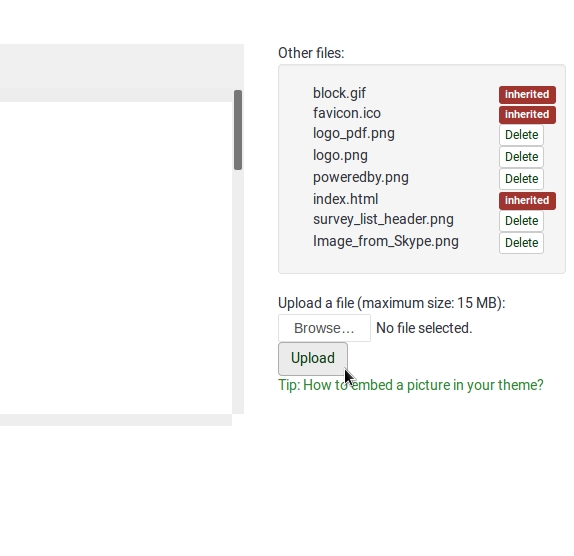
- 画面の右下にあるドロップダウンリストから、`アンケートリスト´というエディタ画面を選択します。
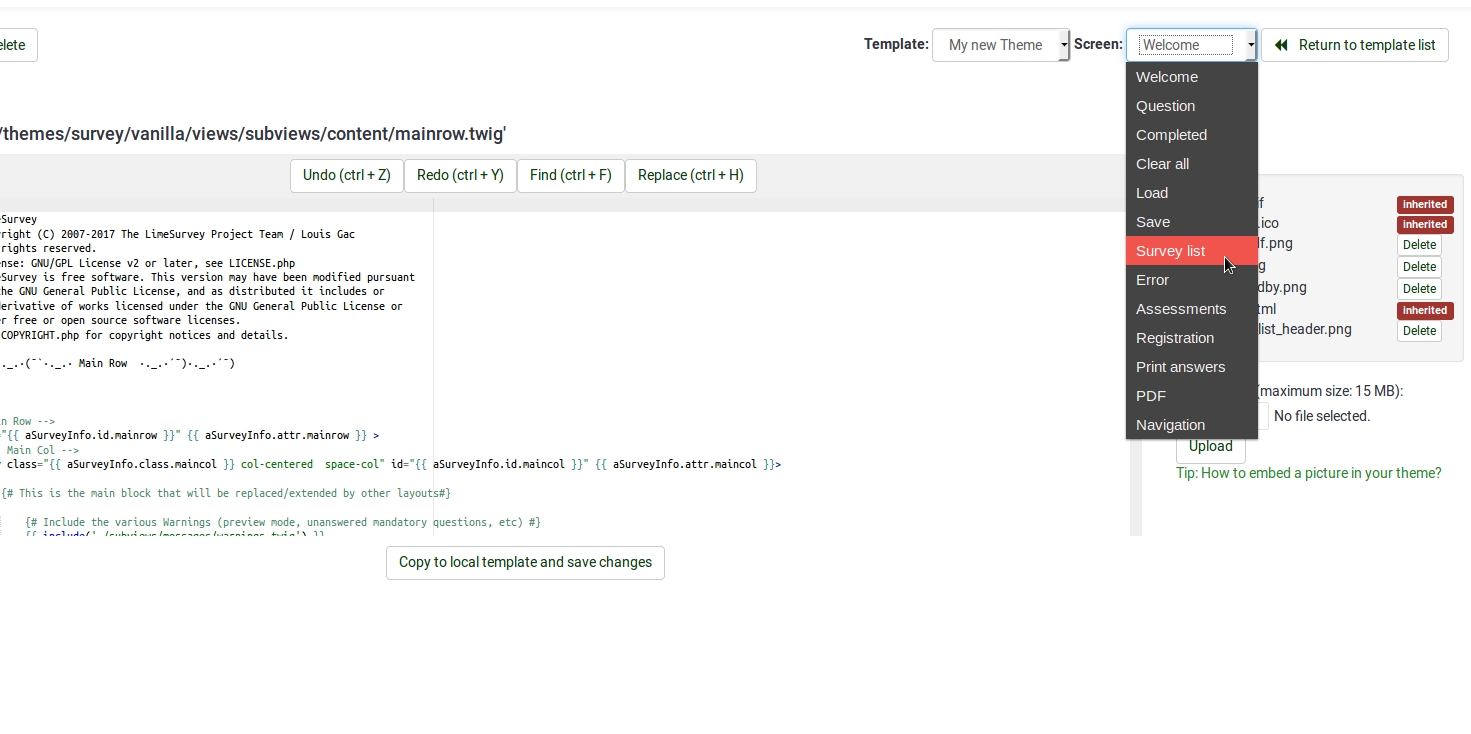
- 次に左側のメニューで、`layout_survey_list.twig´を選択します。
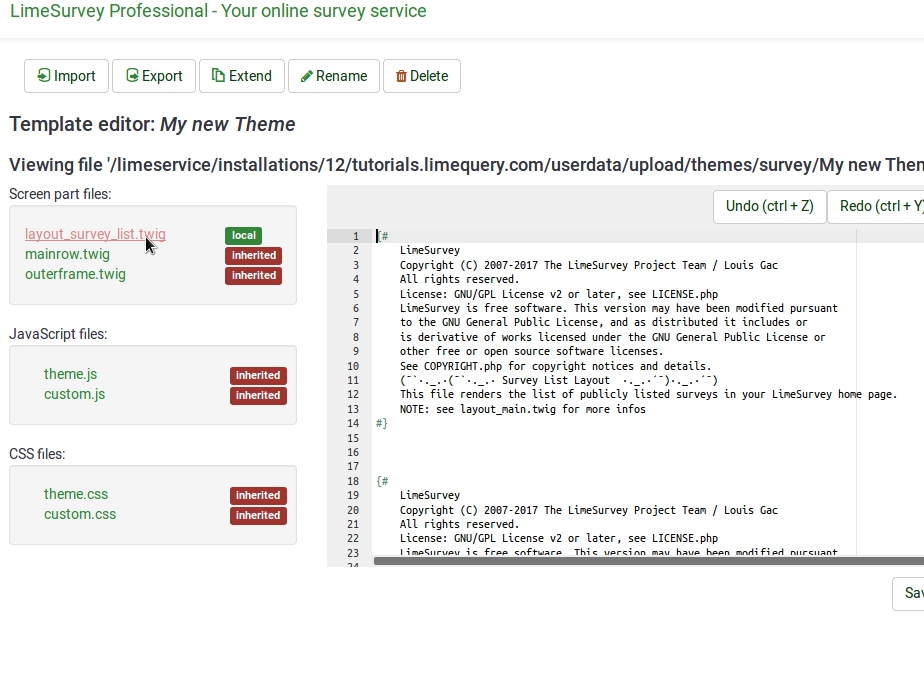
- エディターで126行目にスクロールし、マークされた部分をテーマにアップロードした画像のファイル名に変更します。
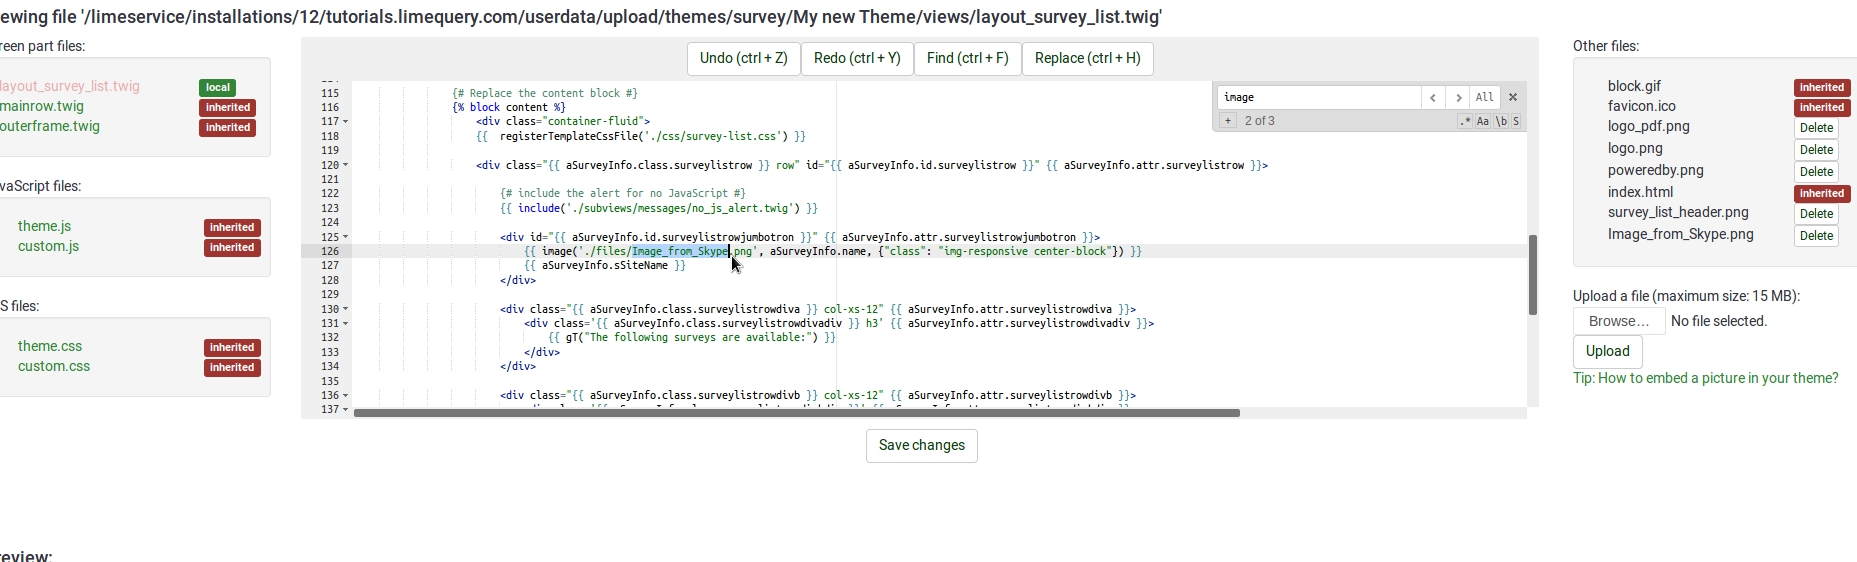
- ファイルを保存します。
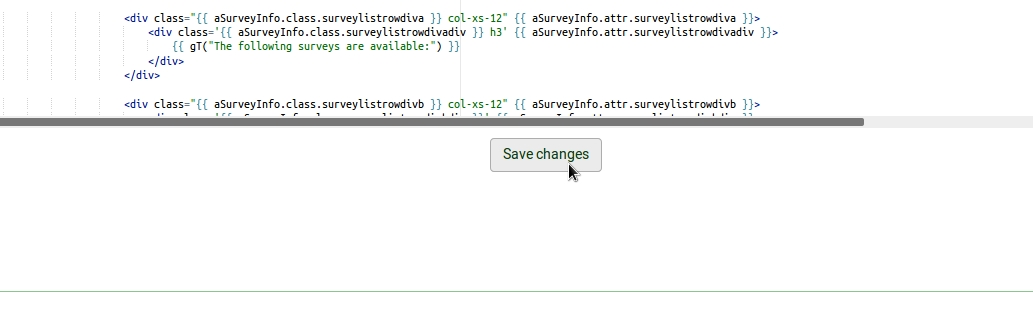
- デフォルトテーマを拡張したテーマに変更します。
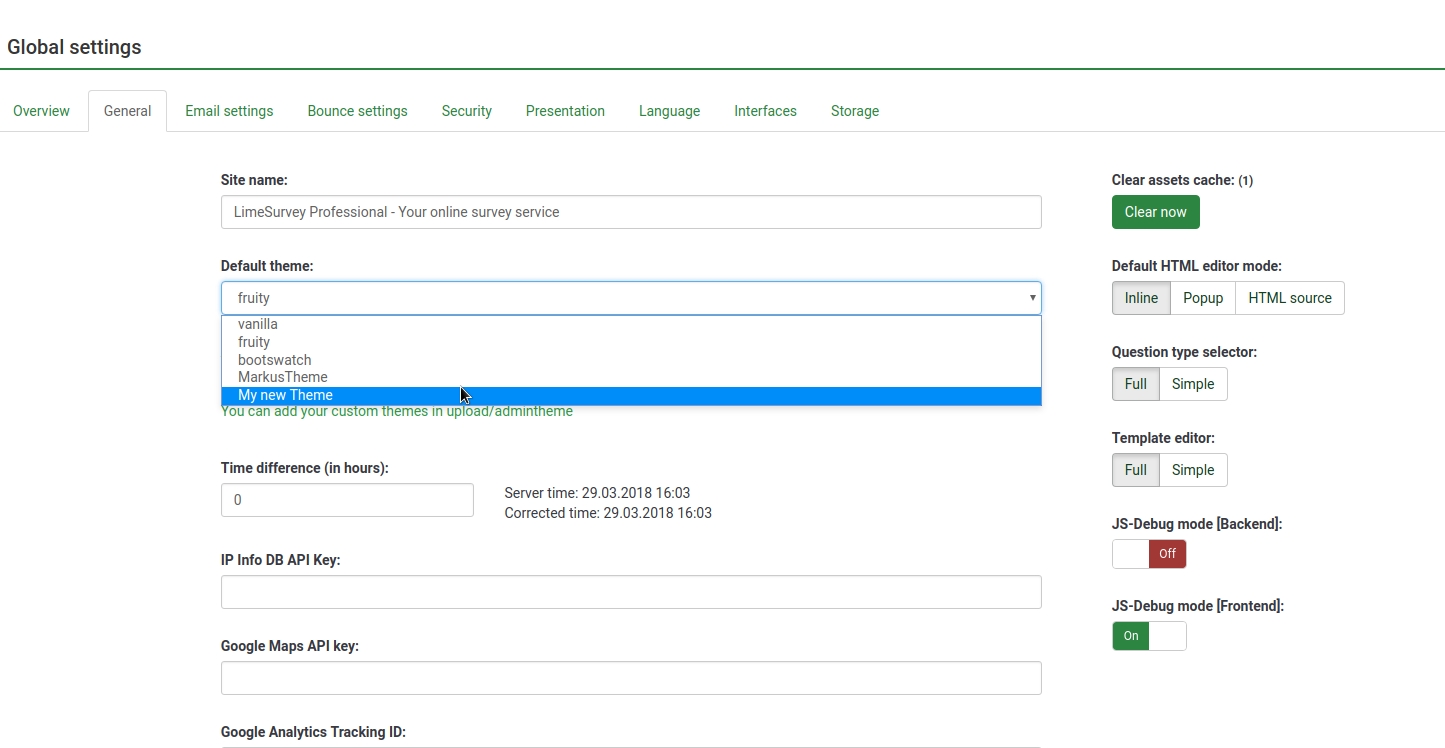


ロゴをアンケートページの中央に配置する
この例は、"extends_fruity"テンプレート用です。他のテンプレートでは、必要なCSSが異なる場合があります。
- LimeSurveyの管理エリアにログインします。
- テーマエディターを開きます。:設定 > テーマ
- リストから"LimeSurvey Fruityテーマ"を探し、"テーマエディター"ボタンをクリックします。
- ページ下部付近の左側にあるファイル一覧から"custom.css"をクリックします。
- そのファイルに以下のCSSをコピーし、"変更を保存"を押します。
.navbar-fixed-top > div.navbar-header {
    width: 100% !important;
}

.navbar-fixed-top > div.navbar-header > div {
    width: 100% !important;
}

.navbar-fixed-top > div.navbar-header > div > img {
    margin: 0 auto 0 auto !important;
}
カスタム質問ビュー (3.0 から追加)
バージョン2.5では、質問と組み込み要素の一部について、テンプレート固有のカスタムビューを作成できます。複数のアンケートの特定の質問タイプのHTMLレイアウトを変更する場合に便利です。
- application/config/config.phpで、'config'=>arrayを探し、次の行を配列に加えます。'allow_templates_to_overwrite_views'=>1
- /{your_template}/config.xmlで、"overwrite_question_views"をtrueに設定します。
- application/views/survey/*をtemplate/{your_view_directory}/survey/にコピーします。
- 変更するファイルのみをコピーする必要がありますが、ファイル構造はapplication/views/survey/と同じでなければなりません。
テンプレートにカスタムCSSまたはJavaScriptファイルを挿入する
バージョン2.50以降では、config.xmlファイルを使用してプラグインファイルを自動的に読み込むことができます。
- テンプレートの/cssまたは/scriptsフォルダーにファイルをアップロードする
- /{your_template}/config.xmlで、<css>ブロックまたは<js>ブロックにファイルパスを追加します。
<css>
	<filename>css/jquery-ui-custom.css</filename>
	<filename>css/bootstrap-slider.css</filename>

	<filename>css/awesome-bootstrap-checkbox/awesome-bootstrap-checkbox.css</filename>
	<filename>css/flat_and_modern.css</filename>

	<filename>css/template.css</filename>

	<filename>css/myCustomPlugin.css</filename>
</css>
<js>
	<filename>scripts/template.js</filename>
	<filename>scripts/bootstrap-slider.js</filename>

	<filename>scripts/myCustomPlugin.js</filename>
</js>
クラス定義(開発者向け)
answer-list
| 質問 | 質問タイプ | 要素 |
|---|---|---|
| arrays/5point | A | tr |
| arrays/10point | B | tr |
| arrays/array | F | tr |
| arrays/column | H | trとcol |
| arrays/dualscale | 1 | tr |
| arrays/increasesamedecrease | E | tr |
| arrays/yesnouncertain | C | tr |
| gender | G | divとul |
| list_with_comment | O | div |
| ranking | R | ulとdiv |
| yesno | Y | ulとdiv |
| ranking_advanced | R | ulとdiv |
| listradio | L | div |
| 5pointchoice | 5 | ul |
| multiplechoice | M | div |
radio-list
| 質問 | 質問タイプ | 要素 |
|---|---|---|
| yesno | Y | ul |
| gender | G | ul |
| arrays/yesnouncertain | C | tr |
| arrays/increasesamedecrease | E | tr |
| arrays/dualscale | 1 | tr |
| arrays/5point | A | tableとtr |
| arrays/10point | B | tr |
| arrays/array | F | tr |
| arrays/column | H | col |
| listradio | L | div |
| list_with_comment | O | divに続くul |
radio-item
| 質問 | 質問タイプ | 要素 |
|---|---|---|
| arrays/yesnouncertain | C | td |
| 5pointchoice | 5 | li |
| arrays/10point | B | td |
| arrays/5point | A | td |
| arrays/array | F | td |
| arrays/column | H | td |
| arrays/dualscale | 1 | td |
| arrays/increasesamedecrease | E | td |
| gender | G | li |
| listradio | L | li |
| yesno | Y | li |
| listradio | L | liとdiv |
| image_select-listradio | L | liとdiv |
| list_with_comment | 0 | li |
list-group
| 質問 | 質問タイプ | 要素 |
|---|---|---|
| yesno | Y | ul |
| 5pointchoice | 5 | ul |
| gender | G | ul |
| ranking | R | ul |
| ranking_advanced | R | ulとdiv |
| question_index_group_buttons | div | |
| question_index_questions_buttons | div |
list-group-horizontal
| 質問 | 質問タイプ | 要素 |
|---|---|---|
| yesno | Y | ul |
| 5pointchoice | 5 | ul |
| gender | G | ul |
list-unstyled
| 質問 | 質問タイプ | 要素 |
|---|---|---|
| list_with_comment | 0 | ul |
| listradio | L | ul |
| multiplechoice | M | ul |
| multiplechoice_with_comments | P | ul |
| multiplenumeric | K | ul |
| multipleshorttext | Q | ul |
| ranking | R | ul |
| ranking_advanced | R | ul |
| bootstrap_buttons_multi | M | ul |
| image_select-multiplechoice | M | ul |
| inputondemand/multipleshorttext | Q | ul |
| register_error | ul | |
| register_message | ul | |
| layout_survey_list | ul | |
| load | ul | |
| save | ul | |
| captcha | ul |
select-list
| 質問 | 質問タイプ | 要素 |
|---|---|---|
| ranking | R | ul |
| ranking_advanced | R | ul |
checkbox-item
| 質問 | 質問タイプ | 要素 |
|---|---|---|
| multiflexi (Array numbers) | : | td |
| multiplechoice | M | li |
| multiplechoice_with_comments | P | div |
| image_select-listradio | L | li |
| image_select-multiplechoice | M | liとdiv |
| navigator | span |
checkbox-text-item
| 質問 | 質問タイプ | 要素 |
|---|---|---|
| multiplechoice_with_comments | P | li |
| multiplechoice | M | li |
| image_select-multiplechoice | M | li |