Assessments/ro: Difference between revisions
From LimeSurvey Manual
Maren.fritz (talk | contribs) (Created page with "Pentru a crea reguli noi de evaluare, completați câmpurile situate sub tabelul „Reguli de evaluare”. Sunt disponibile următoarele opțiuni:") |
Maren.fritz (talk | contribs) (Created page with "*'''Domeniul de aplicare:''' Puteți alege fie „Total” fie „Grup”. Primul va crea o evaluare bazată pe suma tuturor răspunsurilor transmise în întregul sondaj. Ace...") |
||
| Line 48: | Line 48: | ||
Pentru a crea reguli noi de evaluare, completați câmpurile situate sub tabelul „Reguli de evaluare”. Sunt disponibile următoarele opțiuni: | Pentru a crea reguli noi de evaluare, completați câmpurile situate sub tabelul „Reguli de evaluare”. Sunt disponibile următoarele opțiuni: | ||
*''' | *'''Domeniul de aplicare:''' Puteți alege fie „Total” fie „Grup”. Primul va crea o evaluare bazată pe suma tuturor răspunsurilor transmise în întregul sondaj. Acesta din urmă va crea o evaluare bazată pe suma tuturor răspunsurilor trimise dintr-un grup de întrebări; | ||
*''' | *'''Grup:''' Lista drop-down vă permite să alegeți grupul de întrebări pe care doriți să-l evaluați. | ||
Revision as of 09:00, 31 October 2023
Introducere
LimeSurvey conține o caracteristică care permite administratorilor de sondaj să creeze „evaluări” pentru participanții la sondaj - chiar și pentru sondajele multilingve. Evaluările sunt reguli care evaluează răspunsurile la un sondaj imediat după ce acesta este trimis, afișând blocuri de text pentru participantul la sondaj (pe baza acelei evaluări).
Pentru a utiliza caracteristica de evaluare a LimeSurvey, din Meniul Sondaj faceți clic pe fila Evaluări.
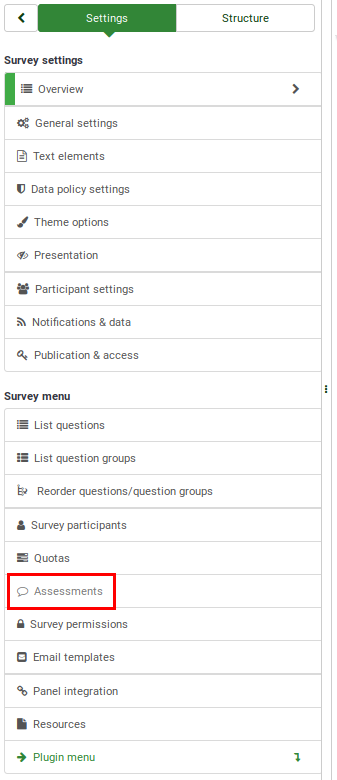
Apoi puteți „activa” modul de evaluare.

Cum funcționează evaluările?
Următorul este un exemplu care, sperăm, vă va ajuta să înțelegeți mai bine cum este proiectat să funcționeze „modul de evaluare”.
Imaginați-vă că aveți două întrebări în sondajul dvs., prima întrebare întreabă dacă utilizatorul fumează: „Fumați?”. Întrebarea are 3 răspunsuri posibile, „Da, mai mult de 10 pe zi” cu valoarea „10”, „Da, dar mai puțin de 10 pe zi” cu valoarea „5” și „Nu, nu fumează deloc” cu o valoare de evaluare de „1”.
A doua întrebare "Faceți exerciții?" are trei răspunsuri posibile: „Da, fac exerciții de cel puțin o jumătate de oră de trei ori pe săptămână” cu valoarea „1”, „Da, fac exerciții ocazional” cu valoarea „5” și „Nu, nu fac exercițiu” cu un cod de răspuns/valoare de „10”.
Dacă ar fi să adunăm totalurile valorilor pentru fiecare răspuns posibil la finalul sondajului, am obține o bună indicație a stării generale de sănătate a respondentului. Cineva care fumează și nu face niciodată exerciții va obține 10 puncte pentru fiecare răspuns, obținând un punctaj total de 20 când adunăm cele două valori. Cineva care nu fumează și nu face mișcare va nota 1 pentru fiecare răspuns, obținând, în final, un punctaj total de 2.
Evaluări
Pagina de evaluari:
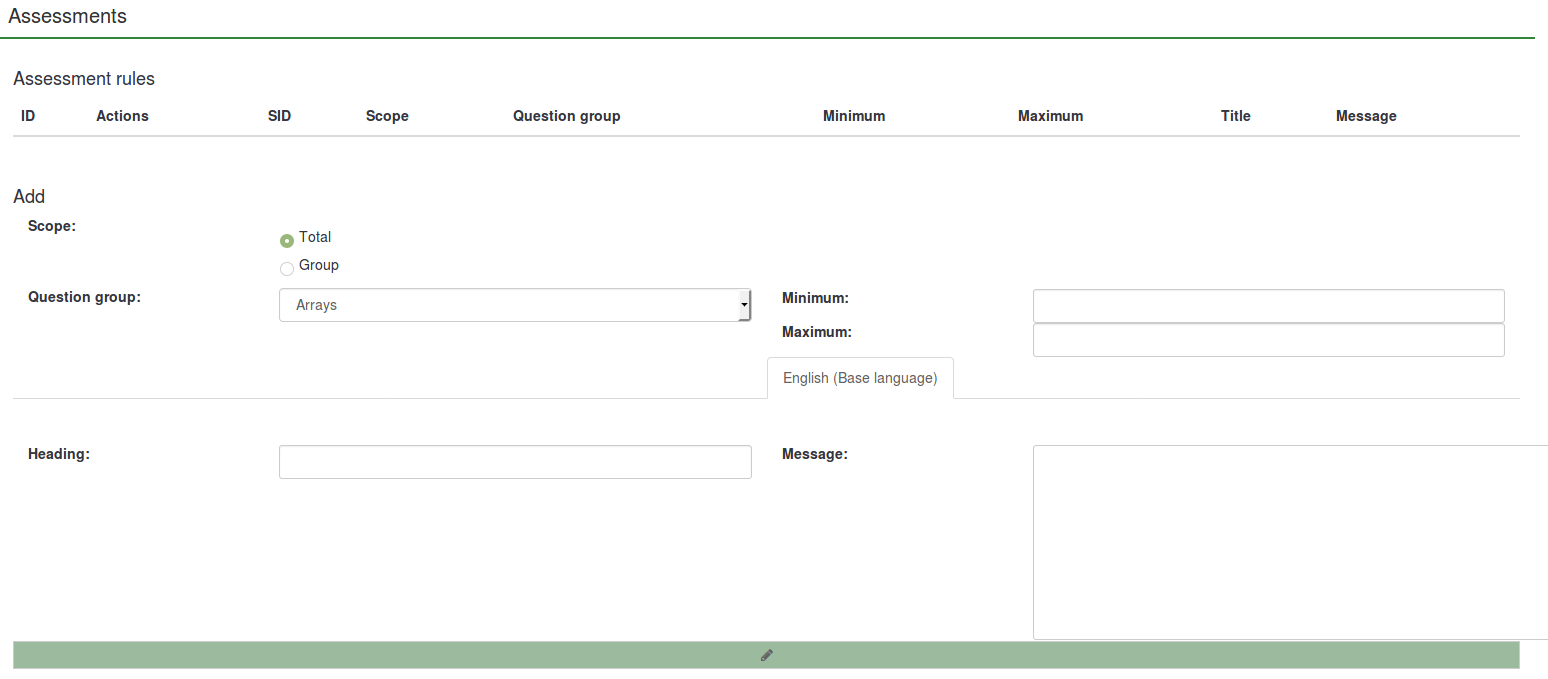
Pentru a crea reguli noi de evaluare, completați câmpurile situate sub tabelul „Reguli de evaluare”. Sunt disponibile următoarele opțiuni:
- Domeniul de aplicare: Puteți alege fie „Total” fie „Grup”. Primul va crea o evaluare bazată pe suma tuturor răspunsurilor transmise în întregul sondaj. Acesta din urmă va crea o evaluare bazată pe suma tuturor răspunsurilor trimise dintr-un grup de întrebări;
- Grup: Lista drop-down vă permite să alegeți grupul de întrebări pe care doriți să-l evaluați.
- Minimum: The minimum score to which this assessment will apply.
- Maximum: The maximum score of answers to which this assessment will apply;
- Heading: The heading of the assessment that will appear if the assessment is going to be displayed;
- Message: The text message of the assessment - displayed at the end of the survey to the participants. You can use placeholders such as {PERC} and/or {TOTAL} to emphasize the scores of each survey question group or the total survey score. Click the green pencil button to access the HTML-editor and enhance the final message of the assessment by adding colours, tables, images, etc.
You can create as many assessments as you like, and you can create more than one assessment to display for a given score.
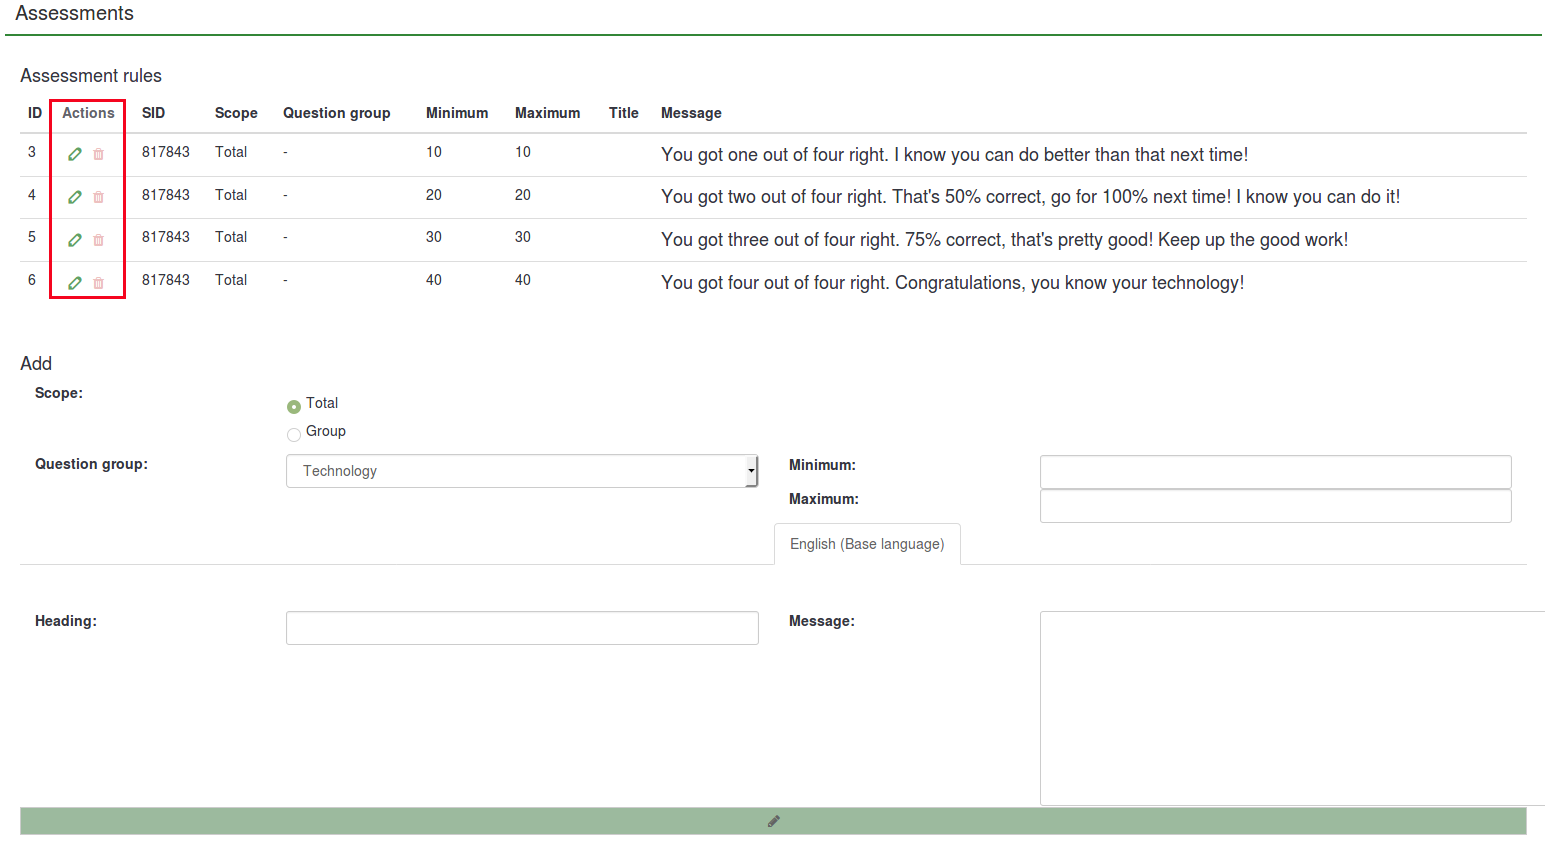
After adding some assessments, the possible assessments actions will be displayed under the Actions column in the Assessments rules table. From there, you can either edit or delete an assessment rule:
How Question types Are Evaluated
There are certain question types which can not be assessed or have to be assessed in a special way. Some of the questions cannot be used with the assessment feature. However, they can be replaced with question types that can be used with this feature. For example, a 5-point choice question can be replaced with a simple list (radio) question type.
The following question types can always be assessed:
- Array dual scale
- Array
- Array by column
- List (Dropdown)
- List (Radio)
- List with comment
- Multiple options
- Multiple options with comments
The following list contains question types that cannot be assessed:
- 5 point choice
- Array (5 point choice)
- Array (10 point choice)
- Array (Increase, Same, Decrease)
- Array (Text)
- Array (Yes/No/Uncertain)
- Array (Numbers)
- Text display
- Date
- Gender
- Huge free text
- Language switch
- Long free text
- Multiple numerical input
- Numerical input
- Ranking
- Short free text
- Yes/No
Set Assessment Values For Each Answer/Label
If enabled, the assessment mode will add an additional field between the answer code and answer option name for all the questions to be assessed.

You can also use label sets as answers options for your set of questions. Just click the Predefined label sets... button located under the answers matrix and select your predefined label set.
If you decide to use label sets, assessment values can be added to all your labels from the moment they are first created. This allows the survey administrator to quickly use predefined label sets with assessment values as answers for multiple sets of questions.

This process is less time-consuming and more practical. You can create a plan in the early stages of your survey to use only one set of label sets with predefined assessment values for multiple questions. This way, you will not have to manually add assessment values to all the answers of the questions used in your survey to be assessed.
Assessment Placeholders
When using assessments the following placeholders are available:
- {PERC}: Displays the score of a question group. It can be used only in the message field of the assessment rule!
- {TOTAL}: Displays the total score. It can be used only in the message field of the assessment rule!
- {ASSESSMENT_CURRENT_TOTAL}: This placeholder can be used within a survey to display the current total score. Keep in mind that the score is only updated when the respondent clicks the "Next" button. Therefore, it is useless in an all-in-one survey. Also, its use requires the existence of at least one assessment rule. Otherwise, the placeholder will not display any value.
If your survey is not anonymous, the following placeholders are available.
- {TOKEN:EMAIL}: Displays the email of the respondent from the survey participants table
- {TOKEN:FIRSTNAME}: Displays the first name of the respondent from the survey participants table
- {TOKEN:LASTNAME}: Displays the last name of the respondent from the survey participants table
- {TOKEN}: Displays the token code of the respondent from the survey participants table
Tips & Tricks
Save Assessment Value in Data
To save assessment value in data and have it in an export : you can create a Question_type_-_Equation and put {ASSESSMENT_CURRENT_TOTAL} in the equation setting.
Use {ASSESSMENT_CURRENT_TOTAL} Without Assessment Message
If you choose not to add an assessment message, then no assessment message is shown.
How to Disable the Assessment Mode
To deactivate assessment mode, go to the Survey menu and click the Data management tab. The Notification and data management panel will be displayed. Click the Enable assessment mode option and disabled it for the respective survey.

Examples
How To Use the Assessment Mode
Let's recreate the example presented above to better understand the steps you have to pursue in order to correctly use the assessment feature.
2) Activate the assessments. Go to the settings menu of the survey and click the Assessments tab. Once there, activate the feature:

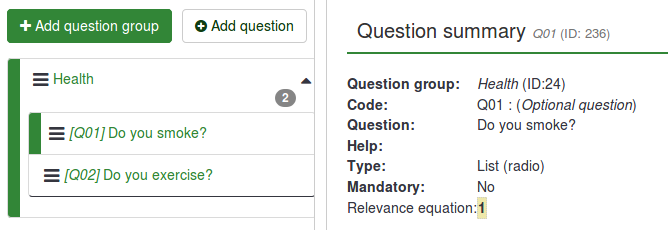
3) Create a question group and start adding the questions. Your survey structure should look like this:
4) Add answers for each question created above. While adding/editing the answers, complete also the assessment value field for each answer:

5) Now that you know the assessment values, access the Assessments panel and start adding assessment rules. Two rules were created for this example:

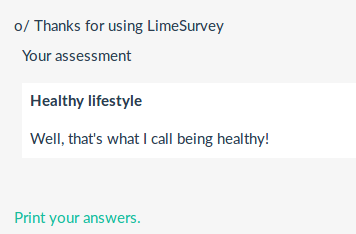
The text message of the first assessment rule (You should start exercising!) will be displayed if the respondent scores between 1 and 10 points. The text message of the second assessment rule (Well, that's what I call being healthy!) will be shown if the respondent scores between 11 and 21 points.
6) Now, preview the survey and see if the assessment mode is active. At the end of the survey, a text message will be displayed based on the score obtained by the respondent.
How To Use the Assessment Placeholders
As mentioned in the previous subsection, three assessment-related placeholders can be used: {PERC}, {TOTAL}, and {ASSESSMENT_CURRENT_TOTAL}.
In the previous example, the following result was obtained: "Well, that's what I call being healthy!". However, no score was displayed.
There are different ways to have the score displayed. You can either create 6 assessment rules to emphasize each possible score/result or use assessment placeholders. The below example explains the latter option.
As mentioned above, {PERC} and {TOTAL} can be used in the message text box of the assessment rule to emphasize the score of the current group and the total score, respectively. Let's take a look at the following two screenshots to understand their usage.
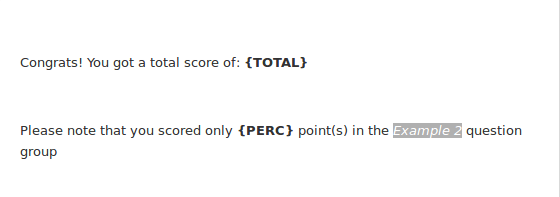
In the first screenshot, {PERC} and {TOTAL} were added into the message text box of the assessment rule.

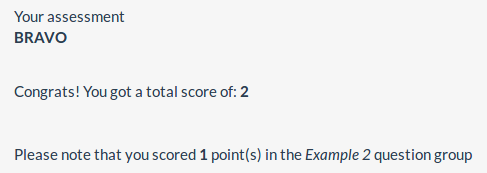
In the second screenshot, you can see how the assessment rule looks to correctly use both placeholders. Because {PERC} is used, the scope of the assessment rule must be switched from Total to Group to correctly display the score of the question group selected from the Question group dropdown list:

After completing the survey and depending on their answers, the participants should receive the following assessment message at the end:
{ASSESSMENT_CURRENT_TOTAL} can be used only inside a survey. You can use it after each question or question group from a quiz. This way you could show each participant his or her current quiz/survey score. To use it, you could add, for example, at the beginning of every question or question group a message like: "You have accumulated till now {ASSESSMENT_CURRENT_TOTAL} points".
Video tutorial
To understand the basics of the LimeSurvey assessments feature, watch the following video.