Quick start guide - LimeSurvey 3.0+/fr: Difference between revisions
From LimeSurvey Manual
Maren.fritz (talk | contribs) (Created page with "Vous devez créer un site d'enquête avant de pouvoir commencer à créer et à gérer des enquêtes en ligne. Connectez-vous à votre compte et cliquez sur '''''Créer un sit...") |
Maren.fritz (talk | contribs) (Created page with "'''Pour créer votre site LimeSurvey''' : *Entrez le nom de votre site. *Choisissez un nom de domaine dans le menu déroulant. *Choisissez un emplacement de serveur. *Cliquez...") |
||
| Line 58: | Line 58: | ||
''' | '''Pour créer votre site LimeSurvey''' : | ||
* | *Entrez le nom de votre site. | ||
* | *Choisissez un nom de domaine dans le menu déroulant. | ||
* | *Choisissez un emplacement de serveur. | ||
* | *Cliquez sur '' Enregistrez et configurez le site LimeSurvey''. | ||
The process can take up to 20 seconds. When the process is complete, the window will close and you will be taken back to your account page. | The process can take up to 20 seconds. When the process is complete, the window will close and you will be taken back to your account page. | ||
Revision as of 06:56, 4 October 2023
Introduction - qu'est-ce que LimeSurvey ?
LimeSurvey est une application d'enquête en ligne open source gratuite écrite en PHP et distribuée sous le label gpl-2.0.html Licence publique générale GNU 2. Le logiciel permet aux utilisateurs de créer et de publier des enquêtes en ligne, de collecter des réponses, de créer des statistiques et d'exporter les résultats vers d'autres applications. Vous pouvez installer LimeSurvey sur votre propre serveur (LimeSurvey Community Edition) ou utiliser notre service d'hébergement (LimeSurvey Cloud).
Ce guide de démarrage rapide a été rédigé pour les utilisateurs de LimeSurvey Cloud. Si vous utilisez LimeSurvey Community Edition, veuillez vous référer à la section Installation du manuel LimeSurvey pour installer LimeSurvey sur votre propre serveur.
Créez un compte LimeSurvey gratuit
Essayez-le maintenant ! Créez un compte gratuit LimeSurvey pour tester ses fonctionnalités et ses fonctions principales. Cliquez sur le bouton « Inscrivez-vous gratuitement » ou sélectionnez « Tarifs » sur la page d'accueil du Site Web LimeSurvey et terminez l'inscription.

Vous serez directement redirigé vers la page d'inscription si vous choisissez Inscrivez-vous gratuitement.
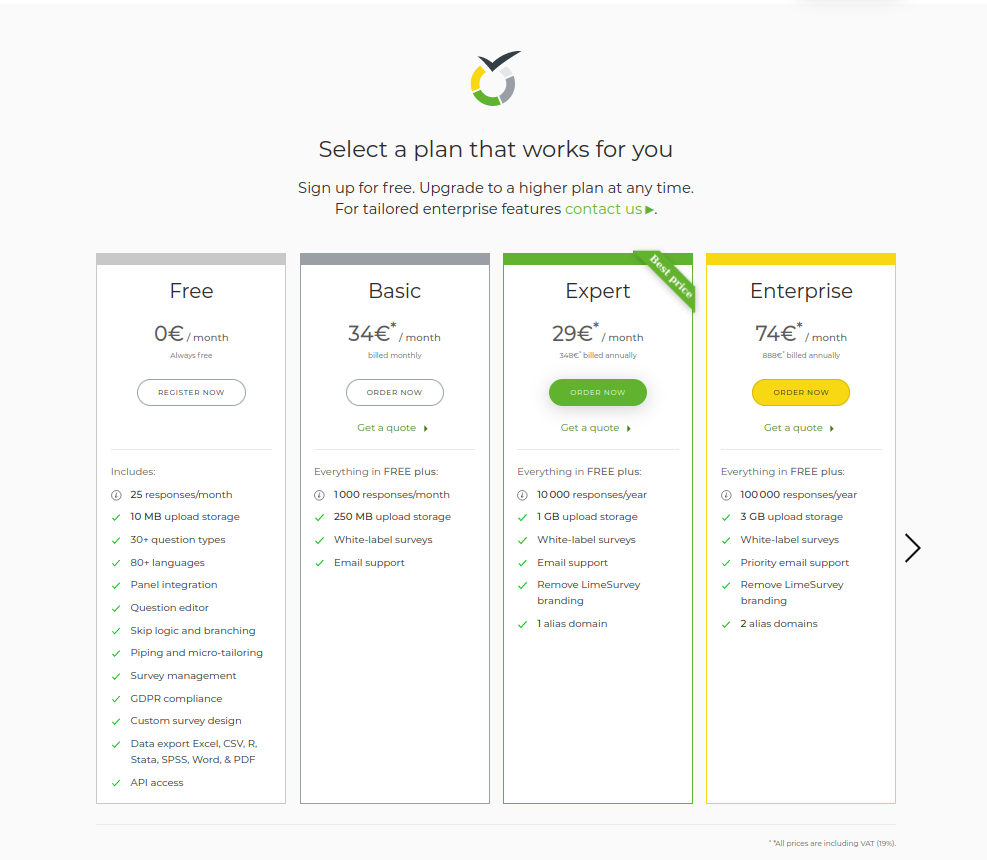
Quatre options seront affichées lorsque Tarif est sélectionné : Gratuit, Basique, Expert et Entreprise. Cliquez sur S'inscrire maintenant dans la case d'option GRATUIT. Vous serez redirigé vers la page d'inscription.
Ensuite, remplissez les champs suivants :
- Nom d'utilisateur : Choisissez un nom d'utilisateur pour votre compte. Votre nom d'utilisateur sera également utilisé pour accéder à votre site LimeSurvey.
- Email: Le lien d'activation sera envoyé par e-mail à l'adresse e-mail fournie.
- Mot de passe: Choisissez un mot de passe, qui sera également utilisé pour accéder à votre site LimeSurvey.
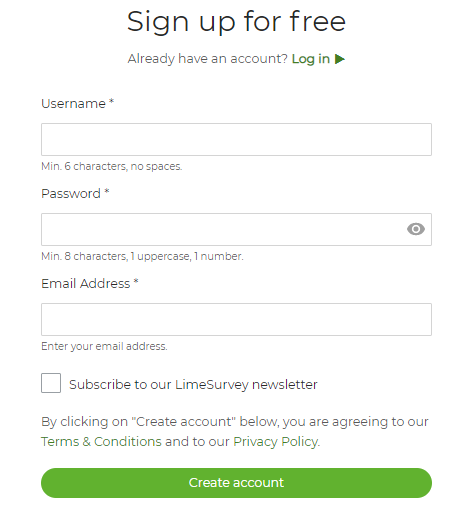
Cliquez dans chaque zone de texte pour révéler des détails sur les informations requises pour chaque champ. Abonnez-vous à la newsletter LimeSurvey afin de recevoir de l'aide, des conseils, des mises à jour, des remises sur les services et les dernières nouvelles.
Après avoir créé votre compte LimeSurvey, vous recevrez un e-mail. Cet e-mail contient le lien d'activation du compte. Cliquez sur le lien pour accéder à votre compte nouvellement créé. En cliquant sur le lien, vous accédez à votre compte sur le Site Web LimeSurvey.
Configuration de votre site d'enquête
Vous devez créer un site d'enquête avant de pouvoir commencer à créer et à gérer des enquêtes en ligne. Connectez-vous à votre compte et cliquez sur Créer un site de sondage.

Pour créer votre site LimeSurvey :
- Entrez le nom de votre site.
- Choisissez un nom de domaine dans le menu déroulant.
- Choisissez un emplacement de serveur.
- Cliquez sur Enregistrez et configurez le site LimeSurvey.
The process can take up to 20 seconds. When the process is complete, the window will close and you will be taken back to your account page.

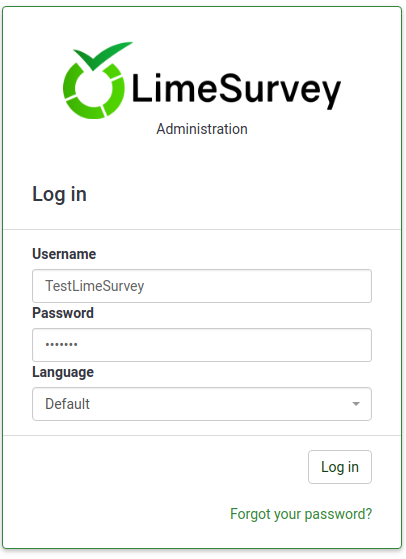
You can now access your survey site by clicking View Survey Site at the top of the page. Sign in to your account using your LimeSurvey.org credentials.
Start using LimeSurvey
There is a toolbar in the top right corner of the page. In the middle of the page, there are six boxes with shortcuts to the most commonly used LimeSurvey features.
The toolbar contains the following options:
- Tutorials: Here, (in any LimeSurvey 3+ application), you will find a "Beginner Tour" tutorial to help you get a basic understanding of LimeSurvey and its most essential features.
- Configuration: Here under the Settings, Users, and Advanced tabs, you will find options to help customize your LimeSurvey application, manage users and survey participants, and customize your surveys.
- Settings: Options for customizing your LimeSurvey application.
- Home Page Settings: Options for customizing the home page.
- Global Settings: The changes made here are applied to the entire LimeSurvey application, including the non-superadministrator settings for all users.
- Plugin Manager: Options for activating and managing all LimeSurvey plugins, which are supported by the LimeSurvey team. You can also add your own plugins.
- Menu Configuration: Options for creating new menus or adding entries to existing menus.
- Menu Entries Configuration: Options for creating, editing, or deleting menu entries.
- Users: Options related to the management of users and survey participants.
- Manage Survey Administrators: You can add new survey administrators from here.
- Create/Edit User Groups: This function allows you to separate administration users into groups.
- Central Participant Databases: You, as an administrator, can use this function to store the information of survey respondents in a central table/database that is independent of any table of participants.
- Advanced Settings: Non-user or survey related settings that allow you to enhance your LimeSurvey application.
- Theme editor: Options that allow you to add/edit/delete survey themes, admin themes, or question themes. You can choose a theme to customize a survey as well as the LimeSurvey interface.
- Manage Label Sets: Label sets are a list of codes with labels that can be used as answers or as subquestions in most questions types.
- Check Data Integrity: This checks the consistency and the redundancy of data.
- Backup Entire Database: Option for backing up the LimeSurvey data when an important upgrade is pushed or when the LimeSurvey application is moved to another server.
- Settings: Options for customizing your LimeSurvey application.
- Surveys: A survey includes: languages, question groups, questions, question attributes, answers, subquestions, default answers, assessments, quotas, quota members, and quota language settings. When clicking the green arrow, a window with the following options will appear:
- Create a New Survey: Creates a new survey.
- Import a New Survey: Imports a new survey.
- Copy a Survey: Lets you easily copy a survey that appears in the surveys list. Once copied it can then be edited.
- List Surveys: Lists all of your existing surveys.
- Response Balance: Shows the number of responses left on your subscription. As you only have access to a free account at the moment, you are limited to 25 responses per month. If you run out of responses, simply purchase more using this link.
- Storage: This is the amount of MBs available to you to store your responses and surveys. You have 10 MB of storage space on your free account. If you need to increase the storage space, choose one of the following paid options from here.
- Username: Here you can view your user preferences or log out of your account.
- Bell Icon: Click the green bell to view notifications related to your LimeSurvey application.
There are six boxes on the home page of your LimeSurvey application.
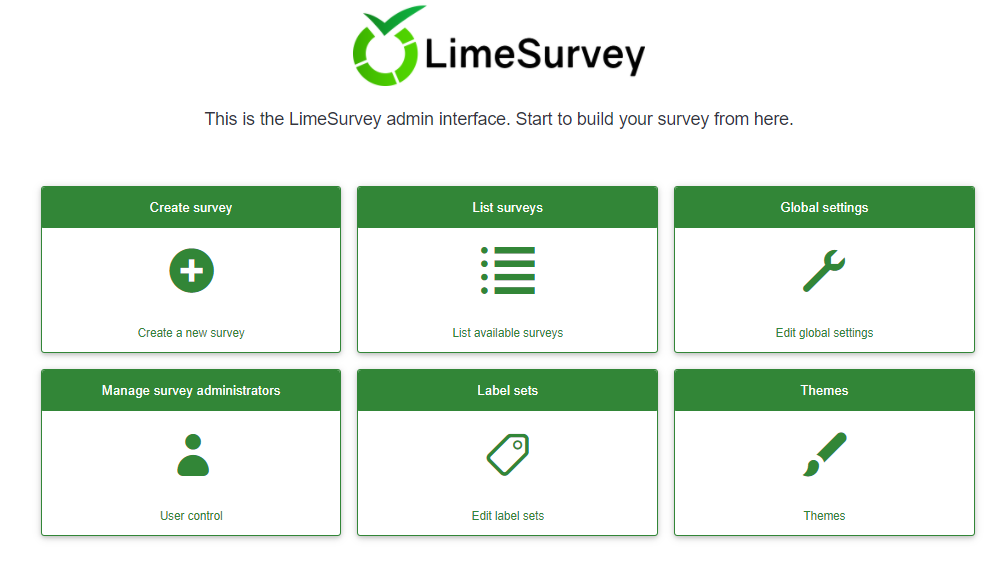
- Create survey
- List surveys
- Global settings
- Manage survey administrators
- Label sets
- Themes
Create a survey
To create a survey, click the Create survey box.
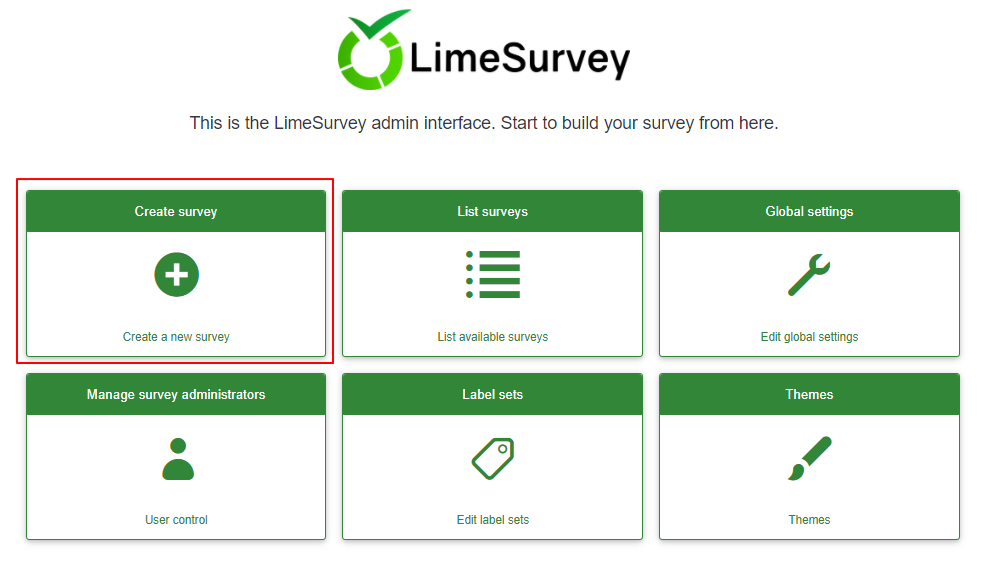
The Create survey page will be displayed.
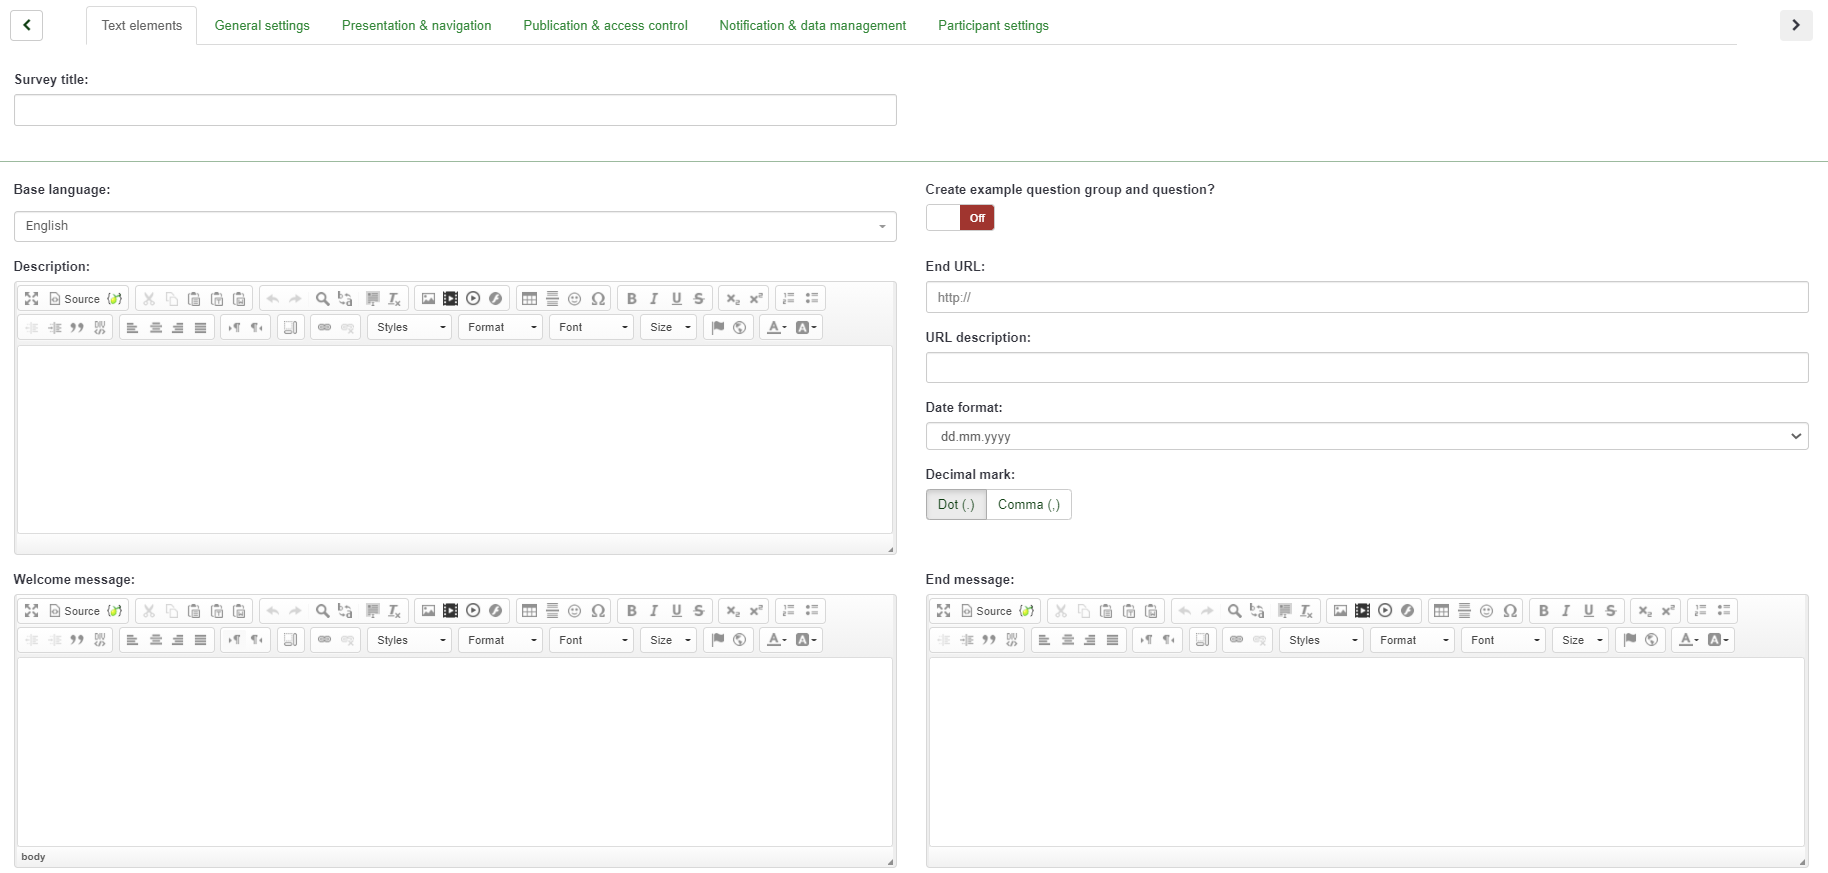
You will find the following on the Create survey page:
- Survey Title: Type in your survey title here. This is a required field. The title of the survey can be changed later.
- Basic Language This is the language used in the survey. The settings of the survey can be modified later to support additional languages.
- Sample Question: This feature is disabled by default. You can enable it to add a question group and question examples to your survey.
- End URL: If users finish filling out the questionnaire, you have the option to redirect them to another page. If you wish to redirect them, place the URL into the field and activate the "automatically load URL" option that is located under the Presentation & navigation tab.
- URL Description: A brief "End URL" description can be added if the user is re-directed to another webpage not related to the survey. It may be helpful to add a note (explaining the reason for the redirection to the respective URL).
- Date Format: This option is important when you want to record timestamps together with the survey participants' answers. You can click it to display a drop-down list of date formats. Choose the date format that your survey respondents will recognize (remember that different dates are used across the world).
- Decimal Format: Two options are available: dot (.) and comma (,). Select the one that is most widely used in the region where your survey will be conducted (e.g., US vs Germany).
- Description: A short description of the survey can be added here.
- Welcome Message: The survey participants will receive the welcome message that is entered here.
- End Message: Enter the message that participants will see once they submit their answers to the questionnaire (when the survey is complete).
After completing the required fields for Text Elements, click Save in the upper-right corner of the window. You will be redirected to the home page of your newly created survey. From the home page of the new survey, you will be able to add question groups and questions.
Create a question group
Question Groups allow you to group questions together. You must add a question group before adding questions.
To create a question group, first choose the survey you want to add the question group to. You will find this option in the top toolbar of LimeSurvey's home page.
Click on the survey you wish to add the question group to. The survey page will be displayed. The menu on the left contains two tabs: Settings and Structure. It is necessary to work from the Structure tab when adding questions and question groups.
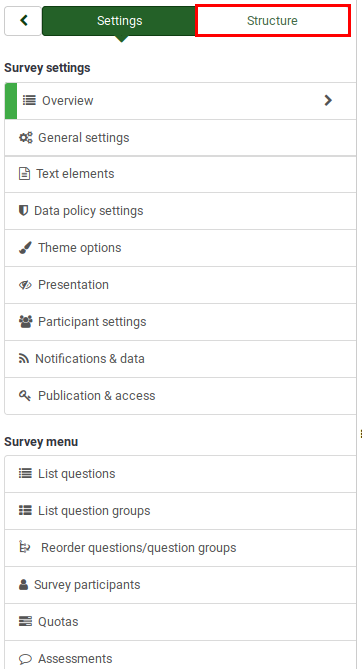
The menu will appear as follows when the Structure tab is selected.
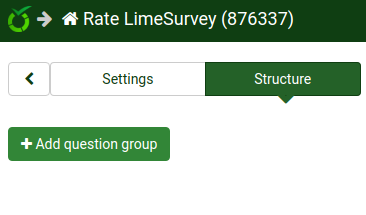
Next, click the Add question group button. The following page will be displayed.
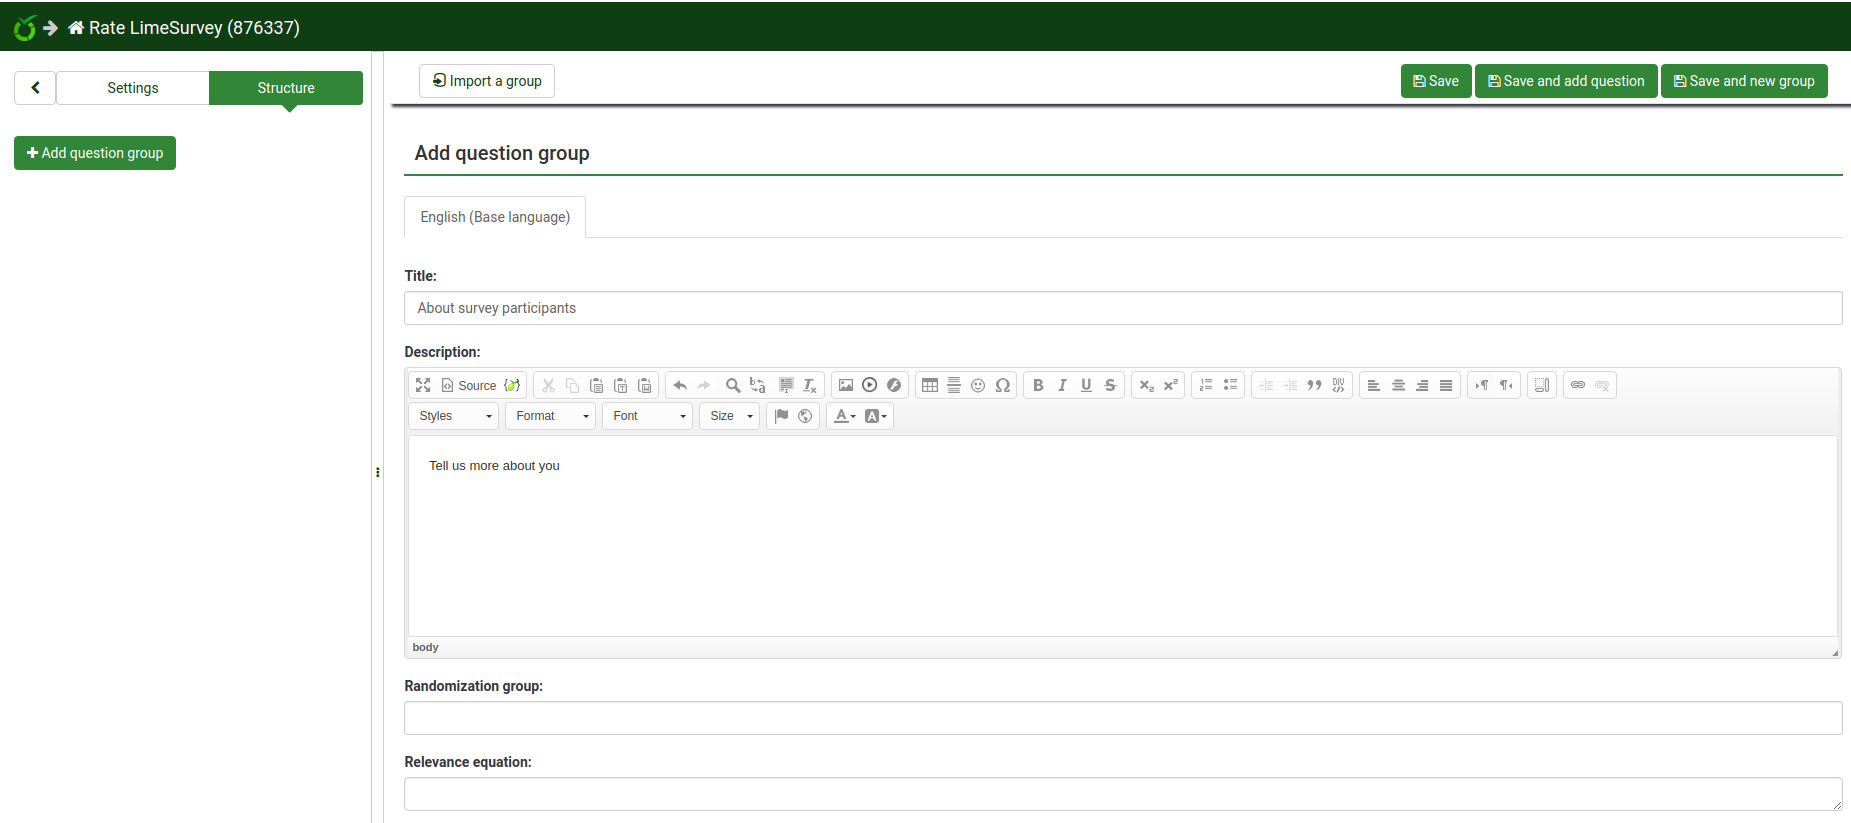
- Title: This is the name of the survey group.
- Description: A short description of the question group can be added. It will be displayed to the survey participants if the corresponding option is enabled from the settings of the survey.
- Randomization Group: This function is used to randomize certain question groups (the same must be allocated to the respective question groups).
- Relevance Equation This feature is used as a way to limit respondents to certain question groups based on their previous responses.
Click the Save button in the upper-right part of the window once you are done.
Create a question
Remember that you must first create a question group before you can add questions. Please review the steps presented above for adding question groups.
Once you have created the survey and added a question group, select the Structure tab again and click add question from the left menu bar or click add new question to group under the Group quick actions heading.

The Create question page will be displayed. It contains the following:
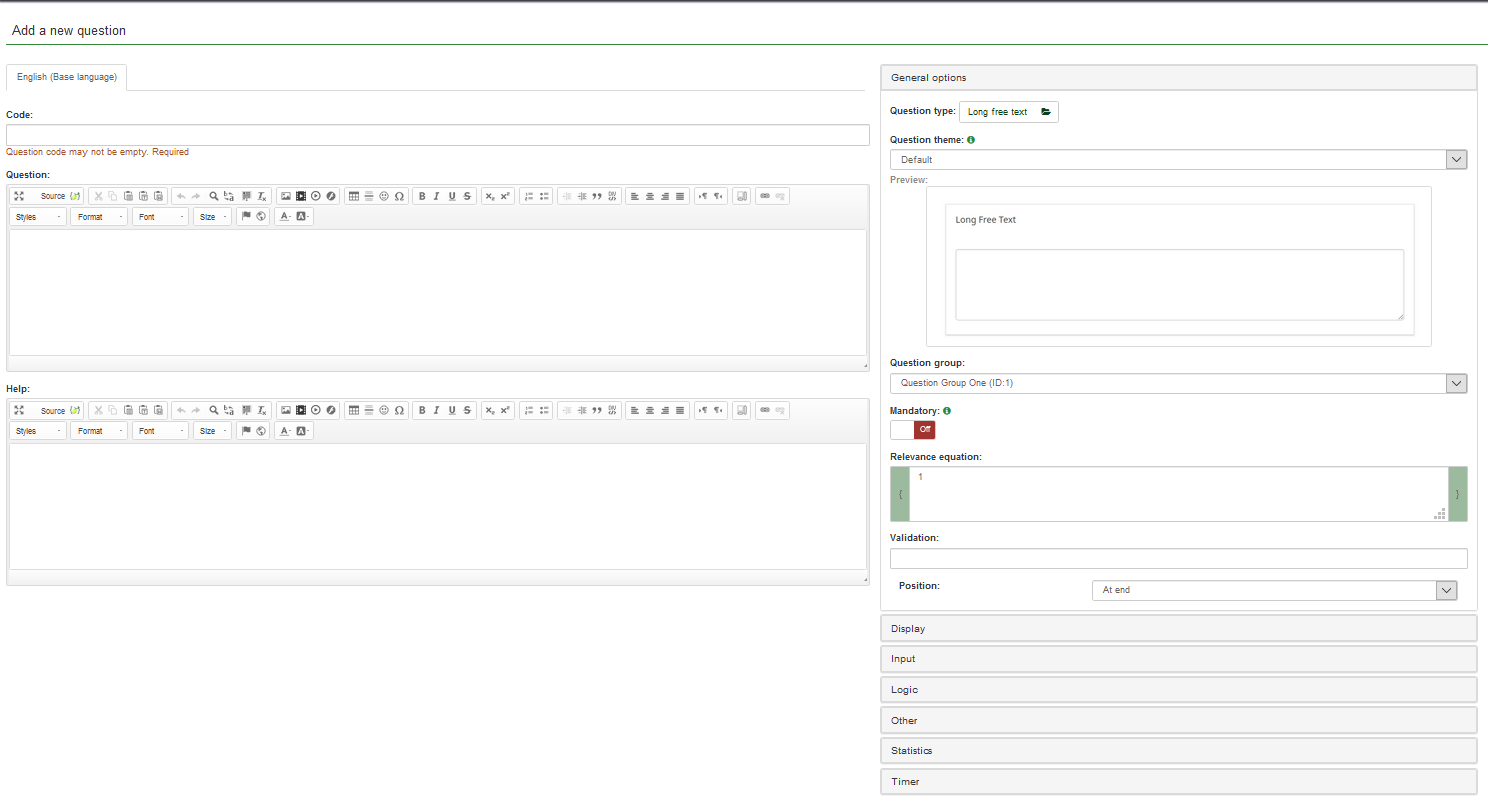
- Code is a representation of the individual question name/code with which the survey is stored in the database.
- Question: This is the question as it will appear to survey participants.
- Help: This is a short text that can be provided to help the survey participants better understand the question.
- General Options: The functionalities found in this option allow you to change the most important question-related settings. It includes seven options:
- Question Type: Many question types can be used in LimeSurvey. To better understand them, hover the mouse over each option or read our wiki on questions.
- Question Theme: You can choose a custom theme for the question (instead of the default).
- Question Group: Here you can choose which question group you would like to add the question to.
- Mandatory: This option is available for all question types. This setting allows you to require users to answer the question before they can move on to the next question.
- Validation: This feature is available on all free text type or numeric questions. It is used for response validation. If the response is not validated, the user will be prompted to try again before they can progress.
- Relevance Equation: This is a setting for advanced users. We recommend that the default value of "1" is used (it means that the item will always be shown).
- Position: Choose where you want to position the question in the group.
Please note that, depending on the type of question selected, different tabs will be displayed below the General settings tab. To find out more about this, we suggest that you to first read the following wiki section.
For example, if the Long free text question type is selected (the default option), then the following tabs will be displayed: General options, Display, Input, Logic, Other, Statistics, Timer.
Complete the required fields and click Save. You will be redirected to a page that contains the summary of the recently added question.
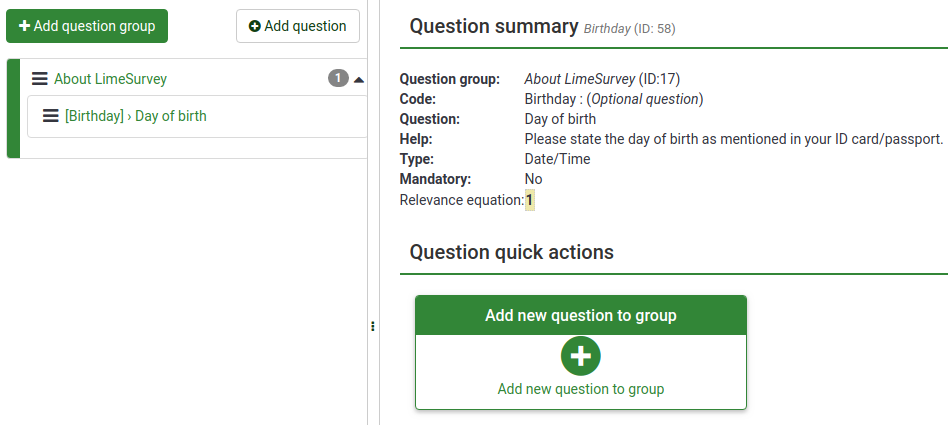
To add more questions, follow the same procedure described above.
Add subquestions and answers
Different types of questions may require subquestions, predefined sets of answers, both or neither. For example, a question that requires the age of a survey participant does not require a subquestion or predefined set of answers. On the other hand, a simple array question requires both subquestions and answers.
The next screenshot contains an array-type question.

Add subquestions
To add subquestions, go to the top toolbar and click Edit subquestions. Type in the subquestions you wish the survey participants to answer.

Add answers
To add a set of predefined answers, go to the top toolbar and click Edit answer options. Type in the answers.

Save the set of answers and preview the question (look for the Preview question button located on the top toolbar).
Our question looks like this:

Congratulations! You have successfully created your first array-type question.
Organize questions
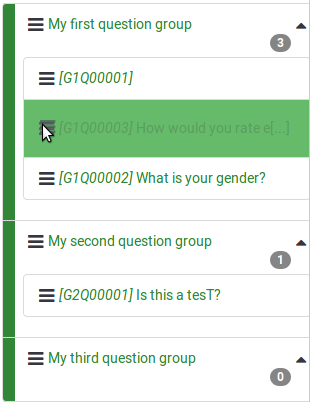
If your survey contains dozens of questions, it can be a time-consuming process to access each question and/or question group and edit the order one-by-one. The survey Structure menu allows you to quickly reorganize your questions and question groups. Select the Structure tab from the menu on the left and click the three-line symbol that is located in front of the question or group name and drag it to its new location.
Activate/Stop survey
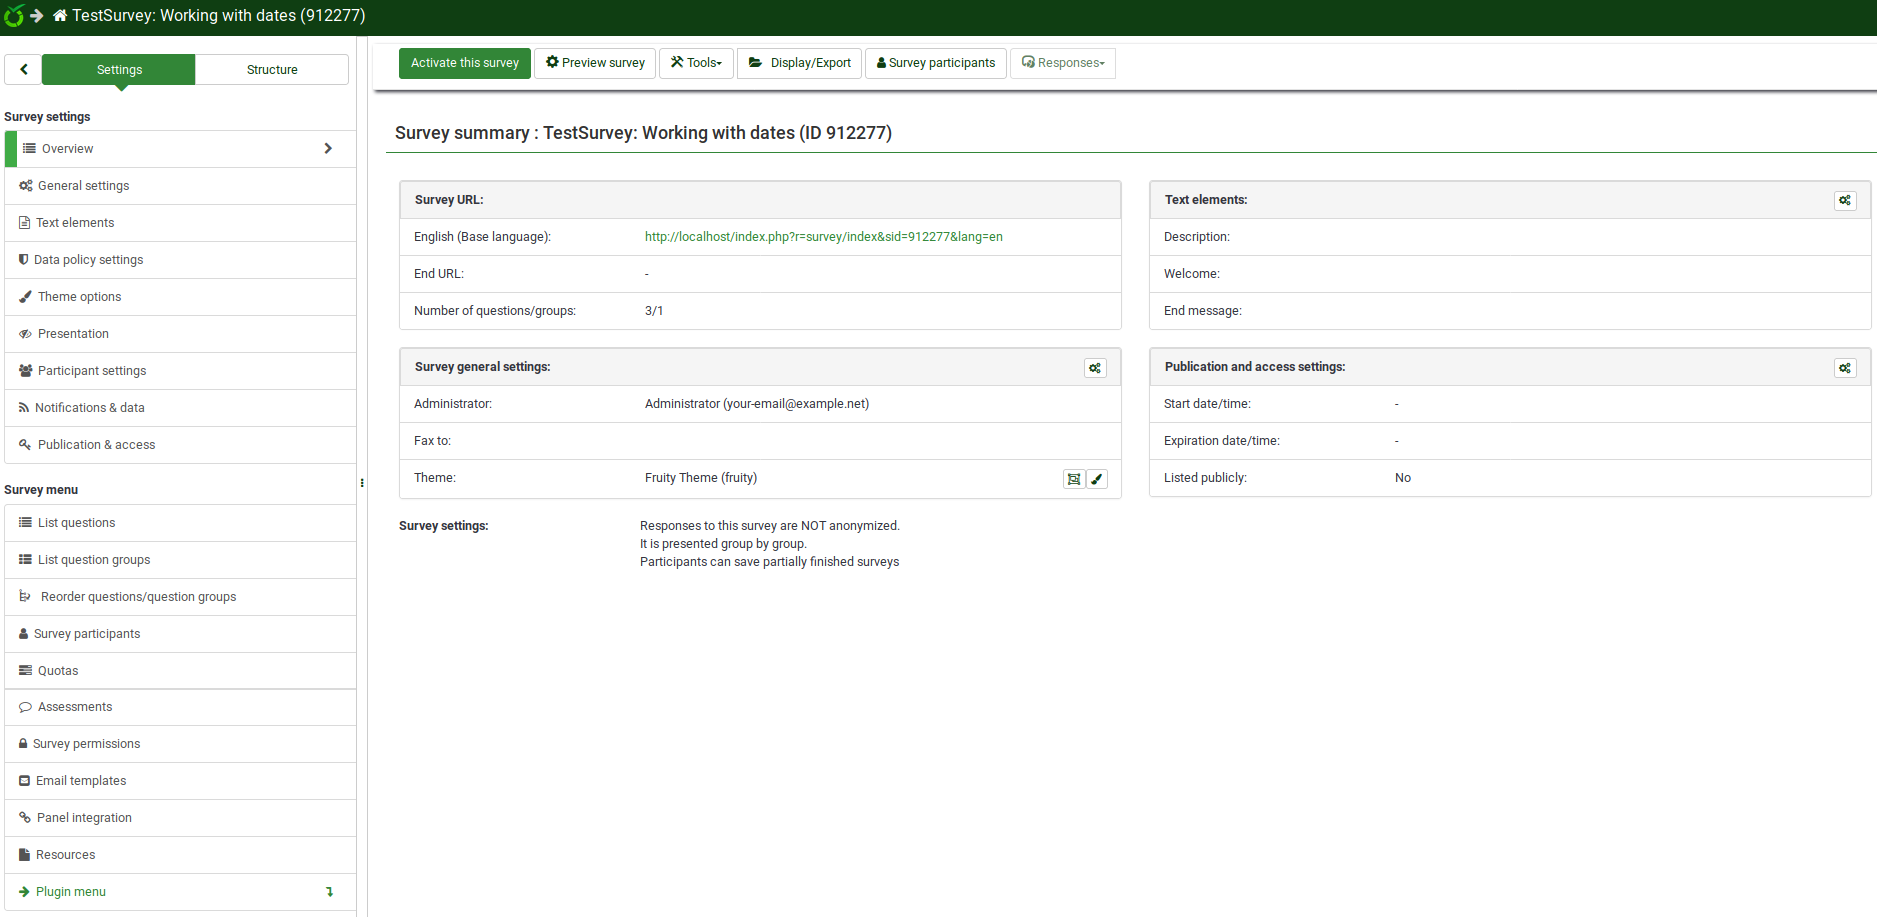
Now that you have at least one question group and one question added to your survey, you can activate it. Select the Settings tab from the menu on the left and click on Overview. The following page will be displayed.
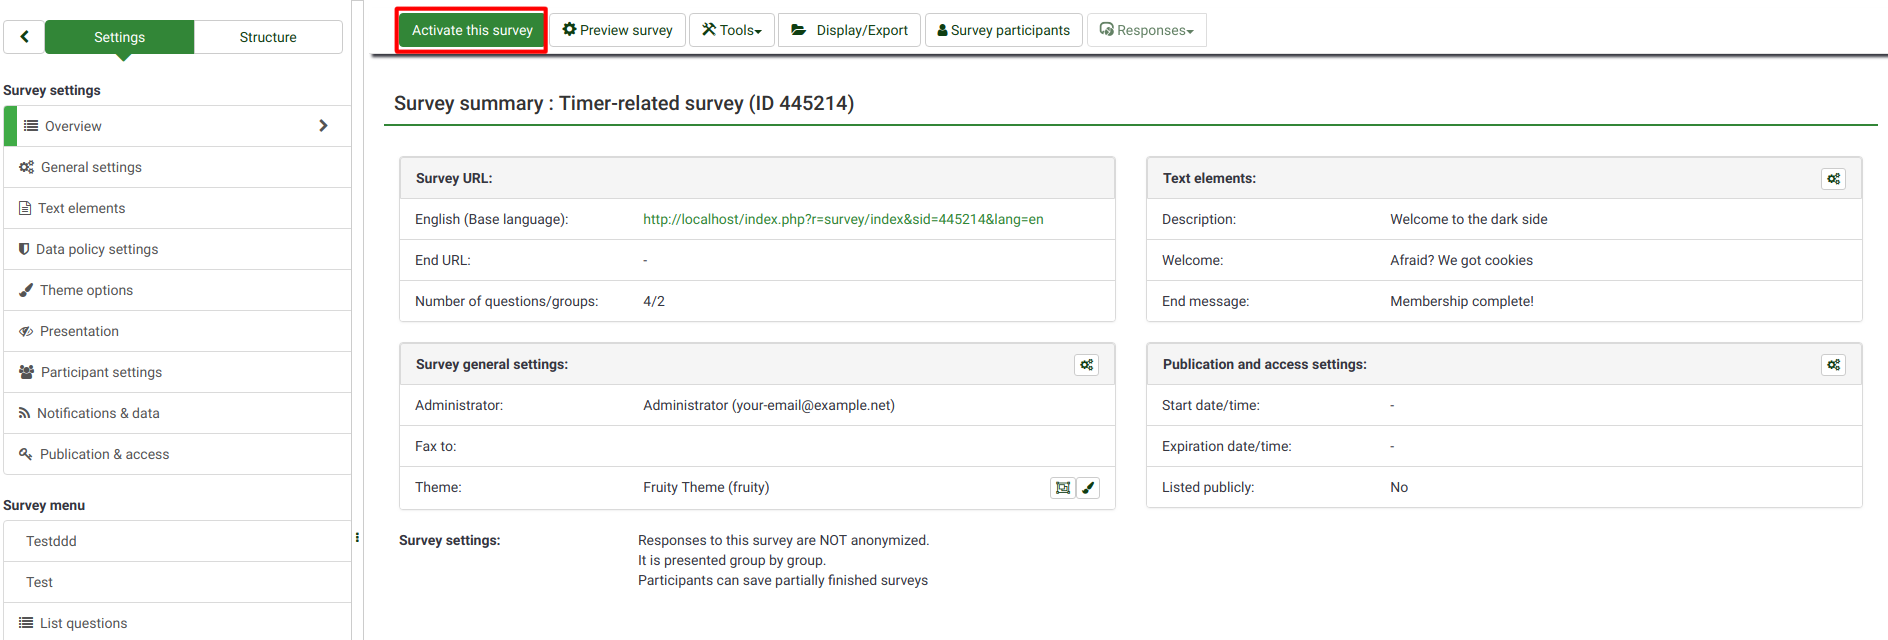
Click Activate this survey on the toolbar.
Before activation, a window will be displayed asking you about general survey settings.

- Anonymized Responses: This option allows you to decide if the information in your survey's token table is matched to the responses in your survey or kept anonymous. If you decide to enable it, your survey is set to anonymize responses. You will not be able to link answers to respondents.
- Save IP Address: If enabled, the IP address of the survey respondent will be stored together with his/her answers.
- Save Timings: If enabled, the time spent on each page of the survey by each survey participant is recorded.
- Date Stamp: Turn this option on if you would like to see the date the answers were submitted.
- Save Referrer URL: If enabled, the referrer URL will be stored together with the answers.
Once the desired functionalities have been enabled, click Save & activate survey. The following message will be displayed.

Select the option "No, thanks" to disable closed-access mode! This will allow everyone to access to your survey using the survey link.
Congratulations! You have activated your first survey! If you want to start sharing the survey URL, go to the home page of your survey, and look for the survey URL in the Survey summary section under Share your survey.
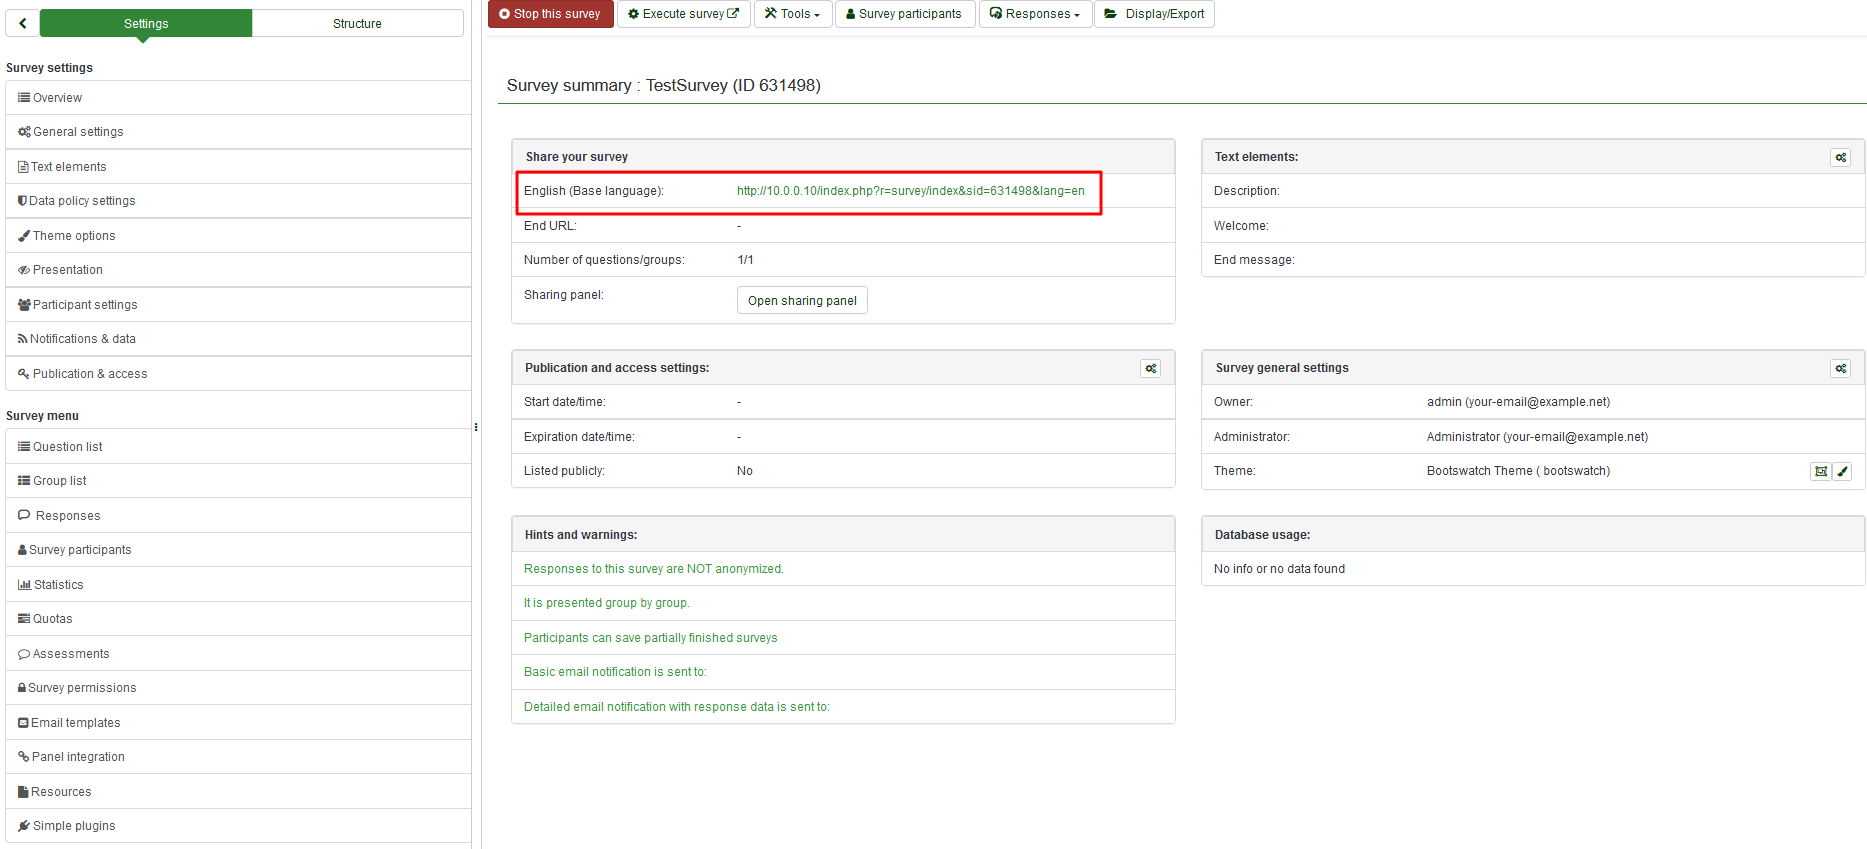
Copy the link and start sharing it.
If you want to deactivate (stop) the survey, click the Overview tab from the menu on the left and look for Stop this survey located on the top toolbar.

Statistics
To quickly view your survey statistics, click Survey located on the top toolbar of your LimeSurvey home page. A list with all the available surveys will be displayed. Next, go to the last column and click the Statistics button (![]() ) that corresponds to the row of the survey you wish to analyse.
) that corresponds to the row of the survey you wish to analyse.

A new window with a set of graphs will be displayed. If you would like to use them in a report, scroll to the bottom of the page and click Export images. Each chart will be saved separately in.png format and archived as a.zip file.
Click Expert mode in the upper-right part of the window to access more statistics-related filters.
Once you have chosen your filters, click View Statistics in the upper-right corner of the window.

The results are displayed in HTML, Excel, or PDF format based on which is chosen.
Exporting questions and responses
You can export survey results in different formats to produce statistics and graphs using apps such as SPSS, R, STATA, etc.. Access the survey you wish to analyze. Click Responses on the top toolbar, and then select Responses & Statistics.

Now you are on the Browse Responses page. Click Export from the top toolbar and select the desired export format. If you select the first option, all the available formats in which you can export the data will be displayed.

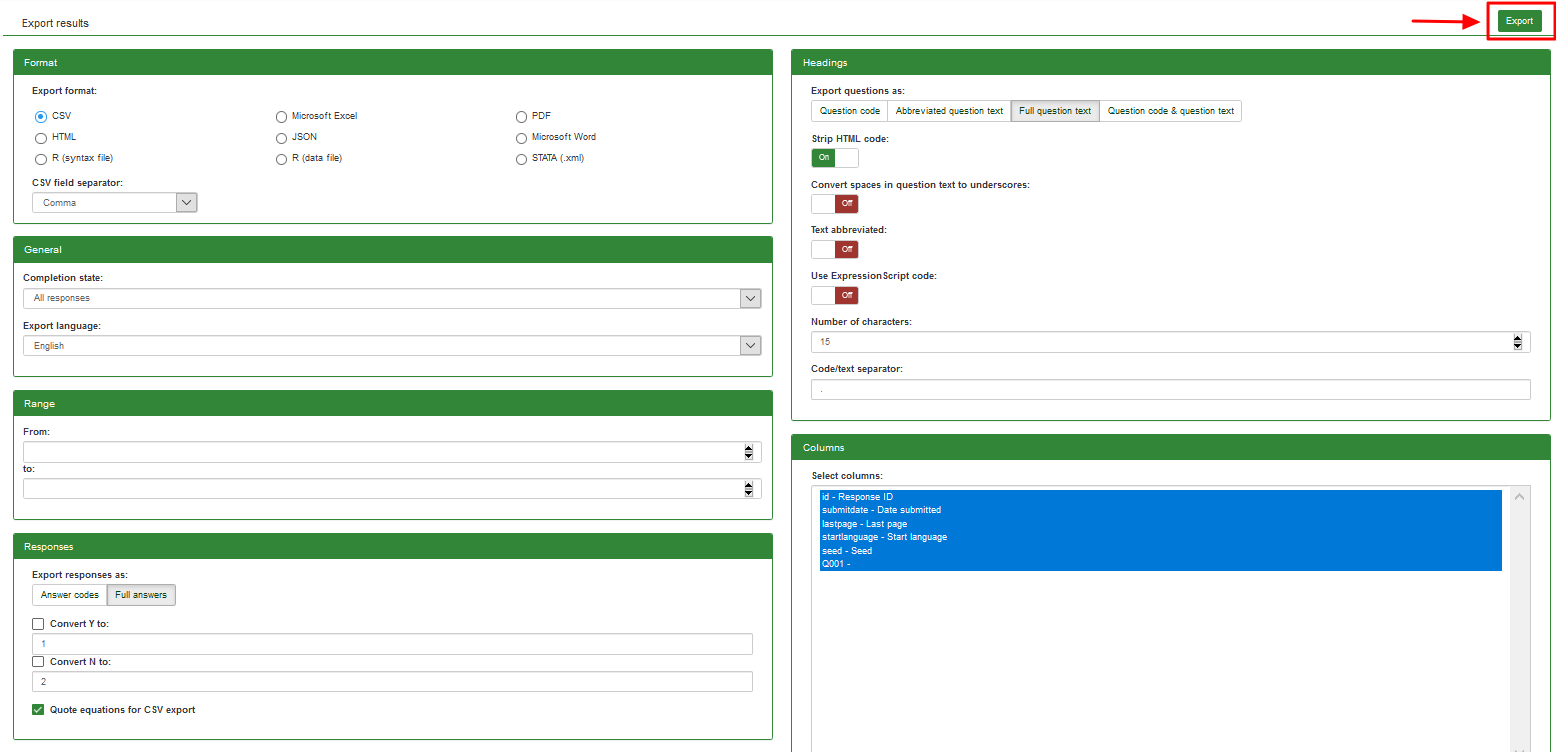
Once the filters are set, click Export located in the upper-right side of the window.
Other LimeSurvey features - advanced users
Check out the features of the LimeSurvey Cloud package.
Still have questions? Please join our LimeSurvey community chat on Discord.