Home page settings/ja: Difference between revisions
From LimeSurvey Manual
Bravehorse (talk | contribs) (Created page with "以下のホームページ設定が利用可能です。") |
Bravehorse (talk | contribs) No edit summary |
||
| (21 intermediate revisions by 2 users not shown) | |||
| Line 1: | Line 1: | ||
<languages /> | <languages /> | ||
=概要= | ==概要== | ||
'''ホームページ設定''' | '''ホームページ設定'''ページでは、ユーザーがホームページをカスタマイズすることができます。'''設定'''->'''ホームページ設定''' | ||
<center>[[File:Configuration Home page settings.png]]</center> | <center>[[File:Configuration Home page settings.png]]</center> | ||
ホームページの設定を編集するだけでなく、LimeSurveyの管理を容易にするため、ユーザーグループごとに新しいボックスを作成することができます。 | ホームページの設定を編集するだけでなく、LimeSurveyの管理を容易にするため、ユーザーグループごとに新しいボックスを作成することができます。 | ||
=ホームページ設定= | =ホームページ設定= | ||
| Line 13: | Line 13: | ||
<center>[[File:Home page settings view.png]]</center> | <center>[[File:Home page settings view.png]]</center> | ||
*''' | *'''ロゴを表示''': 'オフ'にすると、ボックスの上にあるロゴが消えます(デフォルト値は'オン') | ||
*''' | *'''最後に訪問されたアンケートと質問を表示''': 既定では'オン'になっています。最後に訪問した質問とアンケートを表示します。ロゴとボックスの間にバーが配置されます。 | ||
*''' | *'''アンケートリスト表示''': 既定値は 'オフ'です。'オン'にすると、ホームページのボックスの下にアンケートリストが表示されます。 | ||
*''' | *'''アンケートリストの検索ボックスを表示''': 'オフ'の場合は、'''アンケートリスト'''に検索ボックスが表示されません。'''アンケートリスト表示'''オプションがオンになっていない場合、このオプションはホームページに影響しません。 | ||
*''' | *'''ボックスの回りをコンテナで囲う'''{{NewIn/ja|3.0}}: 'オン'にすると、ボックスの周りのコンテナが小さくなります(ホームページに多くのボックスが追加されるときに便利です)。 | ||
*''' | *'''レコード毎のボックス''': 各行に配置したいボックスの数。既定値は'3'です。 | ||
*''' | *'''ボックスオフセット'''{{ObsoleteIn|3.0}}: '''ボックスオフセット'''は、ユーザーがボックスを中央に配置するのにための機能です。たとえば、15個のボックスを使用する場合、ボックスオフセット機能を使用してホームページにきれいに配置することができます。この機能は、LimeSurvey 3.0(およびそれ以降のバージョン)では、ボックスが自動的に中央揃えされるため、もう存在しません。 | ||
*''' | *'''ボックスの向き'''{{NewIn/ja|3.0}}: ''左から右へ''、''右から左へ''、''中央揃え''の3つのオプションが利用できます。 | ||
完了したら'''ボックス設定の保存'''をクリックします。すべてがオンになっている場合、ホームページは次のようになります。 | |||
[[File: Home page view.png]] | [[File: Home page view.png]] | ||
= | =ボックス= | ||
LimeSurveyはデフォルトで、'''アンケートの作成'''、'''アンケートの一覧'''、'''グローバル設定'''、'''ComfortUpdate'''、'''ラベルセット'''、'''テーマ'''の 6つのボックスが作成されており、編集(緑のペンボタン)または削除(赤いゴミ箱のボタン)することができます。 | |||
<center>[[File:Boxes Table.png]]</center> | <center>[[File:Boxes Table.png]]</center> | ||
== | ==ボックスの作成/編集== | ||
'''ボックス'''テーブルに新しいボックスを追加するには、画面の上部にある'''新規ボックス作成'''をクリックします。 | |||
<center>[[File:Creat and reset - boxes.png]]</center>. | <center>[[File:Creat and reset - boxes.png]]</center>. | ||
いくつかのフィールドに記入する必要があります。 | |||
<center>[[File:Create a new box.png]]</center> | <center>[[File:Create a new box.png]]</center> | ||
*''' | *'''位置''': ボックスの位置を示します(数値)。 | ||
*''' | *'''リンク先URL''': それぞれのオプション/機能がアクセスするリンク先。たとえば、データベース全体をバックアップするリンク先URLは''admin/dumpdb''です。 | ||
*''' | *'''題名''': ボックスの名前 | ||
*''' | *'''アイコン''': LimeSurveyの定義済みのアイコンの1つを選択できます | ||
*''' | *'''説明''': ボックスの簡単な説明 | ||
*''' | *'''このボックス表示''': それぞれのボックスが表示される人を選択します。 | ||
**'' | **''管理者のみ'' : LimeSurveyインストールのスーパー管理者だけがそのボックスを見ることができます。 | ||
**'' | **''誰でも'' : LimeSurveyにログインするすべてのユーザー(つまり、[[Manage users/ja|ユーザーコントロールパネル]]で定義されたアンケートユーザー)がそのボックスを見ることができます。**''誰にも表示しない'' : 誰もそのボックスを見ることができません。例えば、特定の[[Users/ja#Manage user groups|ユーザーグループ]]にボックスを隠したいときに使用することができます。 | ||
**'' | **''その他のユーザーグループ'' : 特定のユーザグループがそのボックスを見ることができます。ユーザーグループの詳細については、Wikiの[[Users/ja#Manage user groups|ユーザーグループの管理方法]]をお読みください。 | ||
**'' | |||
完了したら、画面の右上にある'''保存'''ボタンをクリックします。 | |||
<div class="simplebox">[[File:help.png]] | <div class="simplebox">[[File:help.png]] ボックス設定の各フィールドは、後から'''ボックス'''テーブルの最後の列にある緑色のペンボタンをクリックして編集することができます。</div> | ||
{{Note| | {{Note|この機能をよりよく理解するには、 [[Home page settings/ja#Examples|下記の例]]を参照してください。}} | ||
== | ==既定の設定にリセットする== | ||
変更を元に戻したい場合は、ウィンドウの右上にある'''既定のボックスへのリセット'''ボタンをクリックします。これにより既定のボックスが復元されます。 | |||
<center>[[File:Creat and reset - boxes.png]]</center> | <center>[[File:Creat and reset - boxes.png]]</center> | ||
= | =例= | ||
== | ==新しいボックスを作成する== | ||
* | *'''設定'''ダイアログから'''ホームページ設定'''にアクセスします。 | ||
* | *ウィンドウの右上にある'''新規ボックス作成'''をクリックします。 | ||
* | *必要な情報を入力してください。 | ||
<center>[[File:Add a new box - example.png]]</center> | <center>[[File:Add a new box - example.png]]</center> | ||
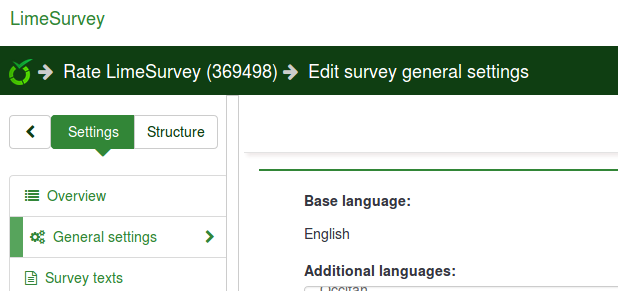
{{Box| | {{Box|リンク先URLはアドレスバーに表示されます。この例では、URLはアンケートの'''一般設定'''へのリンクです。 | ||
<center>[[File:Destination URL.png]]</center>}} | <center>[[File:Destination URL.png]]</center>}} | ||
* | *ボックスを保存し、LimeSurveyのホームページにアクセスします。 | ||
<center>[[File:Add a new box - example 2.png]]</center> | <center>[[File:Add a new box - example 2.png]]</center> | ||
* | *新しく作成したボックスをクリックし、動作するかどうかチェックします(動作しない場合は、リンク先URLを再確認してください)。 | ||
<center>[[File:Create a new box example test.png]]</center> | <center>[[File:Create a new box example test.png]]</center> | ||
Latest revision as of 01:54, 29 May 2021
概要
ホームページ設定ページでは、ユーザーがホームページをカスタマイズすることができます。設定->ホームページ設定

ホームページの設定を編集するだけでなく、LimeSurveyの管理を容易にするため、ユーザーグループごとに新しいボックスを作成することができます。
ホームページ設定
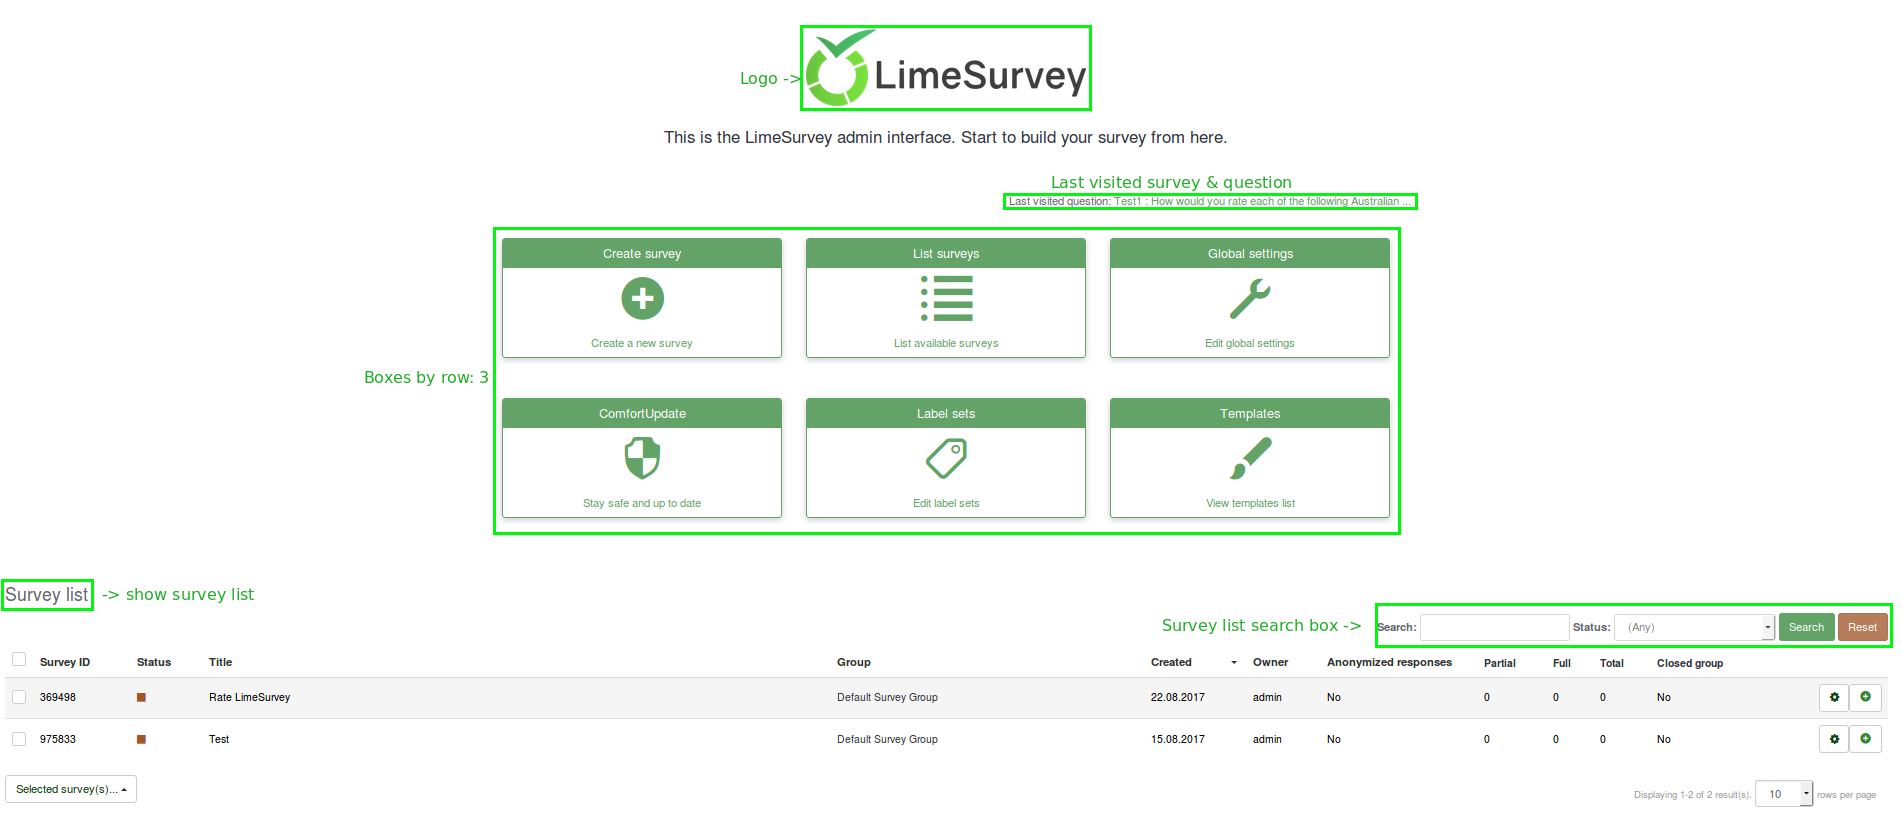
以下のホームページ設定が利用可能です。

- ロゴを表示: 'オフ'にすると、ボックスの上にあるロゴが消えます(デフォルト値は'オン')
- 最後に訪問されたアンケートと質問を表示: 既定では'オン'になっています。最後に訪問した質問とアンケートを表示します。ロゴとボックスの間にバーが配置されます。
- アンケートリスト表示: 既定値は 'オフ'です。'オン'にすると、ホームページのボックスの下にアンケートリストが表示されます。
- アンケートリストの検索ボックスを表示: 'オフ'の場合は、アンケートリストに検索ボックスが表示されません。アンケートリスト表示オプションがオンになっていない場合、このオプションはホームページに影響しません。
- ボックスの回りをコンテナで囲う (3.0 から追加): 'オン'にすると、ボックスの周りのコンテナが小さくなります(ホームページに多くのボックスが追加されるときに便利です)。
- レコード毎のボックス: 各行に配置したいボックスの数。既定値は'3'です。
- ボックスオフセット (Obsolete since 3.0): ボックスオフセットは、ユーザーがボックスを中央に配置するのにための機能です。たとえば、15個のボックスを使用する場合、ボックスオフセット機能を使用してホームページにきれいに配置することができます。この機能は、LimeSurvey 3.0(およびそれ以降のバージョン)では、ボックスが自動的に中央揃えされるため、もう存在しません。
- ボックスの向き (3.0 から追加): 左から右へ、右から左へ、中央揃えの3つのオプションが利用できます。
完了したらボックス設定の保存をクリックします。すべてがオンになっている場合、ホームページは次のようになります。
ボックス
LimeSurveyはデフォルトで、アンケートの作成、アンケートの一覧、グローバル設定、ComfortUpdate、ラベルセット、テーマの 6つのボックスが作成されており、編集(緑のペンボタン)または削除(赤いゴミ箱のボタン)することができます。

ボックスの作成/編集
ボックステーブルに新しいボックスを追加するには、画面の上部にある新規ボックス作成をクリックします。
.
いくつかのフィールドに記入する必要があります。
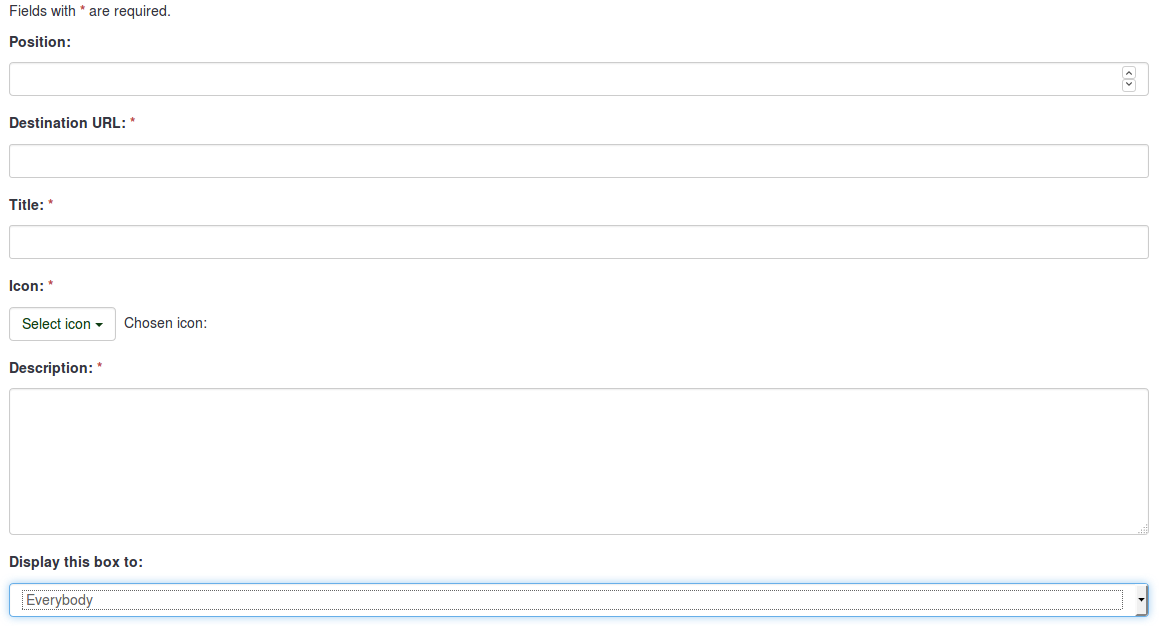
- 位置: ボックスの位置を示します(数値)。
- リンク先URL: それぞれのオプション/機能がアクセスするリンク先。たとえば、データベース全体をバックアップするリンク先URLはadmin/dumpdbです。
- 題名: ボックスの名前
- アイコン: LimeSurveyの定義済みのアイコンの1つを選択できます
- 説明: ボックスの簡単な説明
- このボックス表示: それぞれのボックスが表示される人を選択します。
- 管理者のみ : LimeSurveyインストールのスーパー管理者だけがそのボックスを見ることができます。
- 誰でも : LimeSurveyにログインするすべてのユーザー(つまり、ユーザーコントロールパネルで定義されたアンケートユーザー)がそのボックスを見ることができます。**誰にも表示しない : 誰もそのボックスを見ることができません。例えば、特定のユーザーグループにボックスを隠したいときに使用することができます。
- その他のユーザーグループ : 特定のユーザグループがそのボックスを見ることができます。ユーザーグループの詳細については、Wikiのユーザーグループの管理方法をお読みください。
完了したら、画面の右上にある保存ボタンをクリックします。
既定の設定にリセットする
変更を元に戻したい場合は、ウィンドウの右上にある既定のボックスへのリセットボタンをクリックします。これにより既定のボックスが復元されます。
例
新しいボックスを作成する
- 設定ダイアログからホームページ設定にアクセスします。
- ウィンドウの右上にある新規ボックス作成をクリックします。
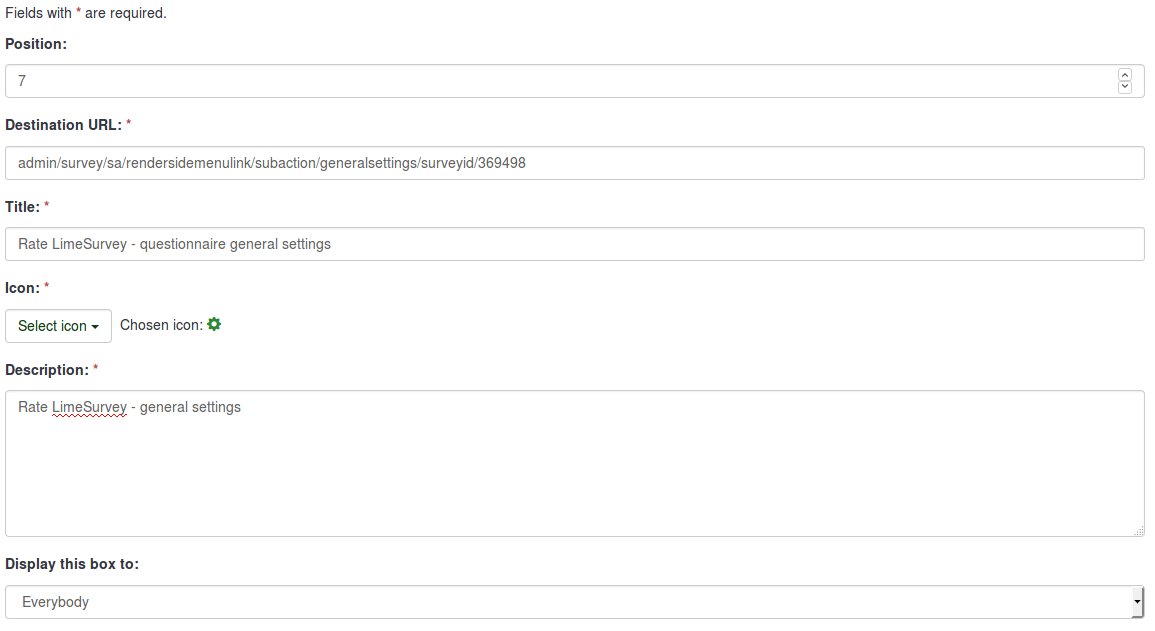
- 必要な情報を入力してください。
- ボックスを保存し、LimeSurveyのホームページにアクセスします。
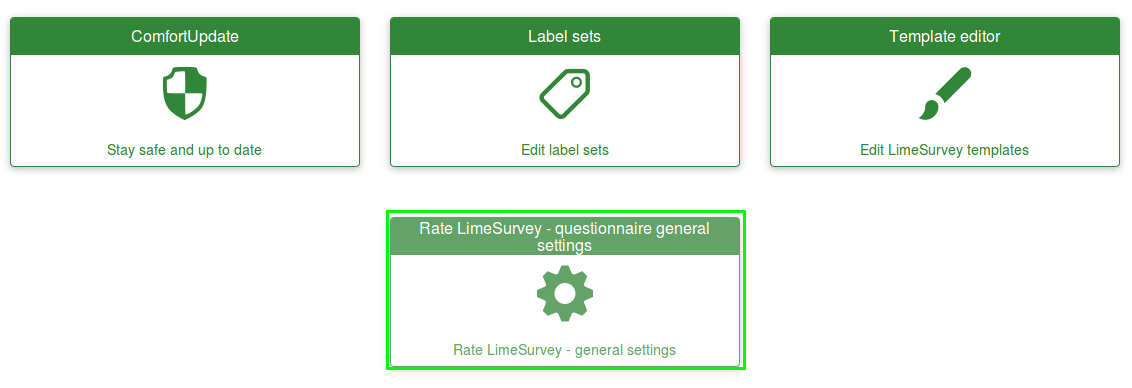
- 新しく作成したボックスをクリックし、動作するかどうかチェックします(動作しない場合は、リンク先URLを再確認してください)。
