Agregar respuestas o preguntas secundarias
From LimeSurvey Manual
General
Los diferentes tipos de preguntas le permiten crear preguntas avanzadas para los encuestados. Agregar respuestas y / o preguntas secundarias representa una manera a través de la cual puede aumentar la complejidad de su encuesta.
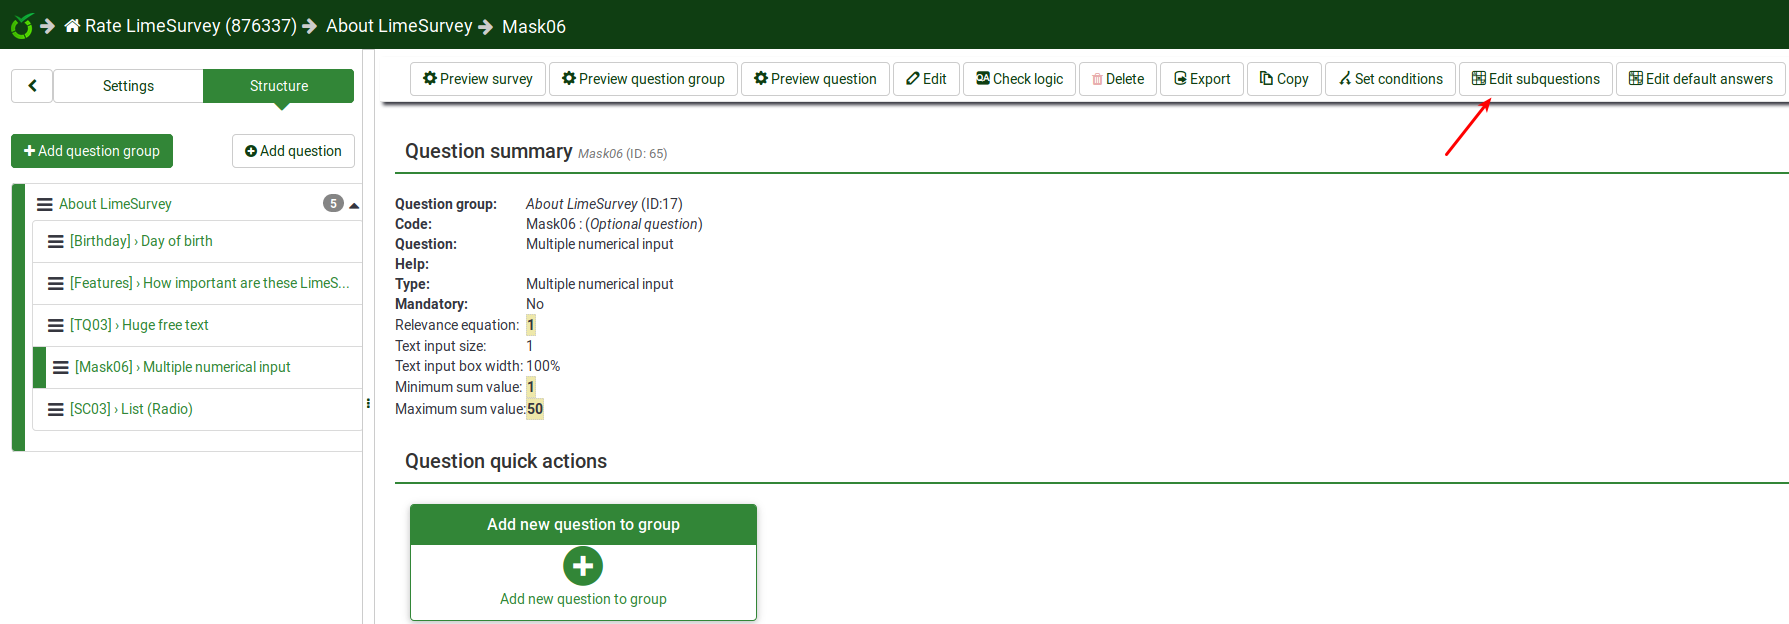
Para comenzar a agregar respuestas y preguntas secundarias, haga clic en la pregunta que desea editar y busque el botón editar respuesta (o pregunta secundaria):

Al agregar una respuesta, debe asignar a cada respuesta/subpregunta un código (que puede usarse para Ecuaciones de relevancia de ExpressionScript, para ejemplo) y debe ingresar el texto de respuesta/subpregunta.
- Position: Click the "three-lines" symbol and drag it up and down to reorder the fields.
- Code: This is the data that will usually be exported to your spreadsheet when compiling results. You may choose whatever code you want (5 character maximum). The code can only contain standard alpha-numeric characters and has to be unique among the answer options for this question.
- Assessment value: Only for answers This field will only show if the assessments mode is activated in the survey settings. It can be set to a positive or negative integer value. For more information, please check out the assessments wiki section.
- Text answer/subquestion: The answer/subquestion text that will be displayed to your survey respondents.
- HTML Editor: Click on the green pencil button to increase the complexity of your answer/subquestion text (e.g., you can add images, videos, and so on).
- Relevance equation: Only for subquestion (Y-axis) This field allow you to set a relevance using ExpressionScript
- Actions: Two actions are available:
- Add new field: Click on the green "plus" button to introduce a new answer/subquestion;
- Delete this field: Click on the red "trash" button to delete the respective field.
Specific for Answers
If the assessment mode is enabled, you can - for certain question types - also enter an assessment value for each answer.

Specific for subquestions
The relevance equation is available only for the subquestions located on the X axis . It is the default axis if there is only one list of subquestions (except array by columns):

Hints & Tips
- You can adjust the layout as well as include pictures or other media elements in your individual answers. This is possible by clicking on the pencil icon at the end of the answer text-box and using the WYSIWYG editor to create, edit or design your answer layout as well as upload images and media.
- There is a special feature to create an answer that is showing up left and right of an array row (this works only with the question type Array). This can be done by using a pipe char '|' to part the answer. For example, if you want to have 'Good' and 'Evil' on the left and right side of the row, just write 'Good|Evil' into this field. This is essentially useful if you want to create a Semantic Differential Question.
- Relevance: You can enter relevance equations for each subquestion (available for question types using subquestions such as multiple choice or array questions). In this way, you can conditionally show/hide certain items of your question. The default value of "1" means that the item is always shown.

Explicamos a continuación las diferentes partes de esta sección de trabajo:
- Selector de archivo estándar: tal como se mencionaba anteriormente, en esta lista se escoge la sección de página que se desea modificar. Según el tipo de página, ésta puede estar dividida en pocas secciones (como la "página de bienvenida" por ejemplo) o en muchas, como la "página de preguntas". ¡Pruebe a seleccionar las diferentes páginas para ver en qué secciones están divididas!, al hacerlo puede apreciar que existen varias secciones o archivos estándar comunes, por ejemplo, el archivo estándar startpage.pstpl contiene el encabezado, definición de colores y el estilo de fuentes de letra para todas las páginas.
- Ventana de edición de código: para poder editar el código del archivo estándar seleccionado es necesario conocer en cierta profundidad el lenguaje HTML así como la definición de páginas de estilos CSS. Sólo tenga cuidado de respetar las etiquetas {ETIQUETA}, pues serán sustituidas por los valores oportunos cuando la plantilla sea usada.
- Administrador de archivos: es posible que usted utilice logotipos y otras imágenes para componer la página, los ficheros respectivos pueden ser gestionados en esta parte del editor.
- Visualizador de la página: mostrará la página que esté siendo editada.