Workarounds: Question design, layout and theme-ing - LimeSurvey 3.0+: Difference between revisions
From LimeSurvey Manual
mNo edit summary |
mNo edit summary |
||
| Line 7: | Line 7: | ||
<div class="simplebox"><center><br />'''Please keep in mind that these workarounds are not official LimeSurvey extensions - they are solutions that users have created for themselves. <span style='color:#EE0000'>Therefore LimeSurvey can't offer guarantees or support for these solutions.</span><br />If you have questions, please contact the users that, thankfully, shared their solutions with the community.'''<br /><br /></center></div> | <div class="simplebox"><center><br />'''Please keep in mind that these workarounds are not official LimeSurvey extensions - they are solutions that users have created for themselves. <span style='color:#EE0000'>Therefore LimeSurvey can't offer guarantees or support for these solutions.</span><br />If you have questions, please contact the users that, thankfully, shared their solutions with the community.'''<br /><br /></center></div> | ||
=Alternate background colour of questions= | |||
''TO BE UPDATED'' | |||
To alternate the background colour of questions, open the ''template.css'' of your template with the Template Editor or a text editor and modify the ''Question styles'' section to include the following style. | |||
<syntaxhighlight lang="php" enclose="div"> | |||
div#question6 td.questiontext { | |||
background-color: #E0EBF8; | |||
} | |||
</syntaxhighlight> | |||
Be sure to apply the style to all of the questions you would like modified using their question IDs (''question2, question4, question6'' in this case). Question IDs are displayed when creating or editing questions - see below: | |||
Here the question ID is #question80 . | |||
=Doing a Likert Scale= | =Doing a Likert Scale= | ||
To be updated | |||
=Embedding audio in questions= | |||
To be updated (see question) | |||
=Hiding inputs of a "Multiple options with comments" question= | =Hiding inputs of a "Multiple options with comments" question= | ||
See example + forum post | |||
=How to hide the asterisk= <!--T:95--> | =How to hide the asterisk= <!--T:95--> | ||
Revision as of 13:34, 17 May 2019
This section more or less deals with styling your survey, adjusting the layout and setting up special question types. You can find similar information at these pages:
- The theme editor - LimeSurvey 3.0+
- Workarounds: Manipulating a survey at runtime using Javascript - LimeSurvey 3.0+
- Workarounds: Survey behaviour - LimeSurvey 3.0+.
- Workarounds: Further solutions provided by LimeSurvey users - LimeSurvey 3.0+
Please keep in mind that these workarounds are not official LimeSurvey extensions - they are solutions that users have created for themselves. Therefore LimeSurvey can't offer guarantees or support for these solutions.
If you have questions, please contact the users that, thankfully, shared their solutions with the community.
Alternate background colour of questions
TO BE UPDATED
To alternate the background colour of questions, open the template.css of your template with the Template Editor or a text editor and modify the Question styles section to include the following style.
div#question6 td.questiontext {

   background-color: #E0EBF8;

}
Be sure to apply the style to all of the questions you would like modified using their question IDs (question2, question4, question6 in this case). Question IDs are displayed when creating or editing questions - see below:
Here the question ID is #question80 .
Doing a Likert Scale
To be updated
Embedding audio in questions
To be updated (see question)
Hiding inputs of a "Multiple options with comments" question
See example + forum post
How to hide the asterisk
The instructions are similar to the ones presented above for LimeSurvey 2.
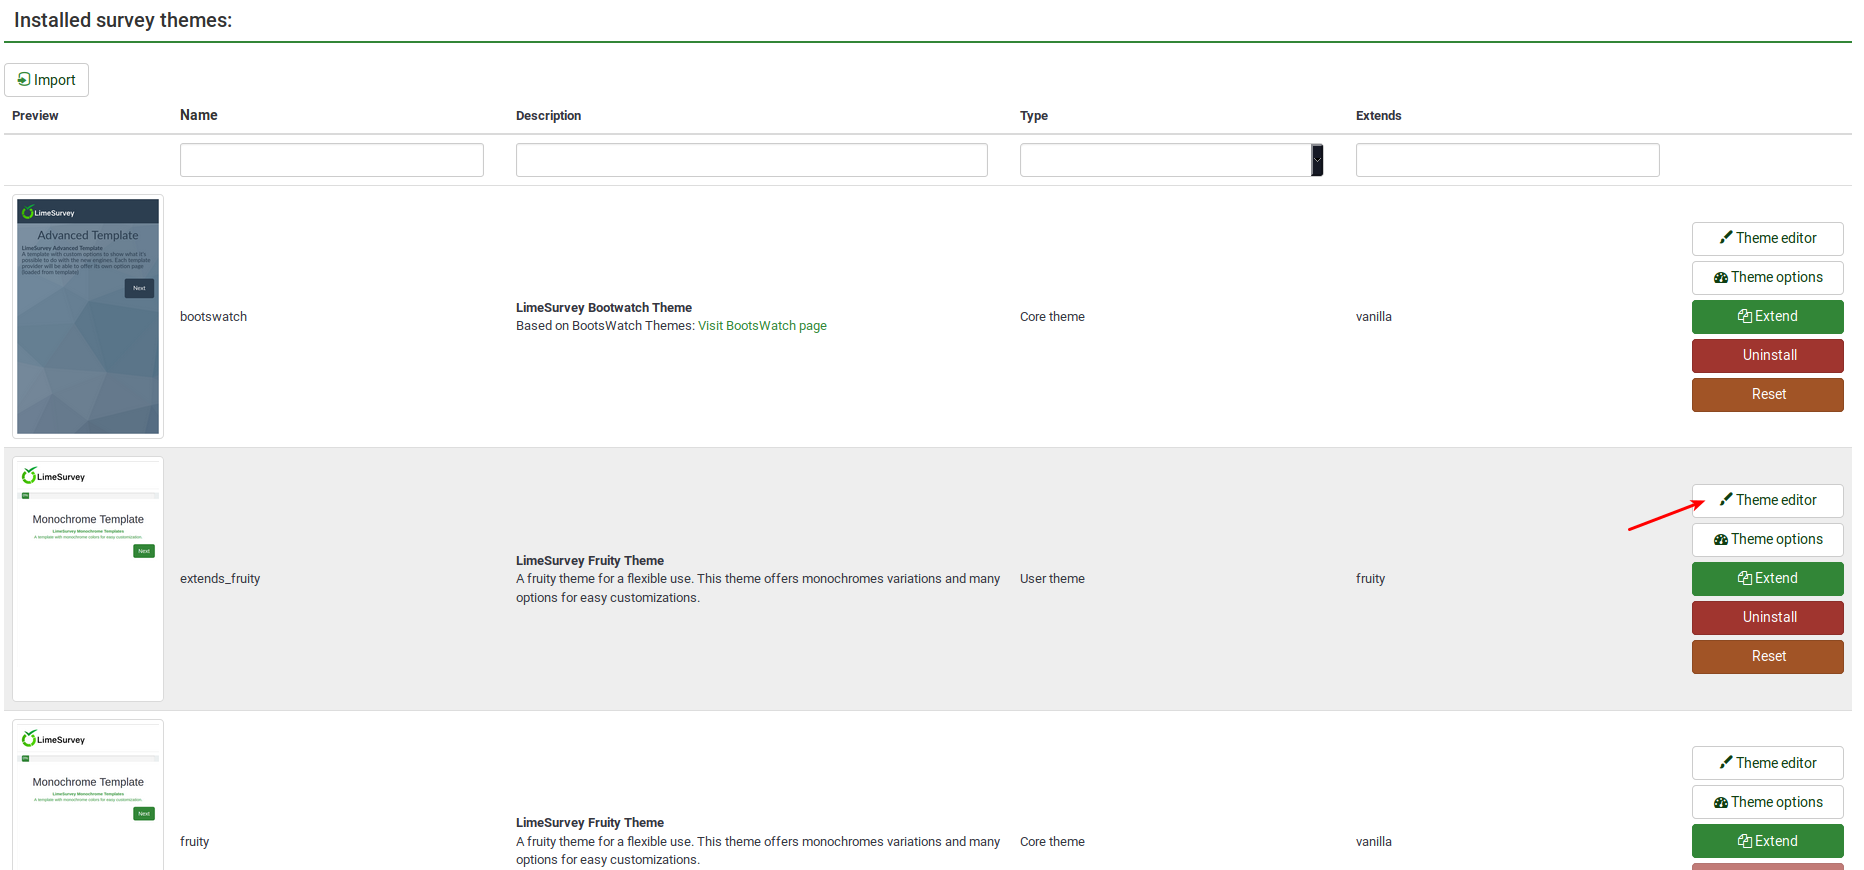
- Access the desired theme. If it is a default theme, create a copy of it by clicking on the "extend" button.
- Access the list of themes and click on the theme editor that corresponds to the newly created theme.
- On the left side, you can visualise the corresponding CSS files of your theme.
- Click on custom.css and add the following line:
.asterisk {display: none;}
- Save the changes. The red asterisk that is usually displayed at the beginning of the question text is hidden.
How to hide the language switcher from the welcome page
In the case in which you decide to launch a multilingual survey, you will observe on the welcome page a drop-down menu that permits your respondents to select the language in which they wish to fill in your survey:

However, in certain scenarios you wish to hide the respective option. There are many ways in which you can hide the language switcher. The "twig" way is displayed below.
Access Themes from the global Configuration menu:

Click on the Theme editor button to edit the desired theme:

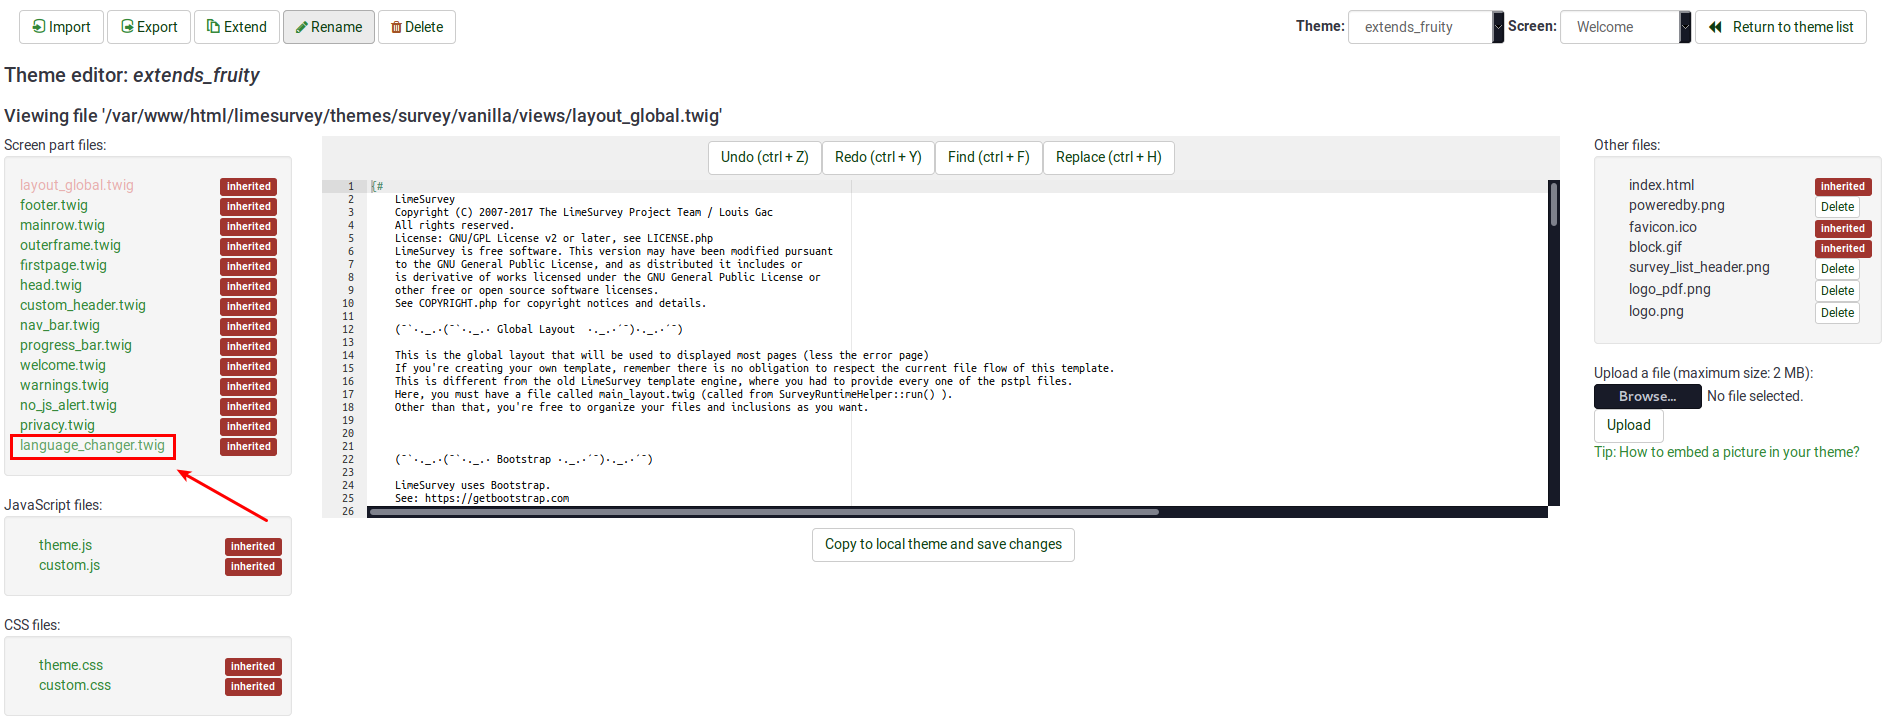
Look on the left side of the screen for the language_changer.twig file.

Go to the line that contains the following function:
{% if aSurveyInfo.alanguageChanger.show == true %}
Comment it out (replace "%" with "#") and copy the following line below it:
{% if false == true %}
The line should look like this in the end:

Click on "Copy to local theme and save changes".
Access your survey and select the edited theme from the general settings panel. Now, the welcome page should look like this:

To hide the top language switcher, we will follow pretty much the same steps as described above. We just have to access the right twig file to edit it. Access again the theme you wish to change, and then go to Screen which is located in the upper-right part of the window and select Navigation from the dropdown list. Now, look on the left side of the window for "language_changer_top_menu.twig". Click on it and comment out:
{% if aSurveyInfo.alanguageChanger.show == true %}
Add the following line below it:
{% if false == true %}
No language switcher will be displayed on the right side of the screen:

Public registration - mandatory fields
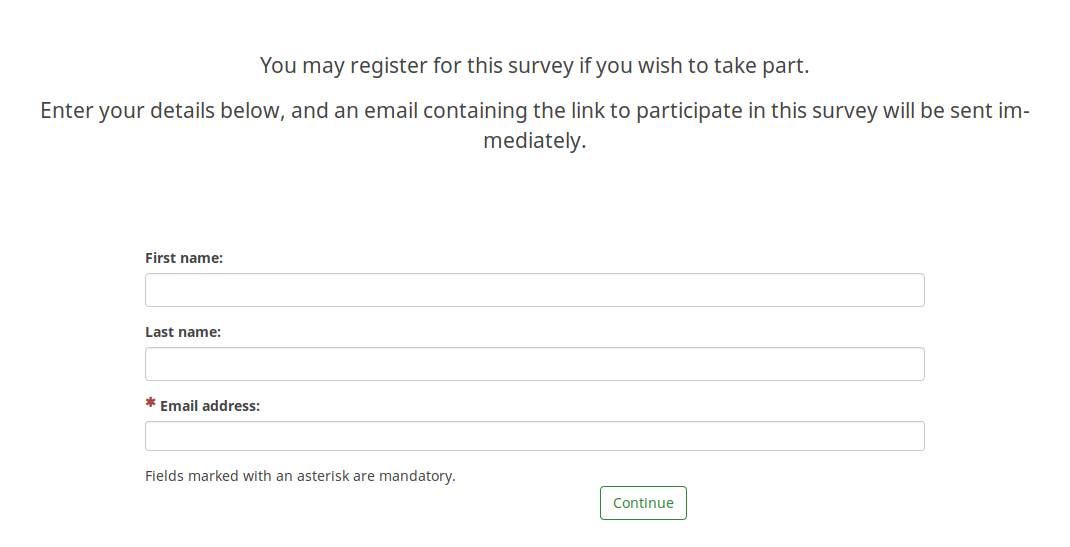
If you use a survey participants table and you also allow public registration, then users will be prompted by the following message:

As it can be observed above, only the email field is mandatory.
To have all three fields marked as being mandatory, please edit your survey theme accordingly. If you use Fruity, you have to go to the registration screen and see how the participants email field looks like:
        {# Participants email #}
        <div class='{{ aSurveyInfo.class.registerformcolrowc }} form-group row' {{ aSurveyInfo.attr.registerformcolrowc }}>
            <label {{ aSurveyInfo.attr.registerformcolrowclabel }} class='{{ aSurveyInfo.class.registerformcolrowclabel }}  control-label'> {{ gT("Email address:") }} {{ include('./subviews/registration/required.twig') }}</label>
            <div {{ aSurveyInfo.attr.registerformcolrowcdiv }}  >
                {{ C.Html.textField('register_email', aSurveyInfo.sEmail, ({'id' : 'register_email','class' : 'form-control input-sm','required' : true})) }}
            </div>
        </div>
After that, make sure to edit the first name and last name fields correspondingly by adding the label:
{{ include('./subviews/registration/required.twig') }}
and this line which makes the field mandatory to be filled out:
'required' : true
The edited file should look like this:
        {# Participants first name #}
        <div class='{{ aSurveyInfo.class.registerformcolrow }} form-group row' {{ aSurveyInfo.attr.registerformcolrow }}>
            <label for='register_firstname' class='{{ aSurveyInfo.class.registerformcolrowlabel }} control-label '>{{ gT("First name:") }} {{ include('./subviews/registration/required.twig') }}</label> {# extra label #}
            <div class="">
                {{ C.Html.textField('register_firstname', aSurveyInfo.sFirstName, ({'id' : 'register_firstname','class' : 'form-control', 'required' : true})) }} {# mandatory field #}
            </div>
        </div>

        <!--T:111-->
{# Participants last name #}
        <div class='{{ aSurveyInfo.class.registerformcolrowb }} form-group row' {{ aSurveyInfo.attr.registerformcolrowb }}>
            <label {{ aSurveyInfo.attr.registerformcolrowblabel }}  class='{{ aSurveyInfo.class.registerformcolrowblabel }} control-label '>{{ gT("Last name:") }} {{ include('./subviews/registration/required.twig') }}</label> {# extra label #}
            <div {{ aSurveyInfo.attr.registerformcolrowbdiv }} >
                {{ C.Html.textField('register_lastname', aSurveyInfo.sLastName, ({'id' : 'register_lastname', 'class' : 'form-control', 'required' : true})) }} {# mandatory field #}
            </div>
        </div>
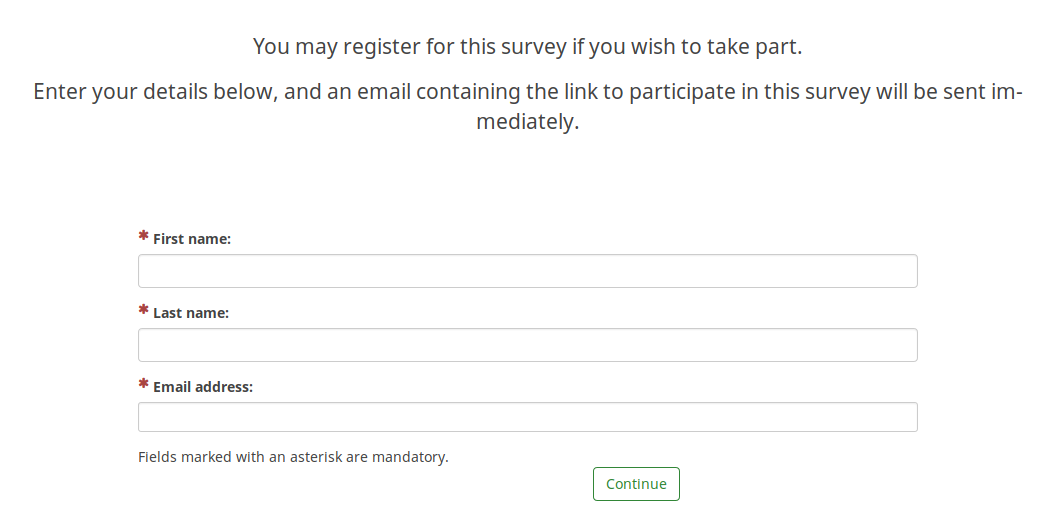
Now, the public registration page should look like this (all the fields being mandatory):

Reverse slider
Slider with control buttons
A custom question theme for Slider Control Buttons for LimeSurvey 3.x can be found here - https://github.com/tpartner/LimeSurvey-Slider-Controls-3x