TwoFactorAdminLogin: Difference between revisions
From LimeSurvey Manual
mNo edit summary |
m (→Introduction) |
||
| Line 7: | Line 7: | ||
'''2-Factor-Authentication''' (2FA) is a way to add additional security to your account. It is called "two-factor-authentication" because two verification methods are used to access your account. The first "factor" is your usual password that is standard for any account. The second "factor" is a verification code retrieved from a 2FA application either from your computer or mobile device. For more details about 2FA and its importance, please visit the following [https://en.wikipedia.org/wiki/Multi-factor_authentication article]. | '''2-Factor-Authentication''' (2FA) is a way to add additional security to your account. It is called "two-factor-authentication" because two verification methods are used to access your account. The first "factor" is your usual password that is standard for any account. The second "factor" is a verification code retrieved from a 2FA application either from your computer or mobile device. For more details about 2FA and its importance, please visit the following [https://en.wikipedia.org/wiki/Multi-factor_authentication article]. | ||
If enabled, a 6 digits code (default value) | If enabled, a 6 digits code (default value) has to be introduced when you log in to your LimeSurvey instance: | ||
| Line 14: | Line 14: | ||
To learn more about this functionality, please continue reading below. | To learn more about this functionality, please continue reading below. | ||
=Activate the 2FA plugin= | =Activate the 2FA plugin= | ||
Revision as of 14:56, 9 April 2019
Introduction
2-Factor-Authentication (2FA) is a way to add additional security to your account. It is called "two-factor-authentication" because two verification methods are used to access your account. The first "factor" is your usual password that is standard for any account. The second "factor" is a verification code retrieved from a 2FA application either from your computer or mobile device. For more details about 2FA and its importance, please visit the following article.
If enabled, a 6 digits code (default value) has to be introduced when you log in to your LimeSurvey instance:
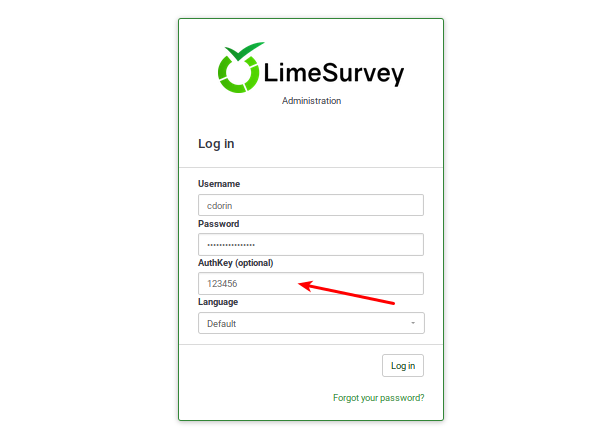
To learn more about this functionality, please continue reading below.
Activate the 2FA plugin
To activate your 2FA plugin, access your LimeSurvey instance, and activate it from your Plugin Manager:

To check the default settings, please click on "Configure".
Plugin settings
The configuration page contains the following settings:
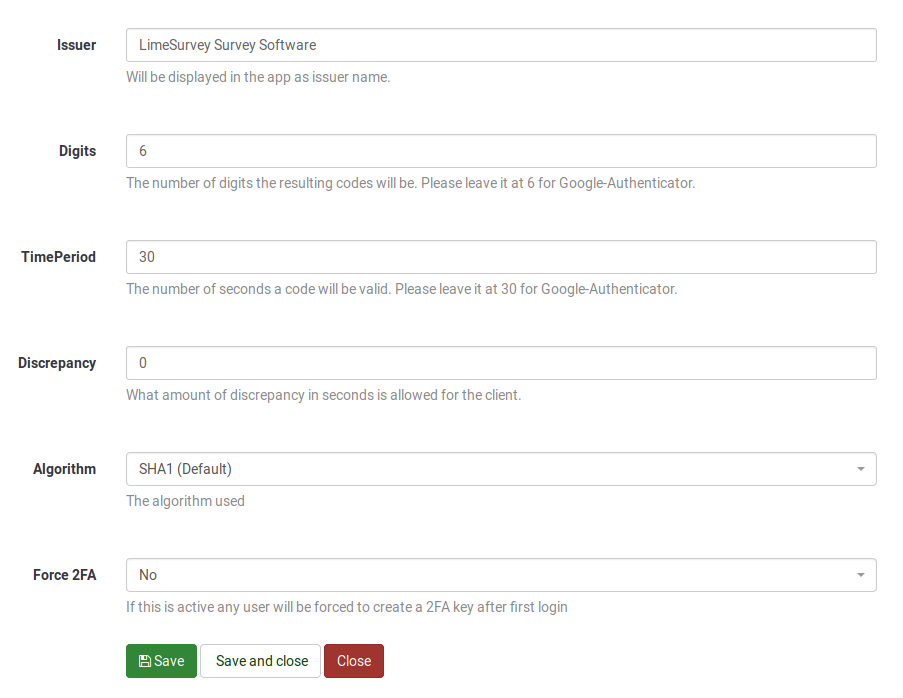
- Issuer: The text typed in this box will be displayed in the app as issuer name.
- Digits: The number of digits the resulting codes will be. Please leave it at 6 for Google Authenticator.
- TimePeriod: The number of seconds a code will be valid. If you use Google Authenticator, please leave it to 30.
- Discrepancy: The amount of discrepancy is allowed for the client after the TimePeriod expires (seconds)
- Algorithm: The algorithm used to generate a hash:
- SHA1 (Default)
- SHA256
- MD5
- Force 2FA: If you enable it, all instance users have to create a 2FA token after they log in again into the LimeSurvey instance.
Don't forget to click on "Save" after updating your 2FA configuration.
2-Factor-Settings
Once you activated the plugin, a new menu item will be displayed on the top bar:
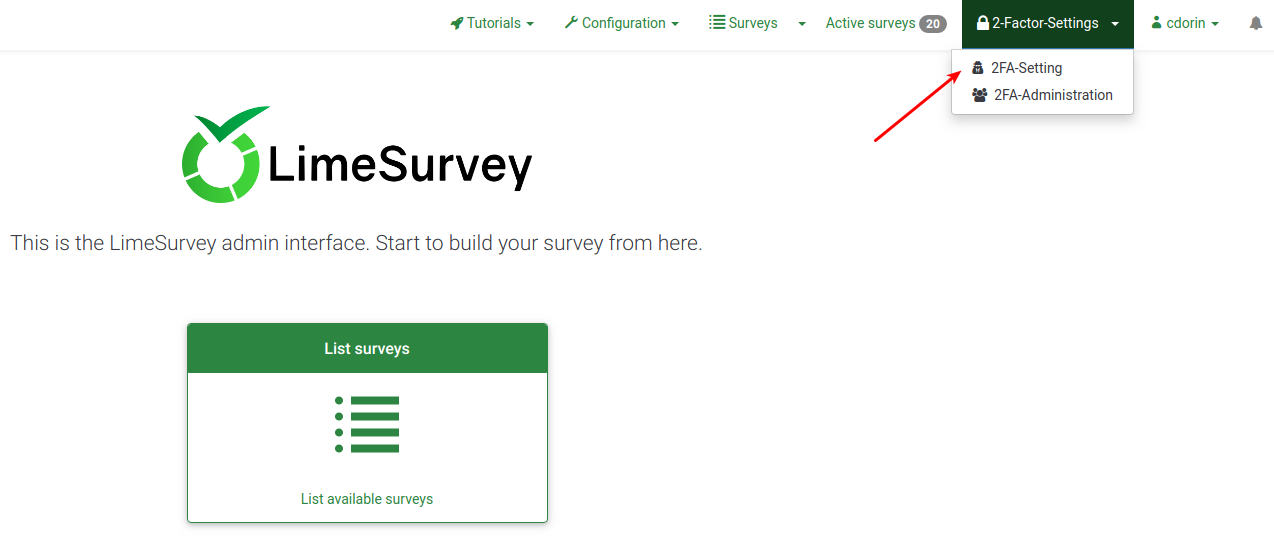
The dropdown menu includes the following two options:
- 2FA-Setting: Users can enable and manage their 2FA settings.
- 2FA-Administration: With the right permission, you can visualize whether the other instance users use 2FA or not.
2FA-Setting
If you haven't created any 2FA-token yet, the following page will be displayed:

If you decide to create a 2FA-token, click on "Register 2FA now". You will be prompted by the following message box:
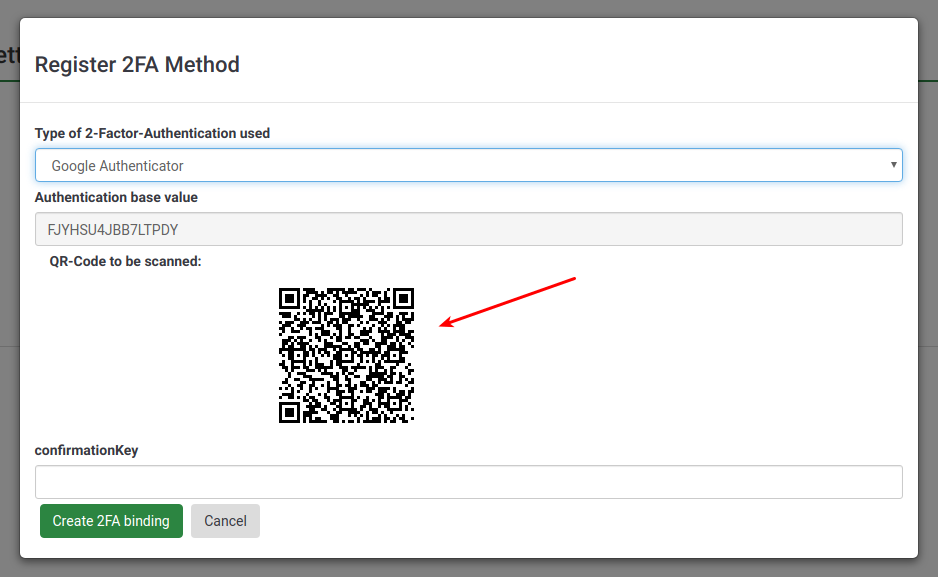
To enable 2FA:
- Select the 2FA authentication method. By default, five different 2FA types are provided: Google Authenticator (default), Authy, YubiKey, Authenticator Plus, Duo, and HDE OTP.
- Scan the QR-code with your mobile phone. For a list of application recommendations, check this article.
- Enter the confirmation key displayed in your 2FA application.
To confirm the creation of your 2FA-token, click on "Create 2FA binding".
Once done, the following two options will be displayed in your personal 2FA settings:
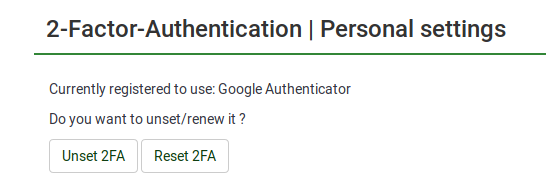
- Unset 2FA: Confirm your action to delete the 2FA-token associated to your account.
- Reset 2FA: If this option is selected, you will be asked to scan the new QR-code and introduce the new confirmationKey.
2FA-Administration
With the necessary permissions, you can have access to the 2FA user management panel from where you can check how many users activated 2FA.

- Action: A red trash button is displayed in this column next to the users that have enabled 2FA. If someone asks to get the 2FA-token reset because he/she cannot log in anymore into your instance, you can delete the 2FA-token associated with his/her account from here.
- Username: All the instance users are listed under this column.
- Full name:The full name typed in here by your users is displayed in this field.
- Email: The email address corresponding to your users.
- 2FA-Method: The 2FA-method chosen by each user.
- 2FA enabled: If "1", it means that 2FA is enabled for the respective user.
FAQ
I am a super administrator and locked myself out. How can I delete my 2FA-token?
How can I enforce 2FA to all my users?
Enable "Force 2FA" from the plugin configuration menu.