Surveys - introduction
From LimeSurvey Manual
General
A survey is an indispensable part of LimeSurvey without which no survey or questionnare can be created. They can be either created, imported or copied. To facilitate the the surveys management, the survey group functionality was added (New in 3.0 ).
Surveys
There are two ways through which you can reach the create a new survey page:
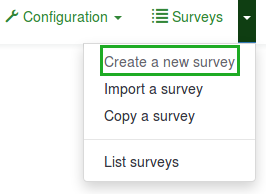
1. The first one is to click on the arrow besides the Surveys button that is located on the main toolbar of your LimeSurvey installation home page. A dialog will show up from where you can choose the Create a new survey option:

2. The second option is to click on the Surveys button located on the main toolbar of your LimeSurvey installation home page:

A survey list will be shown. To create a new survey, click on the Create a new survey button located in the top-left part of the window, above the survey list.

Create a new survey
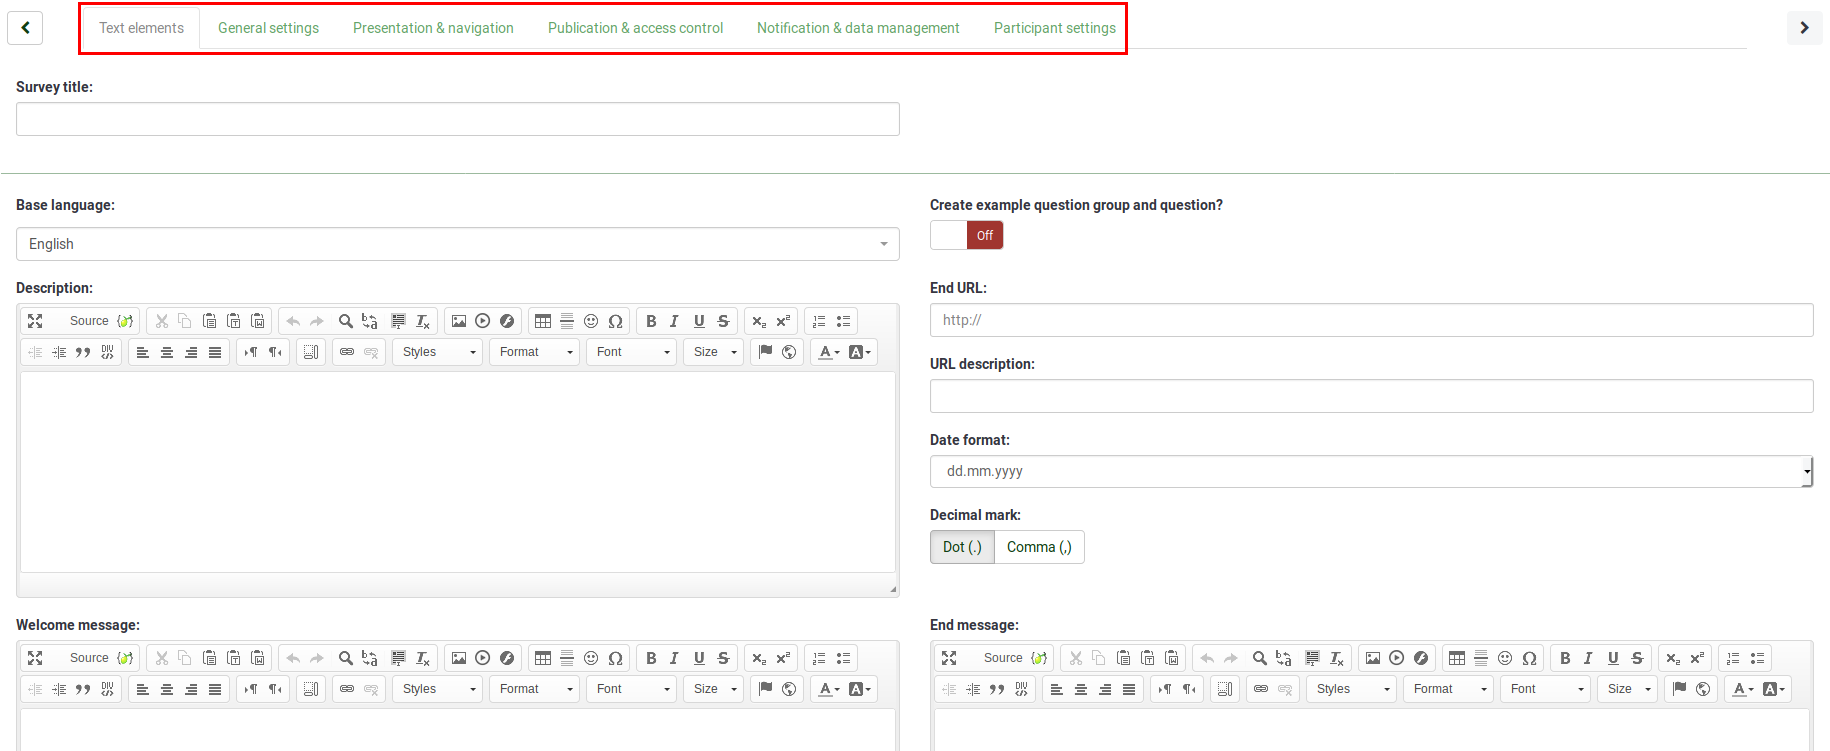
After you clicked Create new survey, the following page will be shown:

To optimize your survey, click on the tabs located on the toolbar:
- Survey texts
- General settings
- Presentation & navigation
- Publication & access control
- Notification & data management
- Participant settings
Survey texts
- Survey title: The title of the survey;
- Create example question and question group?: (New in 3.0 ) If it is on, a question and question group will be added to your survey by default when you create a survey;
- Description: Survey description;
- End URL: It is the URL used to access the survey from the internet. It looks like: http://www.yourdomain.com/limesurvey/index.php?sid=xxx&lang=yy, where:
- xxx is your Survey-ID;
- yy is the language code of the survey.
If tokens are used, then you have to add "&token=zzz" at the end of your URL, where zzz is the token.
- URL description:
- Date format: It is important in the case in which the timestamps are important for your study. If you click on it, a drop-down list will show up with a multitude of date formats. Choose the one that mostly fits your needs. For example, it is recommended to use a different time format on the US market than on an Eastern European country;
- Decimal mark: Two options are available: dot (.) and comma (,). Choose the one that fits the place where you conduct the study (e.g. US vs Germany);
- Welcome message: Type in a message that will welcome the survey participants when they access the end URL;
- End message: Type in a message that will be displayed to the survey participants once they finished the questionnaire.
General settings
- Base language: The main language of the survey. The default value is the one selected in the global settings;
- Additional languages: Translated languages which are in use for this survey;
- Survey owner: Type in the real name of the survey owner;
- Administrator: The name of the administrator, followed by the email-address of the administrator;
- Admin email: Type in the email of the survey administrator;
- Bounce email: It represents the address to which bounced emails will be send to;
- Fax to: The fax number for this survey;
- Group: Select the survey group to which the newly created survey should be added to;
- Format: It allows you to choose how the questions should be displayed. Three options are available: question by question, group by group, all in one;
- Template: The template, which is used for this survey.
- Navigation delay (seconds):
- Show question index / allow jumping:
- Show "There are X questions in this survey": Shows the number of questions and groups in your survey.
- Show group name and/or group description:
- Show question number and/or code:
- Show "No answer:'"
- Show welcome screen:
- Allow backward navigation:
- Show on-screen keyboard:
- Show progress bar:
- Participants may print answers:
- Public statistics:
- Show graphs in public statistics:
- Automatically load URL when survey complete: This is the link of the End-URL, which is displayed or directly loaded when a survey is successfully submitted. (Note: Note: If you are planning to automatically redirect to a certain page at the end of the survey, End Text under General should be blank.)
Publication & access control
- Start date/time: The date the survey starts if "Timed Start" is set to Yes.
- Expiry date/time: If an expire-date is set, it will be shown here.
- List survey publicly:
- Set cookie to prevent repeated participation:
- Use CAPTCHA for survey access:
- Use CAPTCHA for registration:
- Use CAPTCHA for save and load:
Notifaction & data management
- Date stamp:
- Save IP address:
- Save referrer URL:
- Save timings:
- Enable assessment mode:
- Participant may save and resume later:
- Send basic admin notification email to:
- Send detailed admin notification email to:
- Google Analytics settings:
Participant settings
- Set token length to:
- Anonymized responses:
- Enable token-based response persistence
- Allow multiple responses or update responses with one token:
- Allow public registration:
- Use HTML format for token emails:
- Send confirmation emails:
Import a survey
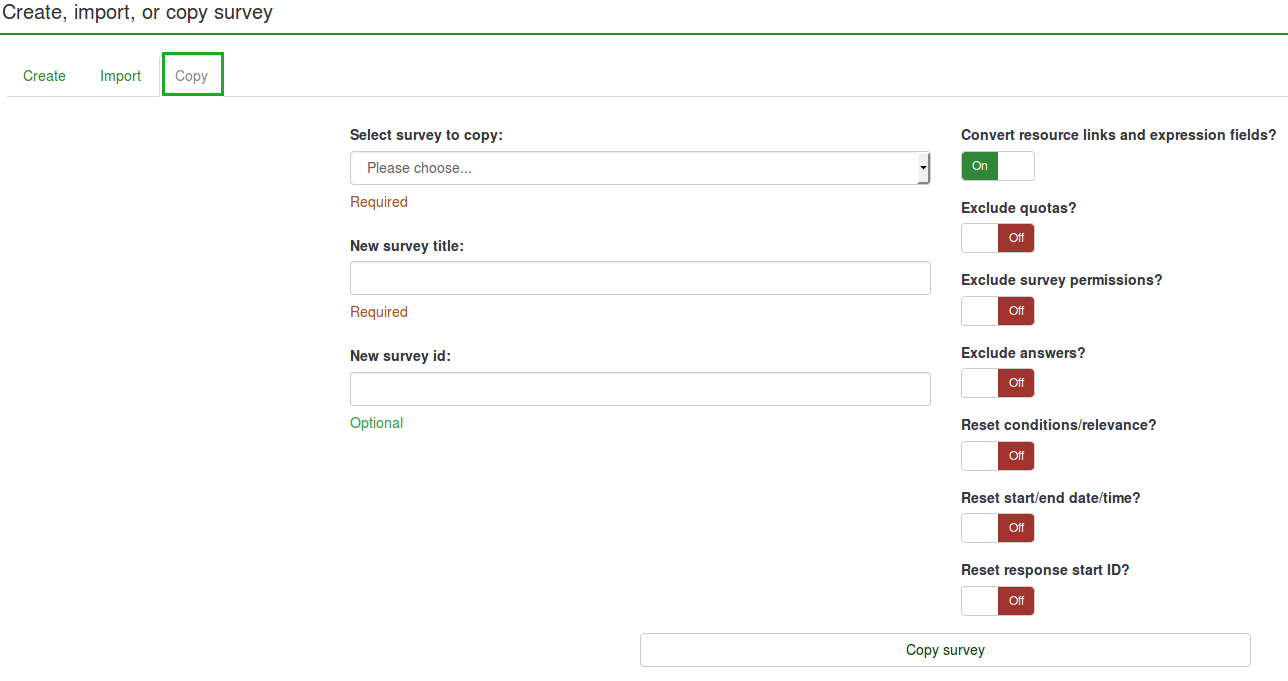
If you have previously exported a survey structure, you can import it from the "Create, import, or copy survey" screen.
To get there just click the 'Create, import, or copy a survey' icon ![]() and in the following screen click on the 'Import' tab.
Click on the browse button to choose the file, and then click on the Import survey' button.
and in the following screen click on the 'Import' tab.
Click on the browse button to choose the file, and then click on the Import survey' button.

The import process reads the following formats:
- .LSS files (XML-format created by LimeSurvey 1.90 or later)
- .LSA files (Survey archive which may include also token, responses and timings - available since LimeSurvey 2.0)
- .TXT files (Text-format created by Excel - available since LimeSurvey 2.0)
- .CSV files (Created by early LimeSurvey versions from 1.50 to 1.90)
That way you can import old surveys from previous versions. The import 'intelligently' re-numbers the survey, group, question, answer, and condition IDs so that they all match each other - no existing surveys will be overwritten. See the section on Exporting a survey structure for more information.
For alternatives - Importing a survey structure
Copy a survey

List surveys

- Survey ID:
- Status:
- Title:
- Group:
- Created:
- Owner:
- Anonymized responses:
- Partial:
- Full:
- Total:
- Closed group:
- Actions:
- General settings & text:
- Add a new question:
- Statistics:
Search bar Status bar Search Reset
=Survey groups= (New in 3.0 )
