Quick start guide - LimeSurvey 2.50+/ja: Difference between revisions
From LimeSurvey Manual
Bravehorse (talk | contribs) (Created page with "サブ質問を追加するには、上部のツールバーに移動し、'''サブ質問編集'''をクリックします。アンケート参加者に答えてほしいサ...") |
Bravehorse (talk | contribs) (Created page with "<div class="simplebox">File:help.png フィールドを追加するには、'''操作'''列の下にある''緑色のプラス記号''をクリックします。</div>") |
||
| Line 278: | Line 278: | ||
<div class="simplebox">[[File:help.png]] | <div class="simplebox">[[File:help.png]] フィールドを追加するには、'''操作'''列の下にある''緑色のプラス記号''をクリックします。</div> | ||
===Add answers=== | ===Add answers=== | ||
Revision as of 06:48, 16 July 2018
はじめに - LimeSurveとは何か?
LimeSurveyは、PHPで書かれたフリーでオープンソースのオンラインアンケートアプリケーションであり、GNU General Public License 2のもとで配布されています。このソフトウェアを使用すると、ユーザーはオンラインアンケートの開発と公開、回答の収集、統計の作成、結果データの他のアプリケーションへのエクスポートが可能になります。あなた自身のサーバーにLimeSurveyをインストールすることも(LimeSurvey CE)、我々のホスティングサービスを介して直接利用することも(LimeSurvey Pro)できます。
このスタートガイドは、LimeSurvey Proの利用を前提にしたものです。LimeSurveyを自前のサーバーにインストールする方法については、LimeSurveyマニュアルのインストールを参照してください。
フリーのLimeSurveyアカウントを作成する
LimeSurveyでは、その特長とコア機能をテストするため、フリーのアカウントを作成することができます。トライするには、LimeSurveyウェブサイトのトップツールバーにあるEditions & Pricingにカーソルを合わせ、LimeSurvey ProタブにあるEditions & Pricingボタンをクリックします。

free、basic、expert、enterpriseの4つの選択肢が現れます。FREEオプションのボックスからRegister Nowボタンをクリックします。
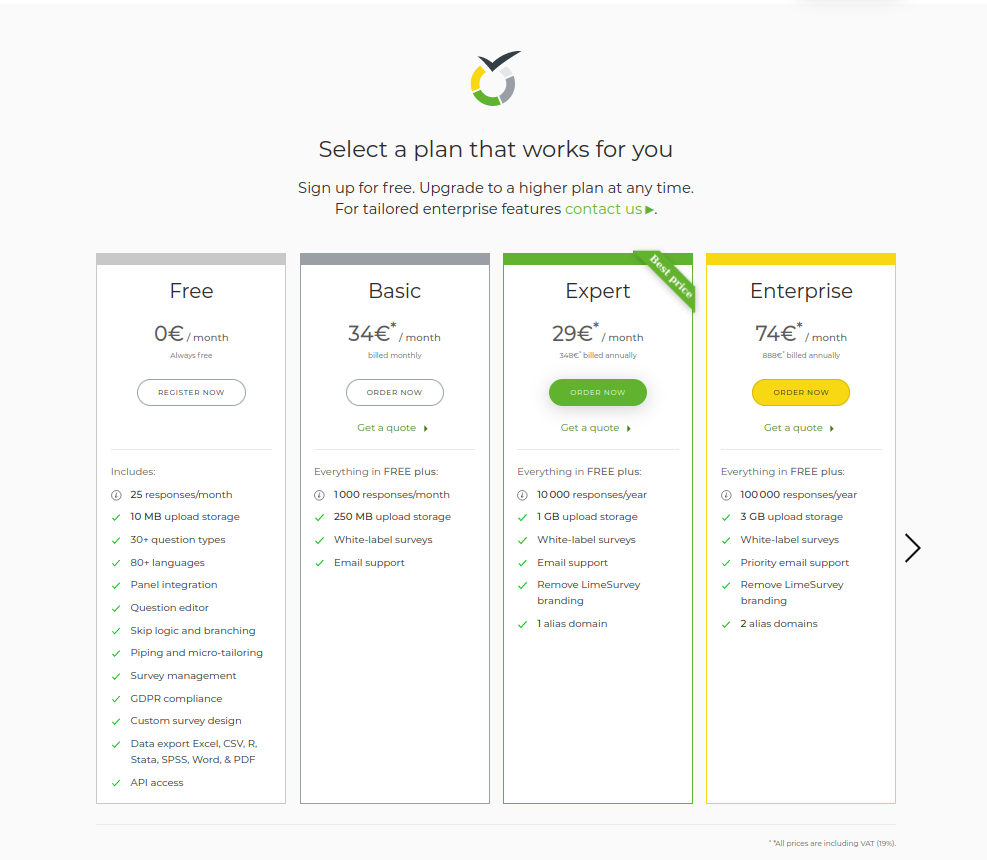
次のステップでは、次のフィールドを入力します。
- Username: LimeSurveyのアクセスにも使用されるアカウントのユーザー名。
- Email: アクティベーションリンクが送信される電子メール。
- Password: アカウントのパスワードで、LimeSurveyのアクセスにも使用されます。
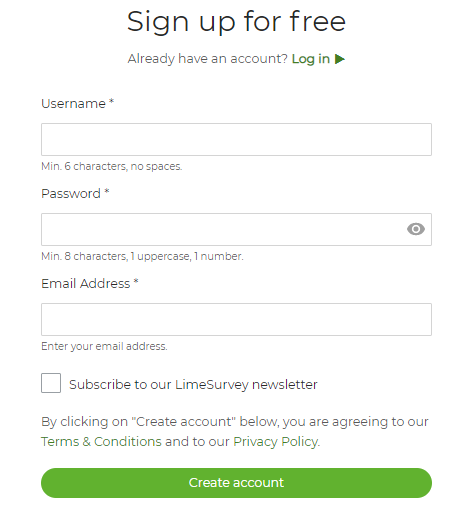
各フィールドの上にマウスを置くと、各フィールドの詳細がテキストボックスにポップアップ表示されます。必要に応じて、LimeSurveyのニュースレターに登録して、ヘルプ、ヒントとテクニック、サービスの割引、最新のニュースを入手することもできます。
手軽に登録できるよう、LimeSurveyではユーザーが自分のTwitter、Gmail、GitHubアカウントでサインアップすることもできます。LimeSurveyは、選択したソースから必要とされる基本情報を収集します。
SIGN UPボタンを クリックしてLimeSurveyアカウントを作成したら、Eメールが届きます。この電子メールには、新しく作成したアカウントにアクセスするためのアカウントアクティベーションリンクが含まれています。クリックすると、LimeSurveyのWebサイトにリダイレクトされ、LimeSurveyのアカウントに自動的にログインします。
アンケートリンクにアクセスするには、まずインストールする必要があります。メインツールバーからユーザー名をクリックし、YOUR LIMESURVEY PROFILEに移動します。

画面の左側にあるプロファイルメニューからInstallationsを選択し、インストールを作成します。
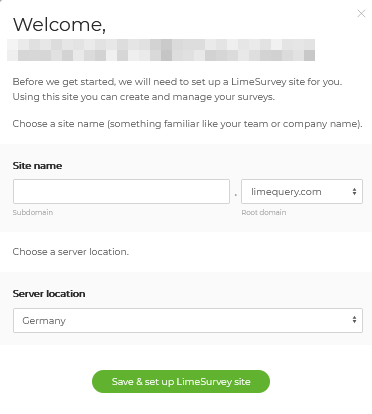
次のように求められます。
- ドメイン名(アンケートのURLリンク)を入力します。
- サーバーの場所を選択します。4つのサーバーの場所のうち、ニーズに適合する1つを選択できます。
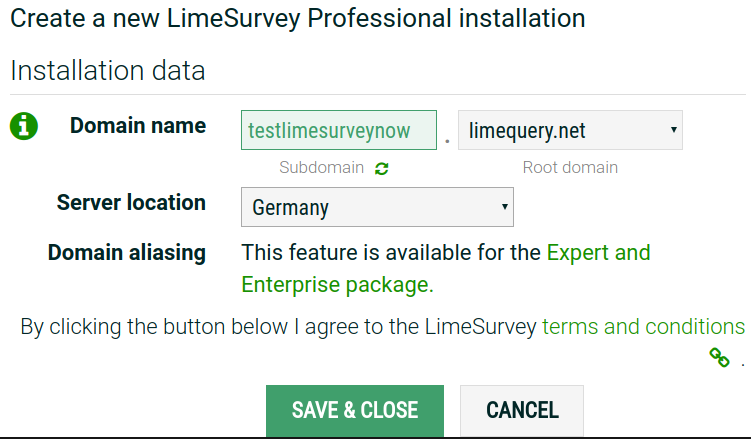
ドメイン関連のフィールドが完了して保存されると、インストールプロセスが開始されます。これには最大10秒かかります。インストール設定ページは次のようになります。
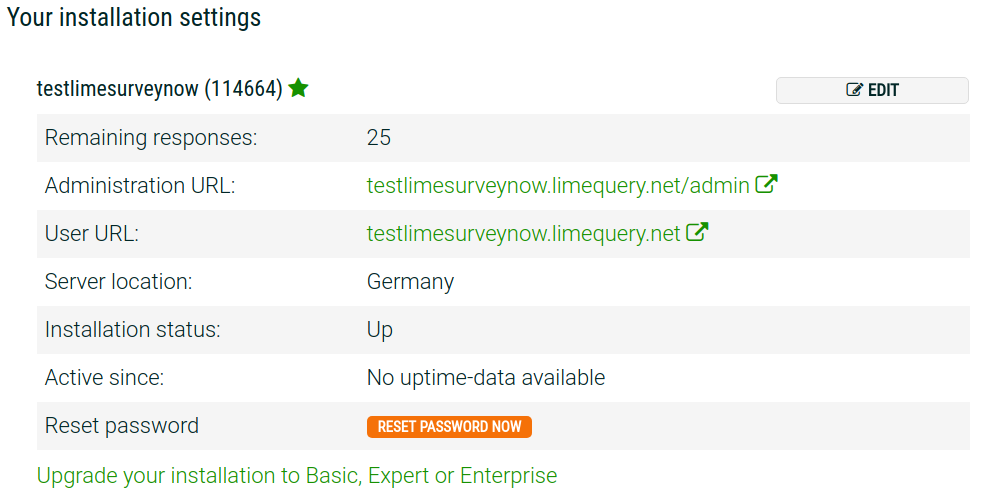
管理URLをクリックすると、サーバーにアクセスできます。LimeSurveyにサインインするには、LimeSurvey.orgの資格情報を使用してください。
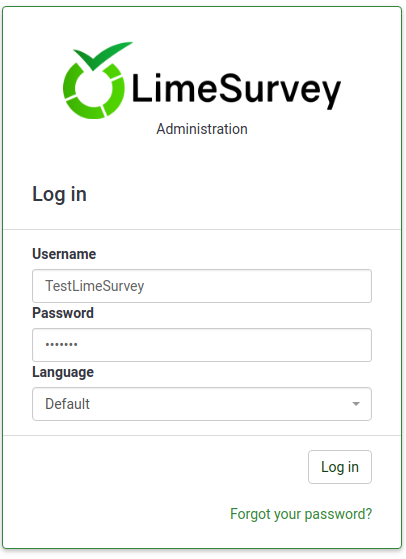
LimeSurveyの使用開始
ログインすると、LimeSurveyのホームページが表示されます。ウィンドウの右上部分にあるツールバーと、ホームページの中央にある6つのLimeSurvey機能のショートカットボックスが表示されています。
このツールバーには次の設定があります。
- Configuration: Once selected, a dialog will show up from where you can administrate your LimeSurvey installation.
- Settings: Under this tab, you may find options that can help you customize your LimeSurvey installation.
- Home page settings: Users can use this option to tweak the settings of the home page according to their needs;
- Global settings: The changes done here affect the entire LimeSurvey installation, influencing also the setting of non-superadministrator users for all users;
- Plugin manager: It allows every user to activate a series of plugins that are supported by the LimeSurvey team. New plugins can also be added to your installation.
- Users: Under this tab you may find options related to the users and survey participants' management.
- Manage survey administrators: New administration users can be added from here;
- Create/edit user groups: This function is meant to group administration users in individual groups;
- Central participant database: It permits every administrator to store the participants' information to a central table that is independent of any token table.
- Advanced settings: It includes options that are non user or settings-related. They can be used to enhance your LimeSurvey installation.
- Themes: If you would like to add/edit/delete templates, access this option. The templates allow control over the look and feel of pages of your survey;
- Manage label sets: Label sets are basically list templates where each list has a set of codes with labels and it can be used in most question types either as answers or as sub-questions;
- Check data integrity: It checks the consistency and the redundancy of the data;
- Backup entire database: It is used to backup the LimeSurvey data when important LimeSurvey upgrades are pushed or when you move your LimeSurvey installation to another server;
- ComfortUpdate: It is a tool utilized to easily update your LimeSurvey installation from your web browser with just a few mouse clicks (instead of performing a manual LimeSurvey reinstallation).
- Settings: Under this tab, you may find options that can help you customize your LimeSurvey installation.
- Surveys: A survey includes via different interconnected databases: languages, question groups, questions, question attributes, answers, subquestions, default answers, assessments, quotas, quota members, and quota language settings. By clicking on the green arrow, a window with the following options will load up:
- Create a new survey: New surveys can be created and added to the surveys list;
- Import a new survey: If you want to import a survey to your list of surveys, use this function;
- Copy a survey: It allows the user to quickly copy a survey. This will appear in the surveys list from where it can be edited;
- List surveys: It allows you you to get an overview on all the existing surveys.
- Response balance: It shows the number of responses left from your subscription. Because you have access only to a free account at the moment, 25 responses per month are available to you. If you run out of responses, purchase more from the following link;
- Storage: it represents the amount of MBs that are at your disposal to store your surveys and answers.Because you created a free account, you get 10 MB storage space. If you would like to receive more storage space, choose one of the following options from here;
- Username: By clicking on it, you can either access your user preferences or sign out from your account;
- Notifications: Different notification related to your LimeSurvey installation will be displayed here.
There are six default boxes on the home page of your LimeSurvey installation:
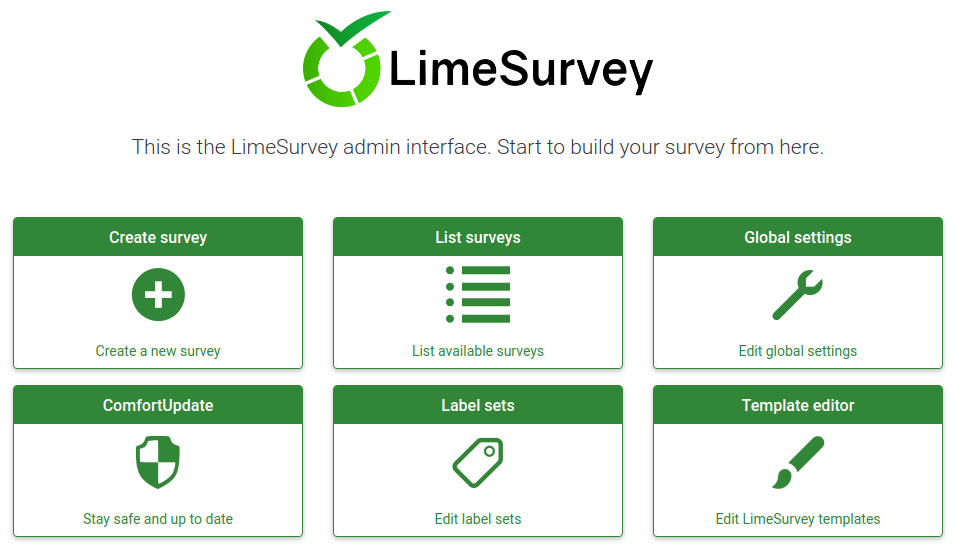
- Create a new survey
- List available surveys
- Edit global settings
- ComfortUpdate
- Label Sets
- Template editor
アンケート作成
アンケートを作成するには、アンケート作成ボックスをクリックします。
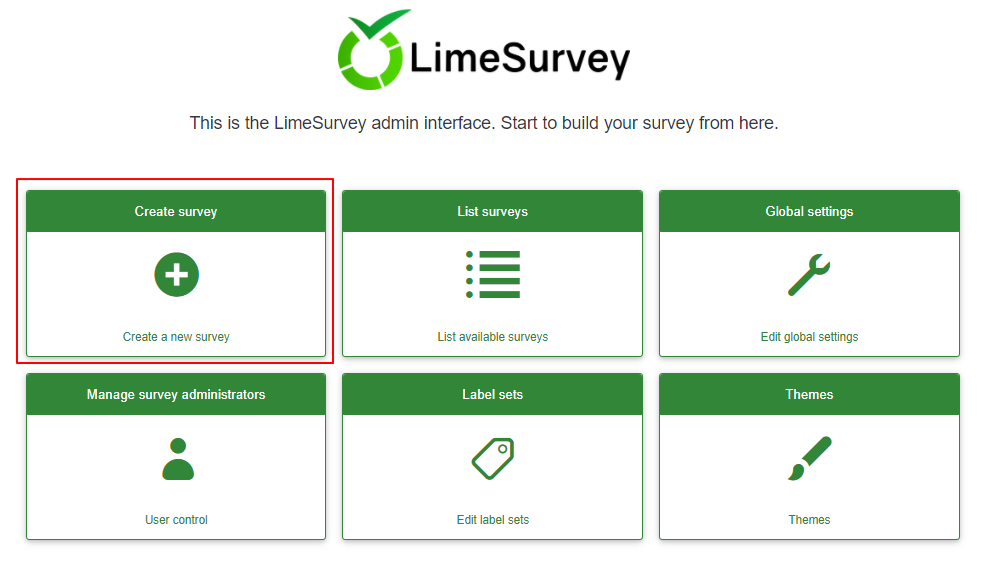
アンケート作成ページが表示されます。
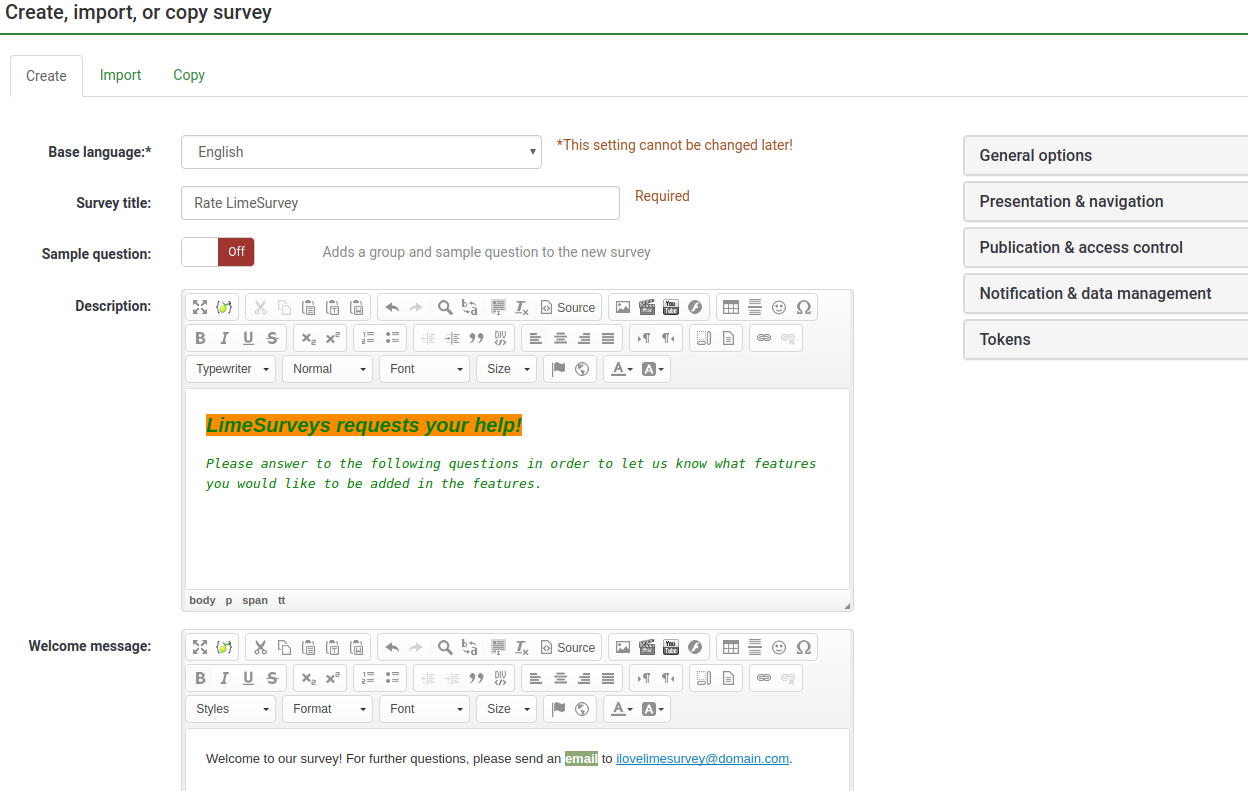
The following options will be displayed:
- Base language: It is the main language of the survey. Additional languages can be added later from the settings of the survey;
- Survey title: The title of the survey has to be typed here. It can be later changed;
- Sample question: It comes disabled by default. If you enable it, a question group and question examples will be added to your survey.
- Description: A short description of the survey can be added here;
- Welcome message: The survey participants will be prompted by this welcome message if something is typed in;
- End message: Type in a message that will be displayed to the survey participants when they submit the answers to the questionnaire.
フィールドの入力が完了したら、ウィンドウの右上にある保存して閉じるボタンをクリックします。いま追加したアンケートのホームページにリダイレクトされます。
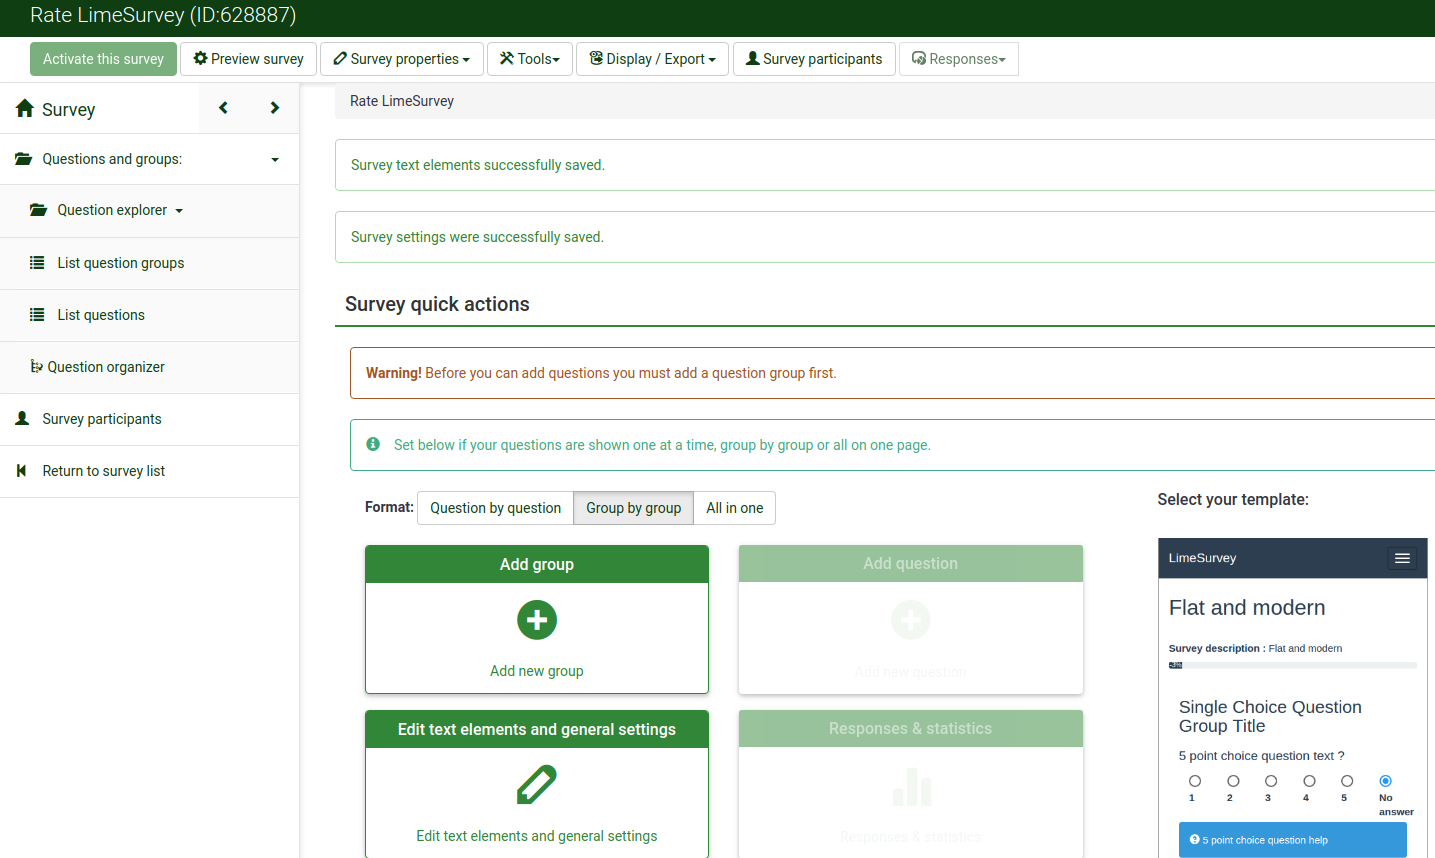
質問グループ追加
質問グループは、説明、質問、および回答のようなアンケートのさまざまな要素をグループ化するために使用します。
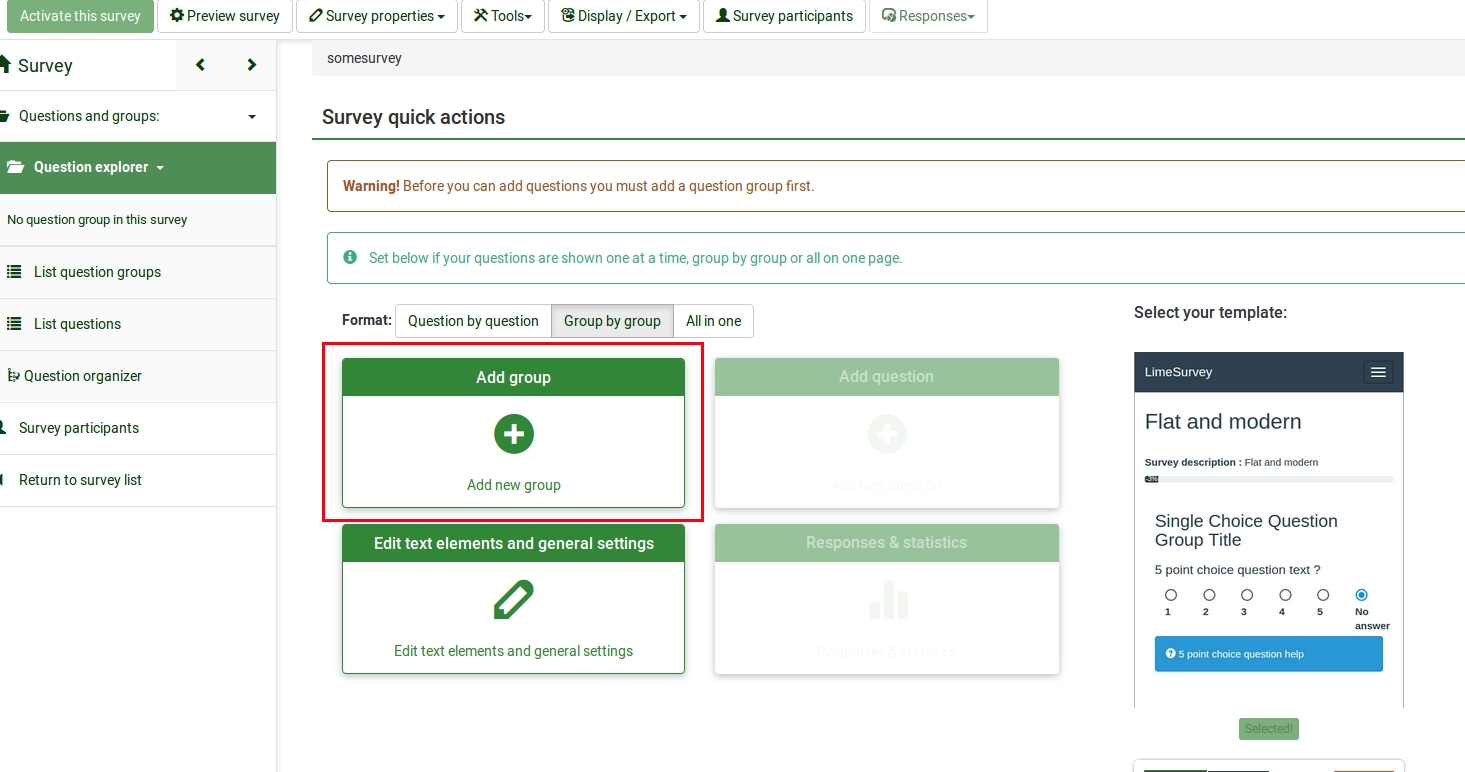
質問グループを作成するには、最初に質問グループを追加するアンケートにアクセスします。LimeSurveyのホームページから上部のツールバーにあるアンケートボタンをクリックします。
Click on the survey you wish to add the question group to. The survey page will show up. Look for the Add group panel in the middle of the page:
以下のページが表示されます。
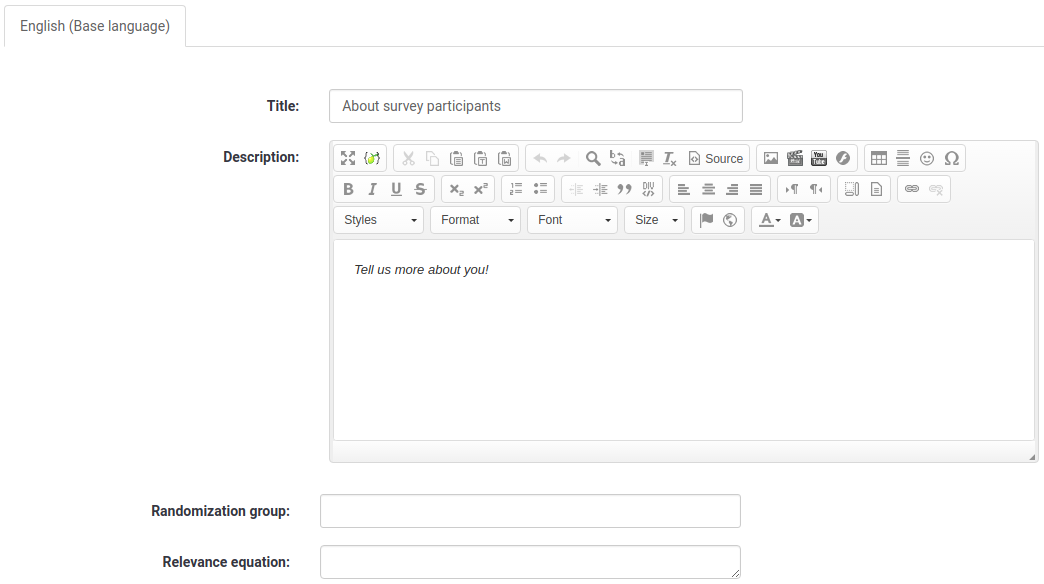
- 題名: 質問グループの名前
- 説明: 質問グループの簡単な説明を入力します。アンケートの設定で対応するオプションが有効になっている場合、アンケート参加者に表示されます。
- グループの表示順序を不規則にする: この機能により、質問グループの表示順序をランダム化します(ランダム化する対象の質問グループのそれぞれに同じ文字列の割り当てが必要です)。
- Relevance equation(出現条件): 先行する質問への回答によって特定の質問グループにしか回答できないようにするために使用します。
完了したら、画面の右上にある保存して閉じるボタンをクリックします。
To get an overview of all question groups, go to the Survey menu and click on: Questions and groups -> List question groups:

質問追加
To create a new question, you need to first create a question group. Please check the steps presented above to see how you can add a question group to a survey. Once done creating the survey group, select the List question groups button from the survey menu:

A list with the all the survey question groups will show up.
Now, look in the last column. It shows you four buttons, representing the available question group actions:
- Add new question to group: It is used to start adding questions to the corresponding question group;
- Edit group: It allows the user to edit the respective question group;
- Group summary: If clicked, a summary page of that question group will be displayed;
- Delete: One option to delete the question group is to click on the red trash button.
Click on the first button and start adding your question to the desired question group. The Create question page will load up. It contains the following options:
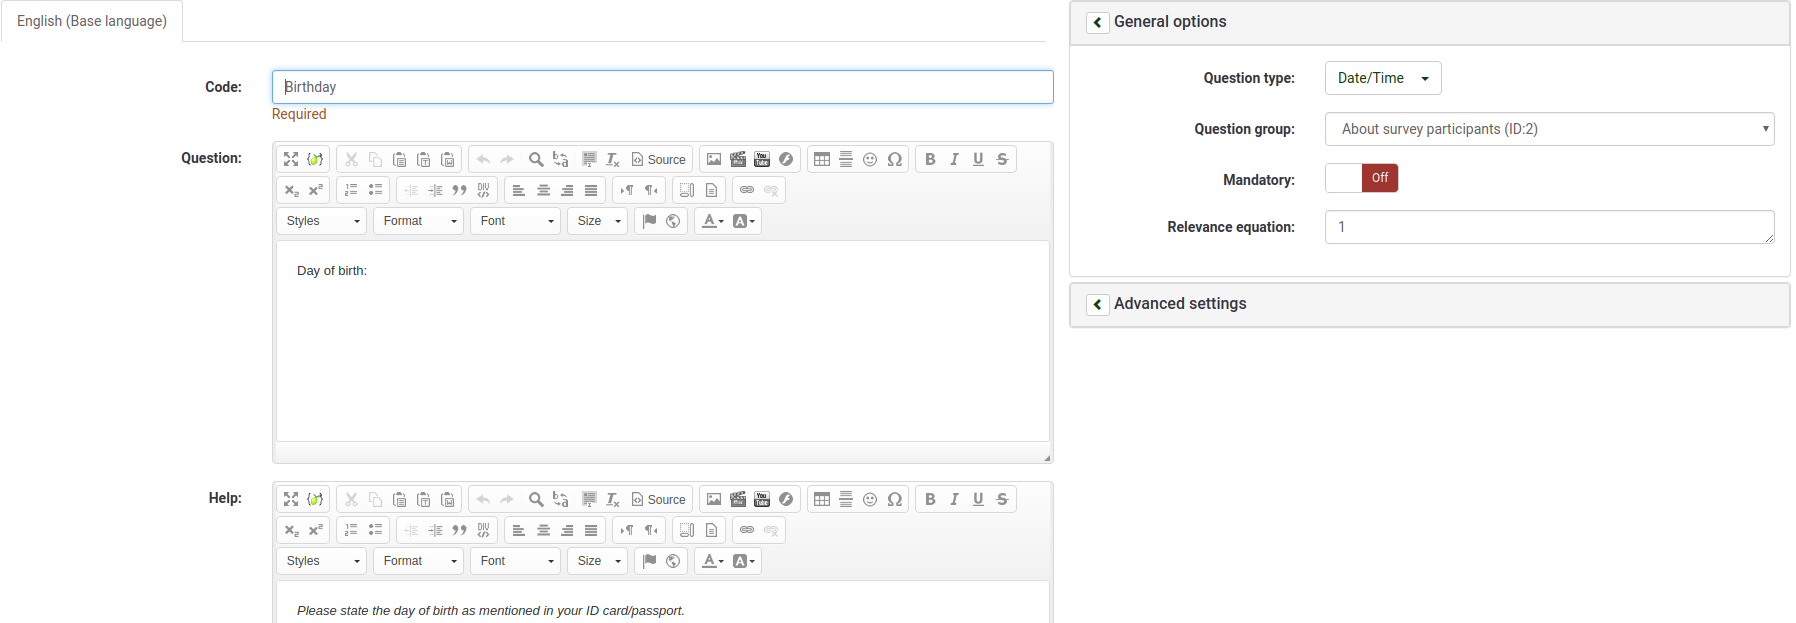
- Code: It represents the individual question name/code with which the survey is saved in the database and can be used further in more complex and advanced types of questions;
- Question: The name of the question that will actually appear in the survey for the survey participants;
- Help: A short text can be provided in order to help the survey participants better understand the question;
- General options: The functionalities located under this option allow you to modify the most important question-related settings. It includes four options:
- Question type: Many question types can be used in LimeSurvey. To better understand them, hover the mouse over each option or read our wiki on questions;
- Question group: You can choose here which question group you would like to add the question to;
- Validation: This feature is available on all free text type or numeric questions. It is used for response validation. If the response is not validated, the user will be prompted to try again before they can progress;
- Mandatory: It is available for all question types. This setting allows you to require users to answer the question before they can move on to the next question;
- Relevance equation: It is a setting for advanced users. It is recommended to use the default value of "1" (it means that the item will be always shown);
- Advanced settings: The advanced settings are different for each question type. Please consult the documentation for your particular question type.
Click on the Save button. Once done, you will be redirected to a page that contains the summary of the recently added question:
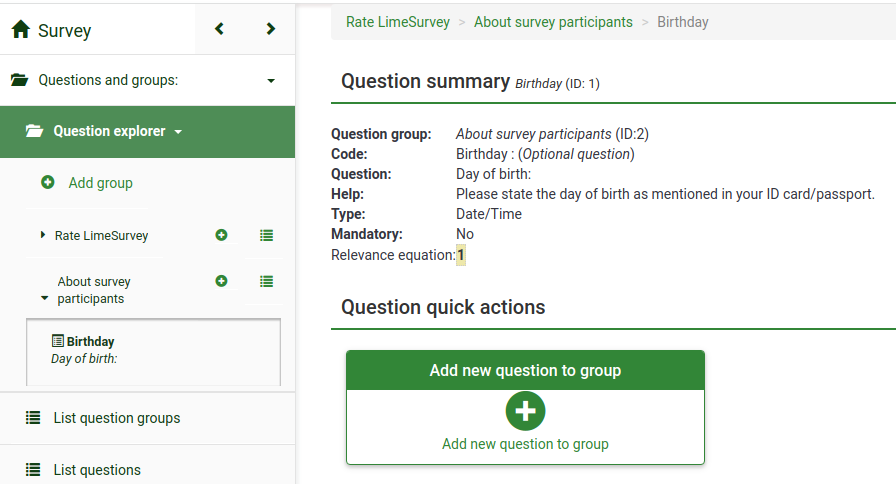
To add more questions, click on the Add new question button located in the Question quick actions menu.
サブ質問と回答の追加
質問の種類によって、サブ質問やあらかじめ定義した回答のセットが必要です。たとえば、アンケート参加者の年齢を尋ねる質問では、サブ質問またはあらかじめ定義した回答のセットは必要ありません。一方、単純な配列質問には、サブ質問と回答の両方が必要です。
次のスクリーンショットには配列タイプの質問が含まれています。

サブ質問の追加
サブ質問を追加するには、上部のツールバーに移動し、サブ質問編集をクリックします。アンケート参加者に答えてほしいサブ質問を入力してください。

Add answers
To add a set of predefined answers, go to the top toolbar and click on Edit answer options. Type in the answers:

Save the set of answers and preview the question (look for the Preview question button located on the top toolbar).
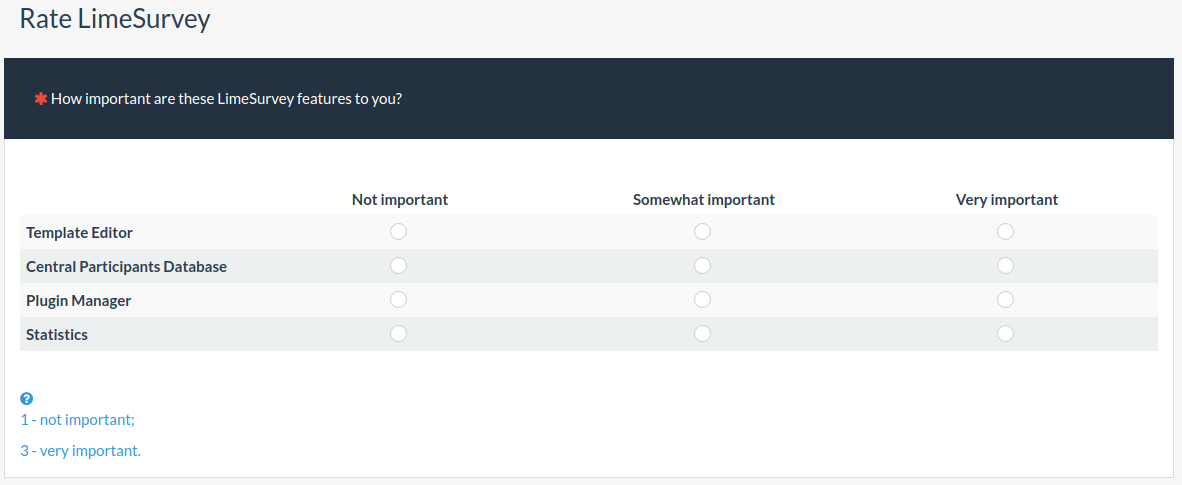
Congratulations! You have successfully created your first array-type question.
Organize questions
If your survey already contains dozens of questions, it is a time-consuming process to access each question and/or question group and edit the order one-by-one. Therefore, to quickly reorganize your questions and question groups, use the Question organizer function (Survey menu -> Questions and groups -> Question organizer).
To reorder them, just drag the question/group and drop it to the desired position. Do not forget to click on the Save button to save your changes.

Activate/Stop survey
Now that you have at least one question and question group added to your survey, you can activate it. Go to the home page of your survey by clicking on the Survey button, located on the top of the survey menu:
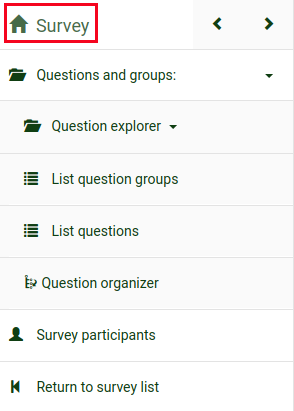
Check the toolbar. The Activate this survey option should be available:
Before activation, a window will be displayed, asking you about some general survey settings:
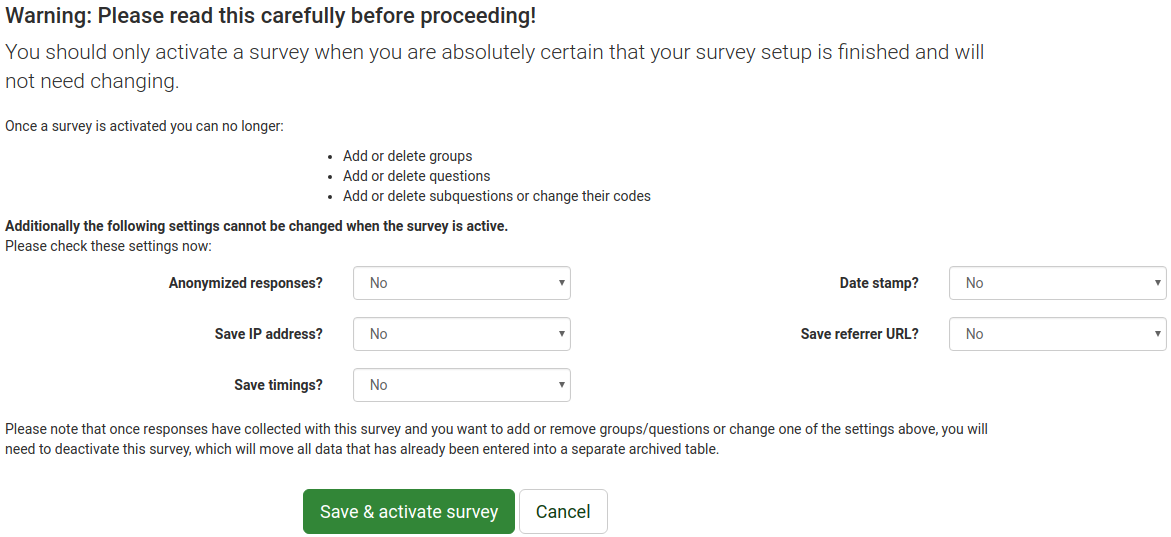
- Anonymyzed responses: This option allows you to determine whether responses to your survey are matched up with information from your survey's token table, or kept "anonymous". If you decide to enable it, your survey is set to anonymize responses - there will be no way to connect answers and participants;
- Save IP address: If enabled, the IP address of the survey respondent will be stored together with his/her answers;
- Save timings: If enabled, the time spent on each page of the survey by each survey participant is recorded;
- Date stamp: Turn it on if you would like to see the date the answers were submitted;
- Save referrer URL: If enabled, the referrer URL will be stored together with the answers.
Once you are done enabling the desired functionalities, click on the Save & activate survey button. The following message should be displayed:
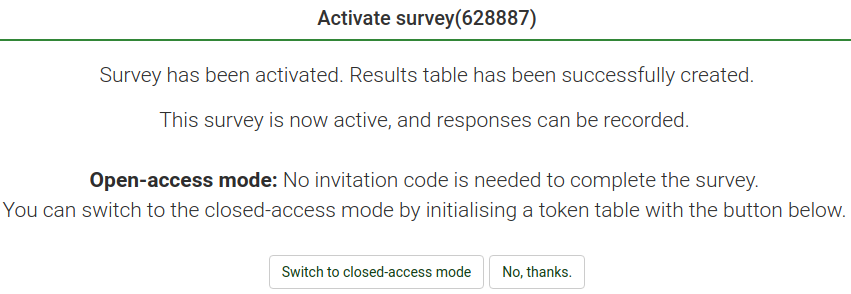
Select the option No, thanks to disable the closed-access mode! In this way, everyone will have access to your survey.
Congratulations! You have activated your first survey! If you want to start sharing the survey URL, go to the home page of your survey, and look for the survey URL in the Survey summary:

Copy the link and start sharing it.
If you want to stop the interview, access the home page of the survey and look for the Stop this survey button located on the top toolbar:

Statistics
To quickly see your survey statistics, click on the Survey button located on the top toolbar of your LimeSurvey home page. A list with all the available surveys will be displayed. Now, go to the last column and click on the Statistics button (![]() ) that corresponds to the row of the survey you wish to analyse:
) that corresponds to the row of the survey you wish to analyse:

A new window with a set of graphs will be loaded up. If you want to use them in a report, scroll down and click on the Export images button located on the bottom-left part of the page. All the charts will be separately saved as .png files and archived in a .zip file.
On the upper-right part of the window, you can see the Expert mode button. Click on it in order to access more statistics-related filters.
Once you select the filters according to your desired analyses, click on the View Statistics button located on the upper-right part of the window.
According to the chosen output, the results are displayed in HTML, Excel or PDF.
Exporting the questions and responses
If you want to export the results in a different format in order to produce statistics and graphs using other apps such as SPSS, R, STATA, etc., access the survey you want to analyse. Click on the Responses button located on the top toolbar, and then on Responses & Statistics:

Now you are on the Browse responses page. Look at the top toolbar for the Export button and select the desired format you wish to export to. If you select the first option, all the availalbe formats in which you can export the data will be displayed:

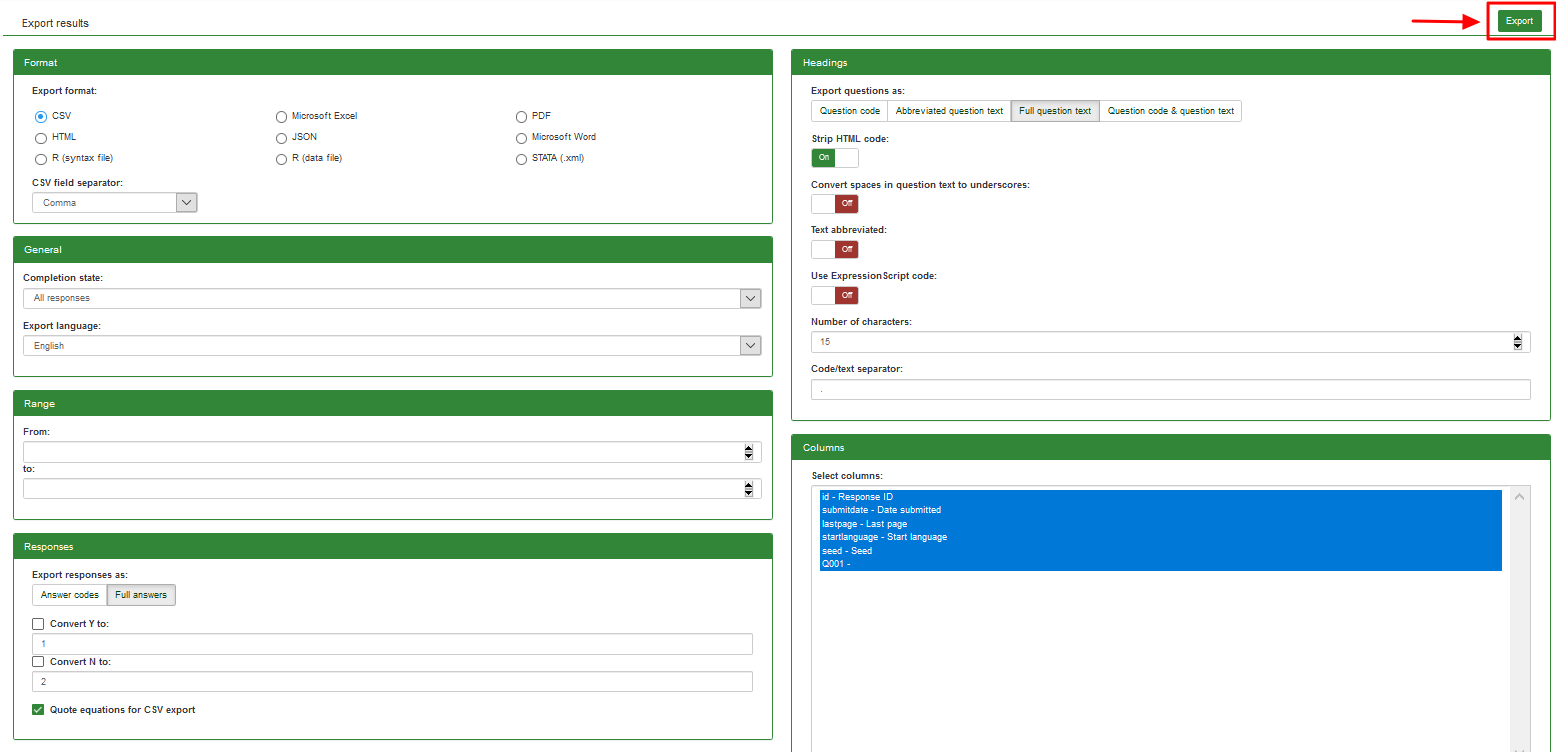
Once the filters are set, click on the Export button located in the upper-right side of the window.
Other LimeSurvey features - advanced users
Check the features of LimeSurvey Pro package by clicking on the following link: https://www.limesurvey.org/editions-and-prices/limesurvey-pro/professional-features.
If further questions arise, please post them on our forum or join the IRC channel.