Quick start guide - LimeSurvey 2.50+: Difference between revisions
From LimeSurvey Manual
No edit summary |
No edit summary |
||
| Line 120: | Line 120: | ||
==Create question group== | ==Create question group== | ||
A question group is used to group different elements of a survey like descriptions, questions, and answers. | |||
To create a question group, you have to first access the survey to which you want to add the question group. To do that, click on the Surveys button located on the toolbar from the LimeSurvey home page: | To create a question group, you have to first access the survey to which you want to add the question group. To do that, click on the Surveys button located on the toolbar from the LimeSurvey home page: | ||
<center>[[File:]]</center> | <center>[[File:Quick start guide - Surveys list.png]]</center> | ||
Click on the survey you wish to add the question group. The survey page will show up. Look for '''Add group''' button: | Click on the survey you wish to add the question group. The survey page will show up. Look for '''Add group''' button located on the left menu - '''Questions and groups''' -> '''Question explorer''' -> Add group''': | ||
<center>[[File:]]</center> | <center>[[File:Quick start guide - add group.png]]</center> | ||
The following page will be displayed: | The following page will be displayed: | ||
<center>[[File:]]</center> | <center>[[File:Quick start guide - create group.png]]</center> | ||
*Title | *'''Title:''' | ||
*Description | *'''Description:''' | ||
*Randomization group | *'''Randomization group:''' | ||
*Relevance equation | *'''Relevance equation:''' | ||
Once done, click on the '''Save and close button''' located in the upper-right part of the window. | |||
{{Box|The last two fields empty in the screenshot because knowledge about the expression manager of LimeSurvey is required. If you would like to read more about it, start with [https://manual.limesurvey.org/Question_groups_-_introduction our wiki on question groups].}} | |||
{{Alert|title=Warning|text= You must create a question group first in order to start adding questions to your survey.}} | {{Alert|title=Warning|text= You must create a question group first in order to start adding questions to your survey.}} | ||
To see your recently added question group, go to the '''Survey menu''' and click on : '''Questions and groups''' -> '''List question groups''': | |||
To see your recently added question group, | |||
<center>[[File:]]</center> | <center>[[File:]]</center> | ||
| Line 148: | Line 147: | ||
To create a new question, you need to have first created a question group. Please check the steps above to see how a question group is added to a survey. | To create a new question, you need to have first created a question group. Please check the steps above to see how a question group is added to a survey. | ||
Once done creaeting the survey group, go to the question groups list from your survey located under the Questions and groups from the Survey menu: | Once done creaeting the survey group, go to the question groups list from your survey located under the Questions and groups from the Survey menu: | ||
<center>[[File]]</center> | <center>[[File:Quick start guide - List question groups.png]]</center> | ||
A list with all the question groups from your survey will be displayed. Look into the last column. The last column shows you the available actions that can be made with the question groups. These are: | A list with all the question groups from your survey will be displayed. Look into the last column. The last column shows you the available actions that can be made with the question groups. These are: | ||
*Add new question to group: | *Add new question to group: | ||
| Line 172: | Line 171: | ||
To add more questions, click on the Add new question button located under the Question quick actions menu. | To add more questions, click on the Add new question button located under the Question quick actions menu. | ||
== | ==Add subquestions and answers=== | ||
Depending on the type of question you | Depending on the type of question you | ||
| Line 180: | Line 179: | ||
===Add answers=== | ===Add answers=== | ||
<center>[[File:]]</center> | |||
===Add subquestions=== | |||
<center>[[File:]]</center> | |||
==Organize questions== | ==Organize questions== | ||
<center>[[File:]]</center> | |||
==Activate/Stop survey== | ==Activate/Stop survey== | ||
<center>[[File:]]</center> | |||
==Add survey participants== | ==Add survey participants== | ||
<center>[[File:]]</center> | |||
==Add users== | ==Add users== | ||
<center>[[File:]]</center> | |||
==Statistics== | ==Statistics== | ||
<center>[[File:]]</center> | |||
==Export data== | ==Export data== | ||
<center>[[File:]]</center> | |||
=Other LimeSurvey features - advanced users= | =Other LimeSurvey features - advanced users= | ||
https://www.limesurvey.org/editions-and-prices/limesurvey-pro/professional-features | |||
</translate> | </translate> | ||
Revision as of 15:24, 22 September 2017
Introduction - what is LimeSurvey?
LimeSurvey is a free and open source online survey application written in PHP, and distributed under the GNU General Public License 2. The software enables users to develop and publish online surveys, collect responses, create statistics, and export the resulting data to other applications. You can either install LimeSurvey on your own server (LimeSurvey CE) or you can directly start utilizing it via one of our hosting services (LimeSurvey Pro).
The following start guide relies on the usage of LimeSurvey Pro. To install LimeSurvey on your own server, check our installation section from our manual.
Create a free LimeSurvey account
LimeSurvey allows every user to create a free account in order to test its features and core functions. To try it out, hover the mouse over Editions & Pricing that is located on the top toolbar of [LimeSurvey website]) and look for the Editions & Pricing button located under the LimeSurvey Pro option.

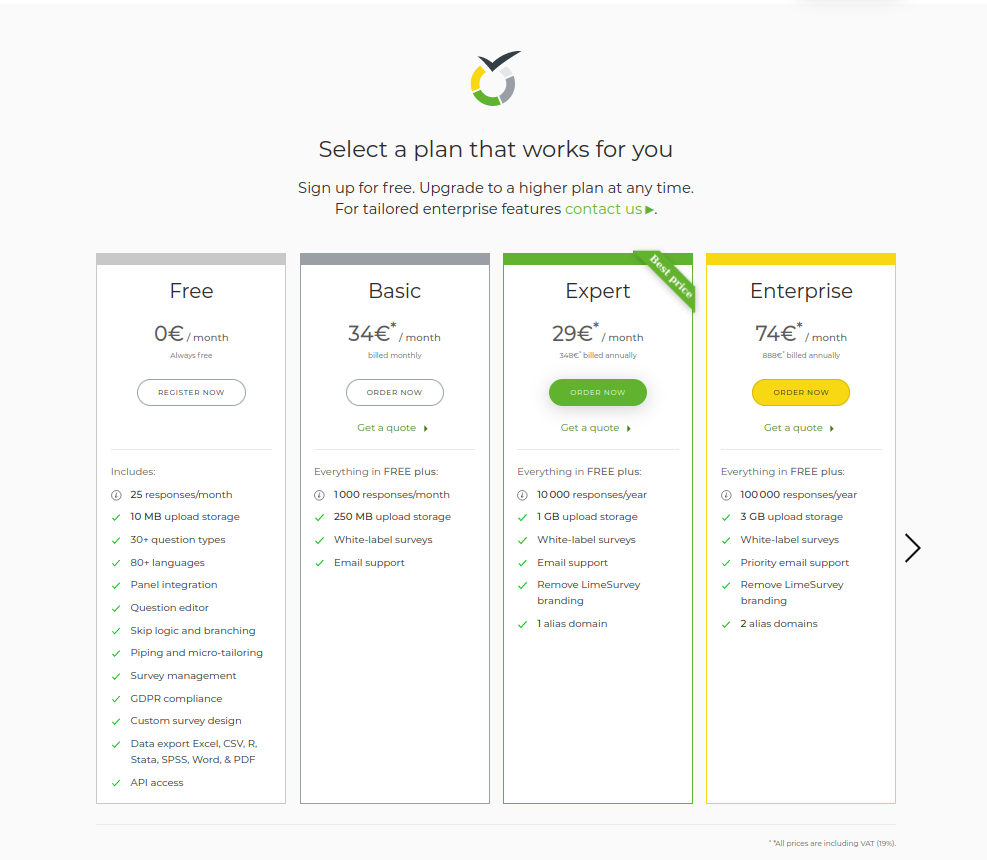
Four options will emerge: free, basic, expert, and enterprise. Click on the Register Now from the FREE option box:
The next step includes filling in the following fields:
- Username: the username of your account which will also be used to access your LimeSurvey installation;
- Email: the email where the activation link will be sent to;
- Password: the password of your account which will also be used to access your LimeSurvey installation.
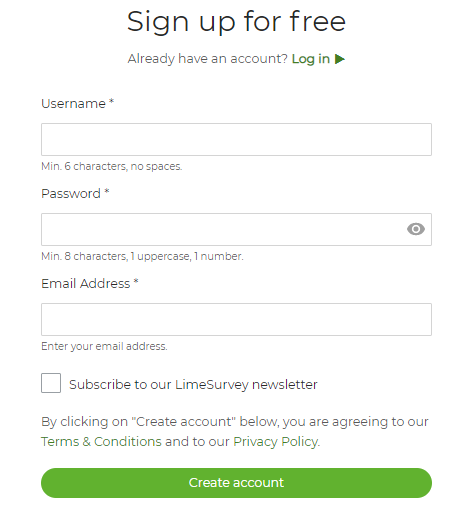
As you hover the mouse over each field, a text box will pop up with further details about each field. Optionally, you could also subscribe to the LimeSurvey newsletter in order to get help, tips & tricks, latest news, and service discounts.
For a faster registration process, LimeSurvey allows each user to sign up via their own Twitter, Gmail or GitHub account. LimeSurvey will gather the basic information we require from your selected source.
After creating your LimeSurvey account by clicking on the sign up button, you will receive an email from us. This email contains the activation link you should click on to access your newly created account. Once done, your account will become active and you will be automatically logged in to your LimeSurvey account.
To access your survey link, you have to first create an installation. Click on your username from the main toolbar, and then go to your LimeSurvey profile:

Select Installations from the Profile Menu located on the left side of the screen and create an installation:
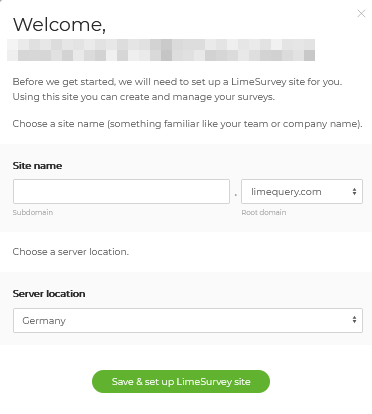
You will be asked to:
- type in the Domain name (the URL link of the questionnaire);
- choose the Server location – you can pick up one of the four server locations that will suit most of your needs.
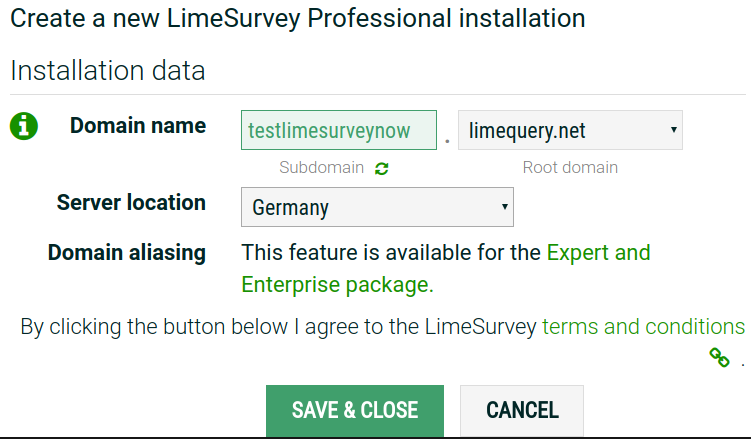
Once the domain-related fields are completed and saved, the installation process will start. This will take up to 10 seconds. After, LimeSurvey will display the settings of your installation:
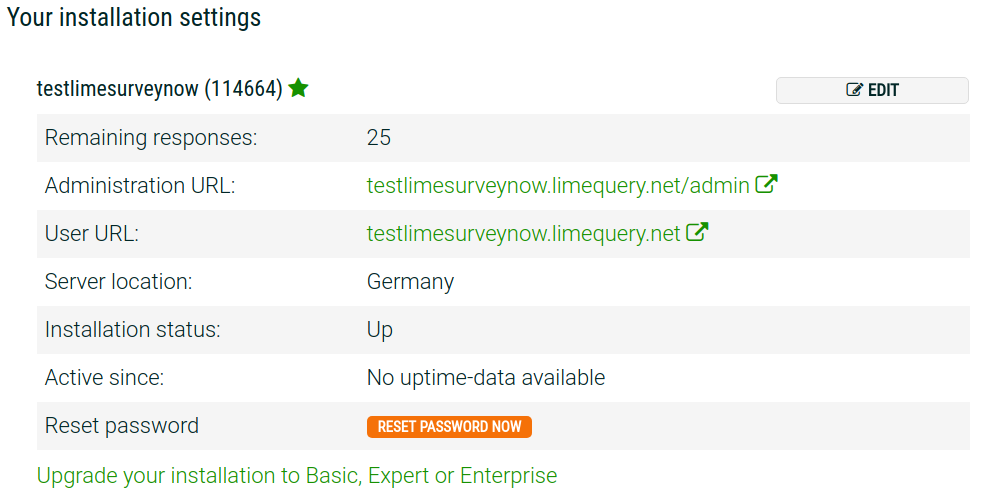
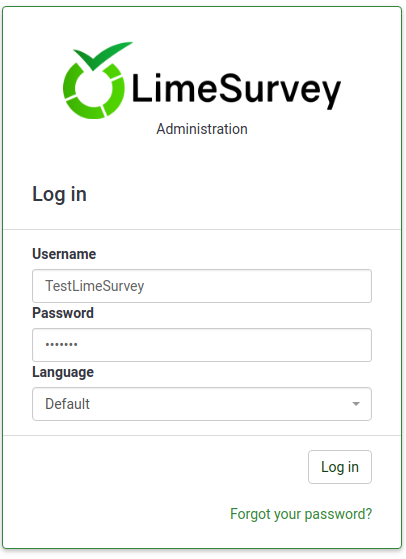
Now, you can access your server by clicking on the administration URL. To sign in to your LimeSurvey installation, use your LimeSurvey.org credentials.
Start using LimeSurvey
Once logged in, you will find yourself on the home page of your LimeSurvey installation. It contains a toolbar located in the top-right part of the window and a default set of boxes at the center of the home page with some shortcuts.
The toolbar contains the following options:
- Configuration: Once selected, a dialog will show up from where you can administrate your LimeSurvey installation.
- Settings: Under this tab you may find options that can help customize your LimeSurvey installation.
- Home page settings: Users can use this option to tweak the settings of the home page according to their needs;
- Global settings: The changes done here affect the entire installation for all users;
- Plugin manager: It allows every user to activate a series of plugins that are supported by the LimeSurvey team. New plugins can also be added to your installation.
- Users: Under this tab you may find options related to the users and survey participants' management.
- Manage survey administrators: New administration users can be added from here;
- Create/edit user groups: This function is meant to group administration users in individual groups;
- Central participant database: It permits every administrator to store the participants' information to a central table that is independent of any token table.
- Advanced settings: It includes options that are non user or settings-related. They can be used to enhance your LimeSurvey installation.
- Template editor: If you would like to add/edit/delete templates, access this option. The templates allow control over the look and feel of pages of your survey;
- Manage label sets: Label sets are basically list templates where each list has a set of codes with labels and it can be used in most question types either as answers or as sub-questions;
- Check data integrity: it checks the consistency and the redundancy of the data.
- Backup entire database: Used to backup all your data in the case in which you would like to do an important LimeSurvey upgrade or move your LimeSurvey installation to another server.
- ComfortUpdate: It is a tool utilized to update your LimeSurvey installation easily from your web browser with just a few mouse clicks (instead of performing a manual LimeSurvey reinstallation).
- Settings: Under this tab you may find options that can help customize your LimeSurvey installation.
- Surveys: A survey includes via different interconnected databases: languages, question groups, questions, question attributes, answers, subquestions, default answers, assessments, quotas, quota members, and quota language settings. By clicking on the green arrow, a window will shop up with the following options:
- Create a new survey: A new survey;
- Import a new survey: If you would like to import a survey to your survey lists, use this function:
- Copy a survey: It allows the user to quickly copy a survey. This will appear in the surveys list from where it can be edited;
- List surveys: Allows you to get an overview of all the existing surveys.
- Response balance: It shows the number of responses left from your subscription. Because we have created a free account, we get 25 responses per month. If you run out of responses, purchase more from the following link;
- Storage: it represents the amount of MBs that are at your disposal to store your surveys and answers.Because you created a free account, you get 10 MB storage space. If you would like to receive more storage space, choose one of the following options from here;
- Username: By clicking on it, you can either access your user user preferences or sign out from your account;
- Notifications: Different notification related to your LimeSurvey installation will be displayed here.
There are six default boxes on the home page of your LimeSurvey installation:
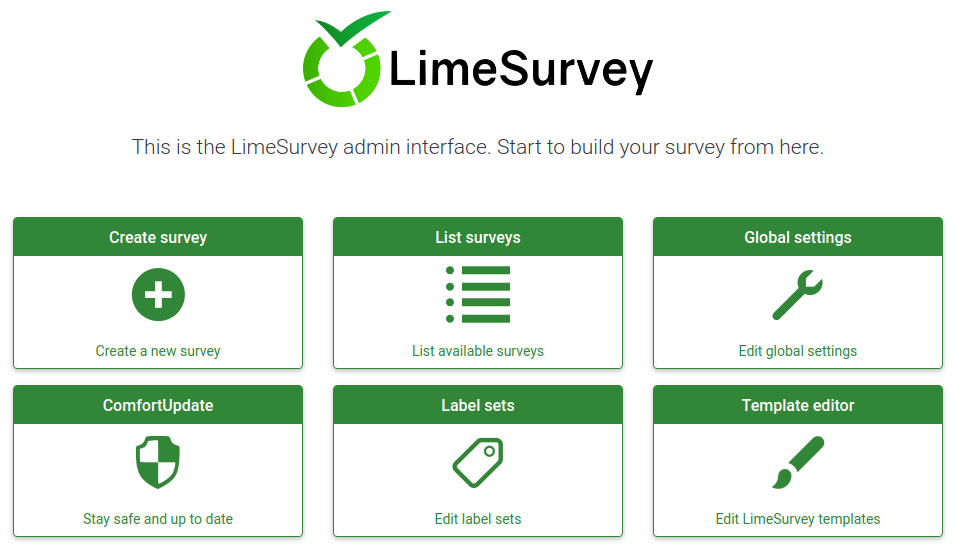
- Create a new survey
- List available surveys
- Edit global settings
- ComfortUpdate
- Label Sets
- Template editor
Create survey
To create a survey group, click on the Create a new survey box:
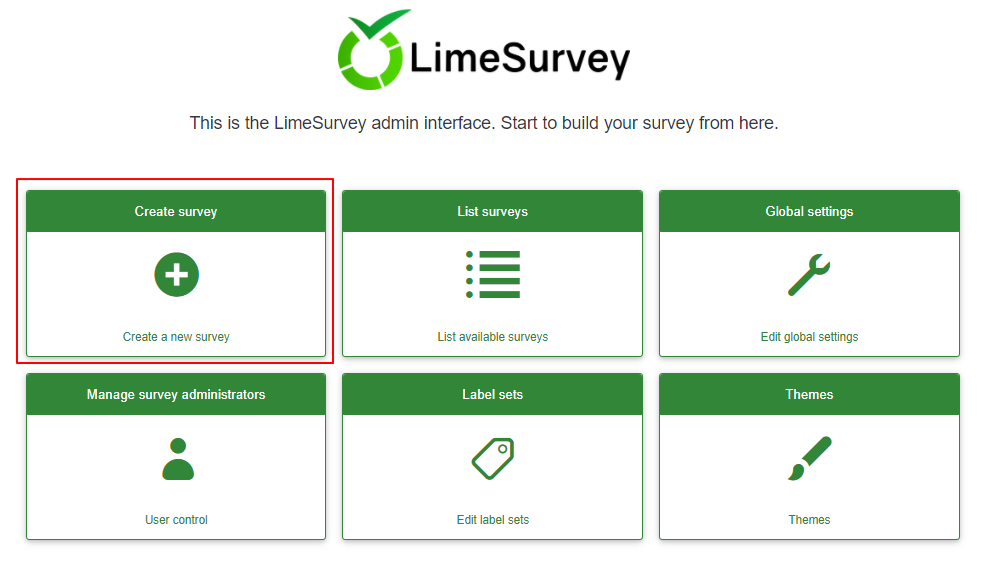
The Create survey page will be displayed:
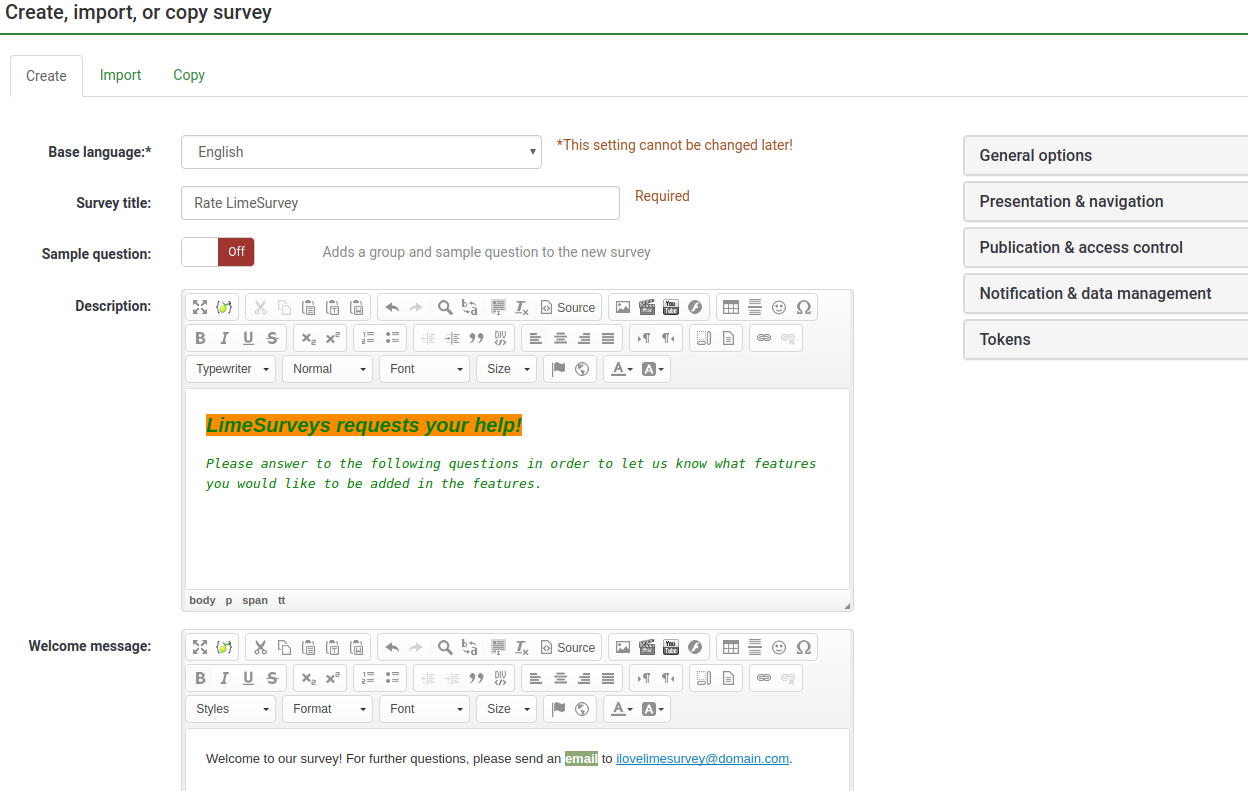
It contains the following information:
- Base language: The main language of the survey. Additional languages can be added later form the settings of the survey;
- Survey title: The title of the survey has to be typed here. It can be later changed;
- Sample question: It comes disabled by default. If you enable it, a question group and question examples will be added to your survey.
- Description: A short description of the survey can be added her;
- Welcome message: The survey participants will be prompted by this welcome message if something is typed in;
- End message: Type in a message that will be displayed to the survey participants once they finish the questionnaire.
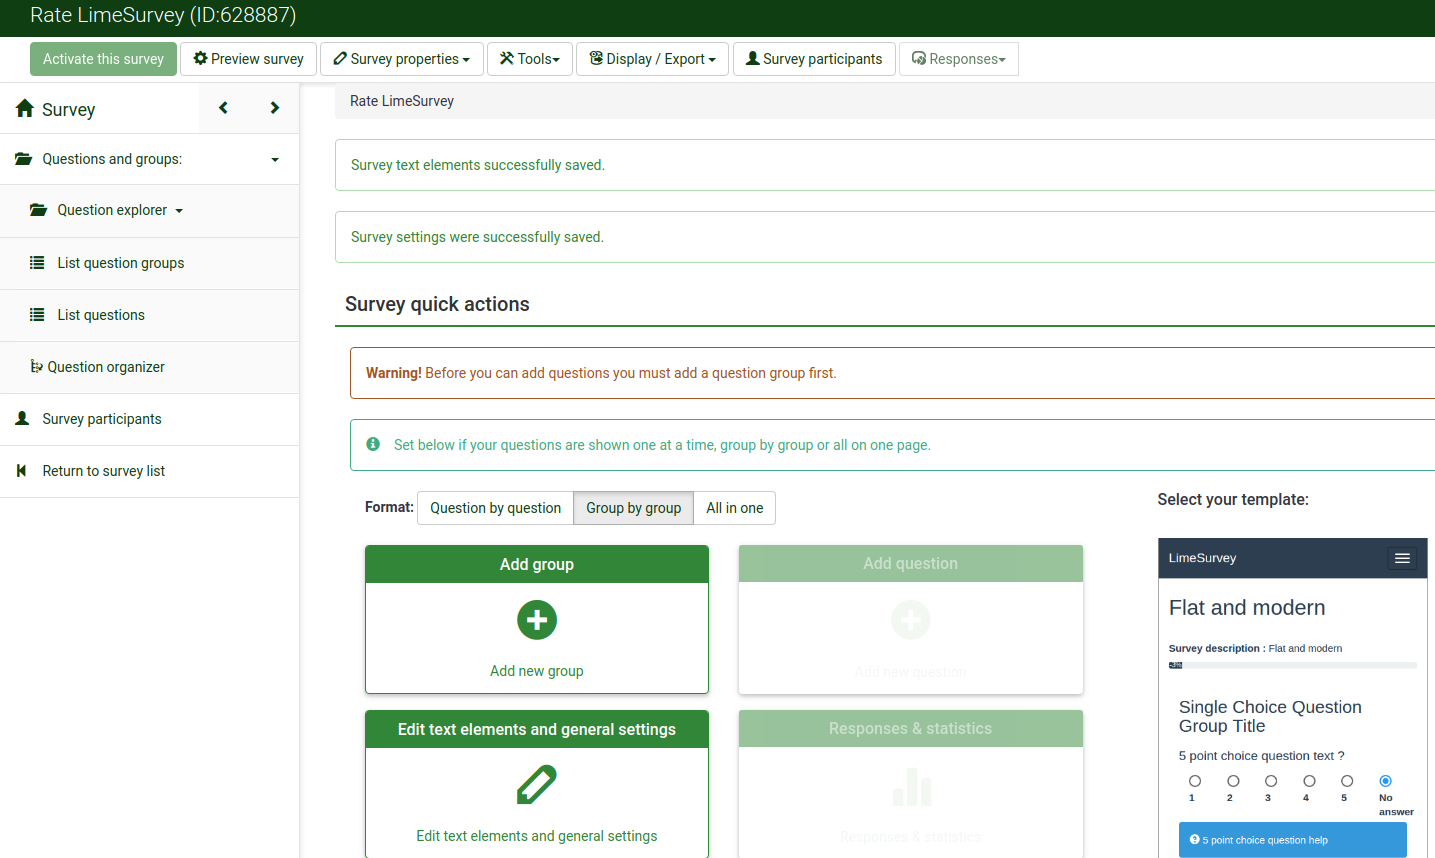
Once you are done completing the fields, click on the Save and close button located in the upper-right part of the window. Once done, you will access the menu of the recently added survey:
Create question group
A question group is used to group different elements of a survey like descriptions, questions, and answers.
To create a question group, you have to first access the survey to which you want to add the question group. To do that, click on the Surveys button located on the toolbar from the LimeSurvey home page:
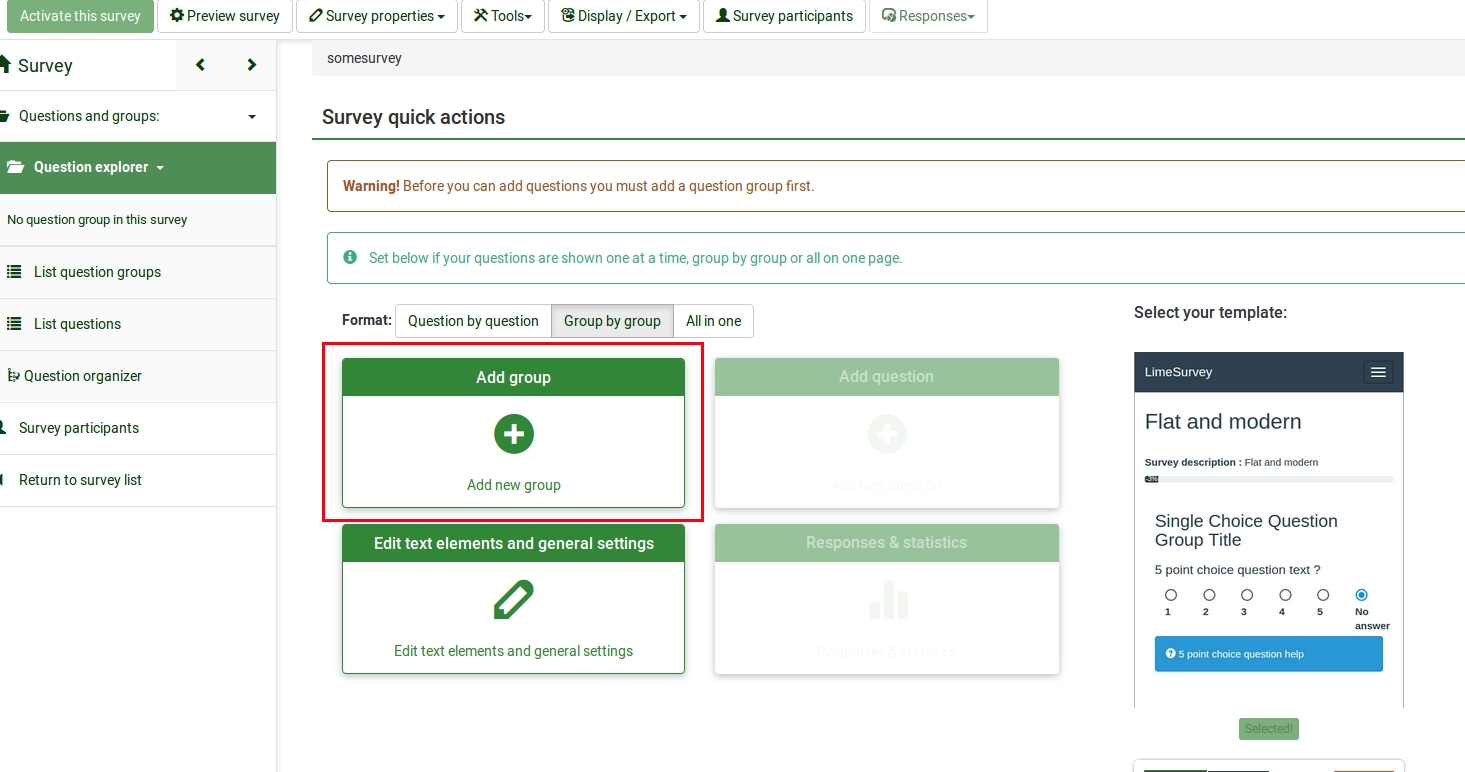
Click on the survey you wish to add the question group. The survey page will show up. Look for Add group button located on the left menu - Questions and groups -> Question explorer -> Add group:
The following page will be displayed:
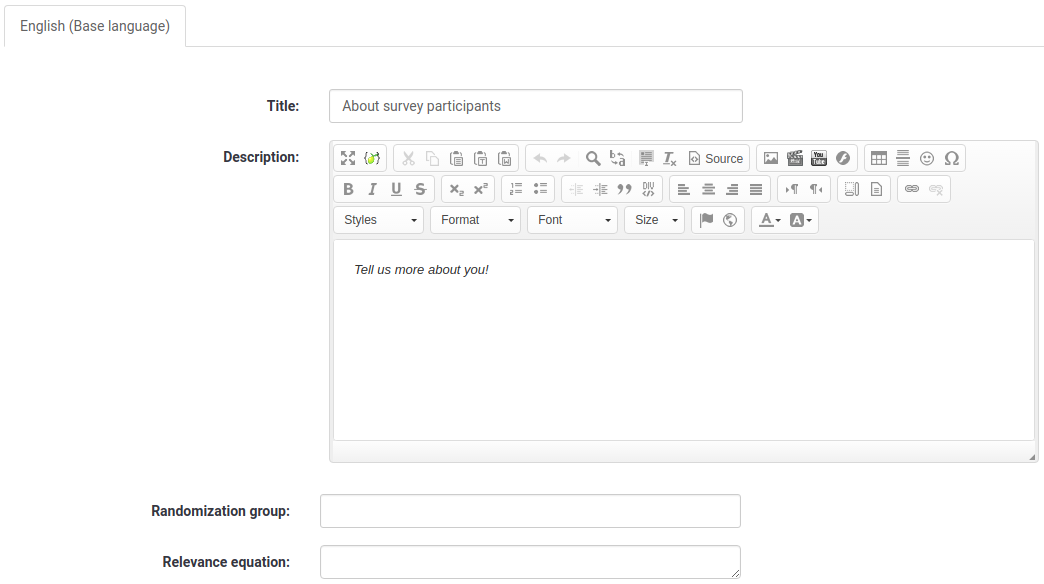
- Title:
- Description:
- Randomization group:
- Relevance equation:
Once done, click on the Save and close button located in the upper-right part of the window.
To see your recently added question group, go to the Survey menu and click on : Questions and groups -> List question groups:
Create question
To create a new question, you need to have first created a question group. Please check the steps above to see how a question group is added to a survey. Once done creaeting the survey group, go to the question groups list from your survey located under the Questions and groups from the Survey menu:

A list with all the question groups from your survey will be displayed. Look into the last column. The last column shows you the available actions that can be made with the question groups. These are:
- Add new question to group:
- Edit group:
- Group summary:
- Delete:
Click on the first button and start adding your question to the desired question group. A new page will be displayed
- Code
- Question
- Help
- General options
- Question type: hover and you will see different options
- Question group:
- Relevance equation:
- Position
- Advanced settings: This set of options is for advanced users. If you wish to find out more about them, check our manual on questions
Click on the save button. Once done, you will access the questions page of the About survey participants question group:
To add more questions, click on the Add new question button located under the Question quick actions menu.
Add subquestions and answers=
Depending on the type of question you We selected Array
Add answers
Add subquestions
Organize questions
Activate/Stop survey
Add survey participants
Add users
Statistics
Export data
Other LimeSurvey features - advanced users
https://www.limesurvey.org/editions-and-prices/limesurvey-pro/professional-features