Set di etichette
From LimeSurvey Manual
General
I set di etichette sono dei semplici modelli di liste, in cui ogni lista contiene un set di codici associati a delle etichette e che possono essere utilizzate nella maggior parte delle domande sia come risposta che come sotto-domanda. Al contrario delle versioni più recenti di LimeSurvey, i set di etichette sono semplicemente copiati nella particolare domanda come sotto-domanda o come risposta. Quindi, se modifichi un'etichetta dopo averla 'utilizzata' in una domanda, i cambiamenti non sono propagati anche alla domanda in cui il set di etichette è stato impostato come modello.
Quello che segue è un esempio di un set di etichette. Se qualcuno volesse definire una scala personalizzata a 7-punti, un set di etichette consente di implementare questa funzione. Nell'esempio, è visibile un set di etichette davvero semplice con le relative associazioni tra codice ed etichetta.
If you want to define a custom 7-point scale, a label set provides this function. In the example below, a very simple custom label set with the code/label pairs (the label is what appears in the actual questions).
| Codice | Etichetta |
| 1 | Per niente utile |
| 2 | 2 |
| 3 | 3 |
| 4 | Abbastanza utile |
| 5 | 5 |
| 6 | 6 |
| 7 | Molto utile |
Un altro esempio grafico:
Come fare per ...
Clicca su Gestione dei set di etichette dal menù Configurazione per modificare, creare, cancellare, importare od esportare set di etichette utilizzati nelle domande ad etichette 'flessibili'.
... Aggiungere un nuovo set di etichette
- Impostare Nome: ad ogni nuovo set di etichette deve esser dato un nome.
- Lingue: per ogni set di etichette va specificata la lingua per la quale sono utilizzate. Puoi scegliere quante lingue vuoi dal menu.
Click the Create or import new label set(s) button located in the upper-left corner of the page. You can either create a new label set or import it from another source:
- New label set: Label sets must be manually created.
- Set Name: Each new label set has to be given a name.
- Languages: Every label set must be specified for the language it's used for. You can choose as many languages from the menu as you want.
- Import label set(s): In order to import a label set, click browse and add the .lsl label set file. If you have previously created a label set, then LimeSurvey will not allow you import a similar external label set unless you turn off the Don't import if label set already exists option. Some useful label sets are available on the LimeSurvey website.
Once the label has been imported or created, click the Save button located in the right-upper part of the screen.
... Modificare, cancellare o esportare un set di etichette
Scegli un set di etichette già esistente dal box all'interno della barra di amministrazione dei set di etichette per modificarlo, cancellarlo o esportarlo.
- Modifica set di etichette: qui è possibile rinominare il set di etichette e aggiungere/rimuovere una o più lingue.
- Cancellare set di etichette: dopo un pop-up, puoi cancellare il set selezionato.
- Esportare questo set di etichette: esportare il set di etichette selezionato in un file .lsl.
- Etichette:
- View labels: Allows the user to view the existing labels located in the respective label set.
- Edit label set: The user can rename the label set and/or add/remove languages.
- Export label set: Export label set to a .lsl file.
- Delete label set: A window will pop up in order to confirm whether you want to delete the respective label set or not.
...add a label
+Per aggiungere una nuova etichetta devi riempire i campi Codice, Valore valutazione, Titolo e premere sul bottone Aggiungi nuova etichetta. Fatto ciò l'etichetta dovrebbe essere elencata sotto. è possibile utilizzare una grafica al posto/in aggiunta al testo . Basta usare il codice HTML per includere la grafica desiderata. Per esempio:

Then, click the plus sign ![]() to add the new label. It's possible to use a graphic instead of (or in addition to) a label text. To do that, you must use HTML-code to include the graphic you want, e.g.:
to add the new label. It's possible to use a graphic instead of (or in addition to) a label text. To do that, you must use HTML-code to include the graphic you want, e.g.:
<img border="0" src="http://www.yourdomain.at/pics/pic.gif">To help with the editing process of the HTML-code, use the embedded HTML editor of LimeSurvey, which is located at the end of the label-text box (click on the green pen button ->![]() ).
).

Quick add
Another way to add labels is to use the Quick add... button. When you click it, a window be displayed. It works under the following form: Code ; Title.
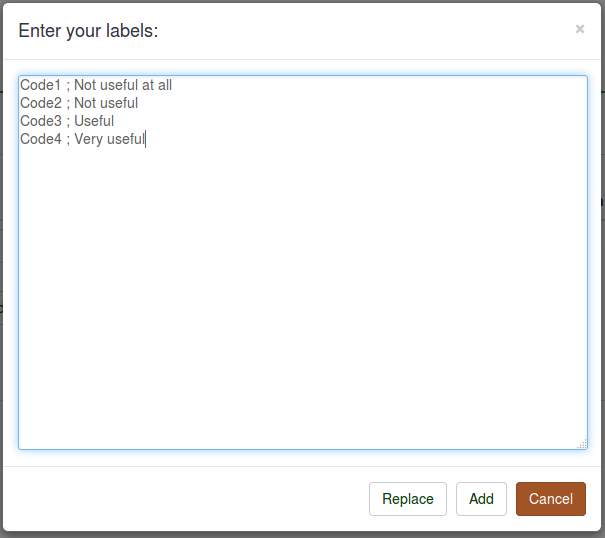
You can either replace or add labels. If you click Replace, all the preexisting labels will be deleted and replaced by the ones entered by you. If you click Add, the new labels will be added into the label set (the preexisting ones not being affected).
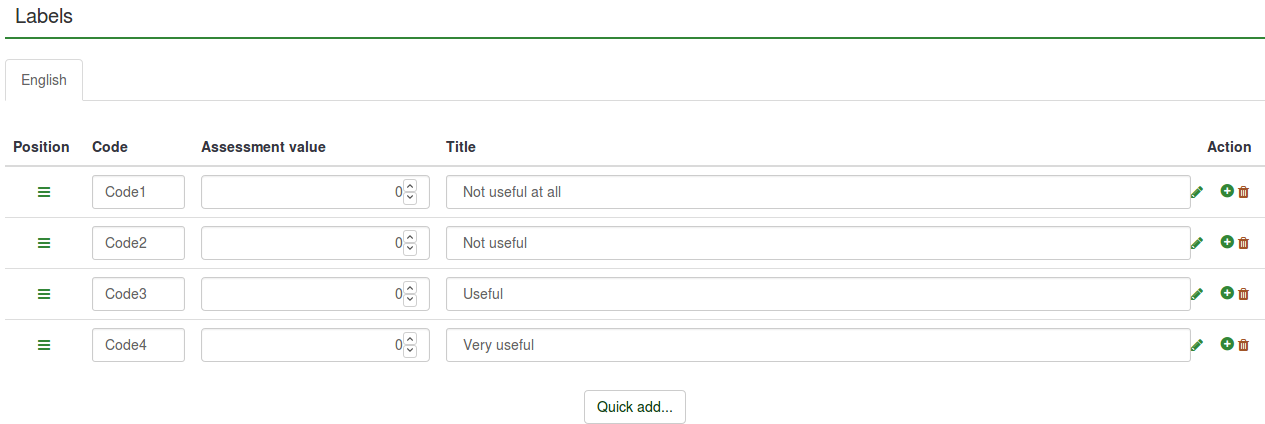
The Code is automatically added if new entrances are created. Therefore, you can type in only the title of the labels which will automatically be assigned a code:
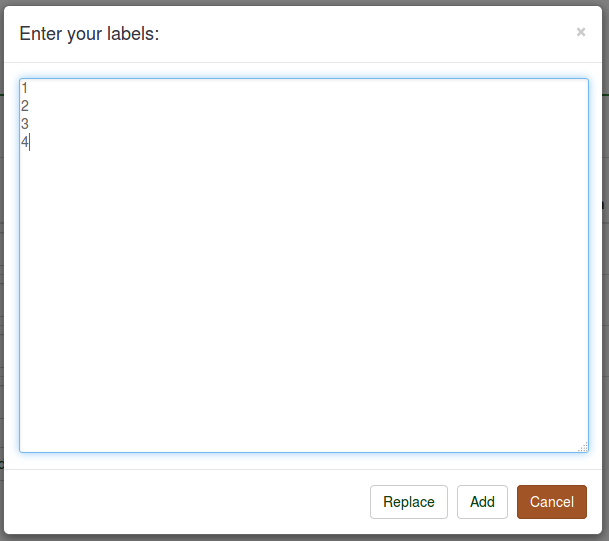
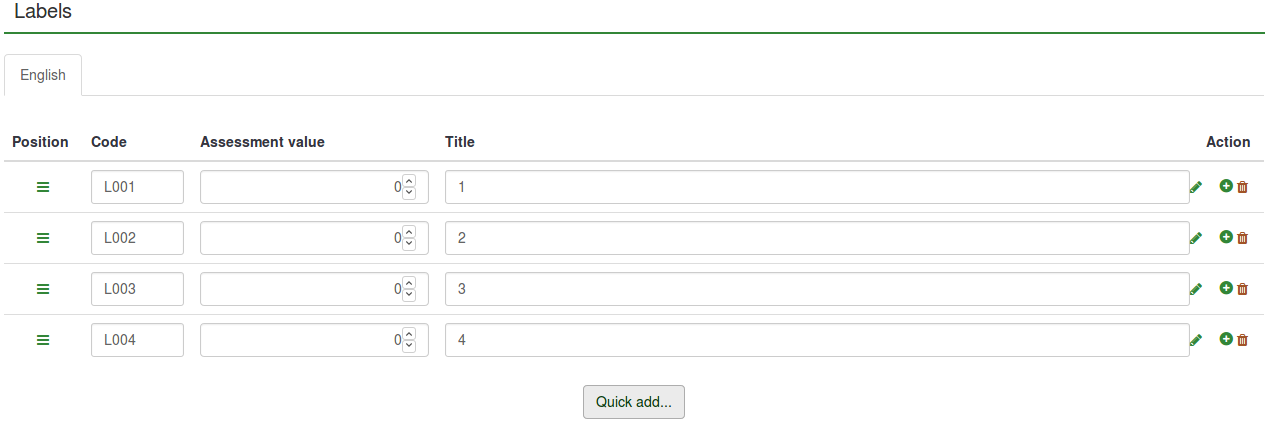
The assessment values cannot be edited/entered via this option - it has to be changed manually from the list of labels.
...delete a label
To delete a label, click the red trash button (![]() ) located under the 'Action' column.
) located under the 'Action' column.
...rearrange a label
To rearrange the order of the labels, click the green sign (![]() ) located under the column called 'Position' and re-position the label.
) located under the column called 'Position' and re-position the label.
Se al tuo set di etichette è associata più di una lingua, puoi scegliere quale modificare. Ogni etichetta necessita di un Codice, un Valore valutazione e un titolo. Il codice può essere cambiato solo nella lingua base del del set. il valore di valutazione può essere ignorato (settandolo a 0) se non si utilizzi assessments. Il titolo è il testo che viene visualizzato nella domanda.
- Cancella-bottone: puoi cancellare etichette con questo pulsante.
- Su/Giù-bottoni: è possibile cambiare la riga dell'etichetta con i pulsanti Su e Giù.
- Controlla e Ordina: puoi verificare la consistenza ed eseguire un ordinamento dell'etichette con questo pulsante.
To add a new language: Create or import new label set(s) -> Languages -> select the languages you wish to add.
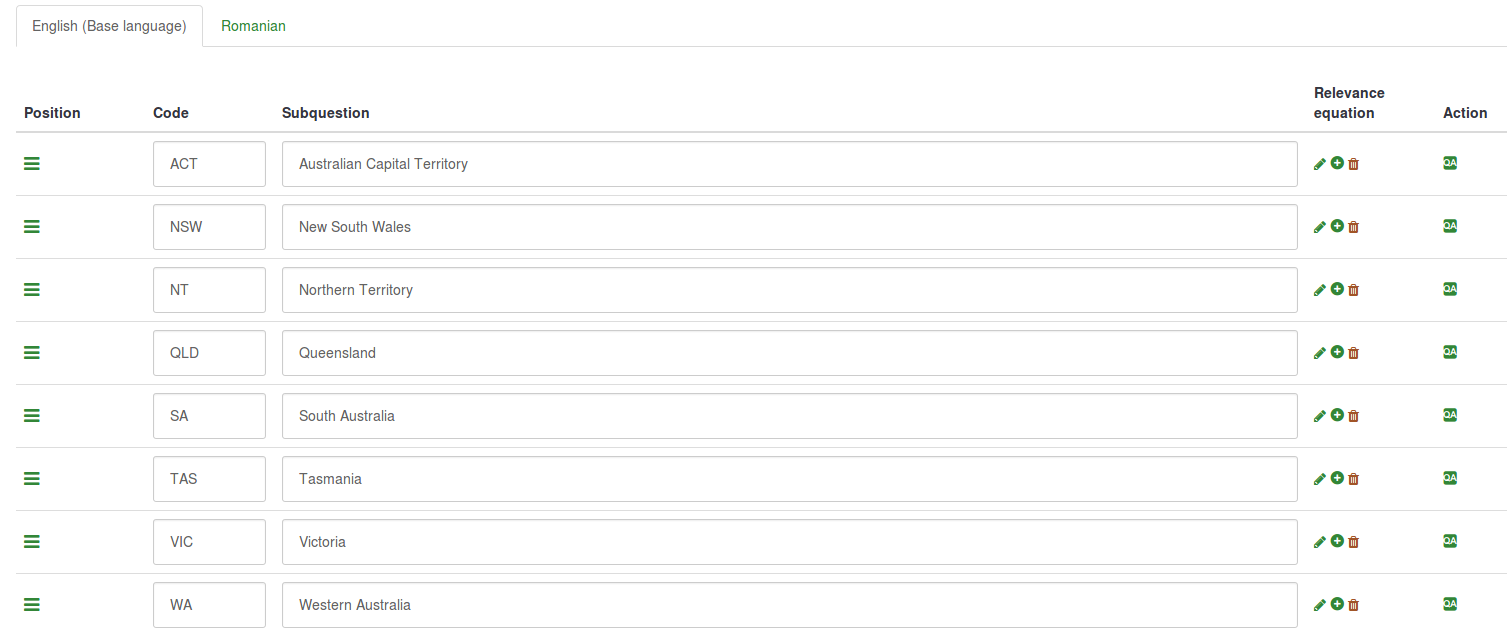
To start translating the labels into another language, select the language in which you would like to translate the labels to from the upper part of the matrix.
Gestione delle risorse caricate
In our case, the language from where the label codes and assessment values can be changed is English. Only the label description can be edited when the Romanian tab is selected - which represents the corresponding Romanian label translation of the English label.
Once you are done with the changes, do not forget to click on the 'Save changes' button located in the upper-right part of the screen.
Questa tab ti permette di gestire i file (immagini, altri file multimediali) che sono stati caricati nell'editor HTML.
For a better understanding of the label sets option, let's take a look at the following examples:
- I want to use a label set as an answer list for one question;
- I want to use labels in another language as answers;
- I want to use emoticons instead of label text;
- I want to import a label set and use it as a subquestion list.
I want to use a label set as an answer list for one question
Assuming that the label set and survey are created:
- Go to the structure of the survey and create a question group - About LimeSurvey.

- Click the Structure tab and then on the newly created question group (About LimeSurvey in our case). Look for group quick actions and choose Add new question to group:
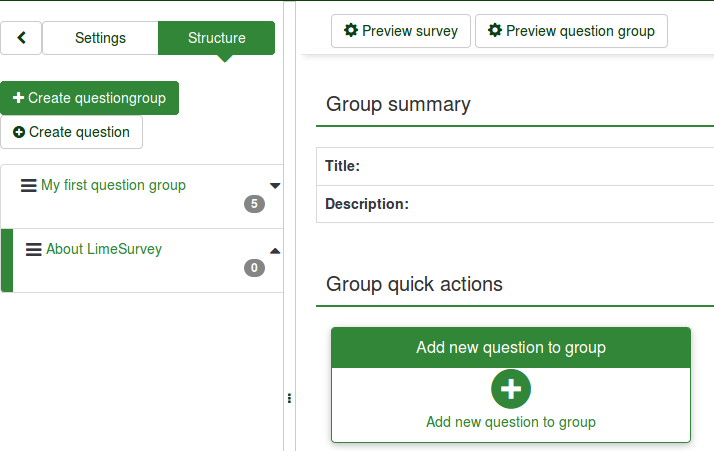
- Type in the code and text of the question.
- To use a label set as a set of answers, pick the right type of question that can make use of label sets. The array question type is selected in our example:

- Save the question to add it into your question group.
- Once created, you will have to add subquestions and answers:

- Add at least one subquestion:

- Add answer options. Predefined label sets... option will be used:
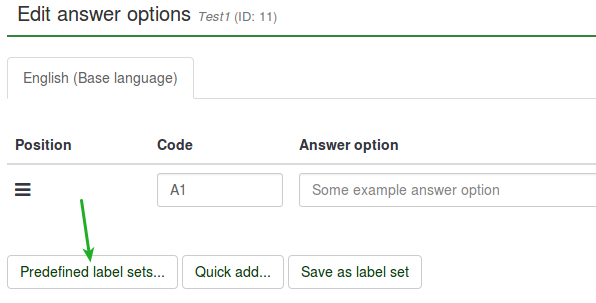
- Select the label set you want to use:
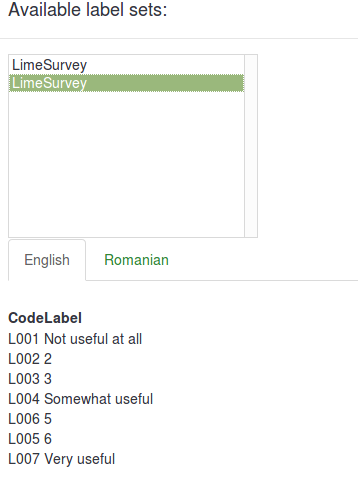
The result should look like this:
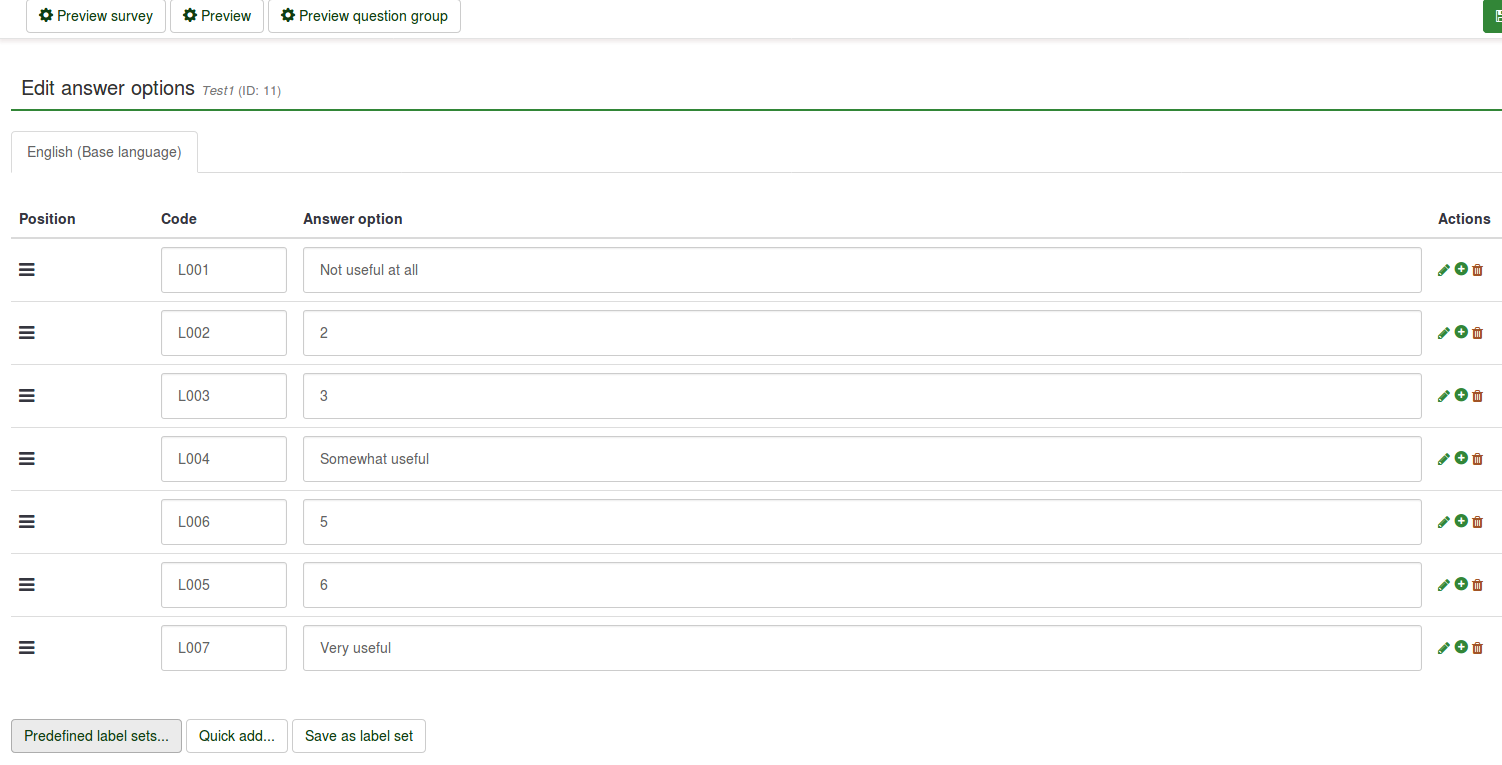
- Save & preview the question:

I want to use labels in another language as answers
- Create a label set and select the other languages you would like to use in your survey. For further details, read our wiki on how to translate a label set in other languages.
- Edit your survey (Settings -> General Settings) by adding the additional languages you want to translate to. For more details on how to create a survey, read the following wiki.
Assuming that the label set and survey are created:
- Create a question that can make use of label sets (e.g. array question type):
- Because the array question type is selected, both the subquestions and answers need to be translated.

- Translate the subquestions. Do not forget to select the right language tab for translation:

- Translate the answers. However, because we use predefined label sets, select the right language tab to add the translated label set as answer options:
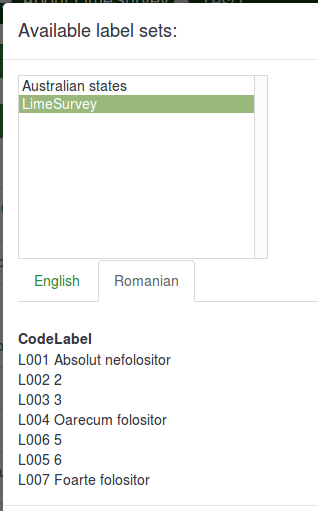
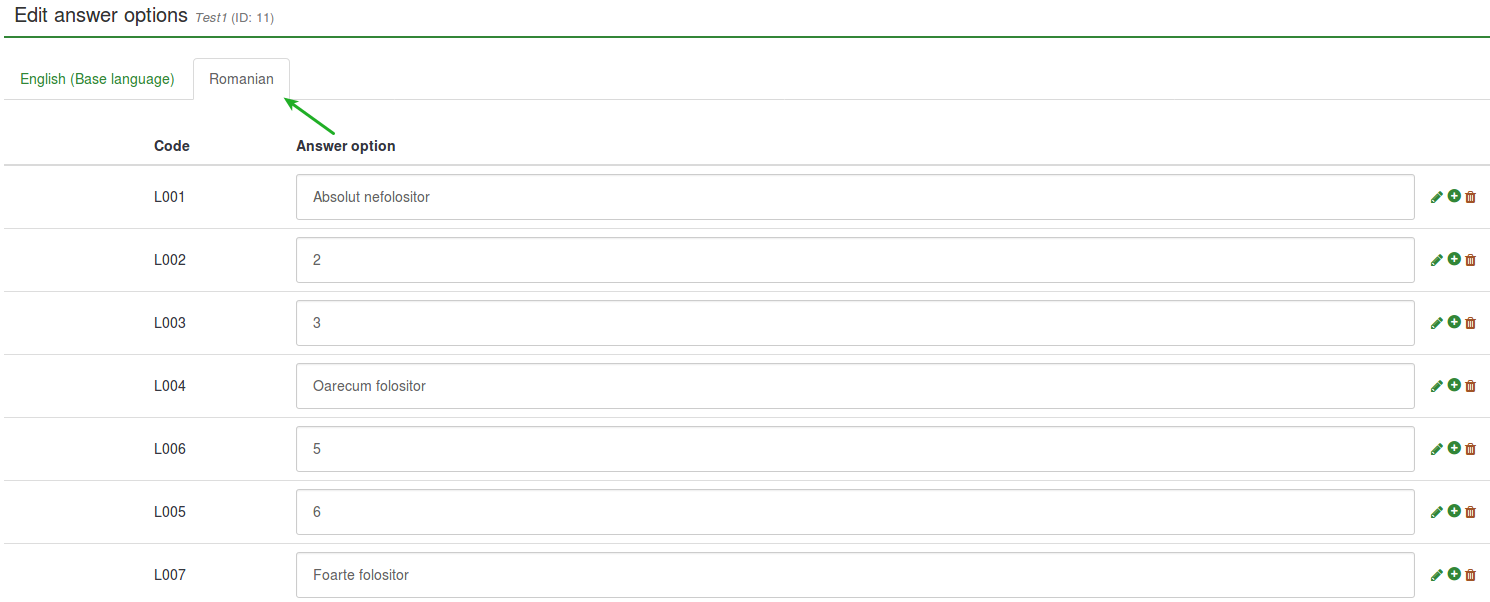
- Save & Preview the survey:

I want to use emoticons instead of label text
Assuming that the survey is created:
- Create a label set and access it. Instead of writing in the Title column, open the HTML editor by clicking on the green pen and add graphics instead of text:


The HTML editor offers you a more comprehensive view on how different options can be used to enhance your survey. It is not necessary to have HTML knowledge because the toolbar is self-explaining (for further details you can either hover the mouse over the options or click on that option for more details). By using such an editor, you can also add (for example) smileys, images and/or videos that are either hosted online or on your server.
In this example. three smileys have been added:

- Create a question that can make use of label sets as predefined answers (e.g. array question type):
- Edit the subquestions and the answer options

- Set predefined labels as answer options.

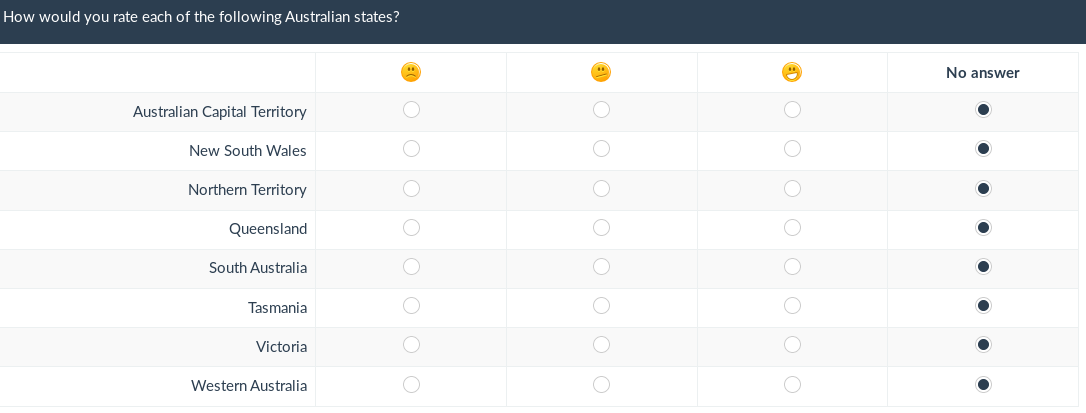
- Save and preview the question:
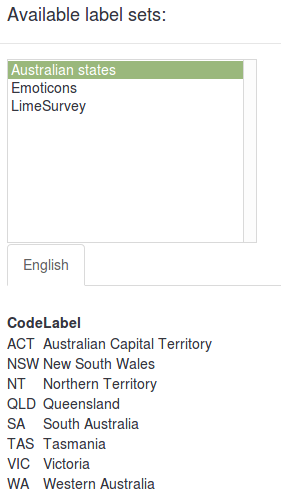
I want to import a label set and use it as a subquestion list
Assuming that the survey is created:
- Go to Configuration and click Manage label sets button.
- Click Create or import new label set(s) (in the upper-left side of the screen) -> Import label set(s). Browse your computer and select the .lsl file (the label set format).
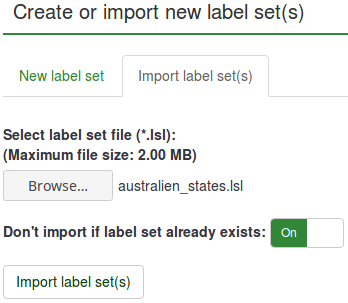
- Now that the label set was uploaded, create a question that requires the usage of subquestions (array question types).
- Edit subquestions.

- Load the imported label set:
- Save and preview.
