Central Participant Database/nl: Difference between revisions
From LimeSurvey Manual
No edit summary |
No edit summary |
||
| Line 76: | Line 76: | ||
<center>[[File:deleteParticipant.png]]</center> | <center>[[File:deleteParticipant.png]]</center> | ||
1) '''Verwijder de deelnemer(s) alleen uit de tabel'''. | 1) '''Verwijder de deelnemer(s) alleen uit de tabel'''. Deelnemers blijven dus in de tokentabellen staan. | ||
2) '''Verwijder deelnemer(s) uit de tabel en eventuele tokentabellen'''. Het antwoord wordt niet verwijderd. | 2) '''Verwijder deelnemer(s) uit de tabel en eventuele tokentabellen'''. Het antwoord wordt niet verwijderd. | ||
Revision as of 19:01, 1 February 2018
Introductie
To access this option: Configuration->Central participants database:

Met deze functie kan de beheerder, onafhankelijk van de toegangscodes, centraal de deelnemers bijhouden. De voordelen daarvan:
- Een enquêtebeheerder hoeft niet eerst de deelnemers van een oude enquête te exporteren (naar CSV) om vervolgens deze in de nieuwe enquête te importeren. De centrale database is een soort back-up.
- Beheerders kunnen deelnemers aan een onbeperkt aantal enquêtes toewijzen.
- De enquêtebeheerder kan deelnemers van een andere beheerder "overnemen" om deel te laten nemen aan zijn enquêtes.
In je LimeSurvey installatie kan een geavanceerde attributen beheer zijn met meerdere andere functies.
Deelnemersdatabase
De volgende opties zijn beschikbaar:
- Display CPDB (Central Participant Database) participants
- [Central participants database#Info|Info]
- Import
- Export
- Settings
- Attributes
- Share panel
Tonen deelnemers in deelnemersdatabase
Hier kun je deelnemers toevoegen, wijzigen, verwijderen, exporteren, aan enquêtes toewijzen, enzovoort.
Er zijn 5 opties voor elke deelnemer beschikbaar in de kolom Actie:

- Edit this participant
- Delete this participant
- Share this participant
- List active surveys
- Add participant to survey
Deelnemer toevoegen
Klik op de knop Voeg deelnemer toe die linksboven staat: ![]() .
.
A dialog box with the following basic attributes will then appear:
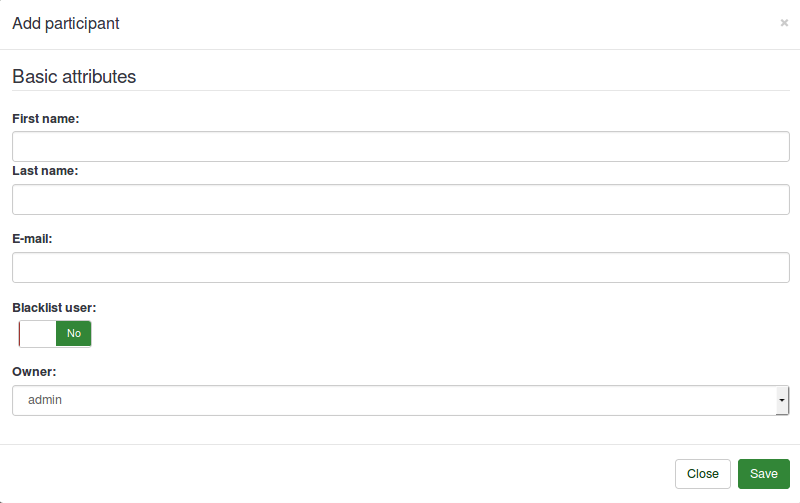
- First name
- Last name
- Blacklist user
- Owner: Any user of LimeSurvey defined in the user control management page can be an owner.
Edit this participant
To edit the basic and/or custom attributes of a participant, click on the first button (from left to right) located in the Action column (![]() ). A window with all the available attributes will show up.
). A window with all the available attributes will show up.
Deelnemer verwijderen
Je kunt eenvoudig een of meerdere deelnemers verwijderen:
- Als je er maar een wilt verwijderen, ga naar de betreffende deelnemer en klik in die rij op de rode afvalbak:
 .
. - Als je er meerdere wilt verwijderen, klik op de knop Geselecteerde deelnemer(s)... (onder de laatste regel, in de kolom Actie) na het selecteren van de deelnemers die je wilt verwijderen:
 . Klik daarna op de optie verwijderen.
When you delete the participant(s), three options are available to you:

1) Verwijder de deelnemer(s) alleen uit de tabel. Deelnemers blijven dus in de tokentabellen staan.
2) Verwijder deelnemer(s) uit de tabel en eventuele tokentabellen. Het antwoord wordt niet verwijderd.
3) Verwijder deelnemer(s) uit de tabel, tokentabellen en antwoorden. Alles van de deelnemer wordt verwijderd.
Please note that in all the three scenarios, the links created for the purpose of maintaining a participant's history are also deleted.
This is another important feature of the Central Participants Database. You can share your participants with other users. You just have to select the participant(s) you want to share and click either on the green right-arrow icon (![]() ) or on the Selected participant(s)... button situated in the bottom left part of the participants table. A modal box will open up which will allow you to select the user with whom you want to share the respective participant(s). You can also set whether the user who shares your participant can edit those participants. If you set it to No, they will get an access denied error when trying to edit the entries of the shared participant.
) or on the Selected participant(s)... button situated in the bottom left part of the participants table. A modal box will open up which will allow you to select the user with whom you want to share the respective participant(s). You can also set whether the user who shares your participant can edit those participants. If you set it to No, they will get an access denied error when trying to edit the entries of the shared participant.

List active surveys
If you click on the next icon ((![]() ), all the active surveys where the respective participant has been added to will be listed.
), all the active surveys where the respective participant has been added to will be listed.
Add participant to survey
Adding a participant to a survey can be done by clicking on the last icon (![]() ) from the Action column. If you wish to add more than one participant to a survey, mark them and select the Share option from the Selected participant(s)... dialog box (located in the bottom-left part of the participants table).
) from the Action column. If you wish to add more than one participant to a survey, mark them and select the Share option from the Selected participant(s)... dialog box (located in the bottom-left part of the participants table).

The title of the dialog box will show you the number of participants that are going to be added to the respective survey. Besides that, there is also a check box, that if checked, will take you to the token table of the survey to which you are adding the participants.
After clicking 'Next', you will be taken to the attribute map page.
The attribute map page has three columns and uses an advanced drag-and-drop functionality. The first column shows all the attributes that are present in the central table. The second column gives space to the user to create new attributes. The third column shows the attributes in the token table to which the user is adding participants. The user is free to choose to either create a new attribute in the token table, to copy new values to or map the values from the attribute located in the central table to the token table.
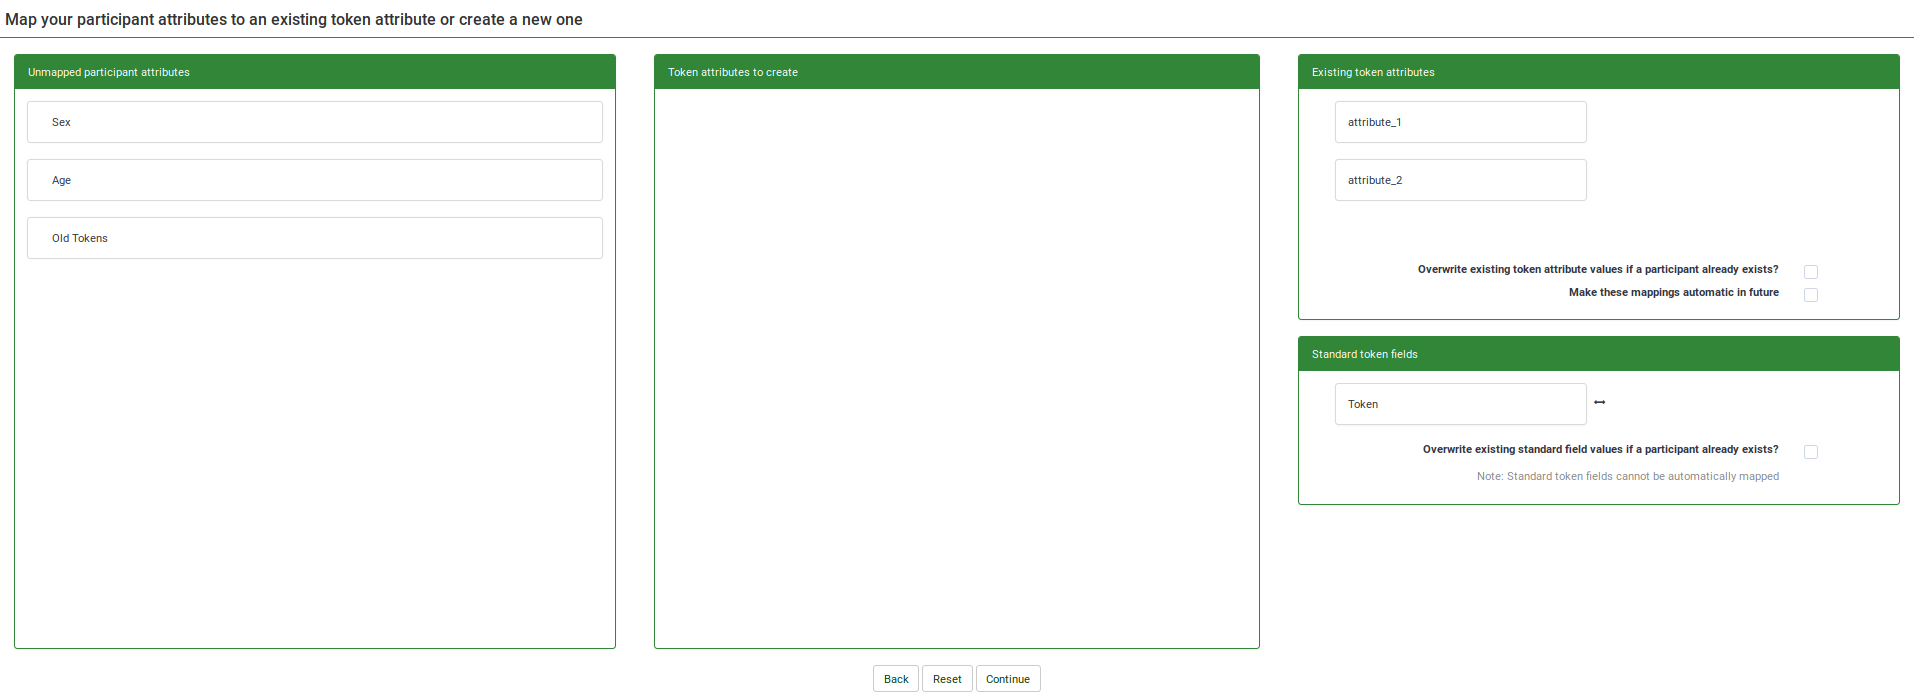
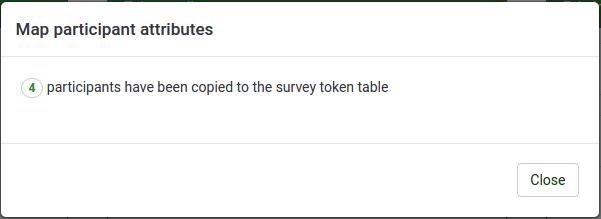
After you have mapped all the attributes, you can click on continue. After processing the participants, a summary page will show up, telling you how many participants were successfully copied. If you have asked for redirection, you will be redirected to the token table table or else you will be redirected to the CPDB main page.
Informatie
Hier kun je de statistieken van de database bekijken:

1) Totaal aantal geregistreerde deelnemers
2) Alle deelnemers van jou (als enquêtebeheerder). Standaard krijgt de nieuwe deelnemer in de deelnemersdatabase als eigenaar degene die de deelnemer heeft opgevoerd.
3) Deelnemers die met jou gedeeld zijn
4) Deelnemers die jij gedeeld hebt
5) Uitgesloten deelnemers (zwarte lijst)
6) Totaal aantal attributen in de database
Import
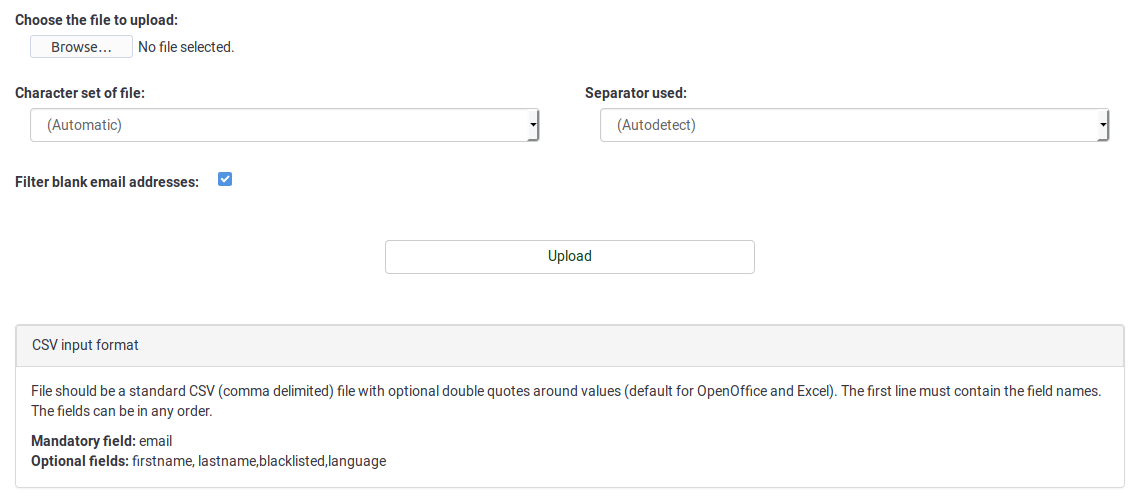
If you wish to add participants via the import function, click on the Import button that is located on the main toolbar of the Central participant database page: ![]()
The following options are available:
Please note the text from the box on CSV input format:
Mandatory field: email
Optional fields: firstname, lastname, blacklisted, language
Importeren
(1) Selecteer een bestand en de bijbehorende instellingen
(2) Wijs de attributen in de CSV toe aan de attributen in de tabel, of kies voor een nieuw attribuut. Deze is altijd van het type "tekst", maar kan later gewijzigd worden.

In het bovenstaande voorbeeld is er een nieuw attribuut "age" (leeftijd) aangemaakt, en het bestaande attribuut "sex" (geslacht) is toegewezen aan hetzelfde attribuut in de tabel.
(3) Wacht op de verwerking en het tonen van een samenvatting.
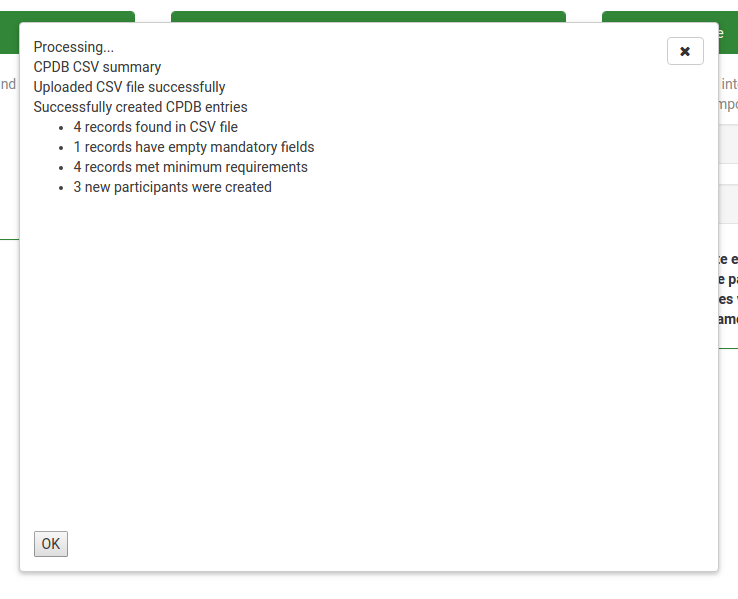
Na een klik op "OK" zie je nu de tabel met daarin de geïmporteerde deelnemers.
Exporteren
De functie export staat in de toolbar van de Deelnemersdatabase: ![]()
When exporting to CSV, you are presented with a dialog box that asks you to mark the additional attributes you want to export. There is also an option for filtering the attributes. It will display all the attributes located in the central table (visible and non-visible).
Het exporteren kan op twee manieren:
(1) Gefilterde export
(2) Alle deelnemers exporteren
Dit is afhankelijk van de criteria die je instelt.
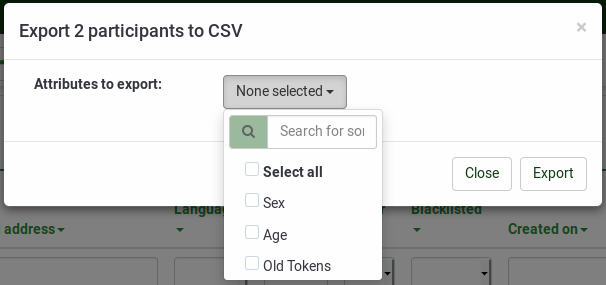
De naam van het exportbestand is central_'datumtijd'.csv.
Instellingen
The Settings button available on the main toolbar of the Central participant database page refers to blacklist settings: ![]() .
.
The following Yes/No options are available:
- Blacklist all current surveys for participant once the global field is set: If set to Yes, the participant cannot be added to any survey.
- Blacklist participant for any new added survey once the global field is set: If new surveys are created, the respective participant cannot be added anymore to them (if Yes is picked up). However, he can still be added to those surveys created earlier.
- Allow blacklisted participants to be added to a survey: Even if a participant is blacklisted, he can still be added to a survey.
- Hide blacklisted participants: Useful function when you would like to hide participant for a specific amount of time and then make them available for the rest of users with whom those blacklisted participants have been shared with.
- Delete globally blacklisted participants from the database: If Yes, the blacklisted participants will be deleted from the database.
- Allow participant to un-blacklist himself/herself: If Yes, a participant can un-blacklist himself without the help of a LimeSurvey user.
Attributen
To access the Attributes management panel, click on the the Attributes button located on the main toolbar of CPDB main page: ![]()

The attribute management facilitates the addition of three types of attributes: text box, date, and drop-down list. To add a new attribute, click on the Add new attribute located in the upper-right part of the window:
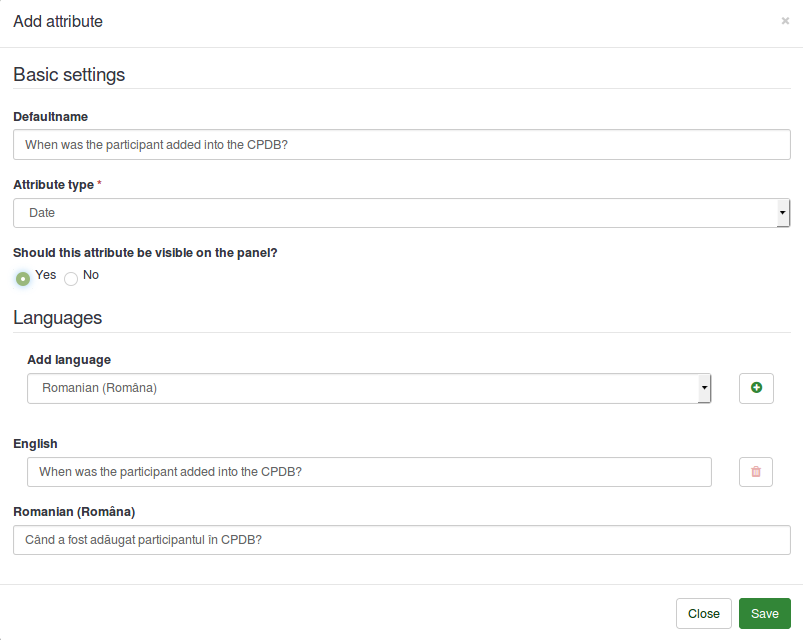
When adding a new attribute, the following options are available:
- Defaultname: It will be used by LimeSurvey to name the attribute in case no other English name is provided.
- Attribute type: You can choose either of the attribute types and the associated user interface will be presented to you while editing.
- Should this attribute be visible on the panel?: It can be Yes or No. This function determines whether the attribute is visible in the CPDB table or not. This can be later edited from the Visible column that is located in the main attributes table.
- Languages: If you would like LimeSurvey not to use the defaultname as the name of the attribute, type here the desired name. Please note that the attribute management has multilingual support. Click on the plus sign after you have selected the language. A new field will appear below English/default language.
Once the changes are done, click on the Save button.
In the attributes table, two actions are available (see the Action column):

If you click on the first icon, a dialog box will show up. It includes the basic settings of the selected attribute that can be edited according to your needs.
To delete an attribute from the table, click on the red trash button, located next to the edit button. Clicking the delete button will not only delete the attribute, but also the associated values from the CPDB.
Deel bestand
Hier kun je zien hoe de deelnemer gedeeld is. Alleen de deelnemers die eigendom zijn van de beheerder worden hier getoond.

Het laat de volgende waardes zien:
1) Achternaam
2) Voornaam
3) E-mailadres
4) Gedeeld met
5) Eigenaar
6) Datum toegevoegd
7) Mag bewerken?
All this information is for viewing/sorting purposes. Only the Can Edit field is editable for the user. The Can edit field determines whether to allow the respective participant to be editable by the user with whom that participant was shared with or not. Just clicking on the check box will make an AJAX call and save the changes on the server.
Uitgebreid zoeken
Hiermee kun je op allerlei manieren de deelnemers doorzoeken.
Je kunt op twee manieren zoeken:
(1) Uniek zoeken
(2) Gecombineerd zoeken
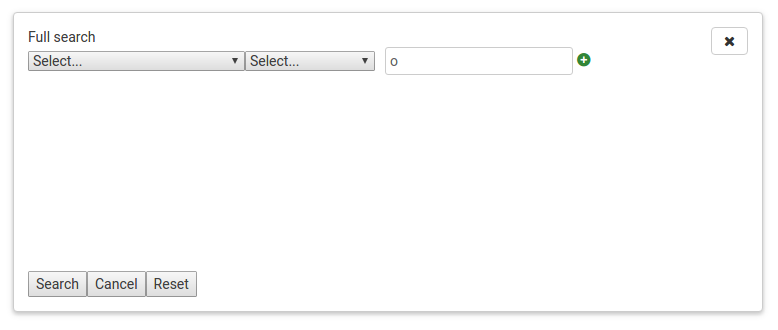
Je kunt aanvullende criteria opgeven door op het "plus"-teken te klikken. Het verwijderen van een criterium gebeurt met het "min"-teken.
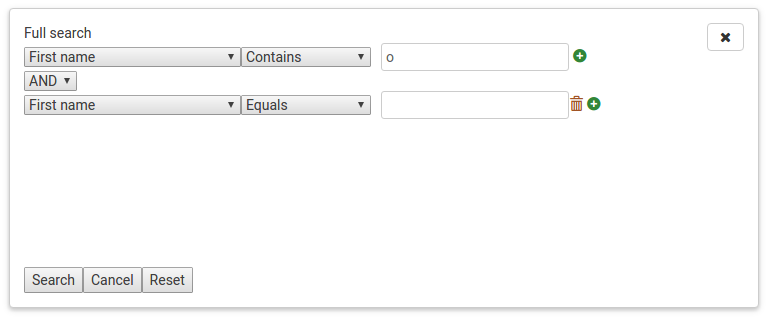
Let op: de zoekfunctie zoekt niet alleen in de huidig getoonde deelnemers, maar over de hele tabel. Het kan dus even duren voor je de resultaten krijgt.
Aanvullende informatie
Aanvullende (technische) informatie is hier beschikbaar.
