Central Participant Database
From LimeSurvey Manual
Introduction
This new feature allows the administrator to store the participants to a central table that is independent of any token. The major advantages of allowing this is :
- The participants are backed up, so if a user wants to backup the participants without having to go through the trouble of exporting his participants to a CSV file and then importing them back into a new survey.
- The user need not have to import CSV to each specific survey , he/she just needs to add the survey to the central table and then can add to as many surveys as he wants.
- In case of multiple users , one user can choose to share his participants with others and also set if he wants it to be editable with the shared user or not.
Along with this, there is a advance attribute control and several other features.
The participants panel management tools

1) Home Screen
2) Information Screen( Summary of CPDB )
3) Display Participant’s Grid
4) Import from CSV
5) Export All
6) Blacklist Control
7) Global Participant’s Settings
8) Attribute Control
9) Share Panel
10) Panel Summary
Home Screen
Participant's Panel is a separate panel in the LimeSurvey administrator toolbar, so this icon takes back the user to the administrator panel
Information Screen
This screen shows the summary of the Central Database by giving the statistics of Central Database. This gives the summary of
1) Total Participants in central table
2) Participants Owned by you
3) Participants Shared with you
4) Participants you have shared
5) Blacklisted Participants
6) Total attributes in the central table
Display Participant’s Grid
This is the main asset of the Participant's Panel. This is where you can perform majority of central Panel's operations, such as adding, deleting , exporting, adding to survey etc.
Let me show you a screenshot of the same and explain each of the feature.

Explaination of the screenshot is given below
1) jqGrid header
2) Add Participant
3) Delete Participant
4) Reload Grid
5) Export to CSV ( Advanced )
6) Advance Search
7) Navigation Bar
8) Share Participant
9) Add to Survey
10) Total Count
11) Hide/show grid
11) Subgrid
Now I will explain each of the features
Add Participant
You can easily add individual participant using the plus sign in the grid pager. For editing the added participant you can simply double click on the row on which you want to edit and after editing you can press enter and any changes you have done will be saved on the server.
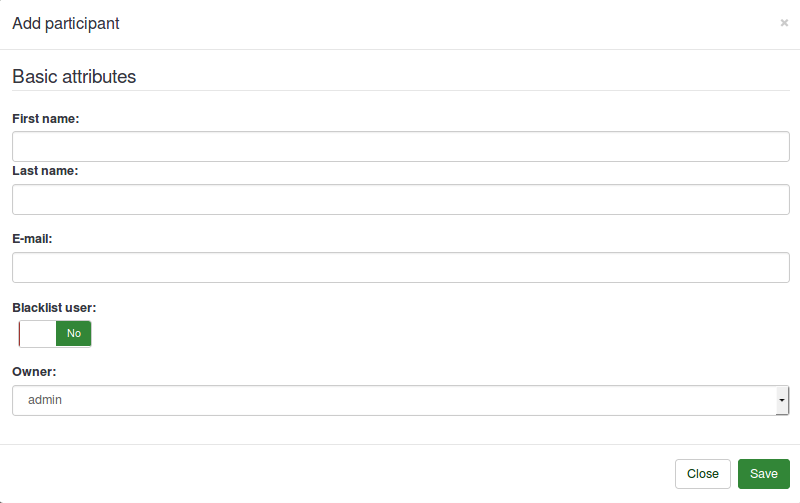
Delete Participant
You can easily mark a single participant to delete or you can choose all the participants in the grid to be deleted. There are three possible conditions when deleting a participant.

The explanation of the three conditions is
1) Delete Participant(s) from central participants panel only
2) Delete Participant(s) from central panel and token tables
3) Delete Participant(s) from central panel,token tables and all associated responses
The first option deletes the participant from the central panel only, if the participant is in the token table, he/she will not be removed.
The second option deletes the participant from central as well as token table, but the responses are kept.
The third option deletes all traces of that participant from the system included responses.
In all the three options the links created for the purpose of maintaining history related to a particular participant are also deleted.
Reload Grid
It simply reloads the grid from the server.
Export to CSV
When exporting to CSV the user is presented with a dialog box asking him to mark the additional attributes which he wants to import. There is also a nice filter for filtering the attributes. It will display all the attributes (visible/non-visible).
The export to CSV will work under two conditions :
1) Export filtered
2) Export All
When you are done filtering it will export all the filtered results otherwise it will export all the participants visible to that user.
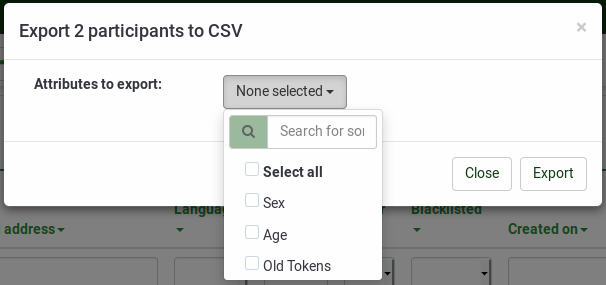
It will export with the file name as central_'the current time stamp'.
Advance Search
This is another major feature of Central Panel. It has a powerful search which not only filters through the participant but through additional attributes as well (visible and non-visible). This feature is also integrated with the grid.
There are two level of searches that an administrator can do.
1) Single Search
2) Combined Search
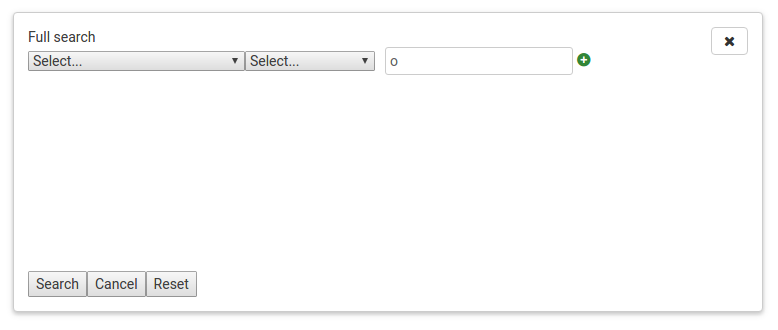
You can add a complex condition using a plus sign next to the previous condition and remove the condition using a minus sign .
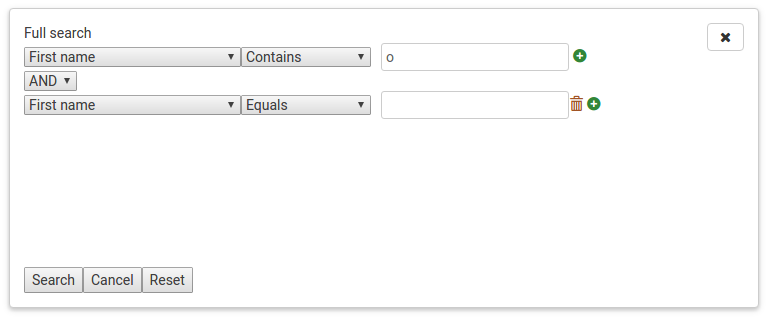
This search not only filters attributes in the grid but also from the database, so it is an extensive search.
To decrease load time of the grid we have used pagination in the grid which allows the user to see the first X entries ( chosen by the user) and then load more if required by him. To control this we have a pagination control in the navigator bar
Using the drop down you can select the entries to be loaded and with navigation buttons you can navigate and also use the text box to go to a certain page. Please note that the number of pages will reduce as you increase the number of eateries visible per page. Also the search and sorting of grid are not dependent on the records visible in the grid at any particular time but are independent of them.
This is another most important feature of CPDB. You can share the participants among other users in the LimeSurvey installation. You just have to select the participants you want to share and click on share. A modal box will open up which will allow you to select the user with who you want to share. You can also set as to whether the participant that you are sharing can be edited by the user with whom you are sharing. If you set it to no, user with whom you have shared will get a access denied error.

Add to survey
Add to survey can be done at three levels :
1) all participants in current search
2) all participants
3) only the participant's that I have selected
As we know that the grid loads only the requested participants and rest of the participants are loaded when requested, thus ensuring minimum loading time for the user. So when you select a page on the grid (using multi-select or single select )that doesn't meant you have selected all the participants on the second and the third page as well.So when exporting you are presented with the above mentioned three options which will be visible/invisible to you as per the present scenario.

For example if you have not selected any row and haven't done any search it will not show you any option and will offer you to add all the participants in the grid and so on...
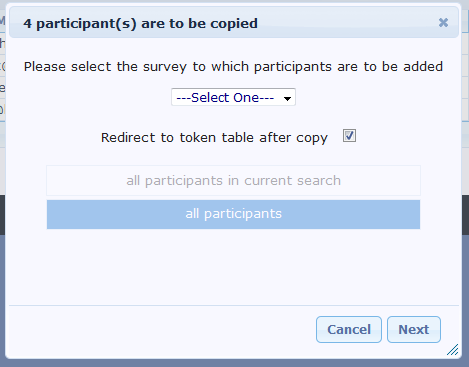
The title of the dialog box will show you the number of participants that you are going to export. Besides that there is also a check box that if checked will take you to the token table of the survey to which you are adding the participants.
After clicking next you will be taken to the attribute map page.
The attribute map page has three columns and uses advance drag and drop functionality. The first column shows all the attributes that are present in the central table. The second column gives space to the user to create new attributes. The third column shows the attributes in the token table to which the user is adding participants to. The user is free to choose to either create a new attribute in the token table to copy new values to or map the values from the attribute in the central table to the token table.
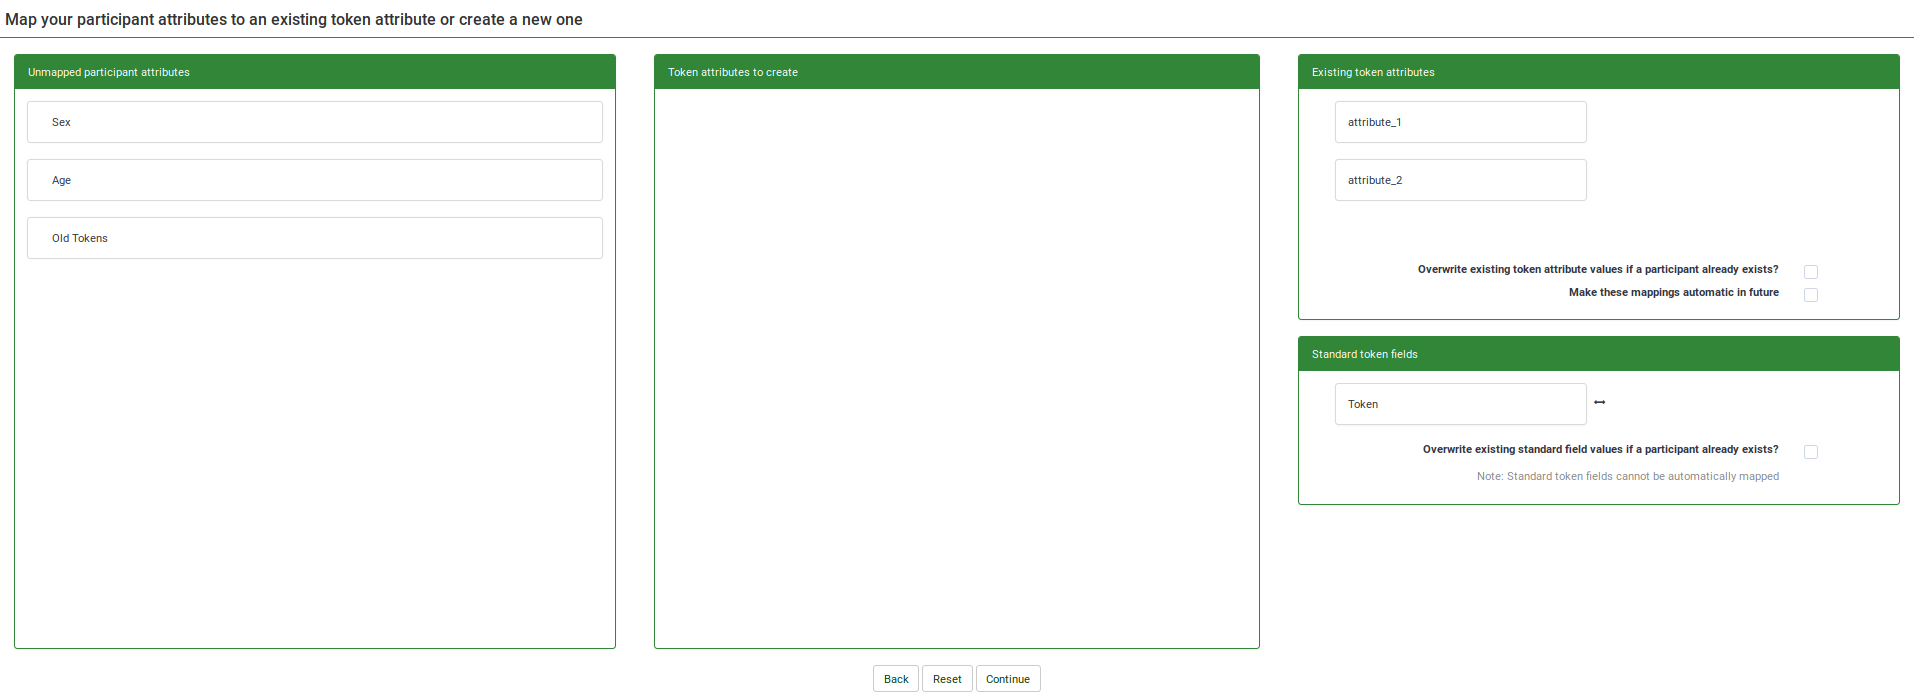
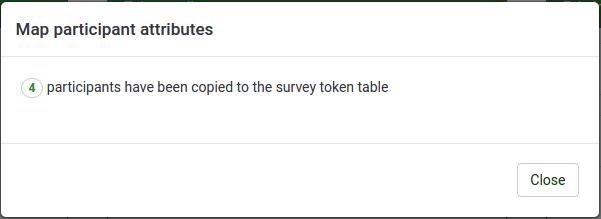
After you have mapped all the attributes, you can click on continue and after processing the participants a summary page will show up that will tell you how many participants were successfully copied, after which if you have asked for redirection you will be redirected to the token table table or else you will be redirected to the central grid.
Total Count
The navigator in the right also displays the number of participants out of the total participants.
Hide/Show grid
Simply hide or show the grid.
Subgrid
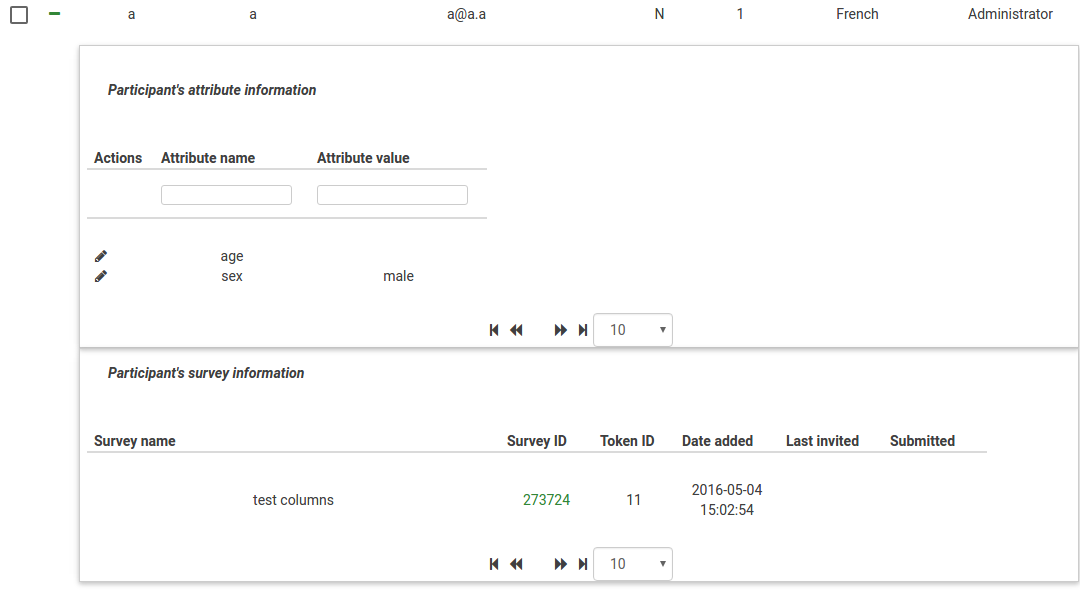
For editing of attributes in the system we have implemented subgrid in the main grid that shows all the attributes in the system and also edit them. The main grid shows only the visible attributes, the rest of the attributes are available here and only fetched when required. The subgrid as the main grid allows inline editing of attributes and also sorting. The subgrid also shows the links to the surveys to which the participant is added to. In case the participant is not added to any survey this subgrid hides itself. When you expand the subgrid all the attributes in the system show up, but that doesn't mean that you have saved all the attribute values for that participant in the database. Only when you add some value that attribute is saved for that particular attribute.
Import from CSV
This feature is similar to as we have in tokens.This supports files with only *.csv extension. The rest of the settings are similar with what we have for import CSV under tokens. As in add to survey we also have a drag and drop control over the attribute here. This feature all the headings in the CSV and show them . The user can map the attribute to already existing central attribute or choose to create new one.
Steps of Import
1) Select a file to import and associated settings.
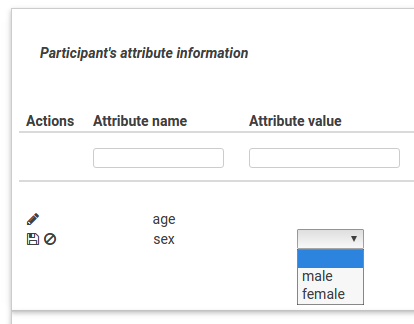
2) Map the attributes in the CSV to the one in the central table or create new. New attributes will be created text box type which can changed later

In the example screenshot I have created a new attribute age and mapped sex with the attribute in the central table.
3) Wait for it process and show the summary.
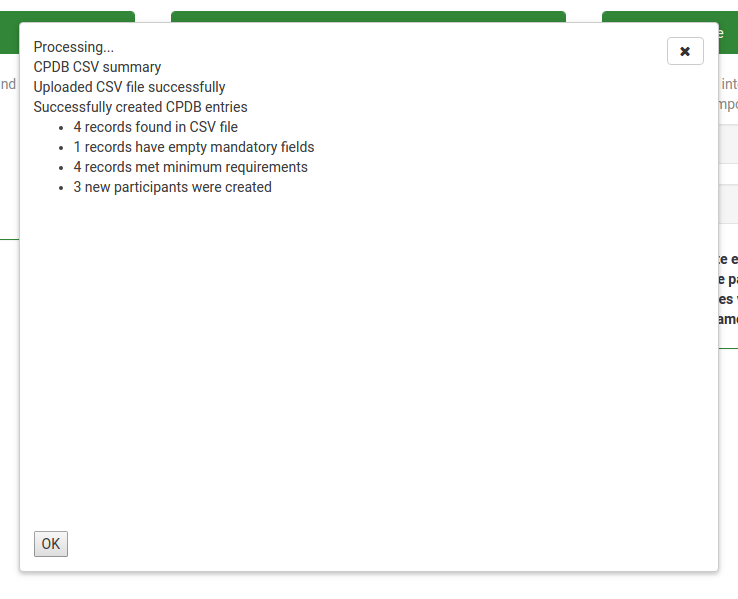
Clicking ok will redirect you to the display participants screen showing the newly imported participants.
Export All
This feature is for simplicity of the user. The user can click on it and can download all the participants that he has rights for.
Global Participant’s Settings
For security purposes the editing of user id is restricted as it's the user id associated with the participant which decides the ownership of the participant. For which there is a setting the main CPDB panel which can be changed only by the super administrator. If the setting is set to yes, the user can edit the user field in the display grid.

When you double click on the row, you can see a drop down in the user id field where the list of all users in the system are listed and you choose which one to give participant rights to.

Attribute Control
This is yet another advance feature of the CPDB. The attribute control in the current system allows only to add the attribute of only text type, which this reduces complexity but when you have to add a large number of attribute values, it becomes very difficult to type in the exact same value, for example 'male' a large number of times. To overcome this problem we have introduced three different attribute types :
1) Drop Down
2) Text Box
3) Date Picker
You can choose either of the attribute types and associated UI will be presented to you while editing attributes. For drop down you will need to add values. Also the attribute control has multilingual support.
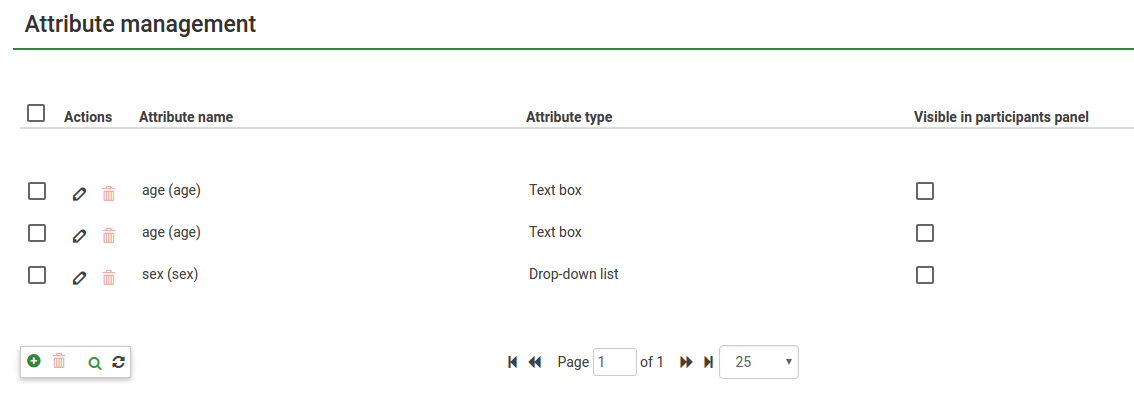
As you can see there are already two existing attributes in the system. You can set their visible right here by just checking the visible check box. the visibility will determine as to whether the attributes should be visible in the main grid or not.
For adding a new attribute you just have to click on the plus sign and another row will pop up allowing you to put in basic details and saving the attribute.
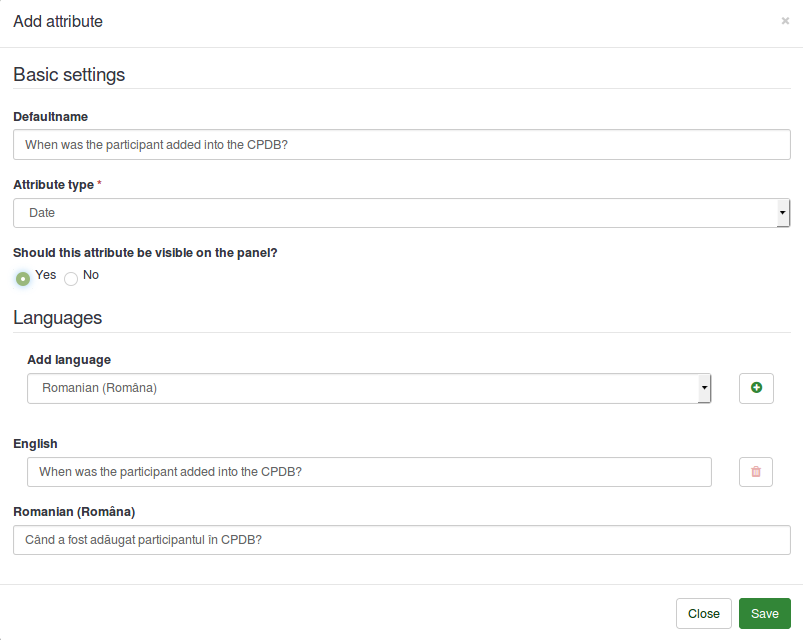
You can save the attribute by using the save button or by pressing enter after entering the attribute name.
For deleting an attribute in the system just click on the delete button next to the edit button. Clicking the delete button will not only delete the attribute but also the associated values.
For advance editing such as adding of drop down values and adding multilingual languages you need to click on the edit button. On clicking the edit button you will see something like this.
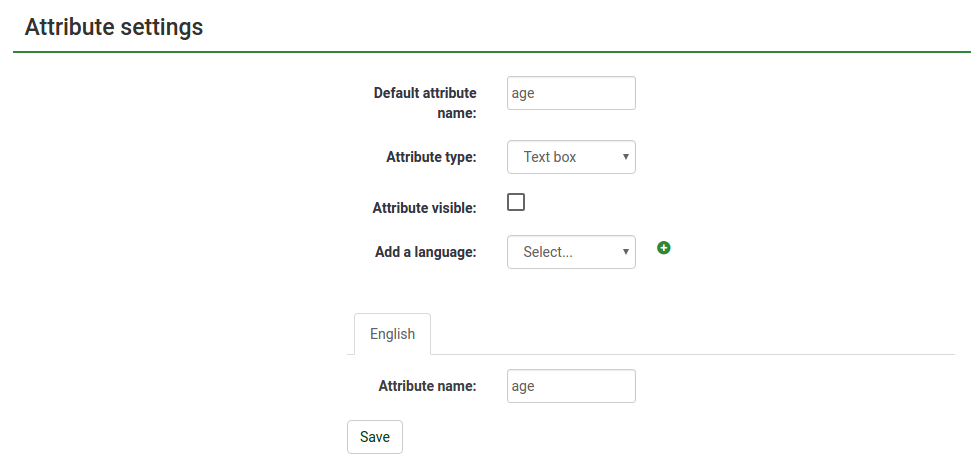
For adding a new language you can click on the plus sign and a new tab will pop up and you can add attribute name in that language there.
You can also add drop down values by selecting the drop down attribute type

You can edit the possible values of the drop down by clicking on the edit button or clicking on the value itself as it supports inline edit similar to what we have in the grid. Delete button is for deleting the possible value.
As you can see in the screenshots, the entire attribute properties can be edited here.
The share panel shows all the information related to the shared participant . Please note that this panel shows only the shared participant by that particular user.
This panel shows values like
1) First Name
2) Last Name
3) E-Mail
4) Shared With
5) Owner
6) Date Added
7) Can Edit
All this information is for viewing/sorting purposes only and only the can_edit field is editable for the user. The can edit field as explained earlier determines as to whether to allow the shared participant to be editable with the sharer or not. You don't need to double click or something, just clicking on the check box will make an AJAX call and save the changes on the server.
Panel Summary
Panel summary is same as information, just that it is loaded when the CPDB panel is opened and it can be accessed again by using the information icon in the panel and it gives general information about the CPDB.