Panel integration/it: Difference between revisions
From LimeSurvey Manual
Maren.fritz (talk | contribs) (Created page with "<center>File:Esempio - aggiungi parametro URL.png</center>") |
Maren.fritz (talk | contribs) (Created page with "Il nome che sceglierai per il parametro dovrà essere incluso nel link di accesso che fornirai in seguito al fornitore del tuo pannello. Sarà chiamato "LSid" nel nostro esemp...") |
||
| Line 54: | Line 54: | ||
Il nome che sceglierai per il parametro dovrà essere incluso nel link di accesso che fornirai in seguito al fornitore del tuo pannello. Sarà chiamato "LSid" nel nostro esempio. Non dimenticare di fare clic sul pulsante '''Salva''' situato nella parte in alto a destra della tabella! | |||
Revision as of 07:52, 1 August 2023
Introduzione
Da questa scheda puoi definire i parametri URL che saranno accettati dalla tua indagine. (Questi parametri saranno allegati all'URL di inizio del sondaggio generale). Questa opzione è importante se desideri integrare il tuo sondaggio con un fornitore di panel di sondaggi professionale che fornisca i partecipanti per te. Quest'ultimo di solito fornisce l'ID univoco di ogni partecipante al sondaggio e dovrai salvare questi ID univoci per ulteriori riferimenti.
Integrazione pannello sondaggio: Menu sondaggio > Menu sondaggio > Integrazione pannello
Integrazione pannello sondaggi
Verrà visualizzata una tabella vuota con l'opzione che consente di aggiungere un parametro URL.
Devono essere compilati due campi:
- Parametro: Digita in questo campo il nome del nuovo parametro.
- Domanda target:. Il valore del parametro viene sempre salvato nella sessione del sondaggio, anche se qui non si imposta una domanda target. Qui puoi selezionare una domanda del tipo "Ordina testo" o "Testi multipli".
Come utilizzare la funzione di integrazione del pannello
Di seguito viene presentato un semplice esempio per spiegare come utilizzare la funzione di integrazione del pannello.
1) Per prima cosa, crea una domanda a testo libero breve/lunga e chiamala come preferisci (useremo "LS" per il campo Codice domanda). Quindi, abilita l'opzione nascondi sempre questa domanda, che si trova sotto la scheda Visualizza all'interno del menu della domanda.
2) Vai alla scheda di integrazione del pannello e fai clic su "Aggiungi parametro URL".
Seleziona la domanda di testo breve/lunga che hai creato nel primo passaggio. I partecipanti che provengono dal rispettivo fornitore di panel professionali atterreranno sulla domanda target. Può essere nascosto in modo che i partecipanti possano iniziare a completare il sondaggio.
Il nome che sceglierai per il parametro dovrà essere incluso nel link di accesso che fornirai in seguito al fornitore del tuo pannello. Sarà chiamato "LSid" nel nostro esempio. Non dimenticare di fare clic sul pulsante Salva situato nella parte in alto a destra della tabella!
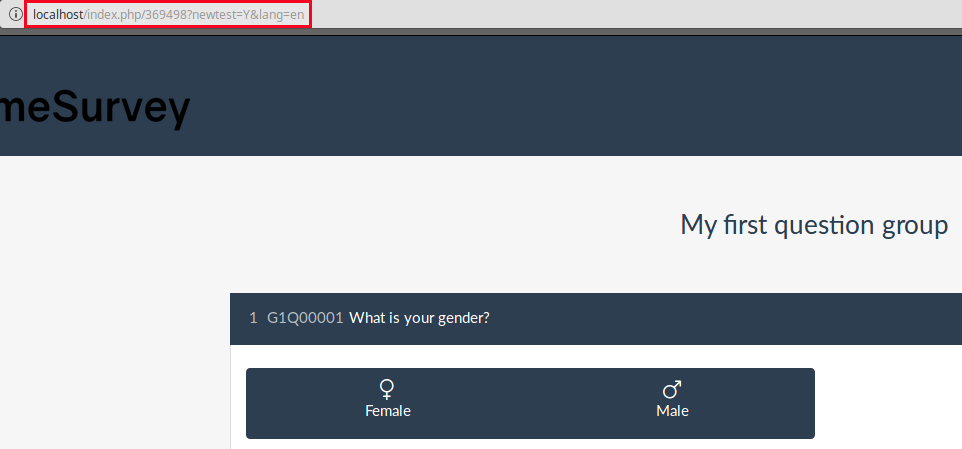
3) Now, you have to set up the entry link that you will send to the your panel provider. To get your survey URL link, click the Preview survey buttons.

Copy the URL you accessed from the address bar:

Add at the end the newly added parameter: &LSid="xxxxxx". The link should look like this:
http://localhost/index.php/369498?newtest=Y&lang=en&LSid="xxxxxx"
What ever you replace the "xxxxxx" with will be stored in the short/long free text question when your respondent lands on that page. For example, I sent to a user the following link:
http://localhost/index.php/369498?newtest=Y&lang=en&LSid=ABCD5
The string after LSid was stored as an answer to the short/long text question.

Examples
The following examples were created to help you add:
- Redirects if the respondents have finished filling out the survey;
- Redirects if the respondents were screened out due to a quota;
- Redirects link if the quota limit was reached.
The complete link
The complete link must be inserted into the end URL field that also has to be loaded automatically for everyone who successfully completes the whole survey.
The URL you have to send back to the panel provider should look like this:
https://panelproviderwebsite.com/?return=complete¶metername={PASSTHRU:parametername}
The screenout link
A screenout prevents the participants from continuing the survey because he or she is not a member of your survey target group. For screenouts, you have to set the quota limit field to "0" (zero) and allow the quota URL to be automatically loaded once it was triggered.
Then, add the following link into the quota URL field:
https://panelproviderwebsite.com/?return=screenout¶metername={PASSTHRU:parametername}
The quotafull link
A quotafull excludes participants from continuing the survey, because a certain quota has been exceeded.
https://panelproviderwebsite.com/?return=quotafull¶metername={PASSTHRU:parametername}