Multilingual survey/nl: Difference between revisions
From LimeSurvey Manual
(Created page with "Begin met het vertalen van de teksten in het bewerkingsvenster voor elk van de vragen. Je kunt in het onderstaande screenshot zien dat er drie extra talen boven het veld met v...") |
(Created page with "Klik op een van hen en begin met het vertalen.") |
||
| Line 57: | Line 57: | ||
Klik op een van hen en begin met het vertalen. | |||
The same type of "language bar" is located in many other places such as in the text elements and data policy settings panels, answer and subquestion text fields, and so on. However, translating fields using this method can get tricky if your survey is long and you wish not to miss anything. That is why we heavily recommend our users to use the quick translation tool. To access it, click on any survey-related setting (such as "Overview") -> [[Tools]] -> [[Quick-translation]] | The same type of "language bar" is located in many other places such as in the text elements and data policy settings panels, answer and subquestion text fields, and so on. However, translating fields using this method can get tricky if your survey is long and you wish not to miss anything. That is why we heavily recommend our users to use the quick translation tool. To access it, click on any survey-related setting (such as "Overview") -> [[Tools]] -> [[Quick-translation]] | ||
Revision as of 17:16, 26 March 2019
Inleiding
LimeSurvey bevat een ingebouwde functie die het snel en eenvoudig vertalen van een enquête mogelijk maakt. Deze functie is ontworpen om het voor iemand gemakkelijk te maken om een enquête uit de standaardtaal te vertalen naar een specifieke doeltaal.
Hier geven wij aan hoe je snel een meertalige enquête kunt maken. De onderwerpen zijn:
Het voorbeeld van een meertalige enquête (niet in het Nederlands) dat we hier gebruiken kun je downloaden. Pak het uit en importeer het lss-bestand in je LimeSurvey.
Een taal toevoegen
De standaardtaal van de enquête is de taal die je hebt geselecteerd als standaardtaal. Standaard is dit de taal die is geconfigureerd in de algemene instellingen van je applicatie.
Om te controleren welke taal de standaardtaal is, ga je naar het paneel algemene enquête-instellingen en zoekt u naar het veld voor de standaardtaal. In ons voorbeeld is dit "Engels". Raadpleeg het veld voor aanvullende talen om nieuwe talen toe te voegen waarin je de enquête wilt vertalen. In ons voorbeeld zijn er drie andere talen geselecteerd: Frans, Duits en Italiaans.
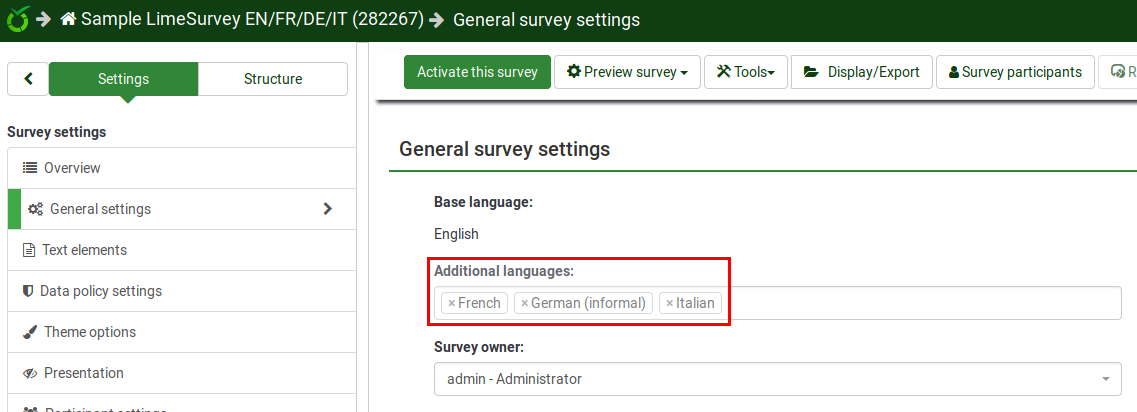
Vergeet als je klaar bent niet op de knop 'Bewaar' in de rechterbovenhoek te klikken.
Als je nu de bovenste taakbalk aanvinkt, zie je naast "Voorvertoon enquête" een kleine pijl staan. Dit betekent dat de enquête kan worden bekeken in verschillende talen:

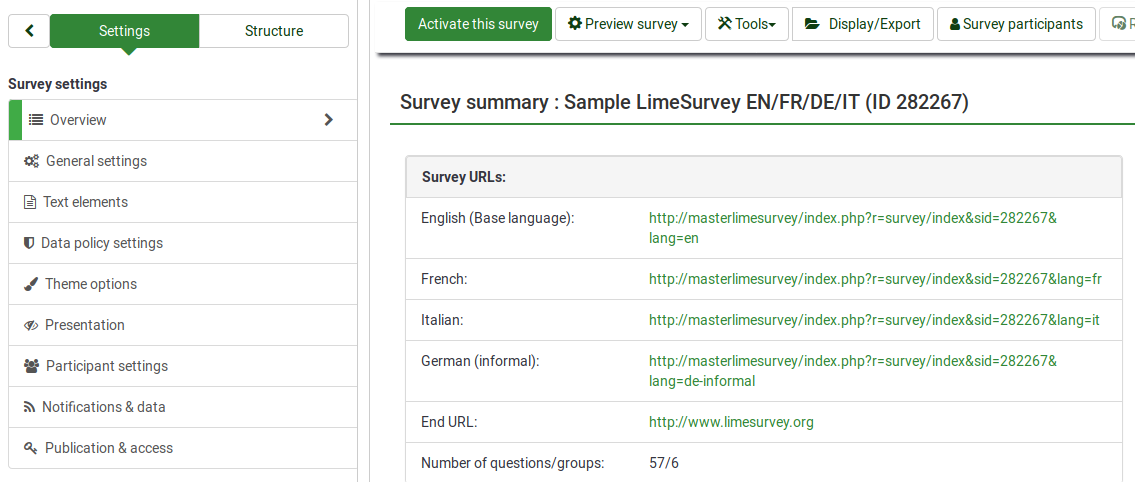
Als u het paneel overzicht opent, worden vier extra enquêtekoppelingen weergegeven. Ze komen overeen met de beschikbare talen:
Teksten vertalen
Begin met het vertalen van de teksten in het bewerkingsvenster voor elk van de vragen. Je kunt in het onderstaande screenshot zien dat er drie extra talen boven het veld met vraagcodes worden weergegeven:
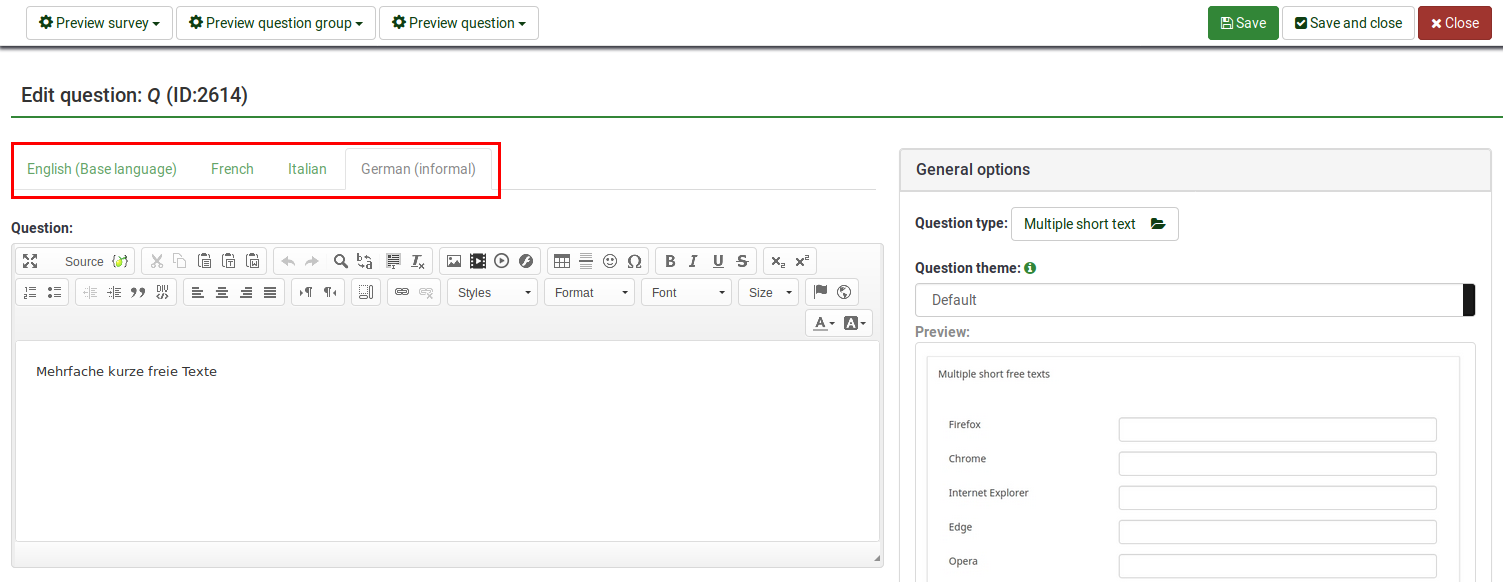
Klik op een van hen en begin met het vertalen.
The same type of "language bar" is located in many other places such as in the text elements and data policy settings panels, answer and subquestion text fields, and so on. However, translating fields using this method can get tricky if your survey is long and you wish not to miss anything. That is why we heavily recommend our users to use the quick translation tool. To access it, click on any survey-related setting (such as "Overview") -> Tools -> Quick-translation
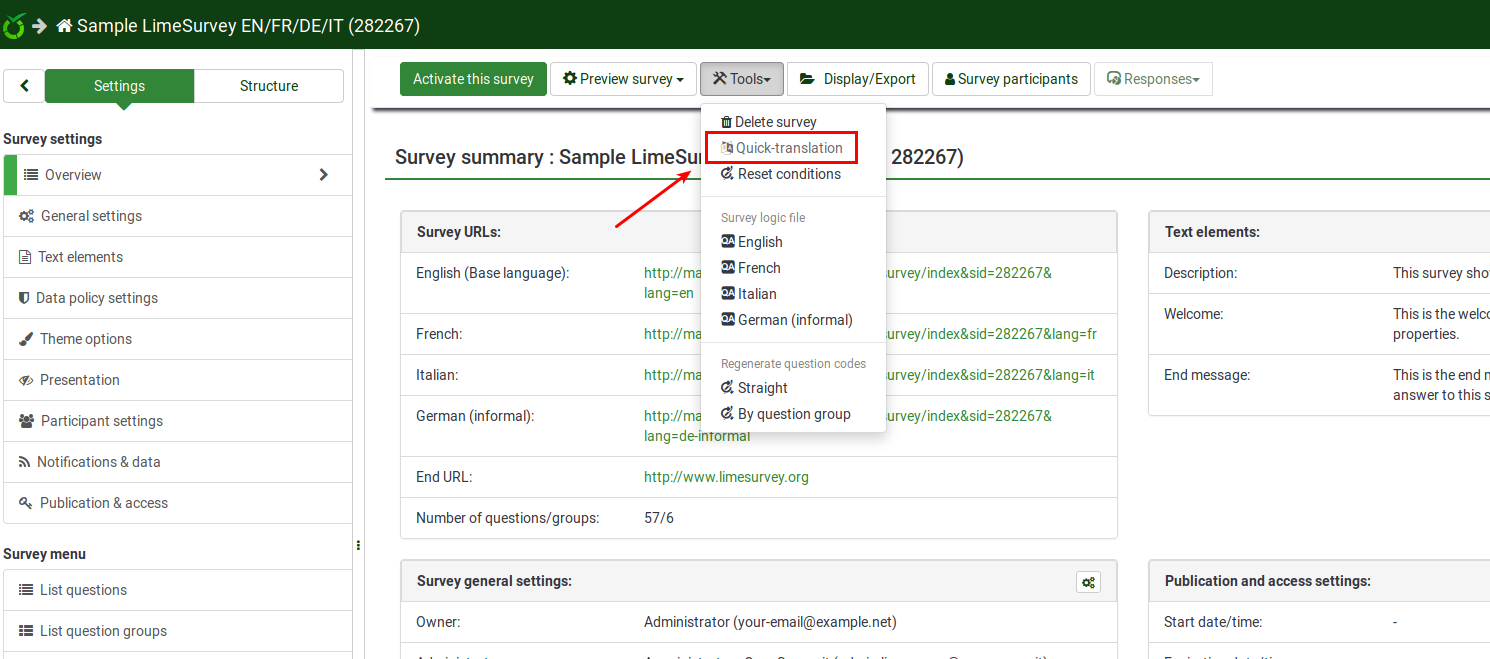
Snelle vertaling
The quick-translation tool has been specifically designed for those that work with multilingual surveys. Once accessed, the following panel will be loaded:
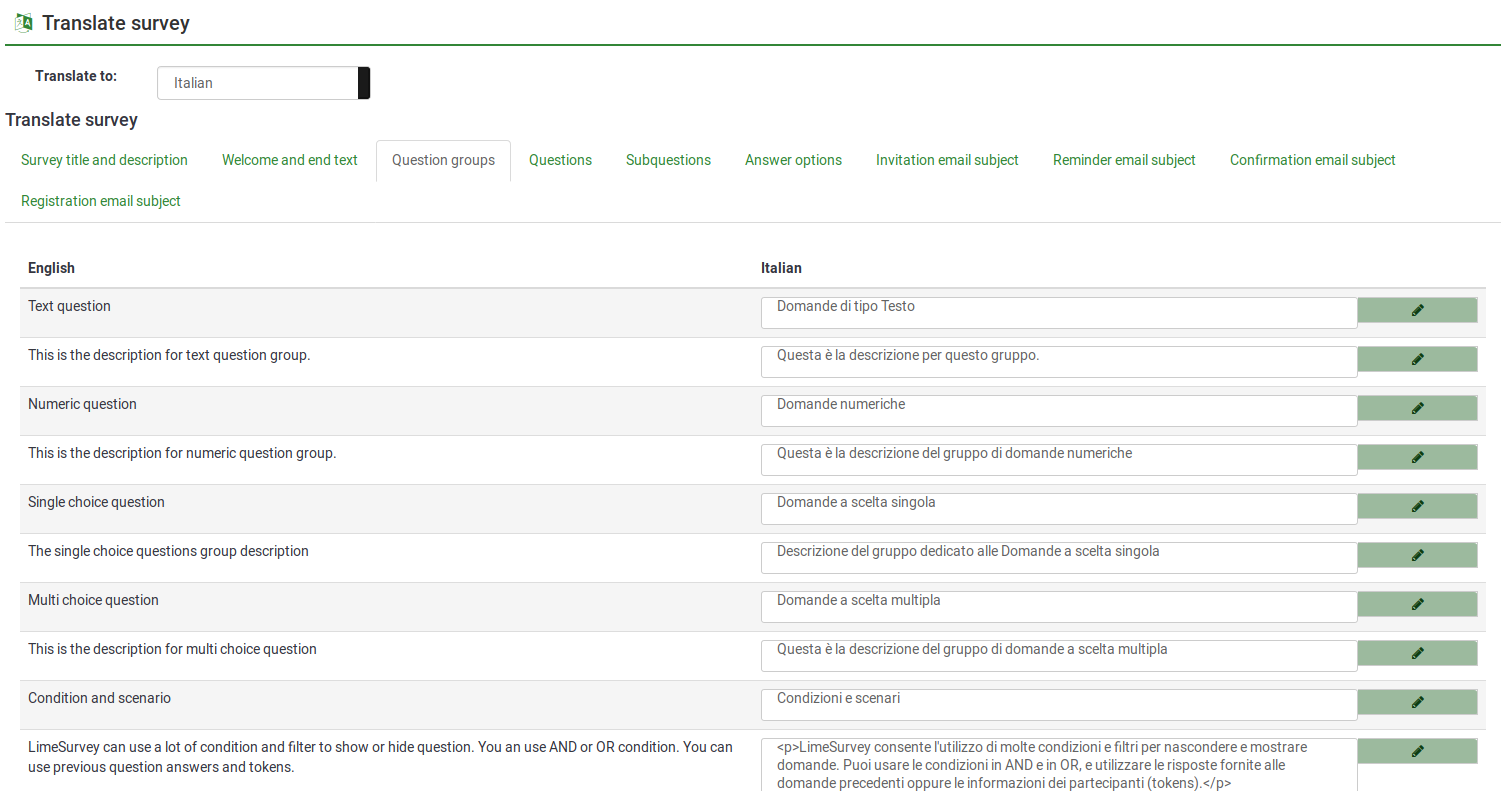
The first option, translate to, gives you the possibility to select the language you wish to translate into from your base language.
The next options refer to the translation of your survey content. They refer to:
- Survey title and description
- Welcome and end texts
- Question groups
- Questions
- Subquestions
- Answer options
- Invitation email subject
- Reminder email subject
- Confirmation email subject
- Registration email subject
Once you are done translating these fields, do not forget to click on the "Save" button located in the upper right part of the panel.
Overzicht meertaligheid
To check your work, use the preview button. The welcome page will look like this:
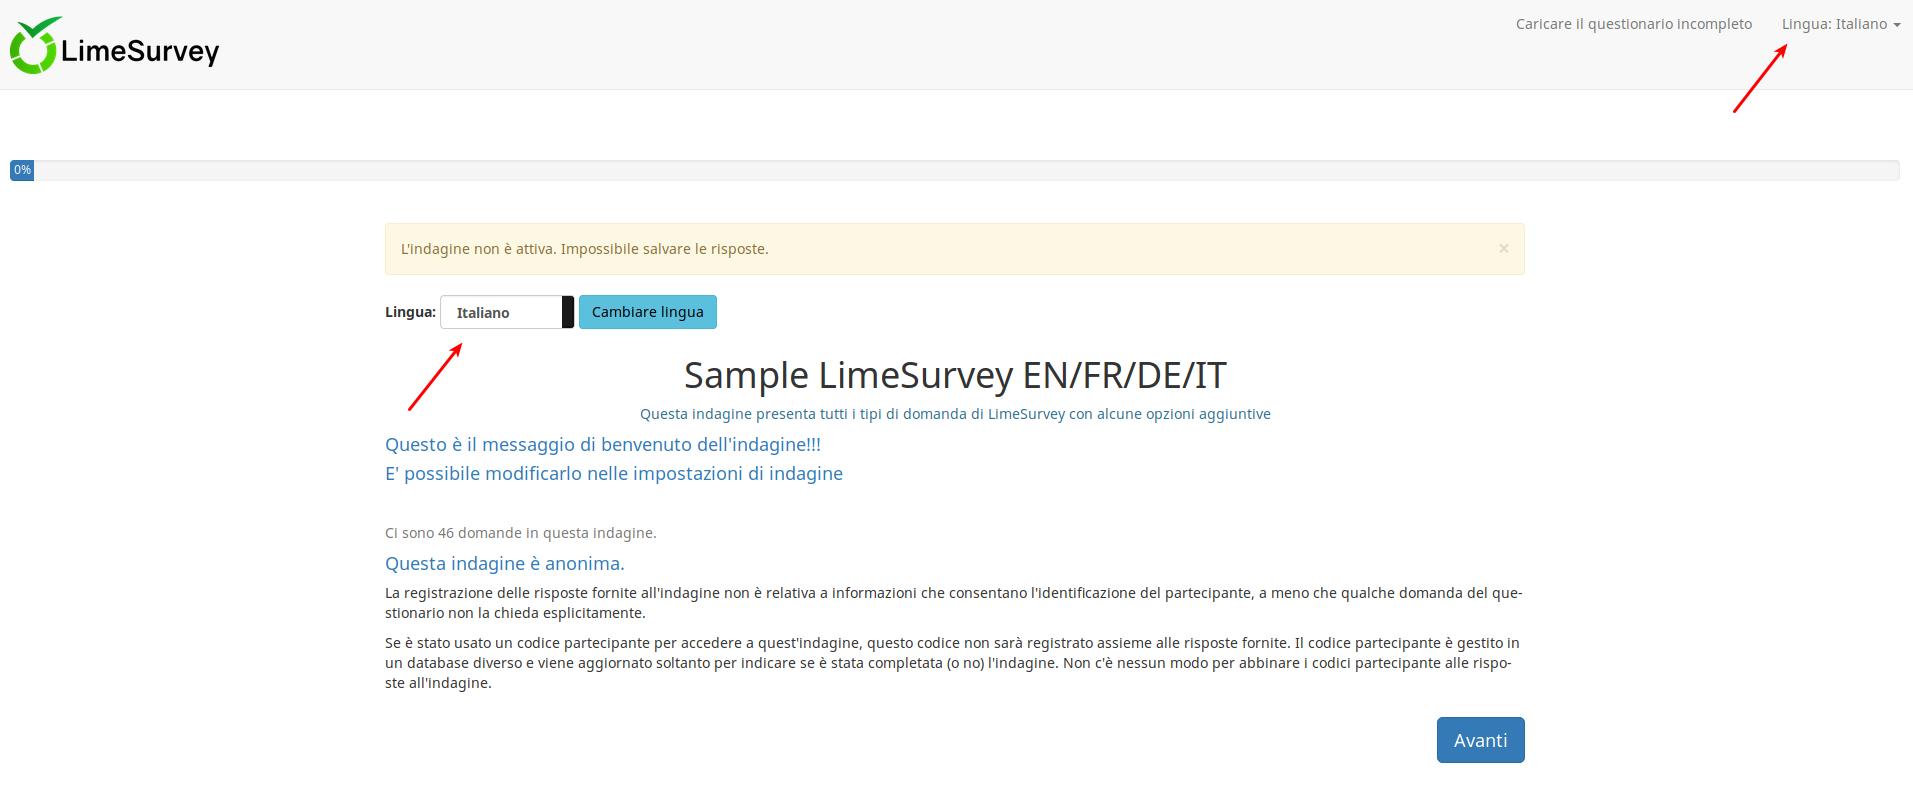
Two language switcher can be observed once the welcome page is loaded. LimeSurvey offers the possibility to your respondents to change the language of instructions even though you shared with them the corresponding link for a specific language. A language switcher will also be located on the top right-side of your survey.
In the case in which you wish to hide the two "language switcher" buttons, edit the theme of your survey. For more details, see the hints & tips wiki subsection.
Tips
- If you wish to grant users translation permissions to access the quick-translation tool, check the following wiki subsection.
- The "Auto-translate" feature makes use of the Google translate web service for automatic translation of a survey. You must enter your Google Translate API Key under global settings to access this feature. Google currently charges $20 US per 1 million characters submitted for translation.
Taalkeuze verbergen op welkomstpagina
In the case in which you decide to launch a multilingual survey, you will observe on the welcome page a drop-down menu that permits your respondents to select the language in which they wish to fill in your survey:

However, in certain scenarios you wish to hide the respective option. There are many ways in which you can hide the language switcher. The "twig" way is displayed below.
Access Themes from the global Configuration menu:

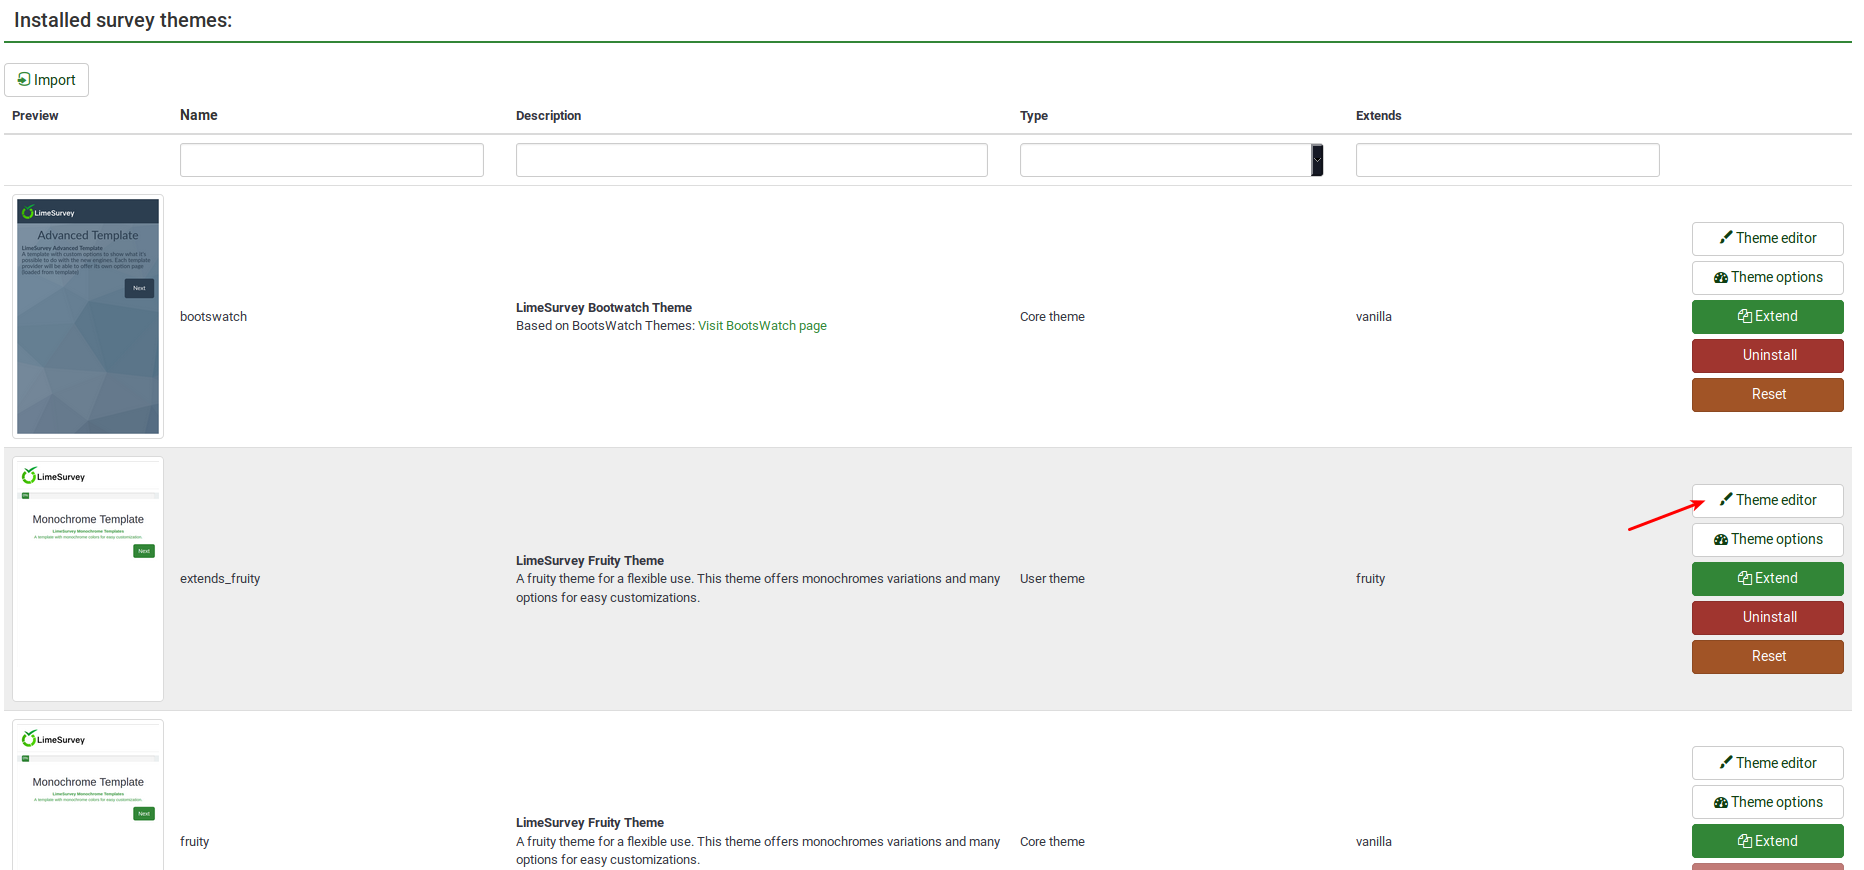
Click on the Theme editor button to edit the desired theme:
Look on the left side of the screen for the language_changer.twig file.
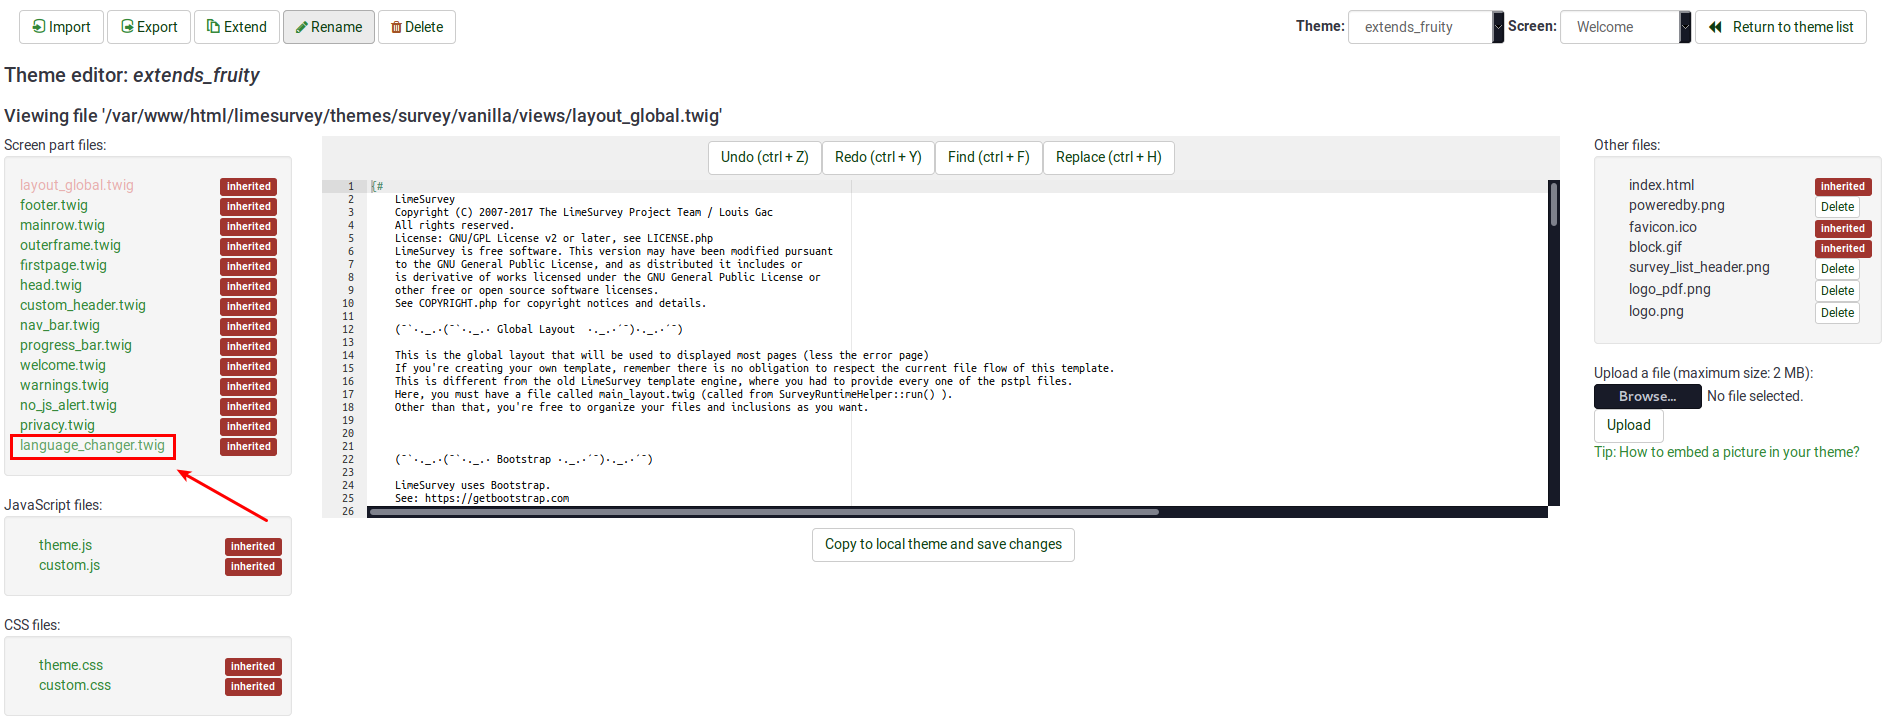
Go to the line that contains the following function:
{% if aSurveyInfo.alanguageChanger.show == true %}
Comment it out (replace "%" with "#") and copy the following line below it:
{% if false == true %}
The line should look like this in the end:

Click on "Copy to local theme and save changes".
Access your survey and select the edited theme from the general settings panel. Now, the welcome page should look like this:

To hide the top language switcher, we will follow pretty much the same steps as described above. We just have to access the right twig file to edit it. Access again the theme you wish to change, and then go to Screen which is located in the upper-right part of the window and select Navigation from the dropdown list. Now, look on the left side of the window for "language_changer_top_menu.twig". Click on it and comment out:
{% if aSurveyInfo.alanguageChanger.show == true %}
Add the following line below it:
{% if false == true %}
No language switcher will be displayed on the right side of the screen:
