Home page settings/da: Difference between revisions
From LimeSurvey Manual
Maren.fritz (talk | contribs) (Created page with "LimeSurvey-installationen leveres som standard med seks bokse oprettet: ''Opret undersøgelse'', ''Listeundersøgelse'', ''Globale indstillinger'', ''ComfortUpdate'', ''Etiket...") |
Maren.fritz (talk | contribs) (Created page with "<center>File:Boxes Table.png</center>") |
||
| Line 31: | Line 31: | ||
<center>[[File:Boxes Table.png]]</center> | <center>[[File:Boxes Table.png]]</center> | ||
=== | ===Opret/Rediger en boks=== | ||
To add a new box into the '''Boxes''' table, click '''Create a new box''', located in the upper part of the screen: | To add a new box into the '''Boxes''' table, click '''Create a new box''', located in the upper part of the screen: | ||
Revision as of 12:37, 29 December 2023
Generelt
Siden hjemmesideindstillinger giver brugerne mulighed for at tilpasse deres hjemmeside: Konfiguration-> Indstillinger -> Startside indstillinger

Udover at redigere startsideindstillinger, kan der oprettes nye bokse (til forskellige brugergrupper) for at lette administrationen af din LimeSurvey-installation.
Startsideindstillinger
Følgende startsideindstillinger er tilgængelige:

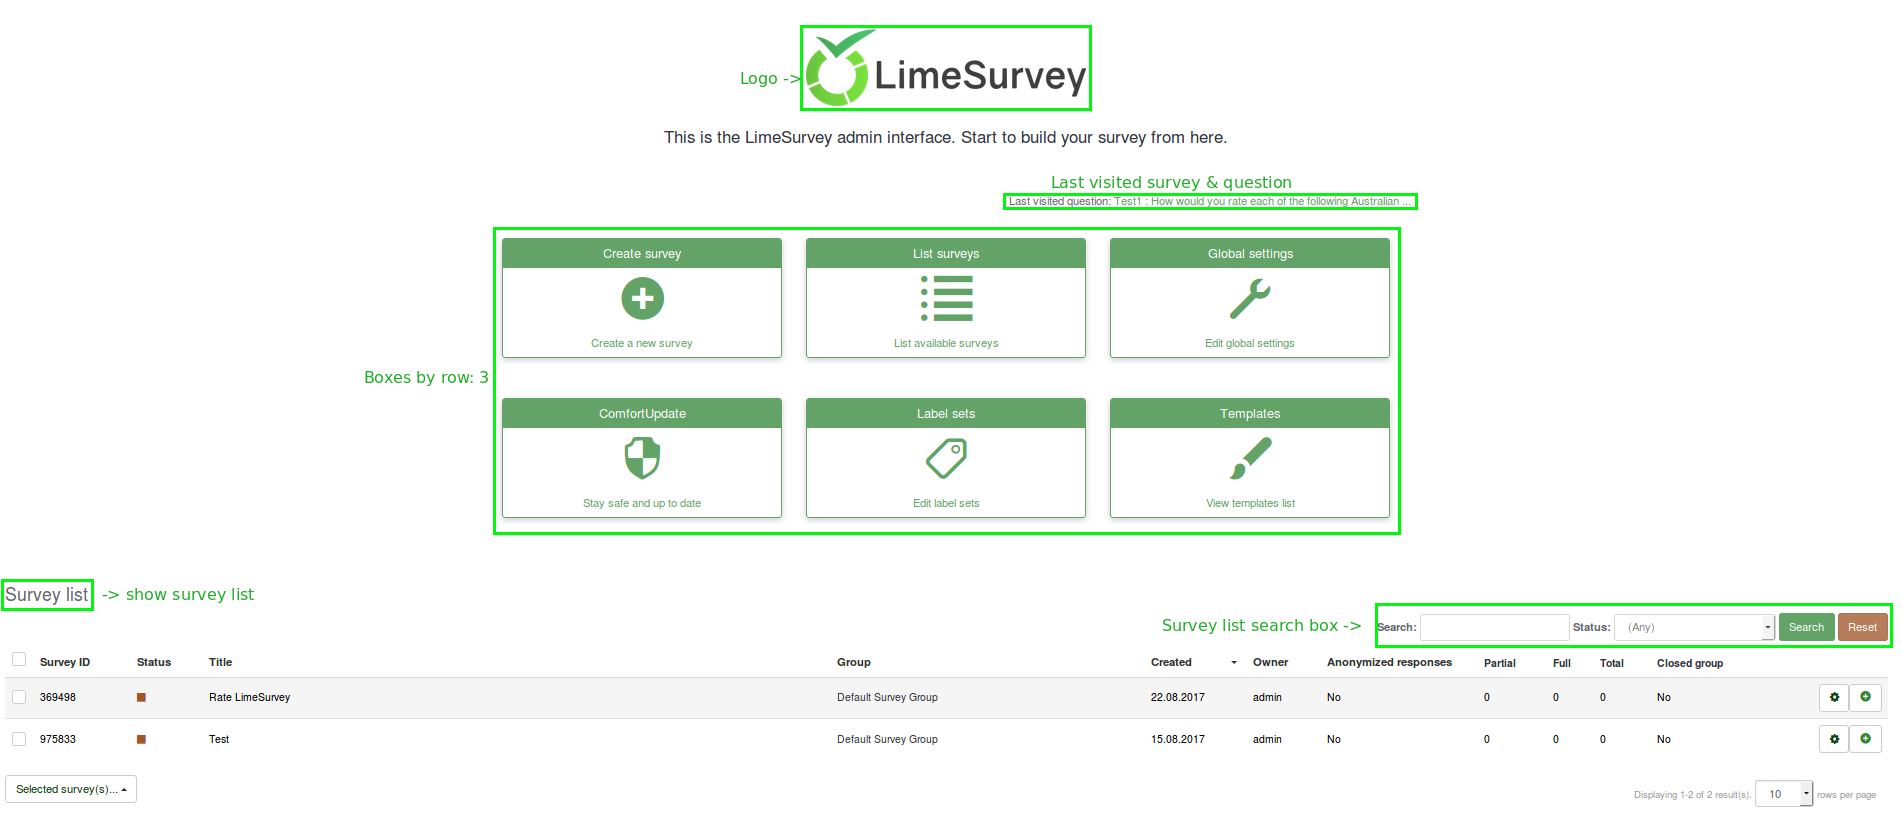
- Vis logo: Hvis det er slået 'Fra', forsvinder logoet over boksene (standardværdien er 'Til')
- Vis sidst besøgte undersøgelse og spørgsmål: Slået til som standard. Det viser det sidst besøgte spørgsmål og undersøgelse, hvor bjælken er placeret mellem logoet og boksene
- Vis undersøgelsesliste: Standardværdien er 'Fra'. Hvis du skifter til 'Til', vil en undersøgelsesliste dukke op under felterne fra startsiden
- Vis søgefelt på undersøgelsesliste: Hvis det er afkrydset 'Fra', vil søgefeltet ikke vises i undersøgelseslisten. Bemærk venligst, at denne valgmulighed ikke har nogen effekt på din startside, hvis muligheden Vis undersøgelsesliste ikke er slået til
- Spak container omkring kasser{{NewIn|3.0} }: Hvis den er slået 'Til', bliver beholderen omkring hver boks mindre (nyttig funktion, når flere kasser føjes til din startside)
- Bokser efter række: Antallet af kasser, du ville gerne have på hver række. Standardtallet er '3'
- Boksforskydning (Obsolete since 3.0): Boksforskydning er en funktion, der hjælper brugere med at centrere boksene. For eksempel, hvis du bruger 15 kasser, kan du bruge boks offset-funktionen for bedre at arrangere dem på din hjemmeside. Denne funktion findes ikke længere i LimeSurvey 3.0 (og de senere versioner), fordi boksene automatisk centreres
- Boksorientering (New in 3.0 ): Tre muligheder er tilgængelige: venstre til højre, højre mod venstre, centreret
Klik på Gem boksindstillinger, når du er færdig. Hvis alt er slået til, skal startsiden se sådan ud:
Kasse
LimeSurvey-installationen leveres som standard med seks bokse oprettet: Opret undersøgelse, Listeundersøgelse, Globale indstillinger, ComfortUpdate, Etiketsæt og Skabeloner . De kan enten redigeres (den grønne pen-knap) eller slettes (den røde papirkurvsknap):

Opret/Rediger en boks
To add a new box into the Boxes table, click Create a new box, located in the upper part of the screen:
.
Different fields have to be filled in:
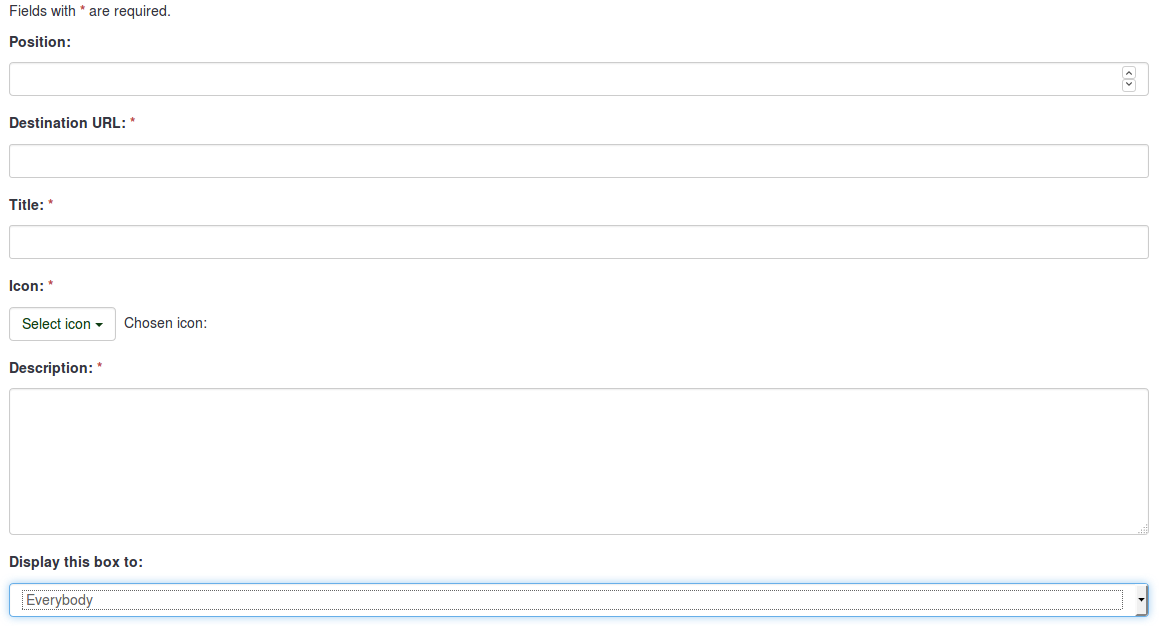
- Position: shows the box position (it is a numerical value)
- Destination URL: the link via which the respective option/function is accessed. For example, the destination URL to backup the entire database is admin/dumpdb
- Title: name of the box
- Icon: allows the user to select one of the LimeSurvey predefined icons
- Description: short description of the purpose of the box
- Display this box to: allows you to choose who can see the respective box
- Only admin : only the super administrator of the LimeSurvey installation can see those respective boxes
- Everybody : everyone who logs in the LimeSurvey installation can see those respective boxes, i.e. survey users defined in the User Control panel
- Nobody : nobody can see those boxes. It can be used when you would like to hide boxes from a specific user group for example
- Other user groups : a certain user group is allowed to see those boxes. To find out more about user groups, read our wiki on how to manage them
Once done, click the Save button that is located in the upper right part of the screen.
Reset to the default settings
If you want to reverse the changes that you made, click the Reset to default boxes button, located on the upper right side of the window. This would restore the default boxes.
Examples
I want to create a new box
- Access Home page settings from the Configuration dialog.
- Click Create new box, located in the upper right part of the window.
- Enter the requested information
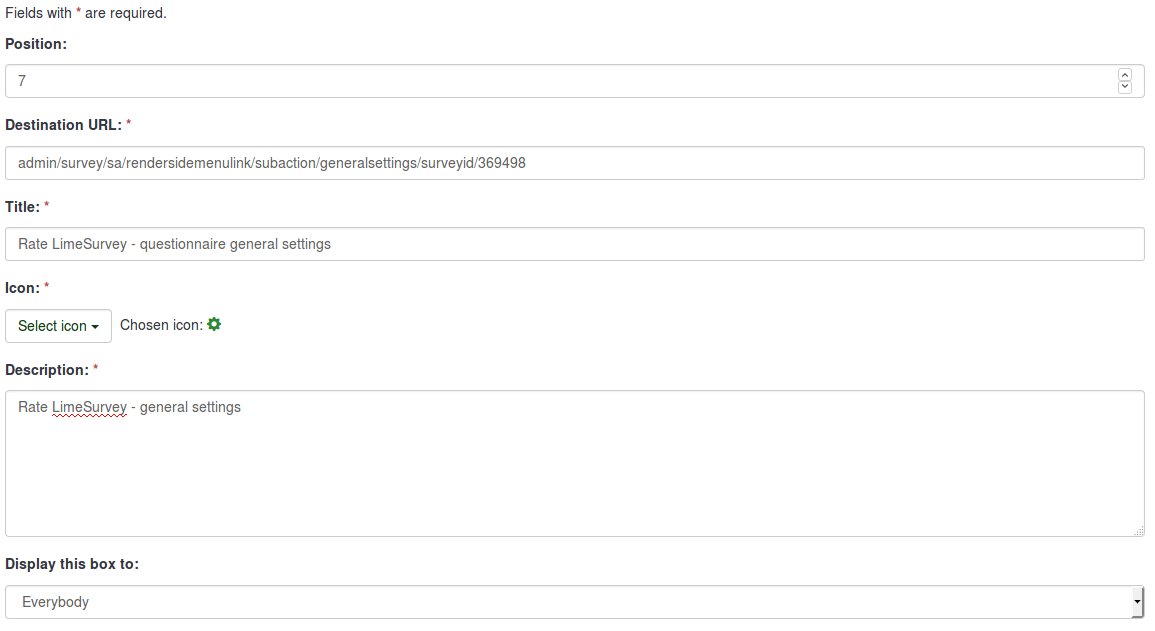
- Save the box and access the home page of your LimeSurvey installation.
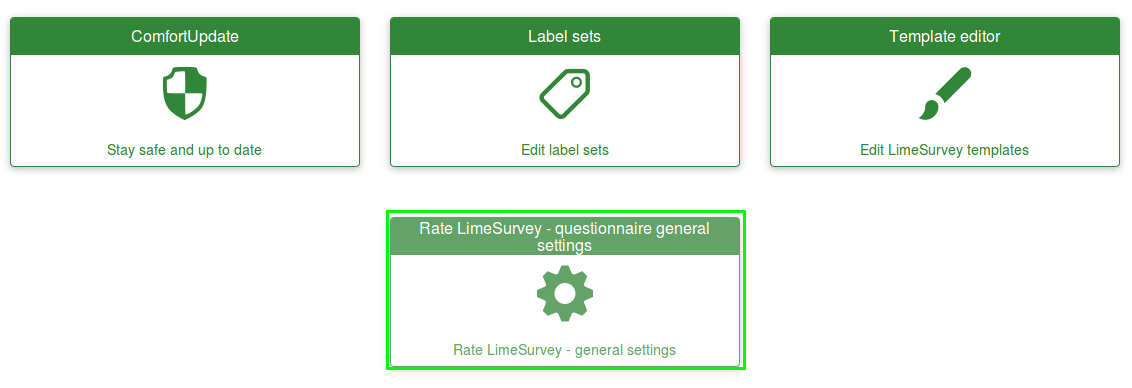
- Click the newly created box and check whether it is working or not (if not, recheck its destionation URL):
